GE PACSystems RX3i Application Manual
Genius dual bus
Hide thumbs
Also See for PACSystems RX3i:
- User manual (169 pages) ,
- Command line interface manual (116 pages) ,
- Secure deployment manual (35 pages)

Related Manuals for GE PACSystems RX3i


Summary of Contents for GE PACSystems RX3i
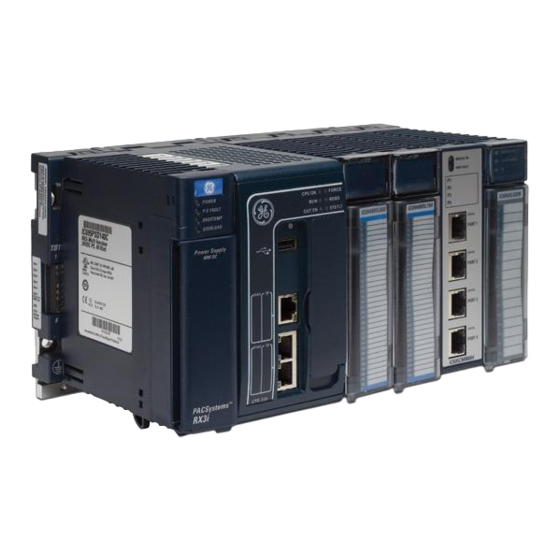
- Page 1 Automation & Controls Programmable Control Products PACSystems* RX3i PACSystems* RX3i Genius Dual Bus Application Guide Application Guide GFK-2928 Genius Dual Bus Application Guide GFK-2928 December 2017 For Public Disclosure...
- Page 2 Changes, modifications, and/or improvements to equipment and specifications are made periodically and these changes may or may not be reflected herein. It is understood that GE may make changes, modifications, or improvements to the equipment referenced herein or to the document itself at any time. This document is intended for trained personnel familiar with the GE products referenced herein.
- Page 3 Online technical support and GlobalCare www.geautomation.com/support Additional information www.geautomation.com Solution Provider solutionprovider.ip@ge.com Technical Support If you have technical problems that cannot be resolved with the information in this manual, please contact us by telephone or email, or on the web at www.geautomation.com/support...
-
Page 4: Table Of Contents
Table of Contents PACSystems* RX3i Genius Dual Bus Application Guide Application Guide GFK-2928 Table of Contents ................................i Table of Figures ................................iii Chapter 1 Introduction ..............................1 Revisions in this Manual ........................... 2 PACSystems Documentation ........................3 Abbreviations .............................. 4 Chapter 2 Overview .............................. - Page 5 Contents Configure the Built-in Ethernet Port of the CPU ................24 Configure the PROFINET Controller Module ..................25 Configure the Genius Communication Gateway Modules ............... 26 Settings Tab ................................. 26 GENIUS Gateway Parameter Tab ........................26 Genius Devices ................................26 Dual Bus Function Block .........................
-
Page 6: Table Of Figures
Contents Table of Figures Figure 1: Genius Dual Bus Combined with RX3i Hot Standby Redundancy .................. 5 Figure 2: RX3i Genius Dual Bus Interfaced to RX3i via Genius Gateway Modules (GCG001) ..........7 Figure 3: System and Dual Bus References ..............................8 Figure 4: Fault Table Display .................................... -
Page 8: Chapter 1 Introduction
Chapter 1 Introduction This document provides application-level information on the functionality, configuration and application of the logic components that support the operation of Dual Genius I/O Busses. The application solution: • Operates upon Dual-Redundant Hot-Standby RX3i PLC platforms • Interfaces to existing Genius I/O devices by way of PROFINET Controllers and Genius Communications Gateway modules. -
Page 9: Revisions In This Manual
Chapter 1. Introduction Revisions in this Manual Date Description Dec- • Initial publication. 2017 PACSystems* RX3i Genius Dual Bus Application Guide GFK-2928... -
Page 10: Pacsystems Documentation
Genius Hand-Held Monitor User’s Guide GFK-0121 In addition to these manuals, datasheets and product update documents describe individual modules and product revisions. The most recent PACSystems documentation is available on the GE Automation & Controls support website www.geautomation.com. GFK-2928 December 2017... -
Page 11: Abbreviations
Chapter 1. Introduction Abbreviations Abbreviation Meaning Genius Bus Switching Module RX3i CPU with embedded Ethernet Genius Communication Gateway (GCG001) Genius Hand-Held Monitor Ethernet Media Redundancy Protocol Proficy Machine Edition (programming & configuration software tool) PROFINET Controller PNSR PROFINET System Redundancy Genius Serial Bus Address PACSystems* RX3i Genius Dual Bus Application Guide GFK-2928... -
Page 12: Chapter 2 Overview
GCG001 supports a number of different Genius head-ends, allowing other types of I/O rack to be attached to the Genius bus. Figure 1: Genius Dual Bus Combined with RX3i Hot Standby Redundancy For details, refer to the PACSystems RX3i Genius Communications Gateway User Manual, GFK-2892C or later. GFK-2928 December 2017... -
Page 14: Chapter 3 Application System Architecture
• Optional – Connectors that provide Hand Held Monitor attachment points for each of the Genius busses. (GE catalog number 44A736310-001-R001. Refer to Genius Hand-Held Monitor User’s Guide, GFK-0121, page 2-9 for further information). If a CPE400 is used, the RMX links are replaced with LAN3 links. -
Page 15: Profinet Network Arrangement
Chapter 3. Application System Architecture PROFINET Network Arrangement A ring topology using MRP is the preferred arrangement. With this topology, a system may use a combination of PROFINET System Redundancy (PNSR) devices and non-PNSR devices (specifically Genius Communication Gateway modules). Also, systems may incorporate managed network switches that support MRP. -
Page 16: Development Environment
Chapter 3. Application System Architecture Figure 4: Fault Table Display The message provides the slot number (S08 in the example) in which the PROFINET Controller is installed, the device number (D004) for the Bus A GCG, the serial bus address (SBA02) for the Genius device, and either Loss of Device (LOD) or Addition of device (AOD). -
Page 18: Chapter 4 Toolchest Components
Chapter 4 Toolchest Components In order to use the dual bus application components, they must first be added to the Proficy Machine Edition Toolchest. Click on the View Tab in PME. Then make certain that the Toolchest item is checked. Figure 5: PME Toolchest Checkbox The Toolchest will be displayed (normally docked on the right side of PME). -
Page 19: Add Toolchest Items To Your Project
Chapter 4. Toolchest Components The Toolchest now contains the DualBus drawer. Using the dropdown text box, click on DualBus. Expand the drawer so that the individual folder items are visible as shown below: Figure 8; Folders in DualBus Drawer Add Toolchest items to your project While depressing the Ctrl key, drag the following items from the Toolchest’s DualBus folders into the PLC target. - Page 20 Chapter 4. Toolchest Components The blocks and corresponding entries are as follows: Group03 – LDs Block Variable Name Entry INIT_GBnn <no name required> INIT_GB00 IGB00 ALM_DEV EXE_CR CR01 Group04 – LDs Block Variable Name Entry DB_SVCS SW_BSM SW01 AUTO_SW Aut_Sw Group05 –...
-
Page 21: Adding Dual Bus Logic
Chapter 4. Toolchest Components Adding Dual Bus Logic In the ladder block named _Main, insert a new row at the beginning of the program. While holding down the Ctrl-key, drag the program block named BUSSES and place it into the first rung. This will create a new instance of the block. -
Page 22: Dual Bus Parameters
Chapter 4. Toolchest Components Dual Bus Parameters Select the function block in the rung that immediately follows the comment rung containing the text “Initialize the Genius Bus definition blocks”. Double-click on the function block to zoom into, and explore the logic that is contained in the block. -
Page 23: Dual Bus Mapper
Chapter 4. Toolchest Components Dual Bus Mapper Each dual bus will require a separate instance of the DBUS function block. In this case the block refers to the first dual bus. The name DB00 relates to the first bus. Figure 11: Edit Block for Mapping Each Dual Bus Note the bus variable on the left side of the function block. -
Page 24: Adding A Dual Bus Configuration Block
Chapter 4. Toolchest Components Adding a Dual Bus Configuration Block Each dual bus requires the addition of a unique configuration block. To add a block, follow the steps below: In the Navigator pane, right-click on INIT_GBnn. (This block is the general template, since all of its entries have been initialized to zeroes). -
Page 25: Figure 15: Genus Bus Number Assignment
Chapter 4. Toolchest Components Click and zoom into INIT_GBnn, so that the “soft” configuration parameters associated with the dual bus may be updated. (Note: in this case nn represents any of the dual busses that have been included in the project). The various parameters are described in the following paragraphs. -
Page 26: Figure 17: Gcg Assignments - Bus A
Chapter 4. Toolchest Components Genius Communication Gateway Modules Figure 17: GCG Assignments – Bus A BUS.GCG_A.PRI_NUM The PROFINET Device Number for the Primary PLC Gateway module attached to Bus A. BUS.GCG_A.SEC_NUM The PROFINET Device Number for the Secondary PLC Gateway module attached to Bus A. -
Page 27: Figure 19: Dual Bus Parameters
Chapter 4. Toolchest Components Dual Bus Parameters Figure 19: Dual Bus Parameters BUS.DEF_TO The Default Timer Preset establishes the time interval (in milliseconds) during which inputs are frozen while a device is missing from Bus A AND from Bus B. BUS.DEF_HLS This parameter (a Boolean) determines the behavior of a missing device: •... - Page 28 Chapter 4. Toolchest Components NOTE: Devices that contain outputs must be configured so that the dual mapping routine can post loss-of-device or addition-of-device messages. Also, the device status (i.e., the presence on either Bus A or Bus B) is shared between the Primary and Secondary PLCs for the purpose of Automatic Role Switching (if enabled).
-
Page 30: Chapter 5 Plc Hardware Configuration (Primary Plc)
Chapter 5 PLC Hardware Configuration (Primary PLC) LC Reference Memory Settings In the Hardware Configuration (Primary) double-click on the RX3i CPU module to display the configuration settings. Click on the Memory tab and adjust the upper memory limits. The minimum settings are shown below: %AI Analog Input 16384... -
Page 31: Configure The Built-In Ethernet Port Of The Cpu
Chapter 5. PLC Hardware Configuration (Primary PLC) Optionally, there is one symbolic variable that may be included in the synchronized data transfer list. It is located in the program logic block named AUTO_SW. The variable ACTV_CSB must be included in the Input Transfer List if you wish to perform automatic role switches based upon the loss of devices on a GCG. -
Page 32: Configure The Profinet Controller Module
Chapter 5. PLC Hardware Configuration (Primary PLC) Configure the PROFINET Controller Module The PROFINET Controller Module has a 32-bit diagnostic/status reference. The recommended starting reference is %I16465 (the next available reference following the Ethernet port status reference). Figure 23: Assign PROFINET Status Address NOTE 1: For each slot in which a PROFINET Controller is installed, the Primary module and the Secondary module will always have identical Status Addresses. -
Page 33: Configure The Genius Communication Gateway Modules
Figure 27: GCG Baud Rate & Output at Startup Settings Genius Devices Refer to the PACSystems RX3i Genius Communications Gateway User Manual, GFK-2892C or later, for instructions on configuring I/O devices that are attached to the GCG. PACSystems* RX3i Genius Dual Bus Application Guide... -
Page 34: Dual Bus Function Block
Chapter 5. PLC Hardware Configuration (Primary PLC) Dual Bus Function Block The main function of the Dual Bus (DBUS) function block is to remap the discrete and analog inputs from the backup bus to the main bus by monitoring the status bits of the Genius devices that are installed on the dual bus pair. -
Page 35: Other Dbus Functionality
Chapter 5. PLC Hardware Configuration (Primary PLC) Other DBUS Functionality Alarms Posted in PLC Fault Table An internal function that posts Loss-of-Device if the device is not attached to either Bus A or Bus B, and the default timer has expired. The time-stamped message appears in the PLC Fault Table. If the device has been offline, this internal function posts Addition-of-Device if the Genius device successfully logs onto either Bus A or Bus B. - Page 36 Chapter 5. PLC Hardware Configuration (Primary PLC) User Accessible Inputs Initiates the execution of a bus switch operation. This may be done by selecting the contact at the top right of the function block and then turning the reference ON using a right-click. Note: do not force this reference.
-
Page 37: Figure 31: Automatic Role Switch (Aut_Sw) Function Block
Chapter 5. PLC Hardware Configuration (Primary PLC) Automatic Role Switch Zoom into the DBUS block to display the Automatic Role Switch (AUT_SW) function block. This function block allows the user to transfer control from the current Active PLC to the current Backup PLC in the event that a GCG associated with the Active PLC fails. - Page 39 GE Automation and Controls Additional Resources Information Centers For more information, please visit our web site: Headquarters: 1-800-433-2682 or 1-434-978-5100 www.geautomation.com Global regional phone numbers are available on our web site www.geautomation.com Copyright © 2017 General Electric Company. All Rights Reserved *Trademark of General Electric Company.