NETGEAR WAC124 User Manual
Ac2000 802.11ac wireless access point/router
Hide thumbs
Also See for WAC124:
- Installation manual (2 pages) ,
- User manual (269 pages) ,
- Quick start (2 pages)

Related Manuals for NETGEAR WAC124


Summary of Contents for NETGEAR WAC124
- Page 1 User Manual AC2000 802.11ac Wireless Access Point/Router Model WAC124 NETGEAR, Inc. December 2018 350 E. Plumeria Drive 202-11885-02 San Jose, CA 95134, USA...
- Page 2 Do not use this device outdoors. If you connect cables or devices that are outdoors to this device, see http://kb.netgear.com/000057103 for safety and warranty information. Trademarks © NETGEAR, Inc., NETGEAR, and the NETGEAR Logo are trademarks of NETGEAR, Inc. Any non-NETGEAR trademarks are used for reference purposes only. Revision History...
-
Page 3: Table Of Contents
Log in to the access point/router when it is connected to the Internet....................26 Log in to the access point/router when it is not connected to the Internet....................28 Use the NETGEAR Insight mobile app to discover the access point/router..................29 Find the IP address of the access point/router.......29 Change the language................31 Change the local login admin password.........32... - Page 4 AC2000 802.11ac Wireless Access Point/Router WAC124 Router mode: Manually set up the access point/router Internet connection...................40 Router mode: Specify a dynamic or fixed WAN IP address Internet connection without a login............40 Router mode: Specify a PPPoE Internet connection that uses a login....................42...
- Page 5 AC2000 802.11ac Wireless Access Point/Router WAC124 Add or remove a device from the allowed list......83 Add or remove a device from the blocked list......84 Router mode: Specify keywords and domains to block Internet sites.......................85 Router mode: Set up keyword and domain blocking....85 Router mode: Specify a trusted device........87...
- Page 6 AC2000 802.11ac Wireless Access Point/Router WAC124 Router mode: Reserve a LAN IP Address.........118 Router mode: Change a reserved LAN IP address....119 Router mode: Remove a reserved LAN IP address entry..120 Add and manage IPv4 static routes..........121 Add an IPv4 static route..............122 Change an IPv4 static route............123...
- Page 7 AC2000 802.11ac Wireless Access Point/Router WAC124 Router mode: Restrict Internet traffic by connection time..158 Router mode: View the Internet traffic volume and statistics..159 Router mode: Unblock the traffic meter after the traffic limit is reached..................160 Router mode: Manage and use remote access......161 Router mode: Set up remote management for the access point/router..................161...
- Page 8 AC2000 802.11ac Wireless Access Point/Router WAC124 Chapter 11 Router Mode: Manage Dynamic DNS and FTP Access Through the Internet Router mode: Set up and manage Dynamic DNS.......192 Router mode: Set up a new Dynamic DNS account....192 Router mode: Specify a DNS account that you already created..................193...
- Page 9 AC2000 802.11ac Wireless Access Point/Router WAC124 Manage MU-MIMO..............219 Manage Airtime Fairness............220 Set Up a WiFi bridge between the access/point router and another device....................221 Chapter 14 Router Mode: Manage Port Forwarding and Port Triggering Router mode: Manage port forwarding to a local server for services and applications................225...
- Page 10 AC2000 802.11ac Wireless Access Point/Router WAC124 Router mode: Internet LED is off..........244 WiFi LED Is Off................245 You cannot log in to the access point/router.......245 Access point mode: You cannot log in to the access point/router..................245 Router mode: You cannot log in to the access point/router...247 Router mode: You cannot access the Internet......248...
-
Page 11: Chapter 1 Hardware Overview Of The Access Point/Router
Hardware Overview of the Access Point/Router The NETGEAR AC2000 802.11ac Wireless Access Point/Router Model WAC124, in this manual referred to as the access point/router, supports dual-band concurrent operation at 2.4 GHz and 5 GHz with combined throughput of 2000 Mbps (300 Mbps at 2.4 GHz and 1700 Mbps at 5 GHz). -
Page 12: Top Panel With Leds
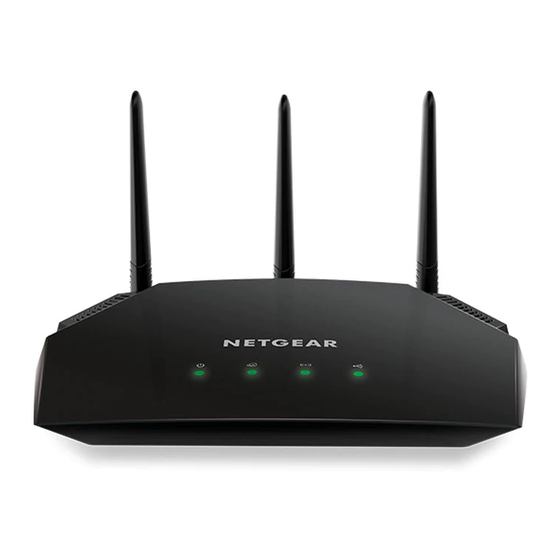
AC2000 802.11ac Wireless Access Point/Router WAC124 Top panel with LEDs The four status LEDs are located on the top panel of the access point/router. From left to right, the top panel contains the Power LED, Internet LED, WiFi LED, and USB LED. -
Page 13: Back Panel With Ports, Buttons, And A Power Connector
AC2000 802.11ac Wireless Access Point/Router WAC124 Table 1. LED descriptions (Continued) Description WiFi Solid green. One or both WiFi radios are operating. Blinking green. One or both WiFi radios are sending or receiving traffic. Blinking green slowly. Someone pressed the WPS button. -
Page 14: Position The Antennas For Best Wifi Performance
AC2000 802.11ac Wireless Access Point/Router WAC124 Viewed from left to right, the back panel contains the following components: • USB 2.0 port. One USB 2.0 port to connect a storage device or printer to the access point/router. • LAN ports 4 through 1. Four Gigabit Ethernet RJ-45 LAN ports numbered LAN4 through LAN1 to connect the access point/router to Ethernet devices such as a computer and a switch. - Page 15 AC2000 802.11ac Wireless Access Point/Router WAC124 Figure 3. Access point/router label Hardware Overview of the User Manual Access Point/Router...
-
Page 16: Chapter 2 Install And Access The Access Point/Router In Your
• Log in to the access point/router when it is connected to the Internet • Log in to the access point/router when it is not connected to the Internet • Use the NETGEAR Insight mobile app to discover the access point/router • Find the IP address of the access point/router •... -
Page 17: Connect The Access Point/Router To Your Existing Router And Log In For The First Time
AC2000 802.11ac Wireless Access Point/Router WAC124 Connect the access point/router to your existing router and log in for the first time By default, the access point/router is in access point mode and functions as a WiFi access point and LAN switch for Internet access. Basically, in access point mode, the access point/router functions as a bridge between your existing router and the access point/router’s LAN and WiFi clients. - Page 18 4. Log in to the access point/router by using one of the following methods: • Connect over WiFi. On a WiFi-enabled computer or mobile device, find and connect to the access point/router’s WiFi network. The default SSID is NETGEAR-1. The default passphrase is sharedsecret. Install and Access the Access User Manual...
- Page 19 AC2000 802.11ac Wireless Access Point/Router WAC124 • Connect over Ethernet to the same network. Using an Ethernet cable, connect the LAN port on your computer to the same router that the access point/router is connected to. You can connect your computer either directly or through a switch or hub to the router.
- Page 20 Set up a new account. c. Log in with your MyNETGEAR registered email address and password. Note: If the NETGEAR Account Login page or Create NETGEAR Account page does not display, if you cannot sign in to your existing MyNETGEAR account or create a...
-
Page 21: Update The Access Point/Router Firmware If You Cannot Complete The Initial Log-In Process
During the initial log-in process, if the NETGEAR Account Login page or Create NETGEAR Account page does not display, if you cannot sign in to your existing MyNETGEAR account or create a new MyNETGEAR account, or if you encounter any other problem that prevents you from completing the initial log-in process, you first might need to reset the access point/router to factory default settings. -
Page 22: About Router Mode
The Power LED starts blinking yellow and the configuration is reset to factory default settings. When the reset is complete, the access point/router reboots and connects to the NETGEAR server to detect if new firmware is available. The entire process of resetting, rebooting, and detecting firmware takes about three minutes. -
Page 23: Use The Access Point/Router In Router Mode
AC2000 802.11ac Wireless Access Point/Router WAC124 Important: Only after you complete the initial log-in process in access point mode (see Connect the access point/router to your existing router and log in for the first time on page 17), can you change the system mode to router mode and connect the access point/router to an Internet modem. - Page 24 AC2000 802.11ac Wireless Access Point/Router WAC124 Note: If you are not sure what the WAN type of your modem is, contact your ISP before you start the following procedure. Figure 5. Connect the access point/router in router mode to your Internet modem...
- Page 25 Internet. Do the following: a. Launch a web browser and enter http://www.routerlogin.net in the address field. The Sign-In page displays. You are prompted to sign in with your NETGEAR account. b. Click the Login button.
-
Page 26: Log In To The Access Point/Router When It Is Connected To The Internet
AC2000 802.11ac Wireless Access Point/Router WAC124 d. Select ADVANCED > Setup Wizard. The Setup Wizard page displays. e. Click the Next button. f. During the Internet connection setup process, follow the prompts and provide the required PPPoE, L2TP, or PPTP information. - Page 27 If you do no know the IP address, see Find the IP address of the access point/router on page 29. The Sign-In page displays. You are prompted to sign in with your NETGEAR account. 3. Click the Login button.
-
Page 28: Log In To The Access Point/Router When It Is Not Connected To The Internet
17), you can log in again, even if the access point/router is not connected to the Internet. In such a situation, use the local login admin user name and default password, which are different from the registered email address and password for your NETGEAR account. -
Page 29: Use The Netgear Insight Mobile App To Discover The Access Point/Router
2. Connect your mobile device to the access point/router WiFi network. 3. Open the NETGEAR Insight mobile app. 4. Select LOG IN to log in to your existing NETGEAR account, which is the same account that you logged into or created during the initial log-in process. - Page 30 • Your computer or mobile device is directly connected to the access point/router, but the access point/router is not connected to the Internet. • Your network includes another NETGEAR device that is also accessible by using http://www.routerlogin.net. In such a situation, if you use http://www.routerlogin.net, you might log in to the access point/router or you...
-
Page 31: Change The Language
2. Connect your mobile device to the access point/router WiFi network. 3. Open the NETGEAR Insight mobile app. 4. Select LOG IN to log in to your existing NETGEAR account, which is the same account that you logged into or created during the initial log-in process. -
Page 32: Change The Local Login Admin Password
AC2000 802.11ac Wireless Access Point/Router WAC124 The Sign-In page displays. You are prompted to sign in with your NETGEAR account. If the access point/router is not connected to the Internet, you are prompted to sign in with the local login credentials (see Log in to the access point/router when it is not connected to the Internet on page 28). -
Page 33: Set Up Password Recovery For The Local Login Admin User Name
If you do not know the IP address, see Find the IP address of the access point/router on page 29. The Sign-In page displays. You are prompted to sign in with your NETGEAR account. If the access point/router is not connected to the Internet, you are prompted to sign in with the local login credentials (see Log in to the access point/router when it is not connected to the Internet on page 28). -
Page 34: Connect A Wired Or Wifi Device To The Access Point/Router's Network After Installation
AC2000 802.11ac Wireless Access Point/Router WAC124 4. Enter your registered email address and password and click the LOG IN button. The BASIC Home page displays. 5. Select ADVANCED > Administration > Set Password. The Set Password page displays. 6. Select the Enable Password Recovery check box. -
Page 35: Use Wi-Fi Protected Setup To Join The Wifi Network Of The Access Point/Router
AC2000 802.11ac Wireless Access Point/Router WAC124 To connect a computer or LAN device to the access point/router with an Ethernet cable: 1. Make sure that the access point/router is receiving power and is connected to the Internet (both its Power LED and Internet LED are lit). -
Page 36: Manually Join The Wifi Network Of The Access Point/Router
This applicaiton scans for all WiFi networks in your area. 3. Look for the access point/router’s network and select it. The default SSID is NETGEAR-1. (By default, the access point/router’s second and third WiFi network are disabled.) 4. Enter the default passphrase for WiFi access. -
Page 37: Chapter 3 Specify The Access Point/Router Internet Settings Manually
Specify the Access Point/Router Internet Settings Manually Usually, the quickest way to set up the Internet connection is to allow the NETGEAR installation assistant to detect the Internet connection when you first set up and access the access point/router with a web browser. After initial setup, you can use the Setup Wizard at any time. -
Page 38: Use The Internet Setup Wizard
You can use the Setup Wizard to detect your Internet settings and automatically set up your access point/router. Although the functionality is similar, the Setup Wizard is not the same as the NETGEAR installation assistant that runs the first time that you connect to your access point/router to set it up. -
Page 39: Access Point Mode: Specify A Fixed Lan Ip Address
If you do not know the IP address, see Find the IP address of the access point/router on page 29. The Sign-In page displays. You are prompted to sign in with your NETGEAR account. If the access point/router is not connected to the Internet, you are prompted to sign in with the local login credentials (see Log in to the access point/router when it is not connected to the Internet on page 28). -
Page 40: Router Mode: Manually Set Up The Access Point/Router Internet Connection
If you do not know the IP address, see Find the IP address of the access point/router on page 29. The Sign-In page displays. You are prompted to sign in with your NETGEAR account. If the access point/router is not connected to the Internet, you are prompted to sign in with the local login credentials (see Log in to the access point/router when it is not connected to the Internet on page 28). - Page 41 7. If your Internet connection requires an account name (sometimes referred to as a host name), enter it in the Account Name field. The account name is the same as the device name, which, by default, is WAC124. 8. If your Internet connection requires a domain name, enter it in the Domain Name field.
-
Page 42: Router Mode: Specify A Pppoe Internet Connection That Uses A Login
Your settings are saved. 13. Click the Test button to test your Internet connection. If the NETGEAR website does not display within one minute, see one of the following sections: • Router mode: You cannot access the Internet on page 248 •... - Page 43 AC2000 802.11ac Wireless Access Point/Router WAC124 The settings on the page change. 7. From the Internet Service Provider menu, select PPPoE as the encapsulation method. 8. In the Login field, enter the login name that your ISP gave you. This login name is often an email address.
-
Page 44: Router Mode: Specify A Pptp Or L2Tp Internet Connection That Uses A Login
Your settings are saved. 17. Click the Test button to test your Internet connection. If the NETGEAR website does not display within one minute, see one of the following sections: • Router mode: You cannot access the Internet on page 248 •... - Page 45 AC2000 802.11ac Wireless Access Point/Router WAC124 7. From the Internet Service Provider menu, select PPTP or L2TP as the encapsulation method. 8. In the Login field, enter the login name that your ISP gave you. This login name is often an email address.
-
Page 46: Router Mode: Specify An Ipv6 Internet Connection
AC2000 802.11ac Wireless Access Point/Router WAC124 17. Click the Test button to test your Internet connection. If the NETGEAR website does not display within one minute, see one of the following sections: • Router mode: You cannot access the Internet on page 248 •... -
Page 47: Router Mode: Requirements For Entering Ipv6 Addresses
AC2000 802.11ac Wireless Access Point/Router WAC124 • If you are not sure, select Auto Detect so that the access point/router detects the IPv6 type that is in use. • If your Internet connection does not use PPPoE or DHCP, or is not fixed, but is IPv6, select Auto Config. - Page 48 If you do not know the IP address, see Find the IP address of the access point/router on page 29. The Sign-In page displays. You are prompted to sign in with your NETGEAR account. If the access point/router is not connected to the Internet, you are prompted to sign in with the local login credentials (see Log in to the access point/router when it is not connected to the Internet on page 28).
-
Page 49: Router Mode: Use Auto Config For An Ipv6 Internet Connection
If you do not know the IP address, see Find the IP address of the access point/router on page 29. The Sign-In page displays. You are prompted to sign in with your NETGEAR account. If the access point/router is not connected to the Internet, you are prompted to sign in with the local login credentials (see Log in to the access point/router when it is not connected to the Internet on page 28). - Page 50 AC2000 802.11ac Wireless Access Point/Router WAC124 slash (/) is the length of the prefix, which is also indicated by the underline (_) under the IPv6 address. If no address is acquired, the field displays Not Available. • Router’s IPv6 Address on LAN. This field shows the IPv6 address that is acquired for the access point/router’s LAN interface.
-
Page 51: Router Mode: Set Up An Ipv6 6To4 Tunnel Internet Connection.51
If you do not know the IP address, see Find the IP address of the access point/router on page 29. The Sign-In page displays. You are prompted to sign in with your NETGEAR account. If the access point/router is not connected to the Internet, you are prompted to sign in with the local login credentials (see Log in to the access point/router when it is not connected to the Internet on page 28). -
Page 52: Router Mode: Set Up An Ipv6 6Rd Internet Connection
AC2000 802.11ac Wireless Access Point/Router WAC124 8. Select an IPv6 Domain Name Server (DNS) Address radio button: • Get Automatically from ISP. Your ISP uses DHCP to assign your DNS servers. Your ISP automatically assigns these addresses. • Use These DNS Servers. If you know that your ISP requires specific servers, select this option. - Page 53 If you do not know the IP address, see Find the IP address of the access point/router on page 29. The Sign-In page displays. You are prompted to sign in with your NETGEAR account. If the access point/router is not connected to the Internet, you are prompted to sign in with the local login credentials (see Log in to the access point/router when it is not connected to the Internet on page 28).
-
Page 54: Router Mode: Set Up An Ipv6 Passthrough Internet Connection
AC2000 802.11ac Wireless Access Point/Router WAC124 length of the prefix, which is also indicated by the underline (_) under the IPv6 address. If no address is acquired, the field displays Not Available. 7. Select an IPv6 Domain Name Server (DNS) Address radio button: •... -
Page 55: Router Mode: Set Up An Ipv6 Fixed Internet Connection
AC2000 802.11ac Wireless Access Point/Router WAC124 The Sign-In page displays. You are prompted to sign in with your NETGEAR account. If the access point/router is not connected to the Internet, you are prompted to sign in with the local login credentials (see Log in to the access point/router when it is not connected to the Internet on page 28). - Page 56 AC2000 802.11ac Wireless Access Point/Router WAC124 5. Select ADVANCED > Advanced Setup > IPv6. The IPv6 page displays. 6. From the Internet Connection Type menu, select Fixed. The page adjusts. 7. In the WAN Setup section, specify the fixed IPv6 addresses for the WAN connection: •...
-
Page 57: Router Mode: Set Up An Ipv6 Dhcp Internet Connection
If you do not know the IP address, see Find the IP address of the access point/router on page 29. The Sign-In page displays. You are prompted to sign in with your NETGEAR account. If the access point/router is not connected to the Internet, you are prompted to sign in with the local login credentials (see Log in to the access point/router when it is not connected to the Internet on page 28). -
Page 58: Router Mode: Set Up An Ipv6 Pppoe Internet Connection
If you do not know the IP address, see Find the IP address of the access point/router on page 29. The Sign-In page displays. You are prompted to sign in with your NETGEAR account. Specify the Access Point/Router User Manual... - Page 59 AC2000 802.11ac Wireless Access Point/Router WAC124 If the access point/router is not connected to the Internet, you are prompted to sign in with the local login credentials (see Log in to the access point/router when it is not connected to the Internet on page 28).
- Page 60 AC2000 802.11ac Wireless Access Point/Router WAC124 • Use These DNS Servers. If you know that your ISP requires specific servers, select this option. Enter the IP address of your ISP’s primary DNS server. If a secondary DNS server address is available, enter it also.
-
Page 61: Chapter 4 Manage The Basic Wifi And Radio Features
Manage the Basic WiFi and Radio Features This chapter describes how you can manage the basic WiFi and radio settings of the access point/router. For information about the advanced WiFi and radio settings, see Manage the Advanced WiFi and Radio Features on page 209. Tip: If you want to change the settings of the access point/router’s WiFi network, use a wired connection to avoid being disconnected when the new WiFi settings take effect. -
Page 62: Set Up Or Change An Open Or Secure Wifi Network
The access point/router provides three WiFi networks (Wireless 1, Wireless 2, and Wireless 3). By default, the Wireless 1 network is enabled (the other two WiFi networks are disabled), its default SSID is NETGEAR-1, and its default security is WPA2-PSK with the passphrase sharedsecret. - Page 63 The SSID (service set identifier) is the WiFi network name. If you do not change the SSID, the default SSID (NETGEAR-1, NETGEAR-2, or NETGEAR-3) displays. The default SSID is also printed on the access point/router label (see Access point/router label on page 14).
- Page 64 AC2000 802.11ac Wireless Access Point/Router WAC124 (Continued) Setting Description Enable SSID By default, the access point/router broadcasts its SSID so that WiFi clients can detect the Broadcast WiFi name (SSID) in their scanned network lists. To turn off the SSID broadcast, clear the Enable SSID Broadcast check box.
-
Page 65: Configure Wpa And Wpa2 Enterprise Wifi Security
If you do not know the IP address, see Find the IP address of the access point/router on page 29. The Sign-In page displays. You are prompted to sign in with your NETGEAR account. If the access point/router is not connected to the Internet, you are prompted to sign in with the local login credentials (see Log in to the access point/router when it is not connected to the Internet on page 28). - Page 66 AC2000 802.11ac Wireless Access Point/Router WAC124 The BASIC Home page displays. 5. Select BASIC > Wireless. The Wireless Network page displays. 6. Select the WiFi network (Wireless 1, Wireless 2, or Wireless 3). 7. In the Security Options section, select the WPA/WPA2 Enterprise radio button.
-
Page 67: Disable Or Enable A Wifi Network
If you do not know the IP address, see Find the IP address of the access point/router on page 29. The Sign-In page displays. You are prompted to sign in with your NETGEAR account. If the access point/router is not connected to the Internet, you are prompted to sign in with the local login credentials (see Log in to the access point/router when it is not connected to the Internet on page 28). -
Page 68: Hide Or Broadcast The Ssid For A Wifi Network
If you do not know the IP address, see Find the IP address of the access point/router on page 29. The Sign-In page displays. You are prompted to sign in with your NETGEAR account. If the access point/router is not connected to the Internet, you are prompted to sign in with the local login credentials (see Log in to the access point/router when it is not connected to the Internet on page 28). -
Page 69: Enable Or Disable The Wifi Radios
If you do not know the IP address, see Find the IP address of the access point/router on page 29. The Sign-In page displays. You are prompted to sign in with your NETGEAR account. If the access point/router is not connected to the Internet, you are prompted to sign in with the local login credentials (see Log in to the access point/router when it is not connected to the Internet on page 28). -
Page 70: Use Wps To Add A Device To The Wifi Network
AC2000 802.11ac Wireless Access Point/Router WAC124 The NETGEAR Account Login page displays. 4. Enter your registered email address and password and click the LOG IN button. The BASIC Home page displays. 5. Select ADVANCED > Advanced Setup > Advanced Wireless Settings. - Page 71 If you do not know the IP address, see Find the IP address of the access point/router on page 29. The Sign-In page displays. You are prompted to sign in with your NETGEAR account. If the access point/router is not connected to the Internet, you are prompted to sign in with the local login credentials (see Log in to the access point/router when it is not connected to the Internet on page 28).
-
Page 72: Use Wps With The Pin Method
If you do not know the IP address, see Find the IP address of the access point/router on page 29. The Sign-In page displays. You are prompted to sign in with your NETGEAR account. If the access point/router is not connected to the Internet, you are prompted to sign in with the local login credentials (see Log in to the access point/router when it is not connected to the Internet on page 28). - Page 73 AC2000 802.11ac Wireless Access Point/Router WAC124 For four minutes, the access point/router attempts to find the WiFi device (that is, the client) that you want to join the access point/router’s main WiFi network. During this time, the WiFi LED on the top panel of the access point/router blinks.
-
Page 74: Chapter 5 Manage The Firewall And Security
Manage the Firewall and Security The access point/router comes with a built-in firewall that helps to protect your network from unwanted intrusions from the Internet and lets you control access to the Internet. This chapter includes the following sections: • Router mode: Manage the basic firewall settings •... -
Page 75: Router Mode: Manage The Basic Firewall Settings
If you do not know the IP address, see Find the IP address of the access point/router on page 29. The Sign-In page displays. You are prompted to sign in with your NETGEAR account. If the access point/router is not connected to the Internet, you are prompted to sign in with the local login credentials (see Log in to the access point/router when it is not connected to the Internet on page 28). -
Page 76: Router Mode: Set Up A Default Dmz Server
AC2000 802.11ac Wireless Access Point/Router WAC124 4. Enter your registered email address and password and click the LOG IN button. The BASIC Home page displays. 5. Select ADVANCED > Setup > WAN Setup. The WAN Setup page displays. 6. To enable a port scan and disable DoS protection, select the Disable Port Scan and DoS Protection check box. -
Page 77: Router Mode: Manage Igmp Proxying
If you do not know the IP address, see Find the IP address of the access point/router on page 29. The Sign-In page displays. You are prompted to sign in with your NETGEAR account. If the access point/router is not connected to the Internet, you are prompted to sign in with the local login credentials (see Log in to the access point/router when it is not connected to the Internet on page 28). -
Page 78: Router Mode: Manage Nat Filtering
If you do not know the IP address, see Find the IP address of the access point/router on page 29. The Sign-In page displays. You are prompted to sign in with your NETGEAR account. If the access point/router is not connected to the Internet, you are prompted to sign in with the local login credentials (see Log in to the access point/router when it is not connected to the Internet on page 28). -
Page 79: Router Mode: Manage The Sip Application-Level Gateway
If you do not know the IP address, see Find the IP address of the access point/router on page 29. The Sign-In page displays. You are prompted to sign in with your NETGEAR account. If the access point/router is not connected to the Internet, you are prompted to sign in with the local login credentials (see Log in to the access point/router when it is not connected to the Internet on page 28). -
Page 80: Router Mode: Manage Vpn Pass-Through
If you do not know the IP address, see Find the IP address of the access point/router on page 29. The Sign-In page displays. You are prompted to sign in with your NETGEAR account. If the access point/router is not connected to the Internet, you are prompted to sign in with the local login credentials (see Log in to the access point/router when it is not connected to the Internet on page 28). -
Page 81: Allow Or Block Device Access To Your Network
If you do not know the IP address, see Find the IP address of the access point/router on page 29. The Sign-In page displays. You are prompted to sign in with your NETGEAR account. If the access point/router is not connected to the Internet, you are prompted to sign in with the local login credentials (see Log in to the access point/router when it is not connected to the Internet on page 28). -
Page 82: Manage Network Access Control Lists
AC2000 802.11ac Wireless Access Point/Router WAC124 buttons. When the Turn on Access Control check box is cleared, all devices are allowed to connect, even if a device is in the list of blocked devices. 7. Click the Apply button. Your settings are saved. -
Page 83: Add Or Remove A Device From The Allowed List
If you do not know the IP address, see Find the IP address of the access point/router on page 29. The Sign-In page displays. You are prompted to sign in with your NETGEAR account. If the access point/router is not connected to the Internet, you are prompted to sign in with the local login credentials (see Log in to the access point/router when it is not connected to the Internet on page 28). -
Page 84: Add Or Remove A Device From The Blocked List
If you do not know the IP address, see Find the IP address of the access point/router on page 29. The Sign-In page displays. You are prompted to sign in with your NETGEAR account. If the access point/router is not connected to the Internet, you are prompted to sign in with the local login credentials (see Log in to the access point/router when it is not connected to the Internet on page 28). -
Page 85: Router Mode: Specify Keywords And Domains To Block Internet Sites
AC2000 802.11ac Wireless Access Point/Router WAC124 7. To add a device to the blocked list, do the following: a. Click the Add button. The Add Blocked Device page displays. b. Enter the MAC address and device name for the device that you want to block. - Page 86 If you do not know the IP address, see Find the IP address of the access point/router on page 29. The Sign-In page displays. You are prompted to sign in with your NETGEAR account. If the access point/router is not connected to the Internet, you are prompted to sign in with the local login credentials (see Log in to the access point/router when it is not connected to the Internet on page 28).
-
Page 87: Router Mode: Specify A Trusted Device
If you do not know the IP address, see Find the IP address of the access point/router on page 29. The Sign-In page displays. You are prompted to sign in with your NETGEAR account. If the access point/router is not connected to the Internet, you are prompted to sign in with the local login credentials (see Log in to the access point/router when it is not connected to the Internet on page 28). -
Page 88: Router Mode: Remove A Keyword Or Domain From The Blocked List
If you do not know the IP address, see Find the IP address of the access point/router on page 29. The Sign-In page displays. You are prompted to sign in with your NETGEAR account. If the access point/router is not connected to the Internet, you are prompted to sign in with the local login credentials (see Log in to the access point/router when it is not connected to the Internet on page 28). -
Page 89: Router Mode: Remove All Keywords And Domains From The Blocked List
If you do not know the IP address, see Find the IP address of the access point/router on page 29. The Sign-In page displays. You are prompted to sign in with your NETGEAR account. If the access point/router is not connected to the Internet, you are prompted to sign in with the local login credentials (see Log in to the access point/router when it is not connected to the Internet on page 28). -
Page 90: Router Mode: Add A Service Blocking Rule For A Predefined Service Or Application
If you do not know the IP address, see Find the IP address of the access point/router on page 29. The Sign-In page displays. You are prompted to sign in with your NETGEAR account. If the access point/router is not connected to the Internet, you are prompted to sign in with the local login credentials (see Log in to the access point/router when it is not connected to the Internet on page 28). -
Page 91: Router Mode: Add A Service Blocking Rule For A Custom Service Or Application
AC2000 802.11ac Wireless Access Point/Router WAC124 For more information, see Router mode: Set up a schedule for blocking on page • Always. Use service blocking continuously. 7. Click the Add button. The Add Services Blocking page displays. 8. From the Service Type menu, select the service or application to be covered by this rule. - Page 92 If you do not know the IP address, see Find the IP address of the access point/router on page 29. The Sign-In page displays. You are prompted to sign in with your NETGEAR account. If the access point/router is not connected to the Internet, you are prompted to sign in with the local login credentials (see Log in to the access point/router when it is not connected to the Internet on page 28).
-
Page 93: Router Mode: Change A Service Blocking Rule
AC2000 802.11ac Wireless Access Point/Router WAC124 10. Specify a new service blocking rule by selecting a protocol, defining the ports, and defining a name: • Protocol. From the menu, select the protocol (TCP or UDP) that is associated with the service or application. If you are unsure, select TCP/UDP. -
Page 94: Router Mode: Remove A Service Blocking Rule
AC2000 802.11ac Wireless Access Point/Router WAC124 The Sign-In page displays. You are prompted to sign in with your NETGEAR account. If the access point/router is not connected to the Internet, you are prompted to sign in with the local login credentials (see Log in to the access point/router when it is not connected to the Internet on page 28). -
Page 95: Router Mode: Set Up A Schedule For Blocking
If you do not know the IP address, see Find the IP address of the access point/router on page 29. The Sign-In page displays. You are prompted to sign in with your NETGEAR account. Manage the Firewall and User Manual... -
Page 96: Set Up Security Event Email Notifications
If you do not know the IP address, see Find the IP address of the access point/router on page 29. The Sign-In page displays. You are prompted to sign in with your NETGEAR account. Manage the Firewall and User Manual... - Page 97 AC2000 802.11ac Wireless Access Point/Router WAC124 If the access point/router is not connected to the Internet, you are prompted to sign in with the local login credentials (see Log in to the access point/router when it is not connected to the Internet on page 28).
- Page 98 AC2000 802.11ac Wireless Access Point/Router WAC124 13. To send logs based on a schedule, specify these settings: a. From Send logs according to this schedule menu, select the schedule type. b. From the Day menu, select the day. c. From the Time menu, select the time, and select the am or pm radio button.
-
Page 99: Chapter 6 Optimize Performance
Optimize Performance This chapter describes how you can optimize the access point/router’s performance and manage the traffic flows through the access point/router. The chapter contains the following sections: • Optimize traffic with the default QoS rules • Manage default and custom QoS rules •... -
Page 100: Optimize Traffic With The Default Qos Rules
If you do not know the IP address, see Find the IP address of the access point/router on page 29. The Sign-In page displays. You are prompted to sign in with your NETGEAR account. If the access point/router is not connected to the Internet, you are prompted to sign in with the local login credentials (see Log in to the access point/router when it is not connected to the Internet on page 28). -
Page 101: Manage Default And Custom Qos Rules
If you do not know the IP address, see Find the IP address of the access point/router on page 29. The Sign-In page displays. You are prompted to sign in with your NETGEAR account. If the access point/router is not connected to the Internet, you are prompted to sign in with the local login credentials (see Log in to the access point/router when it is not connected to the Internet on page 28). -
Page 102: Add A Custom Qos Rule For A Device
If you do not know the IP address, see Find the IP address of the access point/router on page 29. The Sign-In page displays. You are prompted to sign in with your NETGEAR account. If the access point/router is not connected to the Internet, you are prompted to sign in with the local login credentials (see Log in to the access point/router when it is not connected to the Internet on page 28). -
Page 103: Change A Qos Rule Or Change The Priority For A Rule
IP address that is assigned to the access point/router. If you do not know the IP address, see Find the IP address of the access point/router on page 29. The Sign-In page displays. You are prompted to sign in with your NETGEAR account. Optimize Performance User Manual... -
Page 104: Remove A Qos Rule
IP address that is assigned to the access point/router. If you do not know the IP address, see Find the IP address of the access point/router on page 29. The Sign-In page displays. You are prompted to sign in with your NETGEAR account. Optimize Performance User Manual... -
Page 105: Remove All Qos Rules
If you do not know the IP address, see Find the IP address of the access point/router on page 29. The Sign-In page displays. You are prompted to sign in with your NETGEAR account. If the access point/router is not connected to the Internet, you are prompted to sign in with the local login credentials (see Log in to the access point/router when it is not connected to the Internet on page 28). -
Page 106: Manage Uplink Bandwidth Control
If you do not know the IP address, see Find the IP address of the access point/router on page 29. The Sign-In page displays. You are prompted to sign in with your NETGEAR account. If the access point/router is not connected to the Internet, you are prompted to sign in with the local login credentials (see Log in to the access point/router when it is not connected to the Internet on page 28). -
Page 107: Manage Wifi Multimedia (Wmm) For A Radio
AC2000 802.11ac Wireless Access Point/Router WAC124 6. To find out what uplink bandwidth your Internet connection supports, click the Speedtest button. The speed test checks your uplink bandwidth and the supported uplink bandwidth displays in the Uplink bandwidth Maximum field. Depending on your Internet speed, this process might take up to one minute. -
Page 108: Improve Network Connections With Universal Plug And Play
If you do not know the IP address, see Find the IP address of the access point/router on page 29. The Sign-In page displays. You are prompted to sign in with your NETGEAR account. If the access point/router is not connected to the Internet, you are prompted to sign in with the local login credentials (see Log in to the access point/router when it is not connected to the Internet on page 28). - Page 109 If you do not know the IP address, see Find the IP address of the access point/router on page 29. The Sign-In page displays. You are prompted to sign in with your NETGEAR account. If the access point/router is not connected to the Internet, you are prompted to sign in with the local login credentials (see Log in to the access point/router when it is not connected to the Internet on page 28).
- Page 110 AC2000 802.11ac Wireless Access Point/Router WAC124 9. Click the Apply button. If the access point/router is in router mode, the UPnP Portmap Table displays the IP address of each UPnP device that is accessing the access point/router and which ports (internal and external) that device opened. The UPnP Portmap Table also displays what type of port is open and whether that port is still active for each IP address.
-
Page 111: Chapter 7 Manage The Network Settings
Manage the Network Settings This chapter describes how you can manage various network settings of the access point/router. The chapter includes the following sections: • Router mode: Manage the LAN IP address settings • Router mode: Manage reserved LAN IP addresses •... -
Page 112: Router Mode: Manage The Lan Ip Address Settings
If you do not know the IP address, see Find the IP address of the access point/router on page 29. The Sign-In page displays. You are prompted to sign in with your NETGEAR account. If the access point/router is not connected to the Internet, you are prompted to sign in with the local login credentials (see Log in to the access point/router when it is not connected to the Internet on page 28). -
Page 113: Router Mode: Change The Lan Ip Address And Subnet Settings
If you do not know the IP address, see Find the IP address of the access point/router on page 29. The Sign-In page displays. You are prompted to sign in with your NETGEAR account. If the access point/router is not connected to the Internet, you are prompted to sign in with the local login credentials (see Log in to the access point/router when it is not connected to the Internet on page 28). -
Page 114: Router Mode: Manage The Dhcp Server Address Pool
AC2000 802.11ac Wireless Access Point/Router WAC124 The NETGEAR Account Login page displays. 4. Enter your registered email address and password and click the LOG IN button. The BASIC Home page displays. 5. Select ADVANCED > Setup > LAN Setup. The LAN Setup page displays. - Page 115 If you do not know the IP address, see Find the IP address of the access point/router on page 29. The Sign-In page displays. You are prompted to sign in with your NETGEAR account. If the access point/router is not connected to the Internet, you are prompted to sign in with the local login credentials (see Log in to the access point/router when it is not connected to the Internet on page 28).
-
Page 116: Router Mode: Disable The Dhcp Server
If you do not know the IP address, see Find the IP address of the access point/router on page 29. The Sign-In page displays. You are prompted to sign in with your NETGEAR account. If the access point/router is not connected to the Internet, you are prompted to sign in with the local login credentials (see Log in to the access point/router when it is not connected to the Internet on page 28). -
Page 117: Router Mode: Manage The Router Information Protocol Settings
If you do not know the IP address, see Find the IP address of the access point/router on page 29. The Sign-In page displays. You are prompted to sign in with your NETGEAR account. If the access point/router is not connected to the Internet, you are prompted to sign in with the local login credentials (see Log in to the access point/router when it is not connected to the Internet on page 28). -
Page 118: Router Mode: Manage Reserved Lan Ip Addresses
If you do not know the IP address, see Find the IP address of the access point/router on page 29. The Sign-In page displays. You are prompted to sign in with your NETGEAR account. If the access point/router is not connected to the Internet, you are prompted to sign in with the local login credentials (see Log in to the access point/router when it is not connected to the Internet on page 28). -
Page 119: Router Mode: Change A Reserved Lan Ip Address
If you do not know the IP address, see Find the IP address of the access point/router on page 29. The Sign-In page displays. You are prompted to sign in with your NETGEAR account. If the access point/router is not connected to the Internet, you are prompted to sign in with the local login credentials (see Log in to the access point/router when it is not connected to the Internet on page 28). -
Page 120: Router Mode: Remove A Reserved Lan Ip Address Entry
If you do not know the IP address, see Find the IP address of the access point/router on page 29. The Sign-In page displays. You are prompted to sign in with your NETGEAR account. If the access point/router is not connected to the Internet, you are prompted to sign in with the local login credentials (see Log in to the access point/router when it is not connected to the Internet on page 28). -
Page 121: Add And Manage Ipv4 Static Routes
AC2000 802.11ac Wireless Access Point/Router WAC124 6. In the Address Reservation table, select the radio button for the reserved address. 7. Click the Delete button. The IP address entry is removed. Add and manage IPv4 static routes Static routes provide detailed routing information to your router. Typically, you do not need to add static routes. -
Page 122: Add An Ipv4 Static Route
If you do not know the IP address, see Find the IP address of the access point/router on page 29. The Sign-In page displays. You are prompted to sign in with your NETGEAR account. If the access point/router is not connected to the Internet, you are prompted to sign in with the local login credentials (see Log in to the access point/router when it is not connected to the Internet on page 28). -
Page 123: Change An Ipv4 Static Route
If you do not know the IP address, see Find the IP address of the access point/router on page 29. The Sign-In page displays. You are prompted to sign in with your NETGEAR account. If the access point/router is not connected to the Internet, you are prompted to sign in with the local login credentials (see Log in to the access point/router when it is not connected to the Internet on page 28). -
Page 124: Remove An Ipv4 Static Route
If you do not know the IP address, see Find the IP address of the access point/router on page 29. The Sign-In page displays. You are prompted to sign in with your NETGEAR account. If the access point/router is not connected to the Internet, you are prompted to sign in with the local login credentials (see Log in to the access point/router when it is not connected to the Internet on page 28). -
Page 125: Router Mode: Enable An Iptv Bridge For A Port Group Or Vlan Tag Group
If you do not know the IP address, see Find the IP address of the access point/router on page 29. The Sign-In page displays. You are prompted to sign in with your NETGEAR account. If the access point/router is not connected to the Internet, you are prompted to sign in with the local login credentials (see Log in to the access point/router when it is not connected to the Internet on page 28). -
Page 126: Router Mode: Enable An Iptv Bridge For A Vlan Tag Group
AC2000 802.11ac Wireless Access Point/Router WAC124 The NETGEAR Account Login page displays. 4. Enter your registered email address and password and click the LOG IN button. The BASIC Home page displays. 5. Select ADVANCED > Advanced Setup > VLAN / Bridge Settings. - Page 127 If you do not know the IP address, see Find the IP address of the access point/router on page 29. The Sign-In page displays. You are prompted to sign in with your NETGEAR account. If the access point/router is not connected to the Internet, you are prompted to sign in with the local login credentials (see Log in to the access point/router when it is not connected to the Internet on page 28).
-
Page 128: Router Mode: Change The Mtu Size
AC2000 802.11ac Wireless Access Point/Router WAC124 You must select at least one LAN port or WiFi radio. You can select more than one LAN port and WiFi radio. 9. Click the Apply button. Your settings are saved. If you added a VLAN tag group, the group is added to the table on the VLAN / Bridge Settings page. - Page 129 If you do not know the IP address, see Find the IP address of the access point/router on page 29. The Sign-In page displays. You are prompted to sign in with your NETGEAR account. If the access point/router is not connected to the Internet, you are prompted to sign in with the local login credentials (see Log in to the access point/router when it is not connected to the Internet on page 28).
- Page 130 AC2000 802.11ac Wireless Access Point/Router WAC124 Table 2. Common MTU sizes (Continued) Application 1468 Used in some DHCP environments. 1436 Used in PPTP environments or with VPN. Manage the Network Settings User Manual...
-
Page 131: Chapter 8 Maintain And Monitor The Access Point/Router
Maintain and Monitor the Access Point/Router This chapter describes how you can maintain the access point/router by managing the firmware, configuration file, and logs and by setting up the traffic meter. The chapter also describes how you can monitor the access point/router and its network traffic. The chapter includes the following sections: •... -
Page 132: Update The Firmware Of The Access Point/Router
If you do not know the IP address, see Find the IP address of the access point/router on page 29. The Sign-In page displays. You are prompted to sign in with your NETGEAR account. If the access point/router is not connected to the Internet, you are prompted to sign in with the local login credentials (see Log in to the access point/router when it is not connected to the Internet on page 28). -
Page 133: Check For New Firmware Manually And Update The Access Point/Router Manually
If you do not know the IP address, see Find the IP address of the access point/router on page 29. The Sign-In page displays. You are prompted to sign in with your NETGEAR account. Maintain and Monitor the Access... - Page 134 Open a web browser from a computer or mobile device that is connected to the access point/router network. b. Enter http://www.routerlogin.net in the address field. The Sign-In page displays. You are prompted to sign in with your NETGEAR account. c. Click the Login button.
-
Page 135: Manage The Configuration File Of The Access Point/Router
If you do not know the IP address, see Find the IP address of the access point/router on page 29. The Sign-In page displays. You are prompted to sign in with your NETGEAR account. If the access point/router is not connected to the Internet, you are prompted to sign in with the local login credentials (see Log in to the access point/router when it is not connected to the Internet on page 28). -
Page 136: Restore The Access Point/Router Configuration Settings
If you do not know the IP address, see Find the IP address of the access point/router on page 29. The Sign-In page displays. You are prompted to sign in with your NETGEAR account. If the access point/router is not connected to the Internet, you are prompted to sign in with the local login credentials (see Log in to the access point/router when it is not connected to the Internet on page 28). -
Page 137: Recover The Local Login Admin Password
AC2000 802.11ac Wireless Access Point/Router WAC124 Warning: To avoid the risk of corrupting the firmware, do not interrupt the restoration. For example, do not close the browser, click a link, or load a new page. Do not turn off the access point/router. Wait until the access point/router finishes restarting and the Power LED turns solid green. -
Page 138: Return The Access Point/Router To Its Factory Default Settings
If the access point/router is in access point mode and you do not know the current IP address of the access point/router, first try to use the NETGEAR Insight mobile app or an IP scanner application to detect the IP address. If you still cannot find the current IP address of the access point/router, reset the access point/router to factory default settings. -
Page 139: Erase The Settings To Factory Default Settings
If you do not know the IP address, see Find the IP address of the access point/router on page 29. The Sign-In page displays. You are prompted to sign in with your NETGEAR account. If the access point/router is not connected to the Internet, you are prompted to sign in with the local login credentials (see Log in to the access point/router when it is not connected to the Internet on page 28). -
Page 140: Manage The Time Settings
If you do not know the IP address, see Find the IP address of the access point/router on page 29. The Sign-In page displays. You are prompted to sign in with your NETGEAR account. If the access point/router is not connected to the Internet, you are prompted to sign in with the local login credentials (see Log in to the access point/router when it is not connected to the Internet on page 28). -
Page 141: Change The Ntp Server
If you do not know the IP address, see Find the IP address of the access point/router on page 29. The Sign-In page displays. You are prompted to sign in with your NETGEAR account. If the access point/router is not connected to the Internet, you are prompted to sign in with the local login credentials (see Log in to the access point/router when it is not connected to the Internet on page 28). -
Page 142: Manage The Activity Log
If you do not know the IP address, see Find the IP address of the access point/router on page 29. The Sign-In page displays. You are prompted to sign in with your NETGEAR account. If the access point/router is not connected to the Internet, you are prompted to sign in with the local login credentials (see Log in to the access point/router when it is not connected to the Internet on page 28). -
Page 143: View, Send, Or Clear The Logs
If you do not know the IP address, see Find the IP address of the access point/router on page 29. The Sign-In page displays. You are prompted to sign in with your NETGEAR account. Maintain and Monitor the Access... -
Page 144: View The Status And Statistics Of The Access Point/Router
AC2000 802.11ac Wireless Access Point/Router WAC124 If the access point/router is not connected to the Internet, you are prompted to sign in with the local login credentials (see Log in to the access point/router when it is not connected to the Internet on page 28). - Page 145 If you do not know the IP address, see Find the IP address of the access point/router on page 29. The Sign-In page displays. You are prompted to sign in with your NETGEAR account. If the access point/router is not connected to the Internet, you are prompted to sign in with the local login credentials (see Log in to the access point/router when it is not connected to the Internet on page 28).
- Page 146 AC2000 802.11ac Wireless Access Point/Router WAC124 (Continued) Field Description Serial Number The serial number of the access point/router. This number does not change. Operation mode Field Description LAN Port pane To change these settings, see Use the Internet Setup Wizard on page 38 or Access point mode: Specify a fixed...
-
Page 147: Router Mode: View Information About The Access Point/Router, Internet Port, And Wifi Settings
If you do not know the IP address, see Find the IP address of the access point/router on page 29. The Sign-In page displays. You are prompted to sign in with your NETGEAR account. If the access point/router is not connected to the Internet, you are prompted to sign in with the local login credentials (see Log in to the access point/router when it is not connected to the Internet on page 28). - Page 148 Description Router Information pane Hardware Version The access point/router hardware version, which is the model number WAC124. Firmware Version The access point/router firmware version. If you update the firmware, the version changes (see Update the firmware of the access point/router on page 132).
- Page 149 AC2000 802.11ac Wireless Access Point/Router WAC124 (Continued) Field Description IP Address The IP address that applies to all four access point/router LAN ports through which you can access the access point/router. DHCP Server If the access point/router is in router mode, whether the DHCP server of the access point/router is enabled (the default setting in router mode) or disabled (see Router mode: Disable the DHCP server on page 116).
-
Page 150: Check The Internet Connection Status
If you do not know the IP address, see Find the IP address of the access point/router on page 29. The Sign-In page displays. You are prompted to sign in with your NETGEAR account. If the access point/router is not connected to the Internet, you are prompted to sign in with the local login credentials (see Log in to the access point/router when it is not connected to the Internet on page 28). - Page 151 AC2000 802.11ac Wireless Access Point/Router WAC124 6. In the LAN Port pane (in access point mode) or in the Internet Port pane (in router mode), click the Connection Status button. The information that displays depends on whether the access point/router is in access point mode (the default system mode) or router mode and the type of Internet connection.
-
Page 152: Display Internet Port Statistics
If you do not know the IP address, see Find the IP address of the access point/router on page 29. The Sign-In page displays. You are prompted to sign in with your NETGEAR account. If the access point/router is not connected to the Internet, you are prompted to sign in with the local login credentials (see Log in to the access point/router when it is not connected to the Internet on page 28). -
Page 153: View Devices Currently On The Access Point/Router Network
If you do not know the IP address, see Find the IP address of the access point/router on page 29. The Sign-In page displays. You are prompted to sign in with your NETGEAR account. If the access point/router is not connected to the Internet, you are prompted to sign in with the local login credentials (see Log in to the access point/router when it is not connected to the Internet on page 28). - Page 154 AC2000 802.11ac Wireless Access Point/Router WAC124 5. Select Attached Devices. Wired devices are connected to the access point/router with Ethernet cables. WiFi devices are connected to the access point/router through the WiFi network, in either the 2.4 GHz band or the 5 GHz band. VPN devices are connected over a VPN tunnel to the access point/router.
-
Page 155: Router Mode: Monitor And Meter Internet Traffic
AC2000 802.11ac Wireless Access Point/Router WAC124 (Continued) Field Description Local IP Address The IP address that is assigned to the device when it joined the access point/router network. This address can change when a device is disconnected and rejoins the network. -
Page 156: Router Mode: Restrict Internet Traffic By Volume
If you do not know the IP address, see Find the IP address of the access point/router on page 29. The Sign-In page displays. You are prompted to sign in with your NETGEAR account. If the access point/router is not connected to the Internet, you are prompted to sign in with the local login credentials (see Log in to the access point/router when it is not connected to the Internet on page 28). - Page 157 If you do not know the IP address, see Find the IP address of the access point/router on page 29. The Sign-In page displays. You are prompted to sign in with your NETGEAR account. If the access point/router is not connected to the Internet, you are prompted to sign in with the local login credentials (see Log in to the access point/router when it is not connected to the Internet on page 28).
-
Page 158: Router Mode: Restrict Internet Traffic By Connection Time
If you do not know the IP address, see Find the IP address of the access point/router on page 29. The Sign-In page displays. You are prompted to sign in with your NETGEAR account. If the access point/router is not connected to the Internet, you are prompted to sign in with the local login credentials (see Log in to the access point/router when it is not connected to the Internet on page 28). -
Page 159: Router Mode: View The Internet Traffic Volume And Statistics
If you do not know the IP address, see Find the IP address of the access point/router on page 29. The Sign-In page displays. You are prompted to sign in with your NETGEAR account. If the access point/router is not connected to the Internet, you are prompted to sign in with the local login credentials (see Log in to the access point/router when it is not connected to the Internet on page 28). -
Page 160: Router Mode: Unblock The Traffic Meter After The Traffic Limit Is Reached
If you do not know the IP address, see Find the IP address of the access point/router on page 29. The Sign-In page displays. You are prompted to sign in with your NETGEAR account. If the access point/router is not connected to the Internet, you are prompted to sign in with the local login credentials (see Log in to the access point/router when it is not connected to the Internet on page 28). -
Page 161: Router Mode: Manage And Use Remote Access
AC2000 802.11ac Wireless Access Point/Router WAC124 3. Click the Login button. The NETGEAR Account Login page displays. 4. Enter your registered email address and password and click the LOG IN button. The BASIC Home page displays. 5. Select ADVANCED > Advanced Setup > Traffic Meter. - Page 162 If you do not know the IP address, see Find the IP address of the access point/router on page 29. The Sign-In page displays. You are prompted to sign in with your NETGEAR account. If the access point/router is not connected to the Internet, you are prompted to sign in with the local login credentials (see Log in to the access point/router when it is not connected to the Internet on page 28).
-
Page 163: Router Mode: Use Remote Access
AC2000 802.11ac Wireless Access Point/Router WAC124 The Remote Management Address field shows the IP address and port number at which you can access the access point/router remotely. Router mode: Use remote access To use remote access: 1. Open a web browser from a computer or mobile device that is not connected to the access point/router network. - Page 164 If you do not know the IP address, see Find the IP address of the access point/router on page 29. The Sign-In page displays. You are prompted to sign in with your NETGEAR account. If the access point/router is not connected to the Internet, you are prompted to sign in with the local login credentials (see Log in to the access point/router when it is not connected to the Internet on page 28).
-
Page 165: Disable Led Blinking Or Turn Off Leds
If you do not know the IP address, see Find the IP address of the access point/router on page 29. The Sign-In page displays. You are prompted to sign in with your NETGEAR account. If the access point/router is not connected to the Internet, you are prompted to sign in with the local login credentials (see Log in to the access point/router when it is not connected to the Internet on page 28). - Page 166 • Enable FTP access within the access point/router network • View and manage network folders on a USB storage device • Router mode: Approve a USB storage device • Safely remove a USB storage device For more information about ReadySHARE features, visit netgear.com/readyshare.
-
Page 167: Point/Router
AC2000 802.11ac Wireless Access Point/Router WAC124 USB device requirements The access point/router works with most USB-compliant external flash and hard drives. For the most up-to-date list of USB devices that the access point/router supports, visit kb.netgear.com/app/answers/detail/a_id/18985/~/readyshare-usb-drives-compatibility-list. Some USB external hard drives and flash drives require you to load the drivers onto the computer before the computer can access the USB storage device. -
Page 168: Access A Usb Storage Device That Is Connected To The Access Point/Router
AC2000 802.11ac Wireless Access Point/Router WAC124 Access a USB storage device that is connected to the access point/router From a computer or mobile device on the access point/router network, you can access a USB storage device that is connected to the access point/router. -
Page 169: Map A Usb Storage Device To A Windows Network Drive
AC2000 802.11ac Wireless Access Point/Router WAC124 When you connect the USB storage device to the access point/router’s port, it might take up to two minutes before it is ready for sharing. By default, the USB storage device is available to all computers and mobile devices on the access point/router network. -
Page 170: Back Up A Windows-Based Computer With Readyshare Vault
AC2000 802.11ac Wireless Access Point/Router WAC124 6. Right-click the USB device and select Map network drive. The Map Network Drive window opens. 7. Select the drive letter to map to the new network folder. 8. Click the Finish button. The USB storage device is mapped to the drive letter that you specified. -
Page 171: Back Up A Mac With Time Machine
AC2000 802.11ac Wireless Access Point/Router WAC124 3. Download ReadySHARE Vault from netgear.com/readyshare and install it on the Windows-based computer. 4. Launch ReadySHARE Vault. 5. Use the dashboard or the Backup tab to set up and run your backup. Back up a Mac with Time Machine You can use Time Machine to back up a Mac onto a USB hard disk drive (HDD) that is connected to the access point/router’s USB port. -
Page 172: Prepare To Back Up A Large Amount Of Data
AC2000 802.11ac Wireless Access Point/Router WAC124 10. Click the OK button. 11. Click the Apply button. Your settings are saved. Prepare to back up a large amount of data Before you back up a large amount of data with Time Machine, we recommend that you follow this procedure. - Page 173 AC2000 802.11ac Wireless Access Point/Router WAC124 To back up your Mac onto a USB HDD: 1. Prepare your USB HDD with a compatible format and partitions. For more information, see Set up a USB hard disk drive on a Mac on page 171.
-
Page 174: Manage Access To A Usb Storage Device
If you do not know the IP address, see Find the IP address of the access point/router on page 29. The Sign-In page displays. You are prompted to sign in with your NETGEAR account. If the access point/router is not connected to the Internet, you are prompted to sign in with the local login credentials (see Log in to the access point/router when it is not connected to the Internet on page 28). - Page 175 AC2000 802.11ac Wireless Access Point/Router WAC124 7. To specify a name for the workgroup that the USB storage device is a member of, in the Workgroup field, enter a name. By default, the name is Workgroup. The name works only in an operating system that supports NetBIOS, such as Microsoft Windows.
-
Page 176: Enable Ftp Access Within The Access Point/Router Network
If you set up Dynamic DNS, you can also type a URL domain name. For example, if your domain name is MyName and you use the NETGEAR DDNS server, you can type ftp://MyName.mynetgear.com to access the USB storage device over the Internet and download or upload files. - Page 177 If you do not know the IP address, see Find the IP address of the access point/router on page 29. The Sign-In page displays. You are prompted to sign in with your NETGEAR account. If the access point/router is not connected to the Internet, you are prompted to sign in with the local login credentials (see Log in to the access point/router when it is not connected to the Internet on page 28).
-
Page 178: View And Manage Network Folders On A Usb Storage Device
If you do not know the IP address, see Find the IP address of the access point/router on page 29. The Sign-In page displays. You are prompted to sign in with your NETGEAR account. If the access point/router is not connected to the Internet, you are prompted to sign in with the local login credentials (see Log in to the access point/router when it is not connected to the Internet on page 28). -
Page 179: Add A Network Folder On A Usb Storage Device
If you do not know the IP address, see Find the IP address of the access point/router on page 29. The Sign-In page displays. You are prompted to sign in with your NETGEAR account. If the access point/router is not connected to the Internet, you are prompted to sign in with the local login credentials (see Log in to the access point/router when it is not connected to the Internet on page 28). -
Page 180: Change A Network Folder On A Usb Storage Device
AC2000 802.11ac Wireless Access Point/Router WAC124 Note: By default, the USB storage device that is connected is selected. We recommend that you do not attach more than one USB storage device the USB port (for example, through a USB hub). -
Page 181: Router Mode: Approve A Usb Storage Device
AC2000 802.11ac Wireless Access Point/Router WAC124 The Sign-In page displays. You are prompted to sign in with your NETGEAR account. If the access point/router is not connected to the Internet, you are prompted to sign in with the local login credentials (see Log in to the access point/router when it is not connected to the Internet on page 28). -
Page 182: Safely Remove A Usb Storage Device
AC2000 802.11ac Wireless Access Point/Router WAC124 The Sign-In page displays. You are prompted to sign in with your NETGEAR account. If the access point/router is not connected to the Internet, you are prompted to sign in with the local login credentials (see Log in to the access point/router when it is not connected to the Internet on page 28). - Page 183 If you do not know the IP address, see Find the IP address of the access point/router on page 29. The Sign-In page displays. You are prompted to sign in with your NETGEAR account. If the access point/router is not connected to the Internet, you are prompted to sign in with the local login credentials (see Log in to the access point/router when it is not connected to the Internet on page 28).
-
Page 184: Chapter 10 Use The Access Point/Router As A Media Server
Use the Access Point/Router as a Media Server This chapter contains the following sections: • Specify ReadyDLNA media server settings • Play music from a storage device with iTunes server • Set up the access point/router to work with TiVo... -
Page 185: Specify Readydlna Media Server Settings
If you do not know the IP address, see Find the IP address of the access point/router on page 29. The Sign-In page displays. You are prompted to sign in with your NETGEAR account. If the access point/router is not connected to the Internet, you are prompted to sign in with the local login credentials (see Log in to the access point/router when it is not connected to the Internet on page 28). -
Page 186: Play Music From A Storage Device With Itunes Server
AC2000 802.11ac Wireless Access Point/Router WAC124 information, see Play music from a storage device with iTunes server on page 186. • Media Server Name. Click the Click here to change the Device Name link to change the access point/router media server name (see Router mode: Change the access point/router network device name on page 112). - Page 187 If you do not know the IP address, see Find the IP address of the access point/router on page 29. The Sign-In page displays. You are prompted to sign in with your NETGEAR account. If the access point/router is not connected to the Internet, you are prompted to sign in with the local login credentials (see Log in to the access point/router when it is not connected to the Internet on page 28).
-
Page 188: Set Up The Access Point/Router's Itunes Server With The Remote App
AC2000 802.11ac Wireless Access Point/Router WAC124 12. Enter your Apple ID email address and password. 13. Click the Turn On Home Sharing button. When Home Sharing is enabled, a Home Sharing icon displays in iTunes. 14. Click the Home Sharing icon and from the menu, select the access point/router. - Page 189 If you do not know the IP address, see Find the IP address of the access point/router on page 29. The Sign-In page displays. You are prompted to sign in with your NETGEAR account. If the access point/router is not connected to the Internet, you are prompted to sign in with the local login credentials (see Log in to the access point/router when it is not connected to the Internet on page 28).
-
Page 190: Set Up The Access Point/Router To Work With Tivo
If you do not know the IP address, see Find the IP address of the access point/router on page 29. The Sign-In page displays. You are prompted to sign in with your NETGEAR account. If the access point/router is not connected to the Internet, you are prompted to sign in with the local login credentials (see Log in to the access point/router when it is not connected to the Internet on page 28). - Page 191 Router Mode: Manage Dynamic DNS and FTP Access Through the Internet If the access point/router is in router mode, with Dynamic DNS (DDNS), you can use the Internet and a domain name to access a USB storage device that is attached to a USB port on the access point/router when you are not in your office or home.
-
Page 192: Router Mode: Set Up And Manage Dynamic Dns
Internet. Router mode: Set up a new Dynamic DNS account NETGEAR offers you the opportunity to set up and register for a free Dynamic DNS account. To set up Dynamic DNS and register for a free NETGEAR account: 1. -
Page 193: Router Mode: Specify A Dns Account That You Already Created
Router mode: Specify a DNS account that you already created If you already created a Dynamic DNS account with NETGEAR, No-IP, or Dyn, you can set up the access point/router to use your account. To set up Dynamic DNS if you already created an account: 1. -
Page 194: Router Mode: Change The Dynamic Dns Settings
• For a No-IP or Dyn account, in the User Name field, enter the user name for your account. • For a NETGEAR account, in the Email field, enter the email address for your account. 11. In the Password field, enter the password for your Dynamic DNS account. -
Page 195: Router Mode: Use Ddns With Ftp To Access Your Network
AC2000 802.11ac Wireless Access Point/Router WAC124 The Sign-In page displays. You are prompted to sign in with your NETGEAR account. If the access point/router is not connected to the Internet, you are prompted to sign in with the local login credentials (see Log in to the access point/router when it is not connected to the Internet on page 28). -
Page 196: Router Mode: Set Up Ftp Access Through The Internet On The Access Point/Router
If you do not know the IP address, see Find the IP address of the access point/router on page 29. The Sign-In page displays. You are prompted to sign in with your NETGEAR account. If the access point/router is not connected to the Internet, you are prompted to sign in with the local login credentials (see Log in to the access point/router when it is not connected to the Internet on page 28). -
Page 197: Router Mode: Use Ftp To Access A Storage Device Over The Internet
AC2000 802.11ac Wireless Access Point/Router WAC124 The NETGEAR Account Login page displays. 4. Enter your registered email address and password and click the LOG IN button. The BASIC Home page displays. 5. Select ADVANCED > USB Storage > ReadySHARE. The USB Storage (Advanced Settings) page displays. - Page 198 AC2000 802.11ac Wireless Access Point/Router WAC124 Router mode: Set up FTP access through the Internet on the access point/router on page 196). To access a USB storage device with FTP from a remote computer to download or upload a file: 1.
-
Page 199: Chapter 12 Router Mode: Set Up Vpn Connections With Openvpn
Router Mode: Set up VPN Connections with OpenVPN If the access point/router is in router mode, you can use OpenVPN software to set up VPN connections and remotely access an office or site at which an access point/router is installed. This chapter describes how to set up OpenVPN on the access point/router and on a computer or mobile device and how to initiate a VPN connection using OpenVPN. -
Page 200: Router Mode: Enable And Configure Openvpn And Vpn Client Access On The Access Point/Router
If you do not know the IP address, see Find the IP address of the access point/router on page 29. The Sign-In page displays. You are prompted to sign in with your NETGEAR account. If the access point/router is not connected to the Internet, you are prompted to sign in with the local login credentials (see Log in to the access point/router when it is not connected to the Internet on page 28). -
Page 201: Router Mode: Install Openvpn Client Software On A Remote Client
AC2000 802.11ac Wireless Access Point/Router WAC124 We recommend that you use the default TUN mode and TAP mode settings. However, if you know that you need other settings, you can change the TUN mode and TAP mode settings by doing the following: •... -
Page 202: Router Mode: Install The Openvpn Client Utility And Vpn Configuration Files On A Windows-Based Computer
If you do not know the IP address, see Find the IP address of the access point/router on page 29. The Sign-In page displays. You are prompted to sign in with your NETGEAR account. If the access point/router is not connected to the Internet, you are prompted to sign in with the local login credentials (see Log in to the access point/router when it is not connected to the Internet on page 28). -
Page 203: Router Mode: Install The Openvpn Client Utility And Vpn Configuration Files On A Mac
If you do not know the IP address, see Find the IP address of the access point/router on page 29. The Sign-In page displays. You are prompted to sign in with your NETGEAR account. If the access point/router is not connected to the Internet, you are prompted to sign in with the local login credentials (see Log in to the access point/router when it is not connected to the Internet on page 28). -
Page 204: Router Mode: Install The Openvpn Client Utility And Vpn Configuration Files On An Ios Device
If you do not know the IP address, see Find the IP address of the access point/router on page 29. The Sign-In page displays. You are prompted to sign in with your NETGEAR account. Router Mode: Set up VPN... -
Page 205: Router Mode: Install The Openvpn Client Utility And Vpn Configuration Files On An Android Device
AC2000 802.11ac Wireless Access Point/Router WAC124 If the access point/router is not connected to the Internet, you are prompted to sign in with the local login credentials (see Log in to the access point/router when it is not connected to the Internet on page 28). - Page 206 If you do not know the IP address, see Find the IP address of the access point/router on page 29. The Sign-In page displays. You are prompted to sign in with your NETGEAR account. If the access point/router is not connected to the Internet, you are prompted to sign in with the local login credentials (see Log in to the access point/router when it is not connected to the Internet on page 28).
-
Page 207: Router Mode: Set Up An Openvpn Connection
AC2000 802.11ac Wireless Access Point/Router WAC124 Router mode: Set up an OpenVPN connection The type of virtual private network (VPN) access in which remote users access a protected network is called a client-to-gateway tunnel. The computer is the client, and the access point/router is the gateway. -
Page 208: Router Mode: Use A Vpn Tunnel To Access Your Internet Service At Your Office Or Home
AC2000 802.11ac Wireless Access Point/Router WAC124 the VPN tunnel is established, you cannot access the access point/router network at your office or home with the OpenVPN software. The default LAN IP address scheme for the access point/router is 192.100.0.x. The most common IP schemes are 192.x.x.x, 172.x.x.x, and 10.x.x.x. -
Page 209: Chapter 13 Manage The Advanced Wifi And Radio Features
Manage the Advanced WiFi and Radio Features This chapter describes how you can manage the advanced WiFi and radio features of the access point/router. For information about the basic WiFi and radio settings, see Manage the Basic WiFi and Radio Features on page 61. Tip: If you want to change the settings of the access point/router’s WiFi network, use a wired connection to avoid being disconnected when the new WiFi settings take effect. -
Page 210: Add A Wifi Schedule For A Radio
If you do not know the IP address, see Find the IP address of the access point/router on page 29. The Sign-In page displays. You are prompted to sign in with your NETGEAR account. If the access point/router is not connected to the Internet, you are prompted to sign in with the local login credentials (see Log in to the access point/router when it is not connected to the Internet on page 28). -
Page 211: Change The Channel For A Radio
If you do not know the IP address, see Find the IP address of the access point/router on page 29. The Sign-In page displays. You are prompted to sign in with your NETGEAR account. If the access point/router is not connected to the Internet, you are prompted to sign in with the local login credentials (see Log in to the access point/router when it is not connected to the Internet on page 28). -
Page 212: Change The Wifi Throughput Mode For A Radio Band
If you do not know the IP address, see Find the IP address of the access point/router on page 29. The Sign-In page displays. You are prompted to sign in with your NETGEAR account. If the access point/router is not connected to the Internet, you are prompted to sign in with the local login credentials (see Log in to the access point/router when it is not connected to the Internet on page 28). - Page 213 AC2000 802.11ac Wireless Access Point/Router WAC124 4. Enter your registered email address and password and click the LOG IN button. The BASIC Home page displays. 5. Select ADVANCED > Advanced Setup > Advanced Wireless Settings. The Advanced Wireless Settings page displays.
-
Page 214: Change The Transmission Output Power For A Radio
If you do not know the IP address, see Find the IP address of the access point/router on page 29. The Sign-In page displays. You are prompted to sign in with your NETGEAR account. If the access point/router is not connected to the Internet, you are prompted to sign in with the local login credentials (see Log in to the access point/router when it is not connected to the Internet on page 28). -
Page 215: Manage Advanced Wifi And Broadcast Settings
If you do not know the IP address, see Find the IP address of the access point/router on page 29. The Sign-In page displays. You are prompted to sign in with your NETGEAR account. If the access point/router is not connected to the Internet, you are prompted to sign in with the local login credentials (see Log in to the access point/router when it is not connected to the Internet on page 28). -
Page 216: Manage The Wps Settings
If you do not know the IP address, see Find the IP address of the access point/router on page 29. The Sign-In page displays. You are prompted to sign in with your NETGEAR account. If the access point/router is not connected to the Internet, you are prompted to sign in with the local login credentials (see Log in to the access point/router when it is not connected to the Internet on page 28). - Page 217 AC2000 802.11ac Wireless Access Point/Router WAC124 4. Enter your registered email address and password and click the LOG IN button. The BASIC Home page displays. 5. Select ADVANCED > Advanced Setup > Advanced Wireless Settings. The Advanced Wireless Settings page displays.
-
Page 218: Specify How The Access Point/Router Manages Wifi Clients
If you do not know the IP address, see Find the IP address of the access point/router on page 29. The Sign-In page displays. You are prompted to sign in with your NETGEAR account. If the access point/router is not connected to the Internet, you are prompted to sign in with the local login credentials (see Log in to the access point/router when it is not connected to the Internet on page 28). -
Page 219: Manage Mu-Mimo
If you do not know the IP address, see Find the IP address of the access point/router on page 29. The Sign-In page displays. You are prompted to sign in with your NETGEAR account. If the access point/router is not connected to the Internet, you are prompted to sign in with the local login credentials (see Log in to the access point/router when it is not connected to the Internet on page 28). -
Page 220: Manage Airtime Fairness
If you do not know the IP address, see Find the IP address of the access point/router on page 29. The Sign-In page displays. You are prompted to sign in with your NETGEAR account. If the access point/router is not connected to the Internet, you are prompted to sign in with the local login credentials (see Log in to the access point/router when it is not connected to the Internet on page 28). -
Page 221: Set Up A Wifi Bridge Between The Access/Point Router And Another Device
AC2000 802.11ac Wireless Access Point/Router WAC124 Set Up a WiFi bridge between the access/point router and another device You can use the access point/router as a WiFi bridge and connect multiple devices with WiFi, for example, at the faster 802.11ac speed. To do this, you need another WiFi router or access point (AP) in addition to the access point/router. - Page 222 If you do not know the IP address, see Find the IP address of the access point/router on page 29. The Sign-In page displays. You are prompted to sign in with your NETGEAR account. If the access point/router is not connected to the Internet, you are prompted to sign in with the local login credentials (see Log in to the access point/router when it is not connected to the Internet on page 28).
- Page 223 11. To change the name of the access point/router, enter a new name in the Device Name field. By default, the device name is the access point/router model (WAC124). If you use two access point/routers and you want to distinguish the name of the access...
-
Page 224: Chapter 14 Router Mode: Manage Port Forwarding And Port Triggering
Router Mode: Manage Port Forwarding and Port Triggering As an advanced function of the firewall, you can use port forwarding and port triggering to set up port traffic rules for Internet services and applications. These rules apply specifically to ports. You need networking knowledge to set up port traffic rules. Note: The information in this chapter does not apply if the access point/router is in access point mode. -
Page 225: Router Mode: Manage Port Forwarding To A Local Server For Services And Applications
If you do not know the IP address, see Find the IP address of the access point/router on page 29. The Sign-In page displays. You are prompted to sign in with your NETGEAR account. If the access point/router is not connected to the Internet, you are prompted to sign in with the local login credentials (see Log in to the access point/router when it is not connected to the Internet on page 28). -
Page 226: Router Mode: Add A Port Forwarding Rule For A Custom Service Or Application
If you do not know the IP address, see Find the IP address of the access point/router on page 29. The Sign-In page displays. You are prompted to sign in with your NETGEAR account. Router Mode: Manage Port User Manual... - Page 227 AC2000 802.11ac Wireless Access Point/Router WAC124 If the access point/router is not connected to the Internet, you are prompted to sign in with the local login credentials (see Log in to the access point/router when it is not connected to the Internet on page 28).
-
Page 228: Router Mode: Change A Port Forwarding Rule
If you do not know the IP address, see Find the IP address of the access point/router on page 29. The Sign-In page displays. You are prompted to sign in with your NETGEAR account. If the access point/router is not connected to the Internet, you are prompted to sign in with the local login credentials (see Log in to the access point/router when it is not connected to the Internet on page 28). -
Page 229: Router Mode: Remove A Port Forwarding Rule
If you do not know the IP address, see Find the IP address of the access point/router on page 29. The Sign-In page displays. You are prompted to sign in with your NETGEAR account. If the access point/router is not connected to the Internet, you are prompted to sign in with the local login credentials (see Log in to the access point/router when it is not connected to the Internet on page 28). -
Page 230: Router Mode Application Example: Make A Local Web Server Public
AC2000 802.11ac Wireless Access Point/Router WAC124 Router mode application example: Make a local web server public If you host a web server on your local network, you can use port forwarding to allow web requests from anyone on the Internet to reach your web server. -
Page 231: Router Mode: Manage Port Triggering For Services And Applications
AC2000 802.11ac Wireless Access Point/Router WAC124 5. Your access point/router performs Network Address Translation (NAT) on the source IP address and sends the reply through the Internet to the computer or mobile device that sent the web page request. Router mode: Manage port triggering for... -
Page 232: Router Mode: Add A Port Triggering Rule
If you do not know the IP address, see Find the IP address of the access point/router on page 29. The Sign-In page displays. You are prompted to sign in with your NETGEAR account. If the access point/router is not connected to the Internet, you are prompted to sign in with the local login credentials (see Log in to the access point/router when it is not connected to the Internet on page 28). -
Page 233: Router Mode: Change A Port Triggering Rule
If you do not know the IP address, see Find the IP address of the access point/router on page 29. The Sign-In page displays. You are prompted to sign in with your NETGEAR account. If the access point/router is not connected to the Internet, you are prompted to sign in with the local login credentials (see Log in to the access point/router when it is not connected to the Internet on page 28). -
Page 234: Router Mode: Remove A Port Triggering Rule
If you do not know the IP address, see Find the IP address of the access point/router on page 29. The Sign-In page displays. You are prompted to sign in with your NETGEAR account. If the access point/router is not connected to the Internet, you are prompted to sign in with the local login credentials (see Log in to the access point/router when it is not connected to the Internet on page 28). -
Page 235: Router Mode: Specify The Time-Out For Port Triggering
If you do not know the IP address, see Find the IP address of the access point/router on page 29. The Sign-In page displays. You are prompted to sign in with your NETGEAR account. If the access point/router is not connected to the Internet, you are prompted to sign in with the local login credentials (see Log in to the access point/router when it is not connected to the Internet on page 28). -
Page 236: Router Mode: Disable Port Triggering
If you do not know the IP address, see Find the IP address of the access point/router on page 29. The Sign-In page displays. You are prompted to sign in with your NETGEAR account. If the access point/router is not connected to the Internet, you are prompted to sign in with the local login credentials (see Log in to the access point/router when it is not connected to the Internet on page 28). -
Page 237: Router Mode Application Example: Port Triggering For Internet Relay Chat
AC2000 802.11ac Wireless Access Point/Router WAC124 8. Click the Apply button. Your settings are saved. Router mode application example: Port triggering for Internet Relay Chat Some application servers, such as FTP and IRC servers, send replies to multiple port numbers. Using port triggering, you can tell the access point/router to open more incoming ports when a particular outgoing port starts a session. - Page 238 AC2000 802.11ac Wireless Access Point/Router WAC124 8. When you finish your chat session, your access point/router eventually senses a period of inactivity in the communications. The access point/router then removes the session information from its session table, and incoming traffic is no longer accepted on port numbers 33333 or 113.
-
Page 239: Chapter 15 Diagnostics And Troubleshooting
This chapter provides information to help you diagnose and solve problems you might experience with the access point/router. If you do not find the solution here, visit the NETGEAR support site at netgear.com/support for more product and contact information. The chapter contains the following sections: •... -
Page 240: Reboot The Access Point/Router From Its Local Browser Interface.240
If you do not know the IP address, see Find the IP address of the access point/router on page 29. The Sign-In page displays. You are prompted to sign in with your NETGEAR account. If the access point/router is not connected to the Internet, you are prompted to sign in with the local login credentials (see Log in to the access point/router when it is not connected to the Internet on page 28). -
Page 241: Quick Tips
The access point/router’s default SSID is NETGEAR-1 and the default passphrase is sharedsecret. Note: If you set up an access control list on the access point/router, you must add each computer or mobile device to the access control list (see Enable and manage network access control on page 81). -
Page 242: Check The Dhcp Network Settings Of Your Computer Or Mobile Device
AC2000 802.11ac Wireless Access Point/Router WAC124 Check the DHCP network settings of your computer or mobile device Make sure that the network settings of the computer or mobile device with which you want to connect to the access point/router are correct: •... -
Page 243: Troubleshoot With The Leds
• Make sure that the power adapter is securely connected to your access point/router and securely connected to a working power outlet. • Make sure that you are using the power adapter that NETGEAR supplied for this product. Power LED stays blinking green When you turn on the access point/router, the Power LED lights solid green temporarily, blinks green temporarily, and finally lights solid green. -
Page 244: Access Point Mode: Internet Led Is Off
AC2000 802.11ac Wireless Access Point/Router WAC124 Access point mode: Internet LED is off If the access point/router is in its default access point mode and the Internet LEDs is off, check the following: • Make sure that the Ethernet cable connection is secure at the yellow WAN port (not a LAN port) of the access point/router and at an Ethernet port on the existing network router. -
Page 245: Wifi Led Is Off
Connect over WiFi. If you are using a WiFi-enabled computer or mobile device, check the WiFi connection between the computer or device and the access point/router. The access point/router’s default SSID is NETGEAR-1 and the default passphrase is sharedsecret. Diagnostics and... - Page 246 AC2000 802.11ac Wireless Access Point/Router WAC124 • Make sure that you are using the correct login information. For the initial log-in process, make sure that you log in with a MyNETGEAR account. If you do not have a MyNETGEAR account, you must create one during the initial log-in process.
-
Page 247: Router Mode: You Cannot Log In To The Access Point/Router
Connect over WiFi. If you are using a WiFi-enabled computer or mobile device, check the WiFi connection between the computer or device and the access point/router. The access point/router’s default SSID is NETGEAR-1 and the default passphrase is sharedsecret. • Make sure that you are using the correct login information. -
Page 248: Router Mode: You Cannot Access The Internet
If you do not know the IP address, see Find the IP address of the access point/router on page 29. The Sign-In page displays. You are prompted to sign in with your NETGEAR account. If the access point/router is not connected to the Internet, you are prompted to sign in with the local login credentials (see Log in to the access point/router when it is not connected to the Internet on page 28). - Page 249 AC2000 802.11ac Wireless Access Point/Router WAC124 The BASIC Home page displays. 5. Select ADVANCED. The ADVANCED Home page displays. 6. In the Internet Port pane, click the Connection Status button. The Connection Status pop-up window opens. Note: The information that displays depends on the type of Internet connection. If...
-
Page 250: Router Mode: Check Or Manually Start The Pppoe Connection.250
If you do not know the IP address, see Find the IP address of the access point/router on page 29. The Sign-In page displays. You are prompted to sign in with your NETGEAR account. If the access point/router is not connected to the Internet, you are prompted to sign in with the local login credentials (see Log in to the access point/router when it is not connected to the Internet on page 28). -
Page 251: Troubleshoot Internet Browsing
AC2000 802.11ac Wireless Access Point/Router WAC124 4. Enter your registered email address and password and click the LOG IN button. The BASIC Home page displays. 5. Select ADVANCED. The ADVANCED Home page displays. 6. In the Internet Port pane, click the Connection Status button. -
Page 252: Troubleshoot The Wifi Connectivity
For a device that is connected over WiFi, the WiFi network name (SSID) and WiFi security settings of the access point/router and WiFi device must match exactly. The default SSID is NETGEAR-1 and default WiFi pasphrase is sharedsecret. This information is also on the access point/router label (see Access point/router label on page 14). -
Page 253: Changes Are Not Saved
AC2000 802.11ac Wireless Access Point/Router WAC124 If your WiFi device finds your network but the signal strength is weak, check these conditions: • Is your access point/router too far from your WiFi device or too close? Place your WiFi device near the access point/router but at least 6 feet (1.8 meters) away and see whether the signal strength improves. -
Page 254: Router Mode: Test The Path From Your Computer To A Remote Device
AC2000 802.11ac Wireless Access Point/Router WAC124 3. Click the OK button. You see a message like this one: Pinging <IP address > with 32 bytes of data If the path is working, you see this message: Reply from < IP address >: bytes=32 time=NN ms TTL=xxx... - Page 255 AC2000 802.11ac Wireless Access Point/Router WAC124 3. If you do not receive replies, check the following: • Check to see that IP address of the access point/router is listed as the default gateway for your computer. If DHCP assigns the IP configuration of your computers, this information is not visible in your computer Network Control Panel.
-
Page 256: Appendix A Factory Default Settings And Technical Specifications
Factory Default Settings and Technical Specifications This appendix includes the following sections: • Factory default settings • Technical specifications... -
Page 257: Factory Default Settings
For more information about resetting the access point/router to its factory settings, see Return the access point/router to its factory default settings on page 138. Table 3. WAC124 access point/router factory default settings Feature Default Setting... - Page 258 AC2000 802.11ac Wireless Access Point/Router WAC124 Table 3. WAC124 access point/router factory default settings (Continued) Feature Default Setting Security for Wireless 1 WPA2-PSK [AES] mode default network The default WiFi passphrase is sharedsecret. This information is also on the access point/router label.
-
Page 259: Technical Specifications
AC2000 802.11ac Wireless Access Point/Router WAC124 Table 3. WAC124 access point/router factory default settings (Continued) Feature Default Setting Port forwarding and port Disabled in router mode (does not apply to access point mode) triggering Security Access control Disabled Block sites... - Page 260 AC2000 802.11ac Wireless Access Point/Router WAC124 Table 4. Specifications of the WAC124 access point/router (Continued) Feature Description Weight 0.831 lb (377 g) Operating temperature 32º to 104ºF (0° to 40°C) Operating humidity 10 to 90% maximum relative humidity, noncondensing Storage temperature –20º...
-
Page 261: Appendix B Position And Wall-Mount The Access Point/Router
Position and Wall-Mount the Access Point/Router This appendix includes the following sections: • Position the access point/router • Wall-mount the access point/router... -
Page 262: Position The Access Point/Router
AC2000 802.11ac Wireless Access Point/Router WAC124 Position the access point/router Before you install the access point/router, consider how you will position the access point/router. The access point/router lets you access your network anywhere within the operating range of your WiFi network. However, the operating distance or range of your WiFi connection can vary significantly depending on the physical placement of your access point/router. -
Page 263: Wall-Mount The Access Point/Router
AC2000 802.11ac Wireless Access Point/Router WAC124 If you are using adjacent access points, consider to use different radio frequency channels to reduce interference (see Change the channel for a radio on page 211). Wall-mount the access point/router Wall-mounting holes are on the bottom of the access point/router. The distance between the holes is 4.13 in.