Ultimaker 2+ Installation And User Manual
Hide thumbs
Also See for 2+:
- User manual (50 pages) ,
- Quick start manual (45 pages) ,
- Installation and user manual (39 pages)
Advertisement
Advertisement

Related Manuals for Ultimaker 2+


Summary of Contents for Ultimaker 2+
- Page 1 Ultimaker 2+ Installation and user manual Original manual v2.0 2019...
- Page 2 Ultimaker 2+. Always make sure that anyone who uses the 3D printer knows and understand the contents of the manual and makes the most out of the Ultimaker 2+ or Ultimaker 2 Extended+.
-
Page 3: Table Of Contents
Table of Contents 1. Safety and compliance Safety messages Hazards 2. Introduction Main components Ultimaker 2 or Ultimaker 2 Extended+ Specifications 3. Unpack and install the hardware Unboxing Installing the hardware accessories 4. Set up for first use Build plate leveling... - Page 4 Preface This is the installation and user manual for your Ultimaker 2+ or Ultimaker 2 Extended+. This manual contains chapters about the installation and use of the 3D printer. The manual contains important information and instructions on safety, installation and use. Please read all information and follow the instructions and guidelines in this manual carefully.
- Page 5 Certifications...
-
Page 6: Safety And Compliance
Safety and compliance It is very important to work safely with your Ultimaker 2+ or Ultimaker 2 Extended+. This chapter is about safety and hazards. Please read all information carefully to prevent possible accidents and injuries. -
Page 7: Safety Messages
Never reach inside of the Ultimaker 2+ or Ultimaker 2 Extended+ while it is in operation. Always control the printer with the button at the front or the power switch at the back. Allow the Ultimaker 2+ or Ultimaker 2 Extended+ to cool down for 5 minutes before reaching inside. -
Page 8: Hazards
Mechanical Safety The Ultimaker 2+ contains moving parts. No damage to the user will be expected from the drive belts. The force of the build plate is big enough to give some damage, so keep hands out of the reach of the build plate during operation. -
Page 9: Introduction
Introduction Meet your Ultimaker 2+ and learn what the possibilities of this 3D printer are. -
Page 10: Main Components Ultimaker 2 Or Ultimaker 2 Extended
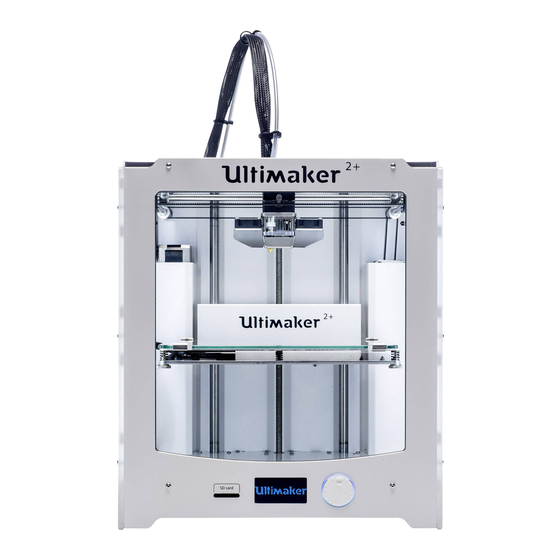
14. Spool holder The model exposed is the Ultimaker 2+. The main components of the Ultimaker 2 Extended+ are the same and on the exact same position. The only difference between the two printers is the height of the housing. See... -
Page 11: Specifications
Ultimaker Cura, our free print preparation software Supplied software Supported OS MacOS, Windows, and Linux Plugin integration SolidWorks, Siemens NX, Autodesk Inventor File types Ultimaker Cura: STL, OBJ, X3D, 3MF , BMP , GIF , JPG, PNG Printable formats: GCODE... -
Page 12: Unpack And Install The Hardware
Unpack and install the hardware Carefully unpack your Ultimaker 2+ or Ultimaker 2 Extended+ and set up the hardware according to the instructions in this chapter. -
Page 13: Unboxing
Take the spool with PLA filament and factory test print out of the styrofoam. Remove the styrofoam packaging, take the Ultimaker 2+ and place it on a flat surface. Manually lift the build plate and remove the packaging material under the build plate. - Page 14 This in the box The Ultimaker 2+ is supplied with several hardware accessories. Check if all these accessories are included before continuing. Material spool PLA (750 g) Nozzle kit Power adapter and cable Glass plate Calibration card Hex wrenches (2 mm, 2.5 mm)
-
Page 15: Installing The Hardware Accessories
Installing the hardware accessories Placing the spool holder Take the spool holder and insert the top part into the hole in the back panel of the Ultimaker 2+. Push the spool holder until it snaps into place. Placing the glass plate Open the two build plate clamps at the front of the build plate. - Page 16 Plug the power cable into the wall socket. Connect the other side of the power supply to the Ultimaker 2+. The flat side of the connector needs to face upwards. Before you push the cable firmly into the socket, you have to pull the sliding mechanism back. When the cord is in the...
-
Page 17: Set Up For First Use
Set up for first use After installing the accessories, you have to set up the printer for the first use. In this chapter you find the steps to be taken for build plate leveling, loading the material and installing Ultimaker Cura software. -
Page 18: Build Plate Leveling
The first run wizard will automatically guide you through the steps to level the build plate: Wait for the Ultimaker 2+ to do its homing procedure and continue when the print head is in the center at the back of the build plate. -
Page 19: Loading Material
Loading material Before you can start printing on the Ultimaker 2+, you need to load material into the printer. For the first use it is recommended to use the spool of PLA that came with the Ultimaker 2+. Loading the material Take the following steps to load the material: Place the spool with the material on the spool holder. -
Page 20: Installing Ultimaker Cura
Installing Ultimaker Cura For the Ultimaker 2+, we recommend our free slicer software Ultimaker Cura to prepare your 3D print files. Ultimaker Cura can accurately convert 3D models into 3D print files and preview the objects you want to print. -
Page 21: Operation
Operation After installation, it is time to start printing with your Ultimaker 2+. This chapter provides information about the display, using Ultimaker Cura, starting a print, materials that can be used, changing and calibrating the print cores and calibrating the build plate. -
Page 22: Control And Display
The display at the front side of the Ultimaker 2+ shows all the necessary information for setting up and using your Ultimaker 2+. When turning on the Ultimaker 2+ for the first time you will be guided through the first run wizard. When turning on your Ultimaker 2+ after the first use, you will always see the Ultimaker logo first after which the main menu appears. -
Page 23: Material
For all materials that are supported on the Ultimaker 2+ it is recommended to apply an adhesive the glass plate before starting a print. In the accessory box of the Ultimaker 2+ is a glue stick, of which a thin layer should be applied to the glass plate. -
Page 24: Preparing A Print With Ultimaker Cura
Preparing a print with Ultimaker Cura Interface After you have added the Ultimaker 2+ in Ultimaker Cura, the main interface will become visible. Here is an overview of the interface. Slicing the model To slice a model for the Ultimaker 2+, take the steps described below. -
Page 25: Starting A Print
Starting a print Printing from the SD card Prints on the Ultimaker 2+ are started from the SD card. To start a print, take the following steps: Place the SD card in your computer. Slice your 3D model in Ultimaker Cura. Ensure that the nozzle size and material configuration in Ultimaker Cura match the configuration on your Ultimaker 2+. -
Page 26: Removing The Print
Use water If neither of these methods works, remove your print using water. Remove the glass plate and print from the Ultimaker 2+. Be careful not to burn your fingers if the glass plate is still warm. Run cool tap water on the back side of the plate to cool quickly. -
Page 27: Changing The Material And Nozzle
Changing the nozzle A Nozzle Kit is supplied with the Ultimaker 2+. This kit contains three nozzle sizes (0.25 mm, 0.6 mm and 0.8 mm) and tools to change the nozzle. The 0.4 mm nozzle is already installed on the Ultimaker 2+. -
Page 28: Maintenance
Maintenance In order to have a smoothly working Ultimaker 2+ it is important to maintain it correctly. In this chapter the most important maintenance tips are described. Read them carefully in order to achieve the best results with your Ultimaker 2+. -
Page 29: Update The Firmware
Update the firmware Periodically, a new version of the Ultimaker 2+ firmware is released. To ensure that your Ultimaker 2+ is equipped with the latest features it is recommended to update the firmware regularly. Updating via USB Firmware can be updated via the USB cable by taking the following the steps: Connect the Ultimaker 2+ to your computer with the USB cable. -
Page 30: Build Plate Calibration
Build plate calibration While using your Ultimaker it is necessary to periodically calibrate the build plate for good adhesion of the print to the build plate. If the distance between the nozzle and build plate is too big, the print will not stick properly to the glass plate. -
Page 31: Storage And Handling Of Materials
Storage and handling of materials When you have multiple spools of material in use, or do not print with a material, it is very important that you store them properly. If material is stored incorrectly, it may affect its quality and usability. To keep your materials in optimal condition it is important that you keep them: •... -
Page 32: Hardware Maintenance
Additionally, you can purchase the Ultimaker 2+ Maintenance Kit. The Ultimaker 2+ Maintenance Kit contains the most commonly used replacement parts for the Ultimaker 2+ or Ultimaker 2 Extended+ and can used as an overall maintenance kit, or for spare parts. -
Page 33: Clean The Printer
Clean the printer For the best print results, it is important to keep the Ultimaker 2+ clean while using it. It is not advised to use the Ultimaker 2+ in a room where it can easily be covered with dust. It is also important to regularly remove small pieces of material that might be in the printer. - Page 34 Clean the feeder and Bowden tube at least once a month, or after experiencing an issue with filament grinding. Clean the feeder On the Ultimaker 2+, navigate to Material g Change. Remove the filament from the feeder and turn off the printer. Blow into the feeder to get the filament particles out. If necessary, use an air compressor.
- Page 35 Inside of the printer Small pieces of material can gather inside the printer, including the initial extrusions. Remove these from the inside of the printer with a cloth or vacuum cleaner. Pay extra attention to the area around the Z limit switch. Leaving larger objects on the bottom panel can lead to errors, as they can obstruct the build plate when homing.
-
Page 36: Lubricate The Axles
It is advised to use machine oil for lubricating the axles. This oil is specifically for the smooth axles of the Ultimaker 2+. Only use machine oil, as using other oils or Magnalube may affect the coating of the axles, which will affect the quality of your prints. -
Page 37: Check For Play On Axles
Start with the right Y axle. Place the print head in the back-left corner to keep it out of the way. Hold the frame of the Ultimaker 2+ with one hand and firmly grab the right Y axle with the other. Attempt to move the axle forwards and backwards;... -
Page 38: Check For Tension Of Short Belts
Check tension of short belts Maintaining proper tension on the short belts is important to ensure good print quality. The short belts transfer the movements of the X and Y motors to the print head. If the belts are too loose, the movements of the print head and the dimensions of the final print may not be accurate. -
Page 39: Lubricate The Lead Screw Of The Z Motor
Over time, the Magnalube may need to be reapplied to maintain consistent and accurate movement of the Z stage. Do this once every three months. A tube of Magnalube is included in the accessory box of the Ultimaker 2+. Lubricate the lead screw Make sure that the build plate is positioned at the bottom of the Ultimaker 2+. -
Page 40: Retighten The Hot-End Isolator
It is recommended to re-tighten the hot-end isolator every three months to ensure the parts are connected securely. On the Ultimaker 2+, navigate to Material g Change. Remove the filament and select “Cancel” . Navigate to Maintenance g Advanced g Heatup nozzle and rotate the button to set the temperature to 150 °C. -
Page 41: Clean The Feeder And Replace The Bowden Tube
It is also recommended to replace the Bowden tube after one year. While cleaning the feeder, follow the instructions for replacing the Bowden tube simultaneously. Detailed instructions for cleaning the inside of the feeder can be found on the Ultimaker website. Replace the Bowden tube The Bowden tube guides filament from the feeder to the print head. -
Page 42: Troubleshooting
Troubleshooting There are a few printer specific issues that could occur while using your Ultimaker 3. In you run into one of these issues, you can troubleshoot the issue yourself with the help of the information on the next pages. -
Page 43: Error Messages
Error messages This is the complete list of error messages that can show up on the Ultimaker 3. For more information on troubleshooting these error messages please go to the error specific page on the Ultimaker website. Error - Stopped Temp Sensor This refers to a problem with the PT100 B sensor, which is the sensor that (ultimaker.com/ER01) -
Page 44: Clogged Nozzle
In this case, the nozzle should be cleaned by performing the below described method. Preparing Remove the material from your Ultimaker by navigating to Material g Change. Select Cancel after you have removed the material. - Page 45 Take a look at the tip of the filament and compare it with the examples below. The goal is to have a clean, cone-shaped tip. Repeat the cold pull steps until the filament comes out as clean as the tip at the bottom. Reassembly Reinsert Bowden tube into the print head, all the way down into the TFM coupler.
-
Page 46: Print Quality Issues
Re-level the build plate to ensure the distance between the nozzle and build plate is correct (see chapter 4 Set up for first use). • Check the Ultimaker Cura settings that were used and try printing with one of the default Ultimaker Cura profiles. Under-extrusion In its simplest form, under-extrusion is when the printer is unable to supply the right amount of material.