Advertisement
Quick Links
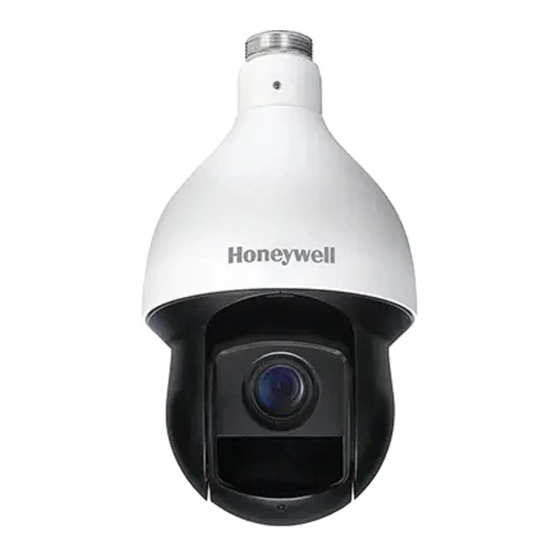
Performance Series Cameras
Performance Series IP HDZP304DI
30x Zoom IR PTZ Dome Camera
Quick Start Guide
Cautions and Warnings
CAUTION Installation and servicing should be performed only by qualified and
experienced technicians to conform to all local codes and to maintain your warranty
CAUTION To ensure compliance with electrical safety standards, NRTL-approved
Class 2 power adaptors are required.
CAUTION To comply with EN 50130-4 requirements, a UPS should be employed when
powering the camera from 24 V AC.
CAUTION IR emitted from this product. Do not view directly with optical instruments
(magnifiers). Do not stare directly into the lamp at a distance of less than 3.3 ft (1 m).
CAUTION Risk of explosion if battery is replaced by an incorrect type. Dispose of used
batteries in accordance with local laws.
FCC Statement of Compliance
Information to the User: This equipment has been tested and found to comply with the limits for a
Class A digital device, pursuant to part 15 of the FCC Rules. These limits are designed to provide
reasonable protection against harmful interference when the equipment is operated in a
commercial environment. This equipment generates, uses, and can radiate radio frequency energy
and, if not installed and used in accordance with the instruction manual, may cause harmful
interference to radio communications. Operation of this equipment in a residential area is likely to
cause harmful interference in which case the user will be required to correct the interference at his
own expense.
Note: Changes or modifications not expressly approved by the party responsible for compliance
could void the user's authority to operate the equipment.
This Class A digital apparatus complies with Canadian ICES-003.
Cet appareil numérique de la Classe A est conforme à la norme NMB-003 du Canada.
Manufacturer's Declaration of Conformance
North America
The equipment supplied with this guide conforms to UL 60950-1 and CSA C22.2
No. 60950-1.
Europe
The manufacturer declares that the equipment supplied with this guide is compliant with
the European Parliament and Council Directive on the Restrictions of the use of certain Hazardous
Substances in electrical and electronic equipment (2011/65/EU), General Product Safety Directive
(2001/95/EC) and the essential requirements of the EMC Directive (2014/30/EU), conforming to
the requirements of standards EN 55032 for emissions, EN 50130-4 for immunity, and EN 60950-
1 for electrical equipment safety.
This is a Class A product. In a domestic environment this product may cause radio interference in
which case the user may be required to take adequate measures.
Waste Electrical and Electronic Equipment (WEEE)
Correct Disposal of this Product (applicable in the European Union and other European
countries with separate collection systems).
This product should be disposed of, at the end of its useful life, as per applicable local
laws, regulations, and procedures.
Safety Instructions
Before installing or operating the unit, read and follow all instructions. After installation, retain
the safety and operating instructions for future reference.
1.
HEED WARNINGS - Adhere to all warnings on the unit and in the operating instructions.
2.
INSTALLATION
•
Install in accordance with the manufacturer's instructions.
•
Installation and servicing should be performed only by qualified and experienced
technicians to conform to all local codes and to maintain your warranty.
•
Any wall or ceiling mounting of the product should follow the manufacturer's
instructions and use a mounting kit approved or recommended by the manufacturer.
3.
POWER SOURCES - This product should be operated only from the type of power
source indicated on the marking label.
HEAT - Situate away from items that produce heat or are heat sources such as radiators,
4.
heat registers, stoves, or other products (including amplifiers).
MOUNTING SYSTEM - Use only with a mounting system recommended by the
5.
manufacturer, or sold with the product.
6.
ATTACHMENTS - Do not use attachments not recommended by the product
manufacturer as they may result in the risk of fire, electric shock, or injury to persons.
7.
ACCESSORIES - Only use accessories specified by the manufacturer.
8.
CLEANING - Do not use liquid cleaners or aerosol cleaners. Use a damp cloth for
cleaning.
9.
SERVICING - Do not attempt to service this unit yourself as opening or removing covers
may expose you to dangerous voltage or other hazards. Refer all servicing to qualified
service personnel.
10.
REPLACEMENT PARTS - When replacement parts are required, be sure the service
technician has used replacement parts specified by the manufacturer or have the same
characteristics as the original part. Unauthorized substitutions may result in fire,
electric shock or other hazards. Using replacement parts or accessories other than the
original manufacturers may invalidate the warranty.
Before You Begin
Check that you have received all of the items listed below:
Module
Wall Mount
Pendant
HDZP304DI
Adaptor
Note: Remove the protective cover bag and tape from the camera body before installation.
Mounting the Camera
The wall mount weighs 1.08 lb (0.49 kg) and can be installed directly to a load-bearing
wall, or to a corner or pole using an appropriate adapter.
Important!
Ensure that the mounting surface can support at least three times the
combined weight of the camera and mount (at least 27.72 lb/12.57 kg).
8
7
1/3
5
2
4
6
Cable Connections
Before connecting the cables, take a minute to familiarize yourself with the cables, as
shown in the figures and table below.
Power
24 V AC
Network
RJ45
Red
Audio
White
Black
Blue
Green
Alarm
Red
Brown
Yellow & Green
Note
The Ethernet cable should not be longer than 328 ft (100 m).
Accessories
Wrench
Waterproof
Waterproof
Quick Start
Tape
Joint
Guide
1.
Loosen the mount locking
screw.
2.
Screw the adapter to the
mount.
3.
Tighten the mount locking
screw.
4.
Loosen the three locking
screws on the adapter.
5.
Feed the camera cables
through the mount.
6.
Attach the camera body to the
adapter and tighten the three
locking screws to secure the
camera body to the mount.
7.
Make connections of the
camera cables with the cables
fed through the wall.
8.
Attach the mount to the wall
using appropriate hardware.
9.
Connect the cables using the
waterproof joint (see image
inset).
Power (24 V AC)
Network: Ethernet
Audio
Alarm
Red
24V AC
Black
24V AC
Yellow&Green
Earth
Audio OUT
Audio IN
Audio GND
Alarm OUT 1
Outputs (x1):
Relay output,
Alarm COM 1
20 V DC, 1 A max. Use alarm
Alarm IN 1
outputs for SELV circuits only.
Alarm IN 2
Inputs (x2):
5 V, pull up.
Alarm GND
2017
Disk
Advertisement

Related Manuals for Honeywell HDZP304DI


Summary of Contents for Honeywell HDZP304DI
-
Page 1: Before You Begin
Performance Series Cameras Performance Series IP HDZP304DI Before You Begin 30x Zoom IR PTZ Dome Camera Check that you have received all of the items listed below: Module Accessories Quick Start Guide Cautions and Warnings 2017 Wall Mount Pendant Wrench... - Page 2 – © 2018 Honeywell International Inc. All rights reserved. No part of this publication may be reproduced by any means without written permission from Honeywell. The information in this publication is believed to be accurate in all respects. However, Honeywell cannot assume responsibility for any consequences resulting from the use thereof. The information contained herein is subject to change without notice. Revisions or new editions to this publication may be issued to...