Table of Contents
Advertisement
Quick Links
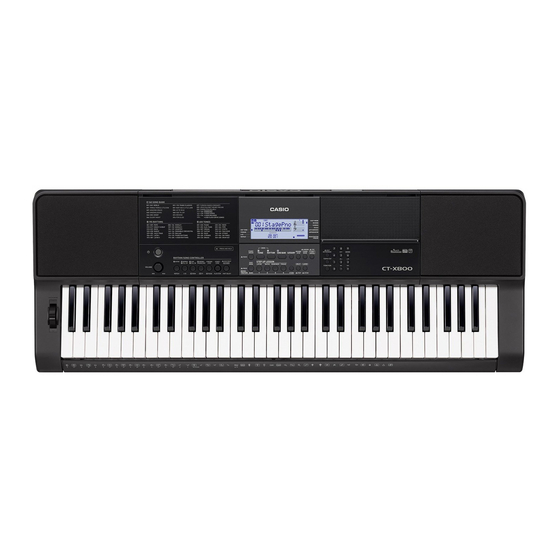
CT - X800
USER'S GUIDE
Please keep all information for future reference.
Safety Precautions
Before trying to use the Digital Keyboard, be sure to read the separate "Safety Precautions".
GUÍA DEL USUARIO
Guarde toda la información para futuras consultas.
Precauciones de seguridad
Antes de intentar usar el teclado digital, asegúrese de leer las "Precauciones de seguridad" separadas.
About Music Score data
You can use a computer to download music score data from the CASIO Website. For more information, visit the
URL below.
http://world.casio.com/
Acerca de los datos de partituras
Puede utilizar un PC para descargar los datos de partituras desde el sitio web de CASIO. Para obtener más
información, visite la siguiente URL.
http://world.casio.com/
CTX800-ES-1A
EN/ES
Advertisement
Table of Contents

Related Manuals for Casio CT-X800


Summary of Contents for Casio CT-X800
- Page 1 Antes de intentar usar el teclado digital, asegúrese de leer las “Precauciones de seguridad” separadas. About Music Score data You can use a computer to download music score data from the CASIO Website. For more information, visit the URL below.
-
Page 2: Fcc Caution
• Any reproduction of the contents of this manual, either in part or its entirety, is prohibited. Except for your own, personal use, any other use of the contents of this manual without the consent of CASIO is prohibited under copyright laws. -
Page 3: Table Of Contents
Using Auto Accompaniment EN-27 Contents Playing the Rhythm Part Only....EN-27 Playing All Parts ......EN-27 General Guide EN-4 Using Auto Accompaniment Effectively . - Page 4 MIDI Implementation Chart Included Accessories Separately Available Accessories ●Music Stand • You can get information about accessories that are separately for this product from the CASIO ●Leaflets • Safety Precautions catalog available from your retailer, and from the • Appendix CASIO website at the following URL.
-
Page 5: General Guide
General Guide The following explains the meaning of the $ symbol that appears on the product console and with the key names below. $ : Indicates a function that is enabled by holding down the button for some time. dm dn cr cs EN-4... - Page 6 General Guide 1 P(Power) button ☞EN-9 cl Area3, REMEMBER button ☞EN-24, 37 2 VOLUME knob ☞EN-9 cm Area4, PHRASE button ☞EN-24, 37 3 INTRO, REPEAT button ☞EN-20, 31 cn STORE button ☞EN-37 co SPLIT, $POINT button ☞EN-14 4 NORMAL FILL-IN, A-B button ☞EN-30 5 VAR.
-
Page 7: Using The (Ct) Number Keys And The (Dk) [-] And [+] Keys
General Guide ■ Display Tone, rhythm, song bank, Music Preset indicators Indicators Number, setting name/status display I N F V E (Auto Accompaniment Types) indicators*, ACCOMP (Auto Accompaniment) indicator Chord name Tempo, measure Beat display ... -
Page 8: (Exit) Key Long-Press
General Guide [–] and [+] Keys • For information about the categories available in each Pressing [–] reduces the currently displayed number or value mode, refer to the “Category” column of the lists. by one, while [+] increases it by one. Holding down either key •... -
Page 9: Getting Ready To Play
Getting Ready to Play Using Batteries Preparing the Music Stand • Be sure to turn off power before loading batteries. • It is up to you to prepare six commercially available batteries. Do not use oxyride batteries or any other nickel based batteries. -
Page 10: Playing The Digital Keyboard
Playing the Digital Keyboard Auto Power Off If you do not perform any operation on the Digital Keyboard for about 30 minutes, power will turn off automatically. Turning on Power and Playing ■ Disabling Auto Power Off Press 1P (power). You can disable Auto Power Off to ensure that power is not This turns on power. -
Page 11: Changing Keyboard Response To Touch Pressure (Touch Response
Playing the Digital Keyboard Changing Keyboard Response to Adjusting Display Contrast Touch Pressure Press cs FUNCTION and then use the ct [2] (Touch Response) (o) and [3] (p) keys to display “Other”. Touch Response alters tone volume in accordance with O t h e r keyboard pressure (speed). -
Page 12: Changing The Tempo Setting
Playing the Digital Keyboard Changing the Beats Per Measure Changing the Tempo Setting You can configure the metronome to use a bell sound for the There are two ways to change the tempo (beats per minute) first beat of each measure of the song you are playing. setting: using buttons to change the tempo value and tapping •... -
Page 13: Controlling The Keyboard Sounds
Controlling the Keyboard Playing with a Piano or Organ Tone Pressing bk PIANO/ORGAN toggles between the piano and Sounds organ modes. Each press of bk PIANO/ORGAN toggles the tone setting between a piano tone (Tone Number 001) and an organ tone (Tone Number 079). Select from a variety of musical In addition to the tone number, you also can configure the instrument sounds... - Page 14 Controlling the Keyboard Sounds • Two tones, one for the left range and one for the right To layer two tones range of the keyboard (page EN-14) This configuration uses the UPPER 1 part and LOWER part (Layer: Off, Split: On). •...
- Page 15 Controlling the Keyboard Sounds Play something on the keyboard. To split the keyboard between two different This will sound the tones assigned to the left and right tones side ranges of the keyboard. Select the tone for the right side range (page VIBRAPHONE 1 FLUTE EN-12).
-
Page 16: Using Reverb
Controlling the Keyboard Sounds Using Reverb Using Chorus Chorus is a function that adds depth and breadth to notes. Press cs FUNCTION and then use the ct [2] (o) and [3] (p) keys to display “Reverb” Press cs FUNCTION and then use the ct [2] (page EN-6). -
Page 17: Changing The Equalizer Setting
Controlling the Keyboard Sounds Selecting the Pedal Effect Changing the Equalizer Setting Press cs FUNCTION and then use the ct [2] You can use the equalizer to adjust the sound quality. See Function No.21 under “FUNCTION Button (cs) Functions” (o) and [3] (p) keys to display “Other”. (page EN-43). -
Page 18: Changing The Pitch (Transpose, Tuning, Octave Shift
Controlling the Keyboard Sounds Octave Shift Changing the Pitch (Transpose, Tuning, Octave Shift) Octave Shift lets you raise or lower the pitch of the keyboard notes of each tone part (page EN-12) in octave units. • The octave shift setting range is –3 to +3 octaves. Changing the Pitch in Semitone Steps Keep pressing cp LAYER until the screen (Transpose) -
Page 19: Using The Pitch Bend Wheel To Shift The Pitch Of Notes
Playing Built-in Songs Using the Pitch Bend Wheel to Shift the Pitch of Notes With this Digital Keyboard, tune data is referred to as “songs”. You can listen to the built-in songs for your own enjoyment, or You can use the pitch bend wheel to slide the pitch of notes you can play along with them for practice. -
Page 20: Playing Back A Particular Song
Playing Built-in Songs Pause, Skip Forward, Skip Back Playing Back a Particular Song Use the operations in this section to perform pause, skip Use the procedure below to play back one of the built-in forward, and skip back operations. songs. You can play along on the keyboard with song playback. - Page 21 Playing Built-in Songs When playback reaches the measure you want Repeating Playback of Specific Measures to select as the end measure, press 4A-B You can use the procedure in this section to repeat particular again. measures for practice playing along until you master it. You This specifies the measure as the end measure and can specify the start measure and the end measure of the starts repeat playback of the measures in the specified...
-
Page 22: Increasing The Selection Of Songs
Playing Built-in Songs Changing Playback Speed (Tempo) Playing Back Data from a USB flash drive You can use the following procedure to change the speed (tempo) in order to slow down playback to practice difficult passages, etc. You can use the following procedure to play back user song See “Changing the Tempo Setting”... -
Page 23: Using Built-In Songs To Master Keyboard Play
Hold down bn SONG BANK until the displayed Using Built-in Songs to tone name changes to the song’s tone name. Master Keyboard Play The same tone used for song playback will be assigned to the keyboard (page EN-21). The methods you can use for practice with this Digital Keyboard are described below. -
Page 24: Lessons 1, 2, And 3
Using Built-in Songs to Master Keyboard Play Lessons 1, 2, and 3 <Lesson 2 Guidance> Master playing the correct note with the correct finger This mode provides you with a three-step practice routine to as instructed by the guidance. Practice playing with the help you master a particular song. -
Page 25: Playing Without Guidance
Using Built-in Songs to Master Keyboard Play Lesson 3: Remember what you learned as Dividing a Song into Parts for you play. Practice (Lesson Phrase) Though song playback stands by waiting for you to press the Any time while doing Step Up Lesson and No Guidance Play, correct keys as in Lesson 2, the Digital Keyboard does not you can divide any of the songs into short phrases to help you provide any guidance about what note you need to play next. -
Page 26: Lesson Settings
Using Built-in Songs to Master Keyboard Play Start Step Lesson (page EN-23) or No Lesson Settings Guidance play (page EN-24). • This starts a lesson with the phrase you selected. Turning Off Voice Fingering Guide To turn off the lesson phrase function, press Use the following procedure to turn off voice fingering guide, cm PHRASE again. - Page 27 Using Built-in Songs to Master Keyboard Play Turning Off Performance Evaluation To simplify accompaniment Use the following procedure to turn off performance Simplifying accompaniment helps to make the lesson sound evaluation, which evaluates your performance and displays a easier to hear. score for Lesson 2, Lesson 3, and No Guidance Play.
-
Page 28: Using Auto Accompaniment
Press 8 START/STOP. Using Auto Accompaniment This starts the rhythm. With Auto Accompaniment, simply select an accompaniment This pattern changes with each beat. pattern. Each time you play a chord with your left hand the appropriate accompaniment will play automatically. It’s like having a personal backup group along with you wherever you •... - Page 29 Example: ■ CASIO CHORD Pressing D-F -A-C on the accompaniment keyboard With CASIO CHORD, you can use simplified fingerings to play the four types of chords described below. Accompaniment for the D-F -A-C chord (D7) sounds. C A S I O C d Accompaniment keyboard •...
- Page 30 With these input modes, you play chords on the Major Chords accompaniment keyboard using their normal chord fingerings. Pressing a single accompaniment area key in the CASIO Some chord forms are abbreviated, and can be fingered with CHORD mode will play the major chord whose name is one or two keys.
-
Page 31: Using Auto Accompaniment Effectively
Using Auto Accompaniment ■ FULL RANGE CHORD ● FINGERED ASSIST Produces an effect that is different from FINGERED 1 when With this mode, you can use the full range of the keyboard to two or three keys are pressed. Pressing a root key and any play chords and the melody. - Page 32 Using Auto Accompaniment ■ Auto Accompaniment Intro ● Variation Pattern Fill-in Use the following procedure to play an intro of a few While a variation pattern is playing, press measures. 5VAR. FILL-IN. Press 3 INTRO. This plays the fill-in for the variation pattern. This starts the intro pattern.
-
Page 33: Using One-Touch Preset
Using Auto Accompaniment ■ Using Synchro Start Using One-Touch Preset Use the following procedure to configure the Digital Keyboard to start Auto Accompaniment play as soon as you press a With One-Touch Preset, the Digital Keyboard automatically keyboard key. configures optimal tone, tempo, and other settings in accordance with the rhythm pattern you select. -
Page 34: Using Music Preset
Using Music Preset Using Auto Harmonize Selecting a Music Preset instantly changes the Digital Auto Harmonize automatically adds harmony to notes you Keyboard to a preset setup (tone, rhythm, chord progression, play with your right hand, which adds rich depth to the melody etc.) for play of songs of various genres/categories. -
Page 35: Using The Arpeggiator
Using the Arpeggiator Type Type Name Description number The Arpeggiator makes it possible to play an arpeggio pattern Duet 1 Adds close (separated by 2 to 4 automatically. There are 100 different arpeggio patterns from degrees) 1-note harmony below which to choose in order to match the music you are playing. the melody note. -
Page 36: Looking Up The Notes Of Chords (Chord Book
Press br A.HAR./ARPEG. to turn on Looking Up the Notes of Arpeggiator. Chords (Chord Book) Playing a chord on the keyboard will start arpeggio play. • Press br A.HAR./ARPEG. again to turn off You can use the Chord Book to look up chords that you do not Arpeggiator. - Page 37 Looking Up the Notes of Chords (Chord Book) Use the dk [–] and [+] keys to select the type of To sound a looked up chord book chord in an chord you want. Auto Accompaniment Selecting a chord type causes the chord to sound, and Before pressing bq CHORD MODE to access shows the chord name and its notes on the display.
-
Page 38: Saving Keyboard Setups To Registration Memory
Saving Keyboard Setups to To save a setup to registration memory Registration Memory Press bm RHYTHM. Registration memory lets you store Digital Keyboard setups (tone, rhythm, etc.) for instant recall whenever you need them. When recalling registration data, you can specify items that you do not want to include in the recall (Freeze). -
Page 39: To Recall A Setup From Registration Memory
Saving Keyboard Setups to Registration Memory To recall a setup from registration Disabling Overwrite of Specific memory Settings (Freeze) Recalling setup data registered to one of the Area buttons (1 Press bs BANK to select the bank that to 4) normally causes the applicable Digital Keyboard settings contains the setup you want to recall. -
Page 40: Recording Your Keyboard Play
To play back what you have recorded, press Recording Your Keyboard 8 PLAY/STOP. Play Each press of 8 PLAY/STOP starts and stops playback. You can use the procedure in this section to record your keyboard play for later playback. You can record your own keyboard play, or the part of either hand during a lesson using •... -
Page 41: Muting A Track
Recording Your Keyboard Play To record to Tracks 1 through 6 Muting a Track Press bn SONG BANK. You can use the procedure below to mute a recorded track and then record to or play back the other track. Use the ct number keys, and the dk [–] and [+] Press bn SONG BANK. -
Page 42: Changing The Recording Track While In Record Standby
Recording Your Keyboard Play Changing the Recording Track Recording Keyboard Play Along while in Record Standby with a Song Lesson This section explains how to play along and record along with To change the recording track one of the Digital Keyboard’s songs. Recorded content is saved in Song Bank location 171. -
Page 43: Deleting A Song
Recording Your Keyboard Play Press bp RECORD/STOP. Deleting a Track This will enter record standby. Press bn SONG BANK. Flashes Use the ct number keys, and the dk [–] and [+] keys to select the song that contains the track you want to delete. - Page 44 FUNCTION Button (cs) Functions You can use the cs FUNCTION button to change the volume and key, and to configure a variety of other settings. To select a function Press cs FUNCTION to display the function menu. This causes the FUNCTION indicator to appear on the display. Use the ct [2] (o) and [3] (p) keys to display the function you want.
- Page 45 FUNCTION Button (cs) Functions Function Display Setting Range Default See Page Preset Scale Scale EN-46 Preset Scale Type Type 1 - 17 EN-46 Preset Scale Root Root 1 - 12 EN-46 Auto Accompaniment Scale AcompScl On/Off EN-46 Tuning Tune 415.5 - 465.9 440.0 EN-17 Registration Memory Freeze Target...
- Page 46 FUNCTION Button (cs) Functions Function Display Setting Range Default See Page Other Other Pedal Effect Pedal 1 - 4 EN-16 Pitch Bend PitchBnd EN-18 Pitch Bend Range Range 0 - 24 EN-18 Tone Part Upper 1 Pitch Bend U1Enable On/Off EN-18 Tone Part Upper 2 Pitch Bend U2Enable...
-
Page 47: Function Button (Cs) Functions
FUNCTION Button (cs) Functions Use the ct number keys, and the dk [–] and [+] Changing the Scale of the keys to select a root setting. Keyboard When the setting is the way you want, hold You can use the following procedure to select from among 17 down the ct [5] (EXIT) key to exit the setting preset scales, including the standard Equal Temperament. -
Page 48: Deleting All Data In Digital Keyboard Memory
FUNCTION Button (cs) Functions Deleting All Data in Digital Keyboard Memory You can use the procedure below to delete all data, and reset settings and other system contents to return them to their initial factory defaults. • This procedure also deletes user songs, user rhythms, registration data, and recorded song data (page EN-39). -
Page 49: Usb Flash Drive
CASIO COMPUTER CO., LTD. shall not be held in any way liable for any use of this Digital Keyboard that is illegal under copyright laws. -
Page 50: Connecting A Usb Flash Drive To And Detaching It From The Digital Keyboard
USB Flash Drive Connecting a USB Flash Drive to Formatting a USB Flash Drive and Detaching It from the Digital Keyboard • Be sure to format a USB flash drive on the Digital Keyboard before using it for the first time. •... -
Page 51: Loading Data From A Usb Flash Drive To Digital Keyboard Memory
USB Flash Drive Loading Data from a USB Flash Saving Digital Keyboard Data to a Drive to Digital Keyboard Memory USB Flash Drive You can use the procedure below to load data from a USB Digital Keyboard memory data can be saved to a USB flash flash drive into Digital Keyboard memory. -
Page 52: Deleting Data From A Usb Flash Drive
USB Flash Drive Press the dk [+] (YES) key. Renaming Data on a USB Flash • The message “Wait” remains on the display while the Drive operation is being performed. Do not perform any operation while this message is on the display. Insert the USB flash drive into the Digital “Complete”... -
Page 53: Connecting External Devices
• Never connect to a computer that does not conform to the above requirements. Doing so can cause problems with your computer. • For the latest news about supported operating systems, visit the website at the URL below. http://world.casio.com/ EN-52... -
Page 54: Midi Settings
Configure the music software settings to select You can mute the sound of the channel assigned to the right- “CASIO USB-MIDI” as the MIDI device. hand navigate channel and left-hand navigate channel and • For information about how to select the MIDI device, play the part on the keyboard. -
Page 55: Storing And Loading Digital Keyboard Memory Data
MIDI file (SMF) data, and Auto Accompaniment the minimum requirements for Data Manager. data you download from the CASIO website to the Digital Keyboard, which greatly expands the Song Bank songs and Download Data Manager and its user’s guide to Auto Accompaniment patterns available to you. -
Page 56: Connecting To Audio Equipment
Connecting External Devices Playing an External Device from the Digital Connecting to Audio Equipment Keyboard This Digital Keyboard can be connected to commercially Connection requires commercially available connecting cords, available stereo, amplifier, or recording equipment, to a supplied by you. portable audio player or other equipment. -
Page 57: Reference
Reference Troubleshooting Symptom Action Included Accessories I can’t find something that should be here. Carefully check inside all of the packing materials. Power Requirements Power will not turned on. • Check the AC adaptor or make sure that the batteries are facing correctly (page EN-8). - Page 58 Reference Symptom Action Notes keep sounding, without stopping. • Turn power off and then back on to initialize all Digital Keyboard settings (page EN-9). • Replace the batteries with new ones or switch over to AC adaptor power (page EN-8). Some notes are cut off while they are playing.
-
Page 59: Error Indicators
Reference Error Indicators Display Cause Action Err Limit You are attempting to record more than 999 Make your recordings up to 999 measures long. measures. Err Mem Full You are attempting a recording that exceeds the Keep song recordings with the allowable per song allowable per song limit. -
Page 60: Specifications
Reference Specifications Model CT-X800 Keyboard 61 standard size keys Touch Response 3 types, Off Maximum Polyphony 48 notes (24 for certain tones) Tones Built-in Tones Functions Layer, Split, Piano/Organ button Reverb 1 to 20, Off Chorus 1 to 10, Tone... - Page 61 Reference Inputs/Outputs USB flash drive port TYPE A USB port TYPE B PEDAL jack Standard jack (6.3mm): sustain, sostenuto, soft, rhythm Phones/Output jack Stereo standard jack (6.3mm) Output Impedance: 167Ω, Output Voltage: 4.5V (RMS) MAX Audio In jack Stereo mini jack (3.5mm) Input Impedance: 10kΩ, Input Sensitivity: 200mV Power Jack DC9.5V...
-
Page 62: Operating Precautions
Reference Operating Precautions Be sure to read and observe the following operating precautions. ■ Location Avoid the following locations for this product. • Areas exposed to direct sunlight and high humidity • Areas subjected to temperature extremes • Near a radio, TV, video deck, or tuner The above devices will not cause malfunction of the product, but interference from the product can cause audio or video interference of a nearby device. -
Page 63: Appendix
Appendix/Apéndice Song List/Lista de canciones SONG BANK/BANCO DE CANCIONES No./Nº Title/Título No./Nº Title/Título WORLD (CATEGORY : 01) HABANERA FROM “CARMEN” TWINKLE TWINKLE LITTLE STAR BRINDISI FROM “LA TRAVIATA” LIGHTLY ROW HUNGARIAN DANCES no.5 LONG LONG AGO MINUET IN G MAJOR ON TOP OF OLD SMOKEY MUSETTE IN D MAJOR SAKURA SAKURA... -
Page 64: Drum Assignment List
Appendix/Apéndice Drum Assignment List/Lista de asignación de baterías DRUMS SET NAME Key/ Note No./ Tecla Nº de nota STANDARD SET 1 STANDARD SET 2 STANDARD SET 3 STANDARD SET 4 STANDARD SET 5 DANCE SET 1 DANCE SET 2 DANCE SET 3 Tabla Ge Dance1 Kick 1 C -1... - Page 65 Appendix/Apéndice Key/ Note No./ DRUMS SET NAME Tecla Nº de nota DANCE SET 4 DANCE SET 5 DANCE SET 6 TRANCE SET HIP-HOP SET ROOM SET POWER SET ROCK SET Dance1 Kick 1 C -1 Dance1 Kick 2 Dance1 Kick 3 E D -1 Dance1 Kick 4 Dance1 Kick 5...
- Page 66 Appendix/Apéndice Key/ Note No./ DRUMS SET NAME Tecla Nº de nota ELECTRONIC SET DRUM MACHINE SET 1 DRUM MACHINE SET 2 DRUM MACHINE SET 3 JAZZ SET BRUSH SET ORCHESTRA SET LATIN SET 1 Timbal Slap C -1 Timbal Open Timbal Bass E D -1 Timbal Moff...
- Page 67 Appendix/Apéndice Key/ Note No./ DRUMS SET NAME Tecla Nº de nota LATIN SET 2 INDONESIAN SET INDIAN SET ARABIC SET CHINESE SET SFX SET 1 SFX SET 2 SNARE SET 1 » Morsing B 1 C -1 » Morsing B 2 »...
- Page 68 Appendix/Apéndice Key/ Note No./ DRUMS SET NAME Tecla Nº de nota SNARE SET 2 KICK SET CYMBAL SET TOM SET C -1 E D -1 F -1 A D -1 Concert Cymbal 2 B D -1 Concert Cymbal 1 Brush Crash Cymbal 1 Brush Ride Cymbal 1 Brush Ride Bell Brush Splash Cymbal...
-
Page 69: Fingering Guide
Appendix/Apéndice Fingering Guide/ Cadd9 Guía de digitación Cmadd9 FINGERED 1, FINGERED 2 Chords/ Acordes FINGERED 1, FINGERED 2 Cm69 *1 With FINGERED 2, interpreted as Am7. *2 With FINGERED 2, interpreted as Am7 b *3 Inverted form not supported in some cases. Cdim *1 Con FINGERED 2, se interpreta como Am7. - Page 70 Appendix/Apéndice...
- Page 74 This recycle mark indicates that the packaging conforms to the environmental protection legislation in Germany. Esta marca de reciclaje indica que el empaquetado se ajusta a la legislación de protección ambiental en Alemania. MA1711-A Printed in China...