Cisco 7945 Quick Start Manual
Hide thumbs
Also See for 7945:
- User manual (8 pages) ,
- Quick reference manual (8 pages) ,
- Quick reference (5 pages)
Table of Contents
Advertisement
Quick Links
Advertisement
Table of Contents

Related Manuals for Cisco 7945


Summary of Contents for Cisco 7945
-
Page 2: Table Of Contents
Contents Introduction Getting Started Reporting problems How to Use Your VoIP Phone Caller ID Access your voice mail How to make a call Redial the last call Redial from call history Call the university operator Make an on-campus call Make an off-campus call Make a toll-free call Make a long distance call Put a call on hold Make a second call Accept a second call Transfer a call Answer your VoIP phone with your cell phone Send a call to your cell phone Make a conference call Remove a party from a conference call Turn on call forwarding Turn off call forwarding View a list of missed calls, received calls, or placed calls Dial a phone number in the list... Edit and dial a phone number in the list... Delete a phone number from the list... Clear all phone numbers from the list... - Page 3 Speed dial a phone number using abbreviated dialing Log in to your personal directory Log out of your personal directory Search your personal address book Dial a number using your personal address book Search the corporate directory How to Customize Your VoIP Phone Call Volume Ringer Volume Ring Tone Background Images Enable Wideband Headset Disable Wideband Headset Brightness Cisco Unified CM User Options Website Log in to the website Change your VoIP PIN Configure mobility settings with your cell phone number Add a speed dial phone number Remove a speed dial phone number Add a personal address book entry Remove a personal address book entry View all entries in your personal address book Search your personal address book Search the directory...
-
Page 4: Introduction
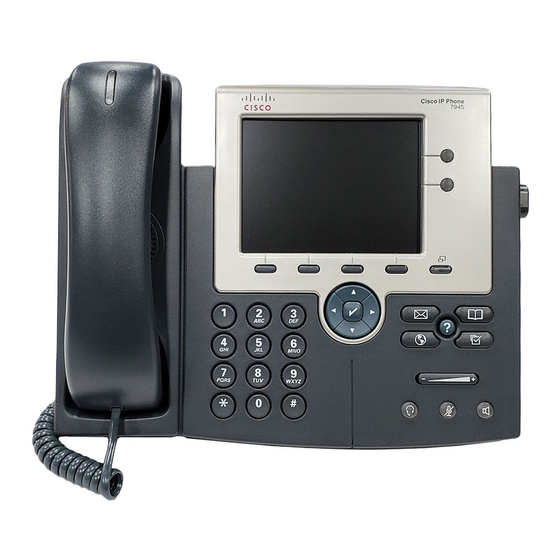
Introduction This guide explains how to use your VoIP telephone at Illinois State University. Voice over Internet Protocol (VoIP) is a communications technology that allows telephone calls to be placed using a broadband network instead of a regular, analog phone line. If you have any questions about your VoIP phone beyond the scope of this document, please consult the website for Telecommunications and Networking at http://www.telecom.ilstu.edu or contact the university operators for assistance. Getting Started Your department’s local technical support staff will install your VoIP phone for you. Four models of desktop VoIP phones are available for use on campus. • Cisco IP Phone 7911 – A basic VoIP phone with a small screen • Cisco IP Phone 7945 – Standard office VoIP phone on campus • Cisco IP Phone 7965 – This VoIP phone has two programmable buttons and can accept two additional side cars, each with 14 additional buttons • Cisco IP Phone 7975 – Same as 7965, except it also has a touch screen This guide covers setup and usage of the 7945, 7965, and 7975 models. Some features and options described in this guide may not be available on the 7911 model. This guide does not include instructions for setting up programmable buttons on the 7965 and 7975 models. For assistance with programmable buttons on the 7965 and 7975 models, contact Telecommunications & Networking. Reporting problems Report problems with your VoIP phone to your department’s local technical support staff. If you do not know who to contact, you can find out who provides your department with technical support by contacting the University Computer Help Desk at 309-438-HELP(4357). Your technical support staff will work with Telecommunications & Networking to resolve the issue. -
Page 5: How To Use Your Voip Phone
How to Use Your VoIP Phone Your VoIP phone works much like a regular phone. Caller ID When you receive a call from a campus phone, the caller’s five-digit phone number is displayed along with the associated name or department. When you receive a call from an off-campus or cellular phone, the caller’s ten-digit phone number is displayed. When you place a call to an off-campus phone number, the recipient’s caller ID (if available) will display either 309-438-4300 or 309-438-4444. These numbers do not correspond to any campus phone. Any caller trying to dial them will receive a recording indicating they are not in service. Access your voice mail You can access the campus voice mail system using your VoIP phone. Standard digital phones and VoIP phones access the same voice mail system. To access your voice mail, do the following: Press the Voice Mail button. Follow the audible instructions to access your voice mail. How to make a call There are several ways to make a phone call with Tip: As you enter a phone your VoIP phone. To make a call, do the following: number, your phone suggests numbers based on your call •... -
Page 6: Redial The Last Call
• Enter a phone number. Pick up the handset to begin dialing. • Enter a phone number. Press the Dial button to begin dialing. • Enter a phone number. Press the Speaker button to begin dialing. Redial the last call To redial the last phone number entered on your phone, do the following: Press the Redial button to call the last phone number dialed. Dialing begins immediately. Redial from call history To redial a phone number found in your call history, do the following: Press up or down on the arrow pad to access your call history. Use the arrow pad to highlight the phone number you want to redial. Do one of the following: • Pick up the handset to begin dialing. • Press the Dial button to begin dialing. • Press the Speaker button to begin dialing. Call the university operator The university operator can provide you with on-campus phone numbers. To call the university operator, do the following: Pick up the handset. -
Page 7: Make An On-Campus Call
Make an on-campus call To make an on-campus call, do the following: Pick up the handset. Do one of the following: • To call an office phone number, dial 8 followed by the four-digit phone number. • To call a residence hall phone number, dial 6 followed by the four-digit phone number. When you are done, hang up. Make an off-campus call To make an off-campus call, do the following: Pick up the handset. Dial 9 followed by the seven-digit phone number. When you are done, hang up. Make a toll-free call You can call 800, 877, and 888 phone numbers toll free. To make a toll-free call, do the following: Pick up the handset. Dial 9 + 1 + the ten-digit toll free phone number. When you are done, hang up. Make a long distance call Long distance calls require a long distance calling code. To make a long distance call, do the following: Pick up the handset. -
Page 8: Put A Call On Hold
When you hear the long distance tone, enter your six-digit long distance calling code. When you are done, hang up. Put a call on hold To place a call on hold, do the following: While you are on a call, press the Hold button. To take a call off hold, press the Resume button. Make a second call While you have a call on hold, you can make a second call without hanging up. To make a second call, do the following: While you are on a call, press the Hold button. This places the first call on hold. Press the New Call button. Enter the phone number for the second call. To switch back to the first call, press up on the arrow pad to select the first call. Press the Resume button. This places the second call on hold. To end an active call, press the End Call button. If a call is on hold, you must resume it before you can end it. Accept a second call While you are on a call, you can answer a second call. If you don’t answer the second call, it is sent to your voice mail. To accept a second call, do the following: If you are on a call when receive a second call, you will hear a beep and the second caller’s phone number will appear on your phone display. -
Page 9: Transfer A Call
Enter the third party’s phone number. the call. When you are ready To transfer the call, press the Transfer to transfer the call, press the button. Transfer button. After transferring the call, hang up. Answer your VoIP phone with your cell phone You can answer your VoIP phone with your cell phone using your VoIP phone’s mobility feature. To use your VoIP phone’s mobility feature, you must configure your mobility settings through the Cisco Unified CM User Options website. Refer to section, Configure mobility settings with your cell phone number. To answer your VoIP phone with your cell phone, do the following: When a call is placed to your VoIP phone, your VoIP phone will ring first. After a moment, your cell phone will begin ringing too. Your cell phone will display 309-438-4300 or 309-438-4444 rather than your caller’s actual phone number. This indicates that the call is coming from Illinois State University (i.e. from your VoIP phone), even if the original caller is calling from a non-university phone number. When you answer the call using your cell phone, your VoIP phone will stop ringing. When you are done, hang up your cell phone. The person on the other end of the call may hear the University’s hold music for a moment before your VoIP phone ends the call. -
Page 10: Send A Call To Your Cell Phone
Send a call to your cell phone While you are on a call, you can send the call to Tip: If you have not your cell phone using your VoIP phone’s mobility configured your VoIP phone’s feature. mobility settings, you can To use your VoIP phone’s mobility feature, you transfer a call to your cell must configure your mobility settings through the phone by following the Cisco Unified CM User Options website. Refer to instructions in the section, section, Configure mobility settings with your cell Transfer a call. phone number. To send a call to your cell phone, do the following: While you are on a call and you want to send the call to your cell phone, press the more button, and then press the Mobility button. With Send call to Mobile Phone highlighted, press the Select button. When your cell phone rings, answer the call. Your cell phone will display 309-438-4300 or 309-438-4444. This indicates that the call is coming from Illinois... -
Page 11: Remove A Party From A Conference Call
last person to hang up. If you hang up before others and they continue talking, you are still paying for the call. Remove a party from a conference call If you are the conference initiator, you can remove a party from an established conference call. To remove a party from a conference call, do the following: While on a conference call, press the more button. Press the ConfList button. Use the arrow pad to highlight the phone number you want to remove from the conference. Press the Remove button. Turn on call forwarding You can set up call forwarding to send your calls to another on-campus phone number. To turn on call forwarding for your phone, do the following: Press the CFwdAll button. Enter the on-campus phone number to which you would like your calls forwarded. • Enter only the last five digits of the phone number. • You cannot forward your phone to a non-university phone number. After entering a phone number, your phone returns to the main screen. An icon of a phone with a flashing arrow appears in the upper-right corner of your display to indicate that call forwarding is turned on. Turn off call forwarding To turn off call forwarding for your phone, do the following: Press the CFwdAll button. -
Page 12: View A List Of Missed Calls, Received Calls, Or Placed Calls
View a list of missed calls, received calls, or placed calls To view a list of missed calls, received calls, or placed calls, do the following: Press the Directories button. Tip: While on the main Use the arrow pad to highlight Missed screen, press up or down on Calls, Received Calls, or Placed Calls. the arrow pad to see a list of Press the Select button. your placed calls. A list of calls is displayed. • On-campus calls may display the name or department along with the phone number. • Off-campus and cell phone calls display the phone number. Use the arrow pad to scroll through the list of calls. Dial a phone number in the list of missed calls, received calls, or placed calls To call one of the phone numbers in the list of missed calls, received calls, or placed calls, do the following:... -
Page 13: Delete A Phone Number From The List
Select the desired phone number from the list of calls. Press the EditDial button. Use the > > button to move the cursor to the right. Use the < < button to backspace and delete a portion of the phone number. Enter new digits using the number pad. Press the Dial button. Delete a phone number from the list of missed calls, received calls, or placed calls To delete a phone number from the list of missed calls, received calls, or placed calls, do the following: Press the Directories button. Use the arrow pad to highlight Missed Calls, Received Calls, or Placed Calls. Press the Select button. Select the desired phone number from the list of missed calls. -
Page 14: Speed Dial A Phone Number Using Abbreviated Dialing
Speed dial a phone number using abbreviated dialing Your VoIP phone allows you to use speed dial phone numbers. This feature is called abbreviated dialing. Each speed dial phone number you set up is associated with a one- or two-digit number. To use abbreviated dialing, you must set up speed Tip: We recommend using dial phone numbers through the Cisco Unified abbreviated dialing for all CM User Options website. Refer to section, Add a of your speed dial needs. speed dial phone number. Your VoIP phone also offers To dial a speed dial phone number using a feature called fast dialing. abbreviated dialing, do the following: Despite its name, fast dialing is rather difficult to use and is Press the one- or two-digit number not very fast. associated with the speed dial phone number you want to call. Press the AbbrDial button. Log in to your personal directory Log in to your personal directory to access your personal address book. Your personal... -
Page 15: Log Out Of Your Personal Directory
• This brings up a mini-menu that contains each letter on the key you pressed. Quickly press the key again to select a different letter. • You only need to enter your ULID once. After you log in successfully, your VoIP phone will store your ULID so you do not have to type it again in the future. Enter your VoIP PIN in the PIN: field. • Use the arrow pad to highlight the PIN: field. • By default, your VoIP PIN is 0000. • You can change your VoIP PIN through the Cisco Unified CM User Options website. Press the Submit button. You are now logged in to your personal directory. You can now access your personal address book. Log out of your personal directory When you are done using your personal directory, you should log out. If you do not log out, anyone who uses your phone can view and edit your personal address book. To log out of your personal directory, do the following: While you are in the personal address book, press the Exit button until you see Log Out as an option. Use the arrow pad to highlight Log Out. Press the Select button. Press the OK button to log out. -
Page 16: Dial A Number Using Your Personal Address Book
Use the arrow pad to highlight Personal Address Book. Press the Select button. Either leave all fields blank or enter a first name, last name, or nickname in the appropriate fields. • If you leave all fields blank, all entries in your personal address book will be returned when you search. • Press the number pad key that corresponds to the first letter of the name. • This brings up a mini-menu that contains each letter on the key you pressed. Quickly press the key again to select a different letter. • Pausing causes your phone to accept the selected letter. • Press the < < button to backspace if you make a mistake. • You can search for partial names, as well as complete names. Press the Submit button. The results of your search are displayed. If your search returned many entries, use the Previous and Next buttons to see additional pages of search results. Use the arrow pad to highlight an address book entry. Press the Select button to view the highlighted address book entry. Use the arrow pad to view the entry’s details. Dial a number using your personal address book To dial a phone number from your personal address book, do the following: Search your personal address book using your VoIP phone, and select an address... -
Page 17: Search The Corporate Directory
Search the corporate directory The corporate directory is a directory of all Corporate Directory Search Tips: students, faculty, staff, and retirees at Illinois State University. It contains only local phone • Names are case insensitive. numbers. • Use both first and last Faculty and staff records usually contain on- names to narrow your campus 438 phone numbers. Students records search results. may contain 436 phone numbers. • To view the next page of Some people do not have a local phone on search results, press the record, so their entries do not contain any phone more button and then numbers. press the Next button. Some people, especially students, may have off- • To refine your search, press campus or long-distance “local” phone numbers. the more button and then press the Search button. To search the corporate directory, do the following: This brings you back to your original search. Press the Directories button. -
Page 18: How To Customize Your Voip Phone
Searching returns a list of names that match the partial or complete name you entered. If the person has a phone number on record, it is displayed underneath the person’s name. When you are done, press the Exit button. How to Customize Your VoIP Phone Customize your VoIP phone’s settings, such as volume, display contrast, and ringer sounds. Log in to the Cisco Unified CM User Options website to configure your VoIP phone. Call Volume Call volume indicates the loudness of your callers’ voices. To adjust your phone’s call volume, do the following: While dialing or on a call, press the -/+ button. You will hear the loudness of your caller’s voice. Press the Save button to save your volume adjustment. Ringer Volume Ringer volume indicates the loudness of your phone’s ringer. To adjust your phone’s ringer volume, do the following: While your phone is idle or when your phone rings, press the -/+ button. You will hear the loudness of your ringer volume. Your ringer volume adjustment is automatically saved. Ring Tone To change the ring tone your VoIP phone uses when you receive a call, do the following: Press the Settings button. With User Preferences highlighted, press the Select button. -
Page 19: Background Images
Press the Save button. 12. Your phone will now use the new ring tone. Background Images To set a background image for your VoIP phone’s Tip: To set a background display, do the following: image, your VoIP phone must have a color display, which is Press the Settings button. available on Cisco IP Phone With User Preferences highlighted, press models 7945, 7965, and 7975. the Select button. Use the arrow pad to highlight Background Images. Press the Select button. Use the arrow pad to highlight one of the available images. With the desired image highlighted, press the Select button. To preview the background image, press the Preview button. When you are done previewing the image, press the Exit button. To save the highlighted image as your background image, press the Save button. Enable Wideband Headset... -
Page 20: Disable Wideband Headset
Use the arrow pad to highlight Audio Preferences. With Wideband Headset highlighted, press the Select button. With Enabled highlighted, press the Select button. Press the Save button. Disable Wideband Headset To disable the use of a wideband headset with your VoIP phone, do the following: Press the Settings button. With User Preferences highlighted, press the Select button. Use the arrow pad to highlight Audio Preferences. With Wideband Headset highlighted, press the Select button. Use the arrow pad to highlight Disabled. Press the Select button. Press the Save button. Brightness To adjust the brightness on your VoIP phone so it is easier to read, do the following: Press the Settings button. With User Preferences highlighted, press the Select button. -
Page 21: Cisco Unified Cm User Options Website
When you are done adjusting the brightness, you should still be able to make out each gradient box. When you are done adjusting the brightness, press the Save button. Change your VoIP PIN To change your VoIP PIN through the Cisco Unified Cisco Unified CM User CM User Options website, do the following: Options Website Log in to the Cisco Unified CM User You can use the Cisco Unified Options website. CM User Options website to: Click the User Options menu in the upper- • Change your VoIP PIN. left corner and select User Settings. • Add, remove, and edit Enter your current VoIP PIN in the Current personal address book PIN box. By default, your VoIP PIN is 0000. entries. Enter your new VoIP PIN in both the • Add, remove, and edit PIN and Confirm PIN boxes. - Page 22 If this is your first time configuring your VoIP phone’s mobility settings, click the Add New button. Otherwise, click the Find button, and then click the link under the Name column to edit your existing settings. Enter a short description of the remote phone number in the Name* field. Dial 9 followed by a seven-digit remote phone number, such as a cell phone number, in the Destination Number* field. • The remote phone number must be a local, seven-digit phone number. • Be sure to dial 9 before the seven-digit phone number. The next three fields, Answer Too Soon Timer (ms)*, Answer Too Late Timer (ms)*, and Delay Before Ringing Timer (ms)*, can be used to adjust the relationship between your VoIP phone and your cell phone. We recommend using the default values to begin with; then adjust the values if you encounter problems with the delay between your VoIP phone and cell phone. • Answer Too Soon Timer (ms)* – This value indicates the minimum amount of time that must pass before you can answer your cell phone.
-
Page 23: Add A Speed Dial Phone Number
11. A new section named Association Information appears on the left side of the window. 12. Put a check mark below Line Association. 13. Click the Save button. Your VoIP phone’s mobility settings are now configured with your cell phone number. When your VoIP phone rings, your cell phone will ring too. Add a speed dial phone number Set up speed dial phone numbers for use with abbreviated dialing through the Cisco Unified CM User Options website. To add a speed dial phone number, do the following: Log in to the Cisco Unified CM User Options website. Click the User Options menu in the upper-left corner and select Device. Click the Speed Dials button. Enter a phone number in the Number column. Enter a short description of the phone number in the Label column. This text is automatically entered into the ASCII Label column too. Click the Save button. The website displays the message, “Update successful.” After a moment, your VoIP phone will be updated too; you may notice your phone’s display flash briefly as this happens. -
Page 24: Add A Personal Address Book Entry
Click the Save button. The website displays the message, “Update successful.” After a moment, your VoIP phone will be updated too; you may notice your phone’s display flash briefly as this happens. Add a personal address book entry Add new entries to your personal address book through the Cisco Unified CM User Options website. To add a personal address book entry, do the following: Log in to the Cisco Unified CM User Options website. Click the User Options menu in the upper-left corner and select Personal Address Book. Click the Add New button. Fill out as many fields as you’d like. The only required field is Nick Name. When you are done, click the Save button. You will see a message that says, “Add successful.” To add another entry, click the Add New button. Remove a personal address book entry Remove personal address book entries through the Cisco Unified CM User Options website, do the following: Log in to the Cisco Unified CM User Options website. -
Page 25: View All Entries In Your Personal Address Book
Click the Find button. All entries in your address book are displayed. Search your personal address book You can search your personal address book using Address Book Search Tips: the Cisco Unified CM User Options website. To search your personal address book, do the • Names are case insensitive. following: • Read the drop-down Log in to the Cisco Unified CM User menus and the search box Options website. altogether. For example, Click the User Options menu in the upper- First Name is exactly Reggie left corner and select Personal Address will return a list of entries Book. that contain the first name, Click the drop-down menu where you see “Reggie.” Nick Name or begins with, and select an •... -
Page 26: Search The Directory
Some people do not have a local phone on record, so their entries do not contain phone First Name is exactly Reggie numbers. Some people, especially students, will return a list of entries have off-campus or long-distance “local” phone that contain the first name, numbers. “Reggie.” To search the directory, do the following: • Multiple search lines are joined together with an Log in to the Cisco Unified CM User implicit AND operator. Options website. For example, by clicking Click the User Options menu in the upper- the plus sign (+) to add a left corner and select Directory. second search line, you Click the drop-down menu where you see can search for First Name Last Name or begins with, and select an appropriate option. is exactly Reggie AND Last Name is exactly Redbird. - Page 27 The second menu (where you see begins with) allows you to choose the criteria for your search. Type appropriate text in the search box. To further refine your search, click the plus sign (+) button. This creates another set of menus and another search box. When you are done defining the search, click the Find button.
- Page 29 Produced by the University Computer Help Desk © 2008 Illinois State University...