Table of Contents
Advertisement
Available languages
Available languages
Final - Approved for Publishing
By Cbyrd
OPERATOR'S MANUAL
MANUAL DEL USUARIO
24V MAX* LITHIUM-ION
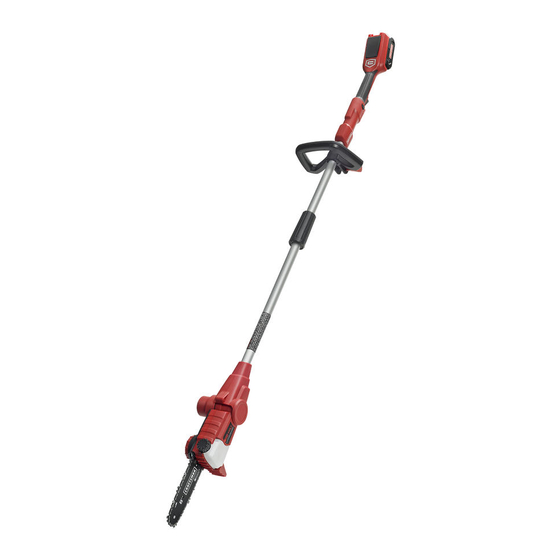
CORDLESS POLE SAW
PODADORA DE ALTURA
INALÁMBRICA CON BATERÍA DE
IONES DE LITIO DE 24 V MÁX.*
Model No. 151.74326
(INCLUDES battery & charger)
Modelo n
151.74326
o
(INCLUYE batería y cargador)
Model No. 151.74926
(Battery & charger NOT INCLUDED)
Modelo n
o
151.74926
(Batería y cargador NO INCLUÍDOS)
NOTE: BAR & CHAIN OIL NOT
INCLUDED. BAR & CHAIN OIL
MUST BE ADDED PRIOR TO USE.
NOTA: ACEITE PARA BARRA
Y CADENA NO INCLUIDO. SE
DEBE AÑADIR ACEITE PARA
BARRA Y CADENA ANTES
DE USAR.
Sears Brands Management Corporation, Hoffman Estates, IL 60179 USA
Visit the Craftsman web page: www.craftsman.com
Visite el sitio Web de Craftsman: www.craftsman.com
Save this manual for future reference
Conserve este manual para futura referencia.
* Maximum initial battery voltage (measured without workload) is 24 volts.
Nominal working voltage is 21.6 volts.
* La tensión inicial máxima de la batería (medida sin carga) es 24 voltios.
La tensión de trabajo nominal es 21,6 volts.
CAUTION:
To reduce the risk
of injury, the user must read and
understand the operator's manual
before using this product.
PRECAUCIÓN:
el riesgo de lesiones, el usuario
debe leer y comprender el manual
antes de utilizar este producto.
Para reducir
3084514
Advertisement
Table of Contents

Related Manuals for Craftsman 151.74326


Summary of Contents for Craftsman 151.74326
- Page 1 DE USAR. Sears Brands Management Corporation, Hoffman Estates, IL 60179 USA Visit the Craftsman web page: www.craftsman.com Visite el sitio Web de Craftsman: www.craftsman.com Save this manual for future reference Conserve este manual para futura referencia. * Maximum initial battery voltage (measured without workload) is 24 volts.
-
Page 2: Table Of Contents
■ Lista de piezas, ilustrada ........28-29 ■ Figure Numbers (Illustrations) .........i-xi ■ Números de las figuras (ilustraciones) ....i-xi CRAFTSMAN LIMITED WARRANTY FOR TWO YEARS from the date of sale, this power tool is warranted against defects in material or workmanship. -
Page 3: English
GENERAL SAFETY INSTRUCTIONS WARNING! ■ Use personal protective equipment. Always wear eye protection. Protective equipment such as dusk mask, non-skid safety shoes, Read and understand all instructions. Failure hard hat, or hearing protection used for to follow all instructions listed below may appropriate conditions will reduce personal result in electric shock, fire and/or serious injuries. - Page 4 GENERAL SAFETY INSTRUCTIONS ■ Do not use on a ladder, rooftop, tree, or ■ Use cordless power tools only with other unstable support. Stable footing on a specifically designated battery packs. Use of solid surface enables better control of the tool any other battery packs may create a risk of in unexpected situations.
-
Page 5: Specific Safety Instructions
SPECIFIC SAFETY INSTRUCTIONS ■ Keep all parts of the body away from the ■ Carry the pole saw by the soft grip with saw chain. Do not remove cut material or the product switched off and away from hold material to be cut when saw chain is your body. - Page 6 SPECIFIC SAFETY INSTRUCTIONS KICKBACK ■ Follow the sharpening and maintenance instructions for the saw chain. Decreasing Kickback may occur when the nose or tip of the depth gauge height can lead to increased the guide bar touches an object, or when the kickback.
- Page 7 SPECIFIC SAFETY INSTRUCTIONS RESIDUAL RISKS This equipment generates, uses and can radiate radio frequency energy and, if not Even if you are operating this product in installed and used in accordance with the accordance with all the safety requirements, instructions, may cause harmful interference potential risks of injury and damage remain.
-
Page 8: Symbols
SYMBOLS Some of the following symbols may be used on this product. Please study them and learn their meaning. Proper interpretation of these symbols will allow you to operate the product better and safer. SYMBOL NAME DESIGNATION/EXPLANATION Volts Voltage Amperes Current Hertz Frequency (cycles per second) -
Page 9: Symbols
SYMBOLS SYMBOL NAME DESIGNATION/EXPLANATION Eye Protection Wear eye protection. Ear Protection Wear ear protection. Bar Nose Contact Avoid bar nose contact. Kickback DANGER! Beware of kickback. One handed Do not operate the saw using only one hand. Operate With Two Hold and operate the saw properly with both hands. -
Page 10: Features
FEATURES PRODUCT SPECIFICATIONS Type ....................Cordless, battery-powered Motor ........................24V max* d.c. Guide Bar Length ......................8 inch Oil Tank Capacity ......................70 ml Chain Speed ....................14.4 ft/s (4.4 m/s) Max. Cutting Diameter ....................6.9 inch Weight with Battery ..................10.52 lbs (4.77 kg) Weight without Battery ..................9.48 lbs (4.3 kg) Battery ......MODEL #71.98724 (24LB2513) 24V max* d.c., 2.5 Ah Lithium-Ion Charger... -
Page 11: Assembly
Return it for replacement could result in a hazardous condition leading to the retailer from which it was purchased. to possible serious personal injury. 151.74326 (KIT) PACKING LIST WARNING! To prevent accidental Upper Pole with Bar, Chain and Scabbard... -
Page 12: Assembly
ASSEMBLY NOTE: User can adjust the auxiliary handle STRAP HANGER AND SHOULDER STRAP to the desired height position for better use. ASSEMBLY See Figures 5-8, page ii-iii Follow the steps below to adjust the handle: The shoulder strap helps the operator to carry ■... -
Page 13: Battery Pack And Charger
BATTERY PACK AND CHARGER NOTE: The battery is supplied partially BECOME FAMILIAR WITH THE CHARGER See Figure 9, page iii charged. To ensure full capacity of the battery, charge the battery in the battery Before attempting to use this charger, charger before using the product for the first become familiar with all of its operating time. -
Page 14: Battery Pack And Charger
BATTERY PACK AND CHARGER ■ The intelligent charger ensures maximum BATTERY LED INDICATORS battery life, because it measures the existing Check the battery pack capacity by pressing charge level of the battery and then charges the LED button. with the required current and voltage. Charge When the LED button is pressed, the number battery fully before storage. -
Page 15: Operation
OPERATION WARNING! Do not allow familiarity with CAUTION! Remove battery pack from products to make you careless. Remember unit before checking and filling oil reservoir. that a careless fraction of a second is Fill oil reservoir with Bar and Chain Oil before sufficient to inflict serious injury. -
Page 16: Operation
OPERATION CHECKING OIL LEVEL TO INSTALL / REMOVE BATTERY PACK See Figure 11-13, page iv See Figures 16-17, page v ■ Do not overfill. Leave approximately 0.2 in. WARNING! Always remove battery (5 mm) of space to the lower edge to allow pack from your tool when you are assembling the lubricant to expand. -
Page 17: Care And Maintenance
OPERATION Starting the pole saw: ■ Switch the product off immediately if you are disturbed while working by other people ■ Make sure chain tension is at desired entering the working area. Always let the setting. Refer to SAW CHAIN TENSIONING product come to complete stop before putting in the CARE AND MAINTENANCE section of it down. - Page 18 OPERATION Ensure correct chain tension. Ensure the WARNING! Never climb into a tree to chain is sharpened correctly. prune! Do not stand on ladders, platforms, ■ Never work with a loose, widely stretched logs, or in any position which may cause you or heavily worn chain.
- Page 19 OPERATION Thin branches: (Fig. 25) off the branch. The cut should go from one third to halfway through the branch. (A) ■ Thin branches can be cut through with one single cut. To prevent the branch from ■ Make a second cut from the top side of the slivering and buckling, the branch should be limb outboard from the first cut.
-
Page 20: Care And Maintenance
CARE AND MAINTENANCE WARNING! When servicing, use only WARNING! Do not at any time let identical replacement parts. Use of any other brake fluids, gasoline, petroleum-based parts may create a hazard or cause product products, penetrating oils, etc., come in damage. - Page 21 CARE AND MAINTENANCE ■ Unplug the charger when there is no Removing the guide bar and chain: battery pack in it. ■ Place the product on a suitable flat surface. ■ Keep the charger stored in normal room ■ Loosen the locking knob and remove the temperature.
- Page 22 CARE AND MAINTENANCE ■ Lay the saw chain around the drive The tension is correct when the chain lifts so sprocket, and lay the guide bar against the that the tie straps are approximately 3/32 - saw body so that the support bolt protrudes 5/32 in.
- Page 23 CARE AND MAINTENANCE ■ Disassemble the guide bar and saw chain Use only a recommended low-kickback chain in reversed order from assembly. on this saw. This fast-cutting chain provides kickback reduction when properly maintained. ■ Check the oiling port for clogging and clean For smooth and fast cutting, maintain the if necessary to ensure proper lubrication of chain properly.
- Page 24 CARE AND MAINTENANCE SAW CHAIN SHARPENING ■ The depth gauge setting is also reduced with each sharpening. Every 5 sharpenings Have your chain sharpened professionally use a depth gauge measuring tool to check at a qualified service center, or sharpen the the height between the cutting tip and the chain yourself by using a proper sharpening ridge (see Fig.
-
Page 25: Environmentally Safe Battery Disposal
ENVIRONMENTALLY SAFE BATTERY DISPOSAL To avoid injury and risk of fire, explosion, or The following toxic and corrosive electric shock, and to avoid damage to the materials are in the batteries used in this environment: battery pack: ■ Cover the battery terminals with heavy-duty Lithium-Ion, a toxic material. -
Page 26: Troubleshooting
TROUBLESHOOTING PROBLEM POSSIBLE CAUSE SOLUTION 1. Battery pack not properly 1. Attach properly attached 2. Battery pack discharged 2. Remove and charge battery pack Product does not start 3. Battery pack damaged 3. Replace with an identical one 4. Other electrical defect to the 4. - Page 27 CRAFTSMAN 24V MAX* LITHIUM-ION CORDLESS POLE SAW – MODEL NUMBER 151.74326 CRAFTSMAN 24V MAX* LITHIUM-ION CORDLESS POLE SAW – MODEL NUMBER 151.74926 The model number will be found on a label attached to the motor housing. TO PURCHASE REPLACEMENT PARTS, CALL 1-888-331-4569 Parts #12 &...
- Page 28 CRAFTSMAN 24V MAX* LITHIUM-ION CORDLESS POLE SAW – MODEL NUMBER 151.74326 CRAFTSMAN 24V MAX* LITHIUM-ION CORDLESS POLE SAW – MODEL NUMBER 151.74926 The model number will be found on a label attached to the motor housing. TO PURCHASE REPLACEMENT PARTS, CALL 1-888-331-4569 ITEM NO.
- Page 29 See this section for all of the figures referenced in the operator’s manual. Consulte esta sección para ver todas las figuras mencionadas en el manual del usuario. Fig. 1 Disassemble The Cover Desmontaje de la cubierta A - Main Handle (Manila principal) B - Power Switch (Interruptor) C - Safety Switch (Interruptor de seguridad) D - Strap Hanger (Soporte de la correa)
- Page 30 Fig. 3 Fig. 2 A - Auxiliary Handle (Manilla auxiliar) A - Locking Knob (Botón de bloqueo) B - Bolt(Perno) Fig. 4 A - Locking Collar (Aro de bloqueo) Fig. 5 A - Strap Hanger (Soporte de la correa) B - Bolt (Perno)
- Page 31 Fig. 7 Fig. 6 Fig. 8 A - Strap Hanger (Soporte de la correa) B - Shoulder Strap (Correa para el hombro) Fig. 9 Fig. 10 A - Power Cord with Plug (Cable de corriente con enchufe) B - Charger (Cargador) A - Battery (Batería) C - Indicator Lights B - Charger (Cargador)
- Page 32 Fig. 11 Fig. 14 1/5 in. 5 mm Fig. 12 A - Pivot Button (Botón del pivote) B - Cutting Head (Cabezal de corte) Fig. 15 A - Chain Oil Reservoir (Tanque de aceite) B - Oil Reservoir Cap (Tapón del depósito de aceite) Fig.
- Page 33 Fig. 16 Fig. 19 A - Tongue of The Battery (Lengüeta de la batería) B - Battery Dock (Puerto de la batería) Fig. 17 Fig. 20 A - Release Button (Botón de liberación) Fig. 18 max 60 (máx 60 A - Power Switch (Interruptor) B - Safety Switch (Interruptor de seguridad)
- Page 34 Fig. 21 Fig. 23 Fig. 22 Fig. 24 Fig. 25 Fig. 26 A - First Cut (Primer corte) B - Second Cut (Segundo corte) C - Final Cut (Corte final)
- Page 35 Fig. 27 A - Lubrication Hole (Boquilla de lubricación) B - Bar Nose (Nariz de la barra) C - Sprocket (Rueda de cadena) Fig. 28 A - Lock Knob (Perilla de bloqueo) B - Chain Cover (Cubierta de la cadena) Fig.
- Page 36 Fig. 30 Fig. 31 A - Saw Chain (Cadena de la sierra) B - Guide Bar (Barra guía) Fig. 32 A - Tension Disc (Disco de tensión) B - Guide Bar (Barra guía) Fig. 33 A - Guide Bar (Barra guía) B - Saw Chain (Cadena de la sierra) C - Drive Sprocket (Rueda de cadena motriz) D - Support Bolt (Perno de soporte)
- Page 37 Fig. 34 A - Saw Chain (Cadena de la sierra) B - Guide Bar (Barra guía) Fig. 35 A - Lock Knob (Perilla de bloqueo) B - Chain Cover (Cubierta de la cadena) Fig. 36 A - Chain Tensioning Knob (Perilla de tensión de la cadena) B - Tie Strap (Correa de amarre)
- Page 38 Fig. 37 Fig. 38 3/32 - 5/32 in. (2 - 4 mm) A - Oiling Port (Boquilla de aceitado) Fig. 39 Fig. 41 Fig. 40 A - Tension Disc (Disco de tensión) B - Guide Bar (Barra guía) C - Screw (Tornillo) D - Rubber Washer (Arandela de Goma)
- Page 39 Fig. 42 Fig. 44 Sharpening Angle (Ángulo de afilado) 25° FILE DIRECTION (DIRECCIÓN DE LA LIMA) Outside(Afuera) Inside(Adentro) SAW CHAIN DIRECTION SAW CHAIN DIRECTION (DIRECCIÓN DE LA CADENA) (DIRECCIÓN DE LA CADENA) A - Right-hand Cutter (Cortador de la derecha) B - Left-hand Cutter (Cortador de la izquierda) A - Left-hand Cutter (Cortador de la izquierda)
-
Page 40: Español
INSTRUCCIONES GENERALES DE SEGURIDAD ¡ADVERTENCIA! eléctricas. Si el cable del cargador está dañado, cambie el cargador por uno idéntico según se indica en las Especificaciones del Read and understand all instructions. Failure Producto de este manual. to follow all instructions listed below may result in electric shock, fire and/or serious ■... -
Page 41: Instrucciones Generales De Seguridad
INSTRUCCIONES GENERALES DE SEGURIDAD ■ Utilice pantalones largos y pesados, ropa bajo un ambiente seco y en un lugar cerrado de manga larga, botas y guantes. No utilice con llave, lejos del alcance de los niños. ropas que le queden sueltas, pantalones ■... -
Page 42: Instrucciones Específicas De Seguridad
INSTRUCCIONES GENERALES DE SEGURIDAD ■ Las baterías pueden explotar en presencia con tales materiales. Si el líquido entra en de una fuente de ignición como, por ejemplo, contacto con su piel, lávese inmediatamente una luz piloto. Para reducir el riesgo de con agua y jabón, luego neutralice con jugo lesiones severas, jamás utilice un producto de limón o vinagre. -
Page 43: Person
INSTRUCCIONES ESPECÍFICAS DE SEGURIDAD ■ Al cortar una rama que esté bajo tensión, el gatillo. Si la cadena gira después de haber esté alerta al efecto de latigazo. Al liberarse soltado del gatillo, deje de usar la podadora la tensión de las fibras de madera, la rama de altura inmediatamente. -
Page 44: Person
INSTRUCCIONES ESPECÍFICAS DE SEGURIDAD mal uso de la herramienta o de incurrir ■ Asegúrese de que el producto está en en procedimientos o condiciones de uso buenas condiciones y bien mantenido. incorrectas; esto puede evitarse al seguir las ■ Utilice los accesorios de corte correctos precauciones adecuadas que se indican a para el producto y asegúrese de que estén continuación:... -
Page 45: Person
INSTRUCCIONES ESPECÍFICAS DE SEGURIDAD ■ Lesiones y daños a la propiedad debido Este equipo genera, utiliza e irradia a accesorios rotos o al impacto súbito de energía de radiofrecuencias; si no se objetos ocultos durante el uso. instala según estas instrucciones, podría provocar interferencias dañinas a las ■... -
Page 46: Símbolos
SÍMBOLOS Algunos de los siguientes símbolos podrían aparecer en este producto. Estúdielos y aprenda su significado. La interpretación adecuada de estos símbolos le permitirá utilizar el producto de mejor manera y con más seguridad. SÍMBOLO NOMBRE NOMBRE/EXPLICACIÓN Voltios Voltaje Amperios Corriente Hertz Frecuencia (ciclos por segundo) -
Page 47: Símbolos
SÍMBOLO SÍMBOLO NOMBRE NOMBRE/EXPLICACIÓN Protección ocular Use protección ocular. Protección auditiva Use protección auditiva. Contacto con la nariz Evite el contacto con la nariz de la barra. de la barra Golpes de retroceso ¡PELIGRO! Esté atento a los golpes de retroceso Una mano No utilice la sierra con una sola mano. -
Page 48: Características
CARACTERÍSTICAS ESPECIFICACIONES DEL PRODUCTO Tipo ..................... Inalámbrico, con batería Motor ........................ 24 V máx.* d.c. Largo de la barra guía ..................... 8 inch Capacidad del tanque de aceite ..................70 ml Velocidad de la cadena .................14,4 ft/s (4,4 m/s) Diámetro de corte máx....................6,9 inch Peso con batería ..................10,52 lbs (4,77 kg) Peso sin batería....................9,48 lbs (4,3 kg) Batería .... -
Page 49: Armado
No intente ¡ADVERTENCIA! modificar este producto o crear accesorios no recomendados para su uso con este (KIT) LISTA DE PIEZAS 151.74326 producto. Cualquier alteración de este tipo o Vara superior con barra, cadena y funda modificación se considera un uso indebido Vara inferior con manilla principal e interruptor que podría causar potenciales lesiones... -
Page 50: Armado
ARMADO ■ Suelte la perilla de bloqueo desde la Utilice solo la barra guía y cadena indicadas manilla auxiliar. en las Especificaciones del producto de este manual. ■ Alinee la manilla auxiliar con la vara inferior. (Fig. 2) Para extraer y reinstalar la barra y cadena, consulte REINSTALAR LA BARRA GUÍA ■... -
Page 51: Batería Y Cargador
BATERÍA Y CARGADOR -5 y 50 °C (23 - 122 °F). Esto asegura una FAMILIARÍCESE CON EL CARGADOR Consulte la Figura 9, página iii. vida de servicio óptima para la batería. Antes de usar este cargador, familiarícese NOTA: La batería que le suministramos está con todas sus características operativas y parcialmente cargada. - Page 52 BATERÍA Y CARGADOR ■ El cargador inteligente garantiza la máxima INDICADORES LED DE LA BATERÍA vida útil de la batería, ya que mide el nivel Compruebe la capacidad de la batería de carga actual de la batería y luego la presionando el botón LED.
-
Page 53: Funcionamiento
FUNCIONAMIENTO ¡ADVERTENCIA! No permita que estar ¡PRECAUCIÓN! Extraiga la batería acostumbrado a usar un producto genere de la unidad antes de revisar o llenar el descuidos en usted. Recuerde que una sola depósito de aceite. Llene el tanque de aceite con aceite para barra y cadena antes de fracción de segundo en que se descuide es encender la podadora de altura. -
Page 54: Funcionamiento
FUNCIONAMIENTO COMPROBACIÓN DEL NIVEL DE ACEITE ¡ADVERTENCIA! Extraiga siempre Consulte las Figuras 11-13, página iv la batería de su herramienta cuando esté ■ No coloque más de la cuenta. Deje ensamblando piezas, realizando ajustes, al aproximadamente 0,2 in.(5 mm) de espacio limpiarla, al transportarla o cuando no esté... -
Page 55: Person
FUNCIONAMIENTO ■ Asegúrese de que la cadena y barra guía personas entran al área de trabajo. Antes de no estén en contacto con ningún objeto antes poner el producto en el suelo, deje que se de encender el producto. detenga por completo. ■... -
Page 56: Cuidados Y Mantenimiento
FUNCIONAMIENTO ■ Siga las instrucciones de afilado y ■ Mantenga a las demás personas alejadas mantenimiento de la sección CUIDADO Y del extremo de corte del producto y a una MANTENIMIENTO de este manual. distancia segura en relación al área de trabajo. - Page 57 FUNCIONAMIENTO ■ Tenga cuidado al llegar al fin del corte. El Ramas gruesas: (Fig. 26) peso del producto podría cambiar de forma ■ Al cortar ramas más grandes, se requieren inesperada al soltarse de la madera. Pueden tres cortes. ocurrir accidentes en piernas y pies. Retire ■...
-
Page 58: Cuidados Y Mantenimiento
CUIDADO Y MANTENIMIENTO ¡ADVERTENCIA! Al realizar ¡ADVERTENCIA! En ningún momento reparaciones, utilice solo piezas de repuesto permita que fluidos de frenos, gasolina, idénticas. El uso de otras piezas podría productos derivados del petróleo, aceites generar un peligro o dañar al producto. penetrantes, etc. - Page 59 CUIDADO Y MANTENIMIENTO ■ Desconecte el cargador cuando no tenga Extracción de la barra guía y cadena: una batería conectada a él. ■ Ponga el producto sobre una superficie ■ Mantenga el cargador almacenado a plana apta. temperatura ambiente normal. No almacene ■...
- Page 60 CUIDADO Y MANTENIMIENTO ■ Ponga la cadena sobre la rueda de cadena PRUEBA DE TENSIÓN motriz y ponga la barra guía contra el cuerpo ■ Compruebe la tensión de la cadena de la sierra de manera tal que el perno de utilizando una mano para levantar la cadena soporte se asome a través del orificio en el sobre el borde de la barra.
- Page 61 CUIDADO Y MANTENIMIENTO tensa, la barra se desgastará rápidamente. MANTENIMIENTO DE LA CADENA Para ayudar a minimizar el desgaste, se Conozca su cadena (Consulte la Figura 42- recomienda el mantenimiento de la barra 43, página xi) guía y de la cadena de la sierra. Utilice solo una cadena de bajo retroceso ■...
- Page 62 CUIDADO Y MANTENIMIENTO AFILADO DE LA CADENA ■ El ajuste del medidor de profundidad también se reduce con cada afilado. Cada 5 Lleve su cadena a un servicio de afilado afilados, utilice una herramienta de medición profesional en un centro de servicio de profundidad para verificar la altura entre calificado, o bien afile la cadena usted la punta de corte y la cima (consulte la Fig.
-
Page 63: Eliminación Ambientalmente Segura De La Batería
ELIMINACIÓN AMBIENTALMENTE SEGURA DE LA BATERÍA Para evitar el riesgo de incendio, explosión, Los siguientes materiales tóxicos y descarga eléctrica y daños al medioambiente: corrosivos están presentes en esta batería: ■ Cubra los terminales de la batería con cinta Iones de litio, un material tóxico. adhesiva aislante. -
Page 64: Resolución De Problemas
RESOLUCIÓN DE PROBLEMAS PROBLEMA POSIBLE CAUSA SOLUCIÓN 1. La batería no está bien 1. Colóquela bien colocada 2. La batería está descargada 2. Saque la batería y cárguela El producto no arranca 3. La batería está dañada 3. Cámbiela por otra idéntica 4. - Page 65 PODADORA DE ALTURA CRAFTSMAN CON BATERÍA DE IONES DE LITIO, 24 V MÁX.* (NÚMERO DE MODELO 151.74326) PODADORA DE ALTURA CRAFTSMAN CON BATERÍA DE IONES DE LITIO, 24 V MÁX.* (NÚMERO DE MODELO 151.74926) El número de modelo se encuentra en la etiqueta adjunta a la carcasa del motor PARA ADQUIRIR PIEZAS DE REPUESTO, LLAME AL 1-888-331-4569 Piezas #12 &...
- Page 66 PODADORA DE ALTURA CRAFTSMAN CON BATERÍA DE IONES DE LITIO, 24 V MÁX.* (NÚMERO DE MODELO 151.74326) PODADORA DE ALTURA CRAFTSMAN CON BATERÍA DE IONES DE LITIO, 24 V MÁX.* (NÚMERO DE MODELO 151.74926) El número de modelo se encuentra en la etiqueta adjunta a la carcasa del motor.
- Page 67 Para respuestas a preguntas o problemas, y ordenar piezas o pedir servicio para la reparación de su equipo. To help us help you, register your product at www.craftsman.com/registration Para poderte ayudar mejor, registra tu producto en www.craftsman.com/registration Join the Craftsman Club today!