Cisco Catalyst 2960-L Getting Started Manual
Hide thumbs
Also See for Catalyst 2960-L:
- Hardware installation manual (80 pages) ,
- Installation manual (22 pages) ,
- Hardware installation manual (72 pages)
Table of Contents
Advertisement
Quick Links
Cisco Catalyst 2960-L Switch Getting Started
Guide
Getting Started with the Switch
Getting Started with the Switch
•
About the document
This guide provides instructions for the initial set up of your Cisco Catalyst 2960-L switch. It includes basic
rack-mounting, desk and shelf mounting for the switch, port and module connection procedures, and
troubleshooting information.
Note
Before installing or upgrading the switch, refer to the Cisco Catalyst 2960-L switch Release Notes available
on cisco.com.
Cisco Catalyst 2960-L Switch Getting Started Guide
1
Advertisement
Table of Contents

Related Manuals for Cisco Catalyst 2960-L


Summary of Contents for Cisco Catalyst 2960-L
- Page 1 Getting Started with the Switch • About the document This guide provides instructions for the initial set up of your Cisco Catalyst 2960-L switch. It includes basic rack-mounting, desk and shelf mounting for the switch, port and module connection procedures, and troubleshooting information.
-
Page 2: Box Contents
Box Contents Box Contents This section lists the contents of the shipping box for an 8-port and 16-port Cisco Catalyst 2960-L switch. Figure 1: Box Contents of an 8-Port and 16-Port Cisco Catalyst 2960-L Switch 8-port or 16-port Cisco Catalyst 2960-L... - Page 3 Getting Started with the Switch Box Contents This section lists the contents of the shipping box for a 24-port and 48-port Cisco Catalyst 2960-L switch. Figure 2: Box Contents of a 24-Port and 48-Port Cisco Catalyst 2960-L Switch 24-port and 48-port Cisco Catalyst 2960-L...
-
Page 4: Installing The Switch
This section describes rack-mounting using 19-inch and 23-inch rack-mounting brackets. For optional bracket information and alternate mounting procedures, such as installing the switch in a 24-inch rack or on a wall, and for additional cabling information, see the Hardware Installation Guide on Cisco.com. Tools and Equipment Obtain these necessary tools: •... - Page 5 • When mounting this unit in a partially filled rack, load the rack from the bottom to the top with the heaviest component at the bottom of the rack. • If the rack is provided with stabilizing devices, install the stabilizers before mounting or servicing the unit in the rack. Statement 1006 Cisco Catalyst 2960-L Switch Getting Started Guide...
- Page 6 When installing or replacing the unit, the ground connection must always be made first and disconnected last. Statement 1046 Warning To prevent the system from overheating, do not operate it in an area that exceeds the maximum recommended ambient temperature of: <113°F (45°C). Statement 1047 Cisco Catalyst 2960-L Switch Getting Started Guide...
- Page 7 Remove the four rubber feet from the adhesive strip, and attach them to the recessed areas at the bottom of the unit. This prevents the switch from sliding on the desk or shelf. We strongly recommend that you attach the rubber feet. Doing so also helps prevent airflow restriction and Note overheating. Cisco Catalyst 2960-L Switch Getting Started Guide...
- Page 8 Insert two screws into the slots on the screw template, and tighten them until they touch the top of the screw template. Figure 3: Attaching the Mounting Screws on to the Screw Template Screw template Desk or shelf Screws Cisco Catalyst 2960-L Switch Getting Started Guide...
-
Page 9: Rack-Mounting The Switch
Attaching the Rack-Mount Brackets to an 8-Port and 16-Port Cisco Catalyst 2960-L Switch Installing an 8-port and 16-port Cisco Catalyst 2960-L switch in a 19-inch rack requires an optional bracket kit that is not included with the switch. You can order these kits by contacting your Cisco representative. - Page 10 Installing the Switch Use the Phillips flat-head screws that are available with the bracket kit to attach the brackets to the switch. Figure 5: Attaching 19-Inch Brackets to an 8-Port and 16-Port Cisco Catalyst 2960-L Switch Switch with 19-inch brackets attached...
- Page 11 Attaching the Rack-Mount Brackets to a 24-Port and 48-Port Cisco Catalyst 2960-L Switch Use two Phillips flat-head screws to attach the long side of the bracket to each side of the switch. Figure 6: Attaching 19-inch Brackets to a 24-Port and 48-Port Cisco Catalyst 2960-L Switch Front-mounting position...
- Page 12 Use the black Phillips machine screw to attach the cable guide to the left or right bracket. Figure 7: Mounting an 8-Port or 16-Port Switch in a Rack with 19-Inch and 23-Inch Brackets 19-inch rack-mounting bracket 23-inch rack-mounting bracket Number-12 or Number-10 Phillips machine screws Cisco Catalyst 2960-L Switch Getting Started Guide...
- Page 13 Use the four supplied Phillips machine screws to attach the brackets to the rack. Step 2 Use the black Phillips machine screw to attach the cable guide to the left or right bracket. Figure 8: Mounting the Switch in a Rack Cisco Catalyst 2960-L Switch Getting Started Guide...
-
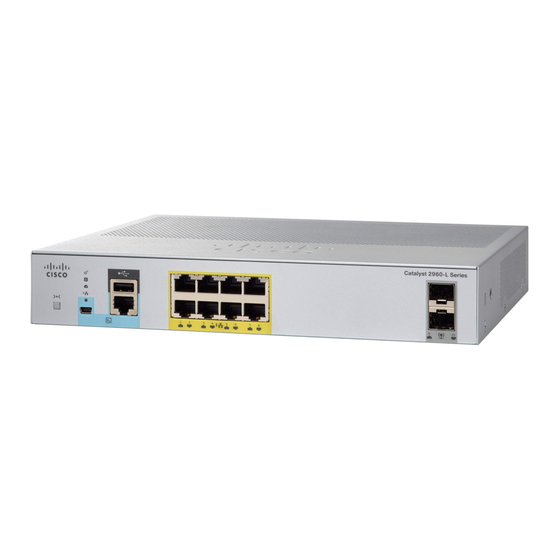
Page 14: Connecting To The Switch Ports
• PoE support for IEEE 802.3af-compliant powered devices These ports also provide Cisco prestandard PoE support for Cisco IP phones and Cisco Aironet Access Points. See the Cisco Catalyst 2960-L Hardware Installation Guide for information on PoE budgeting. By default, a switch PoE port automatically provides power when a compliant device is connected, including PoE, and PoE+. - Page 15 Insert the other cable end into an RJ-45 port on the other device. Connecting to SFP Module Slots For a list of supported modules, see the Cisco Catalyst 2960-L Release Notes on Cisco.com. For detailed instructions on installing, removing, and connecting to SFP modules, see the documentation that came with the SFP module.
-
Page 16: Troubleshooting
Troubleshooting If you experience a difficulty, help is available in this section and also on Cisco.com. This section includes Express Setup troubleshooting information, details about how to reset the password, and where to find additional information. -
Page 17: Related Documentation
When using the online publications, see the documents that match the Cisco IOS software version running on the switch. The software version is on the Cisco IOS label on the switch's rear panel. • Cisco Catalyst 2960-L switch, located at: http://www.cisco.com/go/2960l... - Page 18 Getting Started with the Switch Related Documentation Cisco Catalyst 2960-L Switch Getting Started Guide...
- Page 19 Cisco and the Cisco logo are trademarks or registered trademarks of Cisco and/or its affiliates in the U.S. and other countries. To view a list of Cisco http://www.cisco.com/go/trademarks trademarks, go to this URL: . Third-party trademarks mentioned are the property of their respective owners.