Table of Contents
Advertisement
Quick Links
Advertisement
Table of Contents

Related Manuals for Honeywell HUSS-E1


Summary of Contents for Honeywell HUSS-E1
- Page 1 HUSS System User Guide P/N: 800-01108 Rev. C1...
-
Page 3: Table Of Contents
2 General Information ..............3 Overview ..................3 HUSS-E1 ..................4 HUSS-D1 ..................7 HUSS-M Client................10 Features and Functions............10 System Requirements .............10 3 Installing and Operating HUSS-E1/HUSS-D1 ......12 Panel Description ................12 Front Panel ................12 Rear Panel ................14 Installing Notes ................14 Connecting External Power .............14 Mounting Encoder/Decoder .............15 Connecting Video/Audio Input/Output .........15... - Page 4 Honeywell Login ...................22 Real-time Video ................22 Video Encoder Settings...............24 Status ..................24 Basic..................25 Expert Settings ................31 Reboot..................38 Logout ..................38 5 HUSS-D1 Network Client ............39 Login ...................39 Decoder Settings.................40 Status ..................40 Basic..................40 Expert Settings ................46 Reboot..................49 Logout ..................50 6 HUSS-M Video Client..............51 Overview ..................51...
- Page 5 Figures Figure 2-1 HUSS Structure...............4 Figure 2-2 HUSS-E1.................4 Figure 2-3 HUSS-D1.................7 Figure 3-1 Front Panel of HUSS-E1 ..........12 Figure 3-2 Front Panel of HUSS-D1 ..........12 Figure 3-3 Rear Panel ..............14 Figure 3-4 Install Encoder/Decoder in Cabinet .......15 Figure 4-1 Internet Options.............20 Figure 4-2 Security .................21...
- Page 6 Honeywell Figure 5-7 Detail Information ............44 Figure 5-8 Audio ................44 Figure 5-9 Date/Time..............45 Figure 5-10 OSD ................46 Figure 5-11 System Config .............46 Figure 5-12 Alarm Out ..............47 Figure 5-13 Account ...............48 Figure 5-14 Modify Account............48 Figure 5-15 Firmware Update............49 Figure 5-16 Reboot.................50 Figure 6-1 Login window of HUSS-M..........52...
- Page 7 Honeywell Figure 6-38 Encoder Configuration – Channel (PTZ) .....74 Figure 6-39 Encoder Configuration – Alarm Management....74 Figure 6-40 Encoder Configuration – Motion Detection ....75 Figure 6-41 Encoder Configuration – Loopback Setting ....76 Figure 6-42 Decoder Configuration – Network .......76 Figure 6-43 Decoder Configuration – Log........77 Figure 6-44 Decoder Configuration –...
-
Page 9: About This Document
Chapter 1, About This Document, a brief introduction of this book. • Chapter 2, General Information, describes HUSS structure, functions and specifications of HUSS-E1 video encoder and HUSS-D1 video decoder. • Chapter 3, Installing and Operating HUSS-E1/HUSS-D1, describes installation and operation procedure of HUSS-E1 video encoder and HUSS-D1 video decoder. -
Page 10: Font And Symbols
The manual has been reviewed and the accuracy is guaranteed. If there is any uncertainty or controversy, please refer to the final explanation of Honeywell. Honeywell does not take any responsibility for any consequences caused by misunderstanding of the manual or improper operations. -
Page 11: General Information
HUSS-D1 video decoder and HUSS-M video client. With HUSS-E1 video encoder, you can also control PTZ, send alarm information to HUSS-M video client through network. HUSS-D1 decodes the encoded video information from HUSS-E1 and displays it on analog monitors, with audio signal played synchronously. -
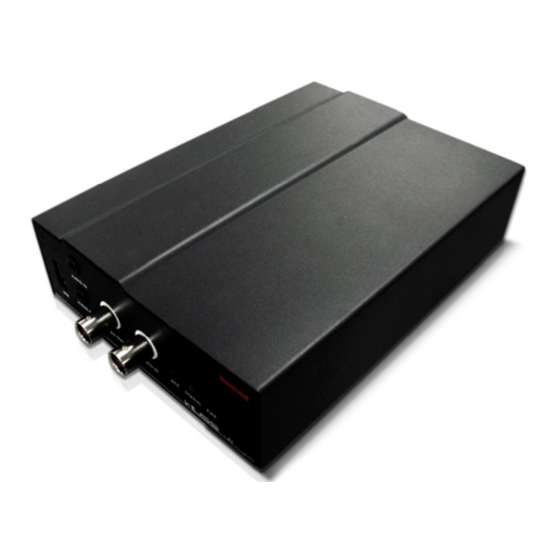
Page 12: Huss-E1
Great network and security performance. With built-in Web Server, HUSS-E1 can be configured remotely through network. And users can also watch real-time video from HUSS-E1 remotely through network. It features multiple user profiles, encrypted data coding,... - Page 13 Local USB backup and system log protect the integrity of information effectively from network breakdown. Excellent integration characteristic and extendable functions. HUSS-E1 can communicate with other device (such as PTZ) and extend functions through RS-232 serial port. Complete API enables the third party to integrate the encoder conveniently.
- Page 14 316mVRMS, output resistance: 10kΩ) Audio sample 8kHz frequency Audio bandwidth 64kb Audio intercom Intercom with HUSS-E1 or HUSS-M TCP, UDP, RTP, RTSP, DHCP, ICMP, Protocol IGMP, HTTP, ARP, SSL, NTP. Supports unit-cast and multi-cast. Supports USB hard disk,Flash Disk USB device...
-
Page 15: Huss-D1
Figure 2-3 HUSS-D1 HUSS-D1 is also based on H.264. It decodes video information from HUSS-E1 and displays it on analog monitors at high resolution. It can be bounded to HUSS-E1 through HUSS-M video client or HUSS-D1 network client. Similar to HUSS-E1, HUSS-D1 possesses strong network and security characteristics, excellent integration capability and extendable functions. - Page 16 316mVRMS, output resistance 10KΩ) Audio sample 8kHz frequency Audio bandwidth 64kb Audio intercom Intercom with HUSS-E1 Protocol TCP, UDP, RTP, RTSP, DHCP, ICMP, IGMP, HTTP, SSL, NTP Virtual video matrix Virtual video matrix configuration Supports USB hard disk, flash disk...
- Page 17 Honeywell Parameter Value Firmware Update Remote TFTP, network client HTTP upload System management HTTP WEBUI, SDK, PC client Security performance Multiple user profiles, SSL certificate Network interface RJ-45, 10/100BASE-T IEEE802.3 Serial port RS-232 (DB9) 485/422 (Tx±, Rx±, for function extension)
-
Page 18: Huss-M Client
General Information HUSS-M Client Features and Functions Real-time surveillance • Multi-channel real-time surveillance • Total encoding/decoding relay < 300ms • PTZ control Remote video recording • Manual recording • JPEG image capture • Play video files • Supports multiple media file formats Alarm management •... - Page 19 Honeywell Software requirements: • .Net Framework 2.0 • Window XP Professional (recommended) • Data access component like MDAC2.8 shall be installed.
-
Page 20: Installing And Operating Huss-E1/Huss-D1
3 Installing and Operating HUSS- E1/HUSS-D1 Panel Description Front Panel The front panels of HUSS-D1 and HUSS-E1 have the same interfaces, except that HUSS-E1 has an extra “Video IN” interface. Figure 3-1 Front Panel of HUSS-E1 Figure 3-2 Front Panel of HUSS-D1... - Page 21 Honeywell Interface Description VIDEO IN For video encoder only—BNC input VIDEO OUT For video encoder—loop output For video decoder—BNC decoded video output AUDIO IN Audio input AUDIO OUT Audio output Power indicator USB interface Video status indicator. For video encoder—flashes green (the indicator is off for 2 seconds after beeping 4 seconds) when encoder is encoding;...
-
Page 22: Rear Panel
Installing and Operating HUSS-E1/HUSS-D1 Rear Panel The rear panels of HUSS-E1 and HUSS-D1 have the same interfaces (see Figure 3-3 Rear Panel). Figure 3-3 Rear Panel Interface Description POWER 12V DC RS-232 RS-232 DB9 serial port RS-485/RS-422 PTZ control interfaces... -
Page 23: Mounting Encoder/Decoder
Honeywell Mounting Encoder/Decoder Video encoders/decoders may be desktop-mounting, rack-mounting or wall-mounting. For desktop-mounting, encoders/decoders can be placed or fixed on desk. For rack-mounting, 9-10 encoders/decoders may be installed in a metal rack-mounting cabinet with the help of plates in the package... -
Page 24: Connecting Video Output
Installing and Operating HUSS-E1/HUSS-D1 • Make sure the signal of camera is stable and reliable Camera should be mounted in right place to avoid backlight and low luminance environment. Or use cameras with good backlight compensation or low luminance. •... -
Page 25: Connecting Audio Output
Honeywell Connecting Audio Output Audio outputs of encoder and decoder are both 3.5mm Audio Jack, Line out (-10dBv / 316mVRMS, output resistance 10KΩ). Headphone or active speaker can be connected to Audio Input directly. Other sound output device can also be connected to Audio Output interface through amplifier. -
Page 26: Connecting Ptz
For PTZ device with RS-485 interface, connect the Rx+ and Rx- cables to Tx+ and Tx- on the rear panel of HUSS-E1 encoder. You can also connect several PTZs in parallel form. If numbers of connected PTZs is larger, connect an impedance of 120Ω between the farthest terminal of Tx+ and Tx-. -
Page 27: Connecting Usb Device
USB recording event. Before disconnecting the USB storage device, use a thin object (e.g. a needle) to press the hidden button on the rightmost of HUSS-E1 front panel for 1 or 2 seconds to safely stop USB storage device, otherwise the last file written on the USB storage device will be corrupted. -
Page 28: Huss-E1 Network Client
HUSS-E1 Network Client 4 HUSS-E1 Network Client HUSS-E1 video encoder can be accessed by Internet Explore (IE6 & IE7) directly without installing any software. Internet Explorer Settings Make sure Internet Explorer supports ActiveX controls before accessing HUSS-E1 through internet. Take Internet Explorer 6 as example. Open a new Internet Explore Browser. -
Page 29: Figure 4-2 Security
Honeywell Figure 4-2 Security Click Custom level… , Figure 4-3 is displayed. Figure 4-3 Security Settings In Security Settings, select “Enable” or “Prompt” for all the options in “ActiveX controls and plug-ins” section:... -
Page 30: Login
HUSS-E1 Network Client Login Enter IP address of HUSS-E1 encoder (for example: http://159.99.251.241) in the Internet Explorer address bar. Login page (Figure 4-4) is displayed. Figure 4-4 Login Click “Chinese” or “English” to choose the language you want, then enter User ID and Password. -
Page 31: Figure 4-5 Install Huss.cab
Real-time window Encoding parameter control • Honeywell Logo: Click it to return to login page. • Real-time video display window: Display real-time video of the encoder. • Video encoding parameter: Resolution (D1, Half D1, CIF, VGA, QCIF, QVGA…); Bitrate is shown as H.264. -
Page 32: Video Encoder Settings
HUSS-E1 Network Client • PTZ control: Click the arrow buttons to adjust PTZ’s direction. Click to zoom in and zoom out. Click change focus. To control PTZ’s speed, select a number from Speed drop-down list.1 is the slowest, 9 is the fastest. -
Page 33: Basic
Honeywell • Network status: Display MAC address, IP address, Subnet Mask, Gateway of the encoder being configured. IP address, Subnet Mask and Gateway can be configured on Basic section. • Version info: Display firmware version and build date. • Log: Display all the configuration modifications as well as the alarm records. -
Page 34: Figure 4-9 Major Stream Setting
HUSS-E1 Network Client Video Settings HUSS-E1 video encoder supports dual-stream: major stream and minor stream. • Major stream setting For major stream, you need to configure following parts: Video Setting, Max Client limit and Multicast Address, see Figure 4-9: Figure 4-9 Major Stream Setting Video Settings •... - Page 35 Max Client Limit Max Number of Clients: Defines maximum number of unicast users. HUSS-E1 video encoder supports up to 8 unit-cast users if multicast mode is disabled. Number of Multicast users is unlimited. Unicast mode is always effective for encoder streaming.
-
Page 36: Figure 4-10 Multicast Address Setting
HUSS-E1 Network Client Figure 4-10 Multicast Address Setting To enable multicast performance, select the check box, enter IP address and Port, then click OK button. If you do not select the check box, video stream will be transmitted only in unicast mode. Default Multicast IP is 234.5.6.7 and port 6666. -
Page 37: Figure 4-12 Audio
PC client. Figure 4-12 Audio Enable: Select the check box to enable audio encoding. Date/Time This option is used to synchronize HUSS-E1 video encoder. Detailed information is shown in Figure 4-13 Synchronize with NTP: To synchronize encoder with a NTP (Network Time Protocol) sever, select Synchronize with NTP radio button. -
Page 38: Figure 4-13 Date/Time
HUSS-E1 Network Client Figure 4-13 Date/Time OSD (On Screen Display) This option enables time and channel information to be displayed on screen along with the real-time video. Figure 4-14 OSD • Date/Time To display date and time on screen while playing video file, select the... -
Page 39: Expert Settings
Honeywell • Channel Enter Channel Name in Channel Name box. If it is an English name, it should include less than 16 characters. If it is a Chinese name, it should include less than 8 characters. To display the Channel name on screen, select the Enable check box under Channel option. -
Page 40: Figure 4-16 Channel (Ptz)
HUSS-E1 Network Client Figure 4-16 Channel (PTZ) Channel Model (PTZ mode): Select PTZ protocol from the drop- down list. The video encoder supports the protocol of Pelco-D, Pelco- P, Diamond (KD6) protocol and transparent port. Transparent port is used for transferring the PTZ protocol from PC client. -
Page 41: Figure 4-18 Modify Account
Honeywell Add new account - User ID: Enter the name of the new account. Length of User ID should be smaller than 14. - Password: Enter the password. Length of password should be smaller than 14. - Confirm: Enter the password one more time to confirm. -
Page 42: Figure 4-19 Alarm Management
Dome Interlock: Select the check box to enable HUSS-E1 to interlock PTZ to preset positions when it detects alarm input.. Delay Time: Configure effective period of alarm output. Motion Detection HUSS-E1 can detect up to 5 areas. Motions in each area can be detected under different sensitivity. -
Page 43: Figure 4-20 Motion Detection
Honeywell Figure 4-20 Motion Detection Area No.: Select the area index from drop-down list. Select the check box on the right to enable the selected area for motion detection. Sensitivity: Configures the sensitivity threshold level for detecting motions. Values range from 1 to 12 in 1 increments. The larger the value is, the more sensitive the detection is. -
Page 44: Figure 4-21 Resolution Is Set As Cif
HUSS-E1 Network Client Figure 4-21 Resolution is set as CIF Figure 4-22 Resolution is set as D1 Loopback Setting Video encoder supports loopback output. In Loopback mode, local monitor is connected to encoder’s Video Out interface. Original images are output to local monitor while they are being encoded by... -
Page 45: Figure 4-23 Loopback Setting
Honeywell If loopback function is enabled, the 75Ω resistance should be matched with external devices, otherwise Note remote decoded video will be over-bright and result in brightness saturation. Figure 4-23 Loopback Setting Firmware Update Video Encoder supports Firmware Update through network. -
Page 46: Reboot
HUSS-E1 Network Client Reboot Click Reboot on the left of the web page, a message window will pop up( as is shown in Figure 4-25 Reboot Click OK to reboot the video encoder and no operation will be performed during the rebooting operation which lasts about 20 seconds. -
Page 47: Huss-D1 Network Client
Honeywell 5 HUSS-D1 Network Client Login Enter the IP address of HUSS-D1 decoder (for example: http://159.99.251.226) in the Internet Explorer address bar. Login page of video decoder (see Figure 5-1) is displayed. Figure 5-1 Login Click “Chinese” or “English” to choose the language you want, then enter User ID and Password. -
Page 48: Decoder Settings
HUSS-D1 Network Client Decoder Settings Video decoder settings contain five sections: Status, Basic, Expert, Reboot and Logout (shown on the left part of the web page). Click proper tabs to entry corresponding setting pages. Status Figure 5-2 Status Status page displays Network Status, Model Info and Log: •... -
Page 49: Figure 5-3 Network
Honeywell Figure 5-3 Network Static IP: Enter IP address, Subnet Mask, Gateway manually to select the right decoder. When the IP address is changed, the system will locate to new decoders corresponding to the new IP address automatically. DHCP: Click the radio button of “Connection Method: DHCP”, the system will assign a new IP address to the decoder automatically. -
Page 50: Figure 5-4 Video
HUSS-D1 Network Client Figure 5-4 Video • Adding a new encoder Click Add and the following page is displayed. Figure 5-5 Add Encoder Select Packet Receive Type by clicking the right radio button: Multicast or Unicast. Note that Packet Receive Type configured here should coincide with the configuration on Page 26 Video Settings,... -
Page 51: Figure 5-6 Modify Encoder
Honeywell - User ID: Enter one of the User IDs owned by the encoder. Usually, one encoder contains more than one user. You can select the right user profile (Admin profile or operator profile). - Password: Enter the password corresponding to the User ID entered in previous step. -
Page 52: Figure 5-7 Detail Information
HUSS-D1 Network Client • Viewing detailed information of the encoder Select one encoder in the list (see Figure 5-4) and click Detail to view the encoder’s detailed information, such as compression standard, IP address and so on (see Figure 5-7). Figure 5-7 Detail Information Audio Settings This configuration determines whether audio information will be... -
Page 53: Figure 5-9 Date/Time
Honeywell Date/Time Click Date/Time tab in the left of the web page and Figure 5-9 displayed. This option is used to synchronize HUSS-D1 video decoders. Figure 5-9 Date/Time Synchronize with NTP: To synchronize decoder with a NTP (Network Time Protocol) sever, select Synchronize with NTP radio button. -
Page 54: Expert Settings
HUSS-D1 Network Client Figure 5-10 OSD System Settings This option enables the device name to be displayed as the IE browser title. As is shown by Figure 5-11, model and channel number of the devices are unchangeable. Figure 5-11 System Config Expert Settings Expert settings include Alarm Out, Account and Firmware Update. -
Page 55: Figure 5-12 Alarm Out
Honeywell Alarm Out Figure 5-12 Alarm Out This performance determines whether the alarm event is enabled or not, and in which event of alarm is to be triggered configured through Manual Mode or Interlock Mode. Manual Mode: Select the Enable check box, decoder will activate alarm relay. -
Page 56: Figure 5-13 Account
HUSS-D1 Network Client Figure 5-13 Account Add new account - User ID: Enter the name of the new account. Length of User ID should be smaller than 14. - Password: Enter the password. Length of password should be smaller than 14. - Confirm: Enter the password one more time to confirm. -
Page 57: Reboot
Honeywell - User ID: Unchangeable. - Password: Enter a new password. - Confirm: Enter the new password one more time to confirm. - Viewer: Select the radio button to indicate a viewer profile. - Administrator: Select the radio button to indicate an administrator profile. -
Page 58: Logout
HUSS-D1 Network Client Figure 5-16 Reboot Logout Click Logout tab to exit the configuration page and return to the login page, see Figure 5-1. -
Page 59: Huss-M Video Client
Honeywell 6 HUSS-M Video Client Overview HUSS-M can receive, decode and display H.264 video streams transmitted by multi HUSS-E1s and play synchronous audio signal. Through HUSS-M, video streams can be saved as files and multiple HUSS-E1s and HUSS-D1s can be configured. -
Page 60: Figure 6-1 Login Window Of Huss-M
HUSS-M Video Client Figure 6-1 Login window of HUSS-M HUSS-M supports two languages: Chinese and English. Enter User and Pass (for the first login, enter “admin” in User and “pass” in Pass.) and then click OK. The main window of HUSS-M is shown as below. Figure 6-2 HUSS-M Main Window (Device Management) Menu Date/Time... -
Page 61: Menu Structure
Honeywell Alarm Management – search, filter and process alarms System Settings – configure HUSS-M properties Figure 6-3 HUSS-M Main Window (Settings) Menu Structure Field Options Description File Exit Exit HUSS-M. (Shortcut key is X.) View Video Play Real-time Video Matrix Enter virtual matrix mode. -
Page 62: Device Management
HUSS-M Video Client Device Management Device management area includes device list and Add/Delete/Modify buttons. Figure 6-4 Device Management Device List Device list displays all devices currently accessible and configurable in the video client. You can change the name of the device while the default is the device’s IP address. -
Page 63: Figure 6-6 Add A Device - Manual
Honeywell Add a Device To add a device, click Figure 6-6 is displayed. Figure 6-6 Add a Device – Manual There are two ways to add a device: Auto and Manual. Click Auto in Figure 6-6 or Manual Figure 6-7 to switch between the two modes. -
Page 64: Real-Time Video Surveillance
HUSS-M Video Client Delete a Device Choose one device in the device list (see Figure 6-4) and click Figure 6-8 is displayed. Figure 6-8 Confirm Deletion Click Yes to delete the device. Modify a Device Choose one device in the device list (see Figure 6-4) and click... -
Page 65: Figure 6-10 Real-Time Surveillance
Honeywell Figure 6-10 Real-time Surveillance Video Window Operations Configure current window: Click one window to configure it as current window. Switch video files between different windows: Select one of those video windows and drag it to another window. Then video files in the two windows are switched. -
Page 66: Figure 6-11 Right-Click Menu Of Video Window
HUSS-M Video Client To end intercom, right click the window and select intercom the popup again. Figure 6-11 Right-click Menu of Video Window Video Window Layout Choose the proper video window layout in the tool bar shown as Figure 6-12. Figure 6-12 Video Window Layout Video Source Information The information of current video window is displayed in the bar under... -
Page 67: Real-Time Alarm Information
Honeywell Real-time Alarm Information Alarm information area list all alarms received, including external alarms input, motion detection, USB recording and video loss. It lists the latest 200 alarms. For more alarm information, refer to Alarm Management on page 80. Figure 6-14 Real-time Alarm Information... -
Page 68: Figure 6-16 Huss-M Player
HUSS-M Video Client Figure 6-16 HUSS-M Player Click File Open. Figure 6-17 is displayed. Figure 6-17 Open Video File Choose a video file to play. (ASF file: video and audio compressed file.) -
Page 69: Ptz Control
Honeywell Button Description Play Pause Stop Back Forward Slow Fast Snapshoot Start saving the current video as a separate file and click again to end it. Volume HUSS-M Player supports playing of raw H.264 data file also (like stream USB back file). But in this case, Note the player can’t do forward operation. -
Page 70: Figure 6-18 Ptz Control (Simple Mode)
HUSS-M Video Client Figure 6-18 PTZ Control (Simple Mode) Button Description Direction Buttons Zoom In/Out Focus Adjust Iris Adjust Full Mode Click Tool PTZ Settings and full-mode PTZ control panel is displayed. See Figure 6-19. -
Page 71: Virtual Matrix Configuration
Honeywell Figure 6-19 PTZ Control (Full Mode) Beside buttons visible in simple-mode PTZ control (see Simple Mode on page 61.), full-mode PTZ control provide the following buttons: • Contrast, Brightness, Grayscale, Saturation. Adjustment of contrast, brightness, grayscale and saturation is unavailable in Rev. -
Page 72: Figure 6-20 Decoder Set
HUSS-M Video Client The windows bound to HUSS-D1 decoders can be laid out exactly according to the real monitor wall . Dragging HUSS-E1 encoder from the list to the window will connect the corresponding decoder to the encoder. In this way, video displayed on each window in HUSS-M corresponds to that displayed on the monitor in the monitor wall. -
Page 73: Figure 6-21 Matrix Set
Honeywell Figure 6-21 Matrix Set Figure 6-22 Customize Matrix Mode Enter the name of the new screen group and set horizontal screen numbers in X and vertical screen numbers in Y. For example, add a screen group named “1” and enter 4 in X and 3 in Y. Click Ok. A 4×3... -
Page 74: Figure 6-23 Customized 4×3 Matrix
HUSS-M Video Client Figure 6-23 Customized 4×3 Matrix Select the screens you’d like to edit and right-click, select Unite or Delete from the popup to configure the layout. For example, if you select Unite in Figure 6-24, layout of the screen is changed as Figure 6-25 shows. -
Page 75: Figure 6-25 Merged Screens
Honeywell Figure 6-25 Merged Screens Drag the decoder from the decoder list to one of the screens to bind it to this screen indicated by Figure 6-25. Then Figure 6-26 is displayed Figure 6-26 Binding Decoder to Screen Click OK to save all the configurations. -
Page 76: Figure 6-27 View Matrix
HUSS-M Video Client Figure 6-27 View Matrix Select an encoder from the Device List (Refer to Figure 6-4, Figure ) and drag it to the window to which a decoder is bound. Then video from the selected encoder is displayed in the window, as is shown in Figure 6-28. -
Page 77: Device Configuration
Honeywell The information of the selected encoder is added to encoder list in the Video settings page of the HUSS-D1 network client (see Figure 6-29) at the same time. Figure 6-29 Video Settings – Matrix Device Configuration In Settings panel, click Device Configuration. -
Page 78: Figure 6-31 Encoder Configuration- Network
There are two tabs in the window: Encoder and Decoder. Video encoder configuration Click Encoder tab to configure HUSS-E1 video encoder. Select an encoder in the list and click OK to open the Encoder Configuration window of the device (see Figure 6-31). -
Page 79: Figure 6-32 Encoder Configuration - Log
Honeywell Figure 6-32 Encoder Configuration - Log Video Click Video tab. Figure 6-33 is displayed. In this page, you can configure the resolution, frame rate and other information of the selected encoder. Refer to Video Settings on page for detailed information about these parameters. -
Page 80: Figure 6-34 Encoder Configuration - Audio
HUSS-M Video Client Figure 6-34 Encoder Configuration – Audio Date/Time Click Date/Time tab to configure date and time of the selected encoder. There are two ways to configure this item: Syn with NTP and Manual Set. Select Syn with NTP radio button to synchronize encoder with a NTP (Network Time Protocol) server(see Figure 6-35).Select Manual... -
Page 81: Figure 6-36 Encoder Configuration - Date/Time(Manual Set)
Honeywell Figure 6-36 Encoder Configuration – Date/Time(Manual Set) OSD (On Screen Display) Click OSD tab. Figure 6-37 is displayed. Select Date/Time check box to display time and date information on screen while playing video. Enter channel name in Channel Name box, If it is an English name, it should include less than 16 characters. -
Page 82: Figure 6-38 Encoder Configuration - Channel (Ptz)
HUSS-M Video Client Channel (PTZ) Click Channel (PTZ) tab. Figure 6-38 is displayed. Refer to Channel (PTZ) on page configure this option. Figure 6-38 Encoder Configuration – Channel (PTZ) Alarm Management Click Alarm Management tab, the page below is displayed. This option configures whether to enable encoder to receive external alarm input. -
Page 83: Figure 6-40 Encoder Configuration - Motion Detection
Honeywell Motion Detection Click Motion Detection tab to configure Motion detection performance of the encoder, as is shown by Figure 6-40. You can configure at most 5 motion detection areas with different sensitivities. Figure 6-40 Encoder Configuration – Motion Detection Name: Select the area which you would like to detect from Name. -
Page 84: Figure 6-41 Encoder Configuration - Loopback Setting
HUSS-M Video Client Loopback Setting Click Loopback Setting tab to configure encoder’s Loopback output function. Select Enable check box and connect local monitor to encoder’s VIDEO OUT Interface. Then original images are output to local monitor while they are being encoded by encoder. Figure 6-41 Encoder Configuration –... -
Page 85: Figure 6-43 Decoder Configuration - Log
Honeywell The Log panel displays all the modified configuration and alarm information of the selected decoder. Figure 6-43 Decoder Configuration – Log Audio Audio tab configures whether to enable audio information to be decoded and played.. Select Enable check box to activate this performance. -
Page 86: Figure 6-45 Decoder Configuration - Date/Time
HUSS-M Video Client Date/Time Date/Time tab configures decoder’s date and time information. Configuration procedure is the same as that of encoder. Refer to Date/Time on page to configure it. Figure 6-45 Decoder Configuration – Date/Time OSD (On Screen Display) Click Osd tab. The page below is displayed. Select Enable check box. -
Page 87: User Management
Honeywell Alarm Out Alarm information can be output in Manual Mode or Interlock Mode. Manual Mode: Select the Enable check box, decoder will output alarm information. Otherwise, decoder won’t output alarm information. Interlock Mode: Select the Interlock Mode (At Encoder) radio button, alarm out of the decoder is linked to the alarm input, motion detection and USB storage events occurred in the video encoder. -
Page 88: Alarm Management
HUSS-M Video Client Figure 6-48 User Management At least one user should exist and a warning message will pop up if you are trying to delete the last user. See Note Figure 6-49. Figure 6-49 Warning Message Alarm Management Click Alarm Management in Settings panel, Figure 6-50 displayed. -
Page 89: System Settings
Honeywell Figure 6-50 Alarm Management Click Search and Figure 6-51 is displayed. Select searching conditions and then click Search. Figure 6-51 Alarm Searching Alarms that match the conditions will be listed (100 records per page) and click Next or Prev to view the alarms. -
Page 90: Figure 6-52 System Set
HUSS-M Video Client Figure 6-52 System Set Network Enter correct Multicast IP and port number. Save Type Configuration Description Video Folder Choose the directory where video record is stored. The default directory is “VideoFile” of HUSS-M installation folder. Video Type H264 –... -
Page 91: Troubleshooting
Honeywell 7 Troubleshooting Q: Why do the images can’t be opened when HUSS-M has been installed? A: Please check if Microsoft .Net Framework and MDAC2.8 com properly. Q: Why do I can’t see images when login the system? A: Please configure the Internet Explorer so that it supports installation and operation of ActiveX com. -
Page 92: Figure 7-2 Run Dxdiag
Troubleshooting Q: Why does monitor connected to HUSS - D1 not display images when both HUSS –E1 and HUSS –D1 have been powered off and restarted. The HUSS – D1 has been connected to HUSS – A: For the sake of security, HUSS –D1 must be certificate when being connected to HUSS -.E1s. -
Page 93: Figure 7-3 Apply Directx Diagnostic Tool
Honeywell Figure 7-3 Apply DirectX Diagnostic Tool Q: Why is PTZ not able to be controlled? A: Please check if RS485 has been connected correctly. See if PTZ protocol, address, baud rate and mach with each other. Q: Why does images can not be displayed correctly on client when video type (PAL or NTSC) is changed or new camera is connected. - Page 94 FAT32 partition. Q: Why does the language change after I login to the web server? A: Since HUSS-E1 and HUSS-D1 allow login of multiple users, after one user login, other user may change the language setting. If this occurs, please logout, make sure no other users login, change the language setting and login again.
- Page 95 Shipping List • HUSS-E1 Video Encoder • HUSS-D1 Video Decoder • Power • User Guide • HUSS-M Software CD-ROM...