Table of Contents
Advertisement
Quick Links
Dell™ W2300 LCD TV User's Guide
Preface
Safety Instructions
Introduction
Setup
Using the LCD TV
Troubleshooting
Specifications
Regulatory Notices
Dell Contact Information
Limited Warranties
Documentation
Information in this document is subject to change without notice.
© 2003 Dell Inc. All rights reserved.
Reproduction in any manner whatsoever without the written permission of Dell Inc. is strictly forbidden.
Trademarks used in this text: Dell and the DELL logo are trademarks of Dell Inc.; Microsoft, Windows, and Windows NT are
registered trademarks of Microsoft Corporation; VESA is a registered trademark of Video Electronics Standards Association; IBM is
a registered trademark of International Business Machines Corporation; Adobe is a trademark of Adobe Systems Incorporated,
which may be registered in certain jurisdictions. As an
E
S
the
NERGY
TAR guidelines for energy efficiency.
Other trademarks and trade names may be used in this document to refer to either the entities claiming the marks and names or
their products. Dell Inc. disclaims any proprietary interest in trademarks and trade names other than its own.
Initial release: November, 2003
E
S
NERGY
TAR Partner, Dell Inc. has determined that this product meets
Advertisement
Table of Contents

Related Manuals for Dell W2300


Summary of Contents for Dell W2300
- Page 1 Reproduction in any manner whatsoever without the written permission of Dell Inc. is strictly forbidden. Trademarks used in this text: Dell and the DELL logo are trademarks of Dell Inc.; Microsoft, Windows, and Windows NT are registered trademarks of Microsoft Corporation; VESA is a registered trademark of Video Electronics Standards Association; IBM is a registered trademark of International Business Machines Corporation;...
-
Page 2: About This Guide
• Notational Conventions About This Guide ™ This guide is intended for anyone who uses the Dell W2300 LCD TV. It describes the product features, setup, and operation. The sections are as follows: Safety Instructions lists safety information. Introduction gives an overview of the LCD TV's features and provides an orientation to the LCD TV. - Page 3 Do not expose the LCD TV to rain or use it near water (in kitchens, next to swimming pools, etc.). If the LCD TV accidentally gets wet, unplug it and contact Dell immediately. You can clean the LCD TV with a damp cloth when necessary, being sure to unplug the LCD TV first.
- Page 4 Do not compromise these design standards by applying excessive pull force to the front, or top of the cabinet which could ultimately overturn the product. Do not place electronic equipment/toys on the top of the set. As such items could unsuspectingly fall from the top of the set and cause product damage and/or personal injury.
- Page 5 Thank you for purchasing the Dell W2300 23-inch wide LCD TV. Utilizing an Active Matrix TFT LCD, the Dell LCD TV display sharp and brilliant images of text and graphics with a maximum resolution up to 1280 x 768 pixels. This Dell LCD TV was designed to accommodate a wide variety of uses from a TV entertainment system with capabilities to display TV broadcast standards and HDTV formats to a performance PC Monitor for use in the home, small office, or large corporate environment.
- Page 6 Setup: Dell™ W2300 LCD TV User's Guide LCD TV Height Adjustable Stand (HAS) Connection to your LCD TV Proper location of your LCD TV Maintenance...
- Page 7 Back to Contents Page Using the LCD TV: Dell™ W2300 LCD TV User's Guide Setting the Optimal Resolution Controls and Indicators Remote Controls Back to Contents Page...
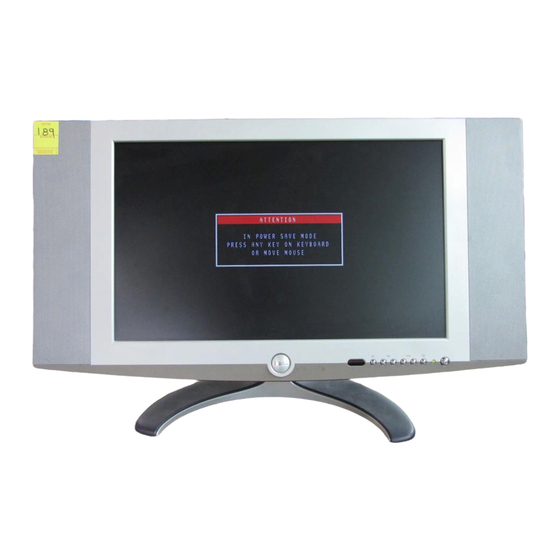
- Page 8 3. Turn on the LCD TV. The floating 'Dell - self-test Feature Check' dialog box should appear on-screen (against a black background) if the LCD TV cannot sense a video signal and is working correctly. While in self-test mode, the power LED remains green and the self-test pattern will scroll through the screen continually.
-
Page 9: Common Problems
LCD TV is in a power save mode (in PC mode). The main OSD menu is unlocked. The main OSD menu is locked. Common Problems The following table contains general information about common LCD TV problems you might encounter. COMMON WHAT YOU EXPERIENCE POSSIBLE SOLUTIONS SYMPTOMS... - Page 10 Check for bent or broken pins Note: When operating in DVI mode, the Pixel Clock and Phase adjustments are not available. Sync Problems Screen is scrambled or appears Perform LCD TV reset torn Push Auto Adjust button Adjust Phase and Clock controls via OSD Perform LCD TV self-test feature check to determine if scrambled screen appears in self-test mode Check for bent or broken pins...
-
Page 11: Remote Control Problems
Connect the audio cable securely No sound See video but no audio Audio cable is connected incorrectly Verify that the audio source is selected correctly in the OSD Remote Control Problems REMOTE CONTROL WHAT YOU EXPERIENCE POSSIBLE SOLUTIONS PROBLEMS Remote control does No response from LCD TV when Point the remote control directly at the remote sensor on the LCD TV not work properly... -
Page 12: Flat Panel
1280 x 768 at 60 Hz Highest addressable 1280 x 768 at 75 Hz resolution * Addressable means the LCD TV will sync up to this mode. However, Dell does not guarantee the image will be sized, shaped and centered correctly. PC Display Modes... - Page 13 Display Mode Horizontal Vertical Frequency Pixel Clock Sync Polarity Frequency (kHz) (Hz) (MHz) (Horizontal/Vertical) VGA, 720x 400 31.469 70.087 28.3 VGA, 640x 480 31.469 59.940 25.2 VESA, 640 x 480 37.500 75.000 31.5 VESA, 800 x 600 37.879 60.317 40.0 VESA, 800 x 600 46.875 75.000...
-
Page 14: Physical Characteristics
Lines per picture 625 frames 525 frames Field frequency, nominal value 60 fields/s 59.94 fields/s Nominal video bandwidth 5HMz 4.2 MHz Norminal line period 64µs 63.5555µs Line-blanking interval 12±0.3µs 10.9±0.2µs Interval between time datum (0H) and back edge of line- 10.5µs 9.2 to 10.3 µs blanking pulse... -
Page 15: Power Management Modes
Environmental Temperature: Operating 0°C to 35°C (32°F to 95°F) Nonoperating Storage: 0 to 60°C (32°F to 140°F) Shipping: -20 to 60°C(-4°F to 140°F) Humidity: Operating 10% to 80% (noncondensing) Nonoperating Storage: 5% to 90% (noncondensing) Shipping: 5% to 90%(noncondensing) Altitude: Operating 3,657.6m (12,000 ft) max Nonoperating... -
Page 16: Pin Assignments
NERGY TAR® is a U.S. registered mark. As an NERGY TAR® Partner, DELL has determined that this product meets the NERGY TAR® guidelines for energy efficiency. NOTE: This LCD TV automatically returns to normal operation when horizontal and vertical sync return, which occurs when you move the computer's mouse or press a key on the keyboard. -
Page 17: Plug And Play Capability
Bi-directional data (SDA) H. Sync V. Sync (vclk) Data clock (SCL) 24 pin digital-only DVI cable: Note: Pin 1 is at the top right. Pin Signal Assignment Pin Signal Assignment Pin Signal Assignment T.M.D.S. Data 2- T.M.D.S. Data 1- 17 T.M.D.S. Data 0- T.M.D.S. -
Page 18: Energy Efficiency
Note that Canadian Department of Communications (DOC) regulations provide, that changes or modifications not expressly approved by Dell Computer Corporation could void your authority to operate this equipment. This Class B digital apparatus meets all requirements of the Canadian Interference-Causing Equipment Regulations. -
Page 19: Nom Information (Mexico Only)
Mexican standards (NOM): Dell Computer Corporation Exporter: One Dell Way Round Rock, TX 78682 Dell Computer de México, Importer: S.A. de C.V. Rio Lerma No. 302 - 4º Piso Col. Cuauhtemoc 16500 México, D.F. Dell Computer de México, S.A. de C.V. al Cuidado de Kuehne & Nagel Ship to: de México S. -
Page 20: Nergy Star
EMC Certifications: FCC Part 15 Class B Energy Consumption and Ergonomics: ® NERGY... -
Page 21: Technical Assistance
Automated Order-Status Service To check on the status of any Dell™ products that you have ordered, you can go to support.dell.com, or you can call the automated order-status service. A recording prompts you for the information needed to locate and report on your order. See "Contacting Dell" for the telephone number to call for your region. - Page 22 Note: Toll-free numbers are for use within the country for which they are listed. When you need to contact Dell, use the electronic addresses, telephone numbers, and codes provided in the following table. If you need assistance in determining which codes to use, contact a local or an international operator.
- Page 23 1-800-879-3355 Dell Outlet Store (Dell refurbished computers) toll-free: 1-888-798-7561 Software and Peripherals Sales toll-free: 1-800-671-3355 Spare Parts Sales toll-free: 1-800-357-3355 Extended Service and Warranty Sales toll-free: 1-800-247-4618 toll-free: 1-800-727-8320 Dell Services for the Deaf, Hard-of-Hearing, or toll-free: 1-877-DELLTTY Speech-Impaired (1-877-335-5889)
-
Page 24: Limited Warranties And Return Policy
Limited Warranties and Return Policy Dell-branded hardware products purchased in the U.S. or Canada come with either a 90-day, 1-year, 2-year, 3-year, or 4-year limited warranty. To determine which warranty came with your hardware product(s), see your packing slip or invoice. The following sections describe the limited warranties and return policy for the U.S., the limited warranties and return policy for Canada, the... - Page 25 Projector lamps carry a 90-day limited warranty. Memory carries a lifetime limited warranty. Monitors carry the longer of either a 3-year limited warranty or the remainder of the warranty for the Dell computer to which the monitor will be connected.
-
Page 26: Total Satisfaction" Return Policy (U.s. Only)
What if I purchased a service contract? If your service contract is with Dell, service will be provided to you under the terms of the service contract. Please refer to that contract for details on how to obtain service. Dell's service contracts can be found online at www.dell.ca or by calling Customer Care at 1-800-847-4096. -
Page 27: Limited Warranty Terms For Dell-Branded Hardware Products (Canada Only)
You must ship the products to Dell within 5 days of the date that Dell issues the Credit Return Authorization Number. You must also return the products to Dell in their original packaging, in as-new condition along with any media, documentation, and all other items that were included in the original shipment, prepay shipping charges, and insure the shipment or accept the risk of loss or damage during shipment. - Page 28 The warranty period is not extended if we repair or replace a warranted product or any parts. Dell may change the terms and availability of limited warranties, at its discretion, but any changes will not be retroactive (that is, the warranty terms in place at the time of purchase will apply to your purchase).
-
Page 29: "Total Satisfaction" Return Policy (Canada Only)
If you are an end-user customer who bought reconditioned or refurbished products from Dell, you may return them to Dell within 14 days after the date on the packing slip or invoice for a refund or credit of the product purchase price. -
Page 30: Dell Software And Peripherals (Canada Only)
While Dell offers a wide selection of software and peripheral products, we do not specifically test or guarantee that all of the products we offer work with any or all of the various models of Dell computers, nor do we test or guarantee all of the products we sell on the hundreds of different brands of computers available today. -
Page 31: Limitation And Statutory Rights
In the absence of applicable legislation, this Guarantee will be the end user’s sole and exclusive remedy against Dell or any of its affiliates, and neither Dell nor any of its affiliates shall be liable for loss of profit or contracts, or any other indirect or consequential loss arising from negligence, breach of contract, or howsoever. - Page 32 Documentation: Dell™ W2300 LCD TV User's Guide You must right-click the link for a portable document format (PDF) file and save the file to your hard-disk drive. Attempting to link directly to large PDF files causes your system to freeze.
- Page 33 Front View: Dell™ W2300 LCD TV User's Guide Power switch On/Off Normal operation: Green. Power LED Sleeping mode: Amber. Menu Enable OSD menu (enter key for PC). Volume Increase / Selection Volume Decrease/ Selection Next channel / Up Previous channel / Down Input source select key;PC Analog, PC Digital, TV Tuner, Composite,...
- Page 34 Back View: Dell™ W2300 LCD TV User's Guide Bass-Port Security cable lock Base release button Cable Clip Lock down button Headphone PVR-- Audio Out (TV Tuner) PVR-- Video Out (TV Tuner)
- Page 35 Side View: Dell™ W2300 LCD TV Monitor User's Guide TV Antenna or Cable In S-Video In (paired with composite audio in and video in) Composite Audio In Composite Video In Audio In (paired with component video in) Earphone In /Line out...
- Page 36 Back to Contents Page Bottom View: Dell™ W2300 LCD TV User's Guide Americas Bottom View AC Inlet (AC in) D-SUB (Analog in) PC Audio in DVI-D ( Digital in) Back to Contents Page...
-
Page 37: Cable Management
Height-Adjustable Stand (HAS): Dell™ W2300 LCD TV User's Guide Attaching HAS • Cable Management • Tilt_Swivel • Vertical Adjustment • Removing HAS Attaching HAS Lay LCD TV on a flat, soft, and clean surface or use the foam cushion shipped with your LCD TV. Attach stand to LCD TV by aligning tabs on stand to the LCD TV. -
Page 38: Vertical Adjustment
Vertical Adjustment Press the Lock Down button at the bottom of the HAS to make any vertical adjustment. HAS travels vertically. Removing HAS Lay LCD TV on a flat, soft, and clean surface or use the foam cushion shipped with your LCD TV. Press the release button, and pull up the base. -
Page 40: Connecting Your Pc
Connect the power cord to an electrical outlet. A. Connection through blue VGA & lime green audio cable 1. Connect one end of the blue VGA cable to the VGA plug on W2300, and connect the other end to the VGA plug on your PC. - Page 41 other end to the audio jack on your PC. Connecting as a TV Cable TV • Antenna • TV to VCR Cable TV 1. If your Cable TV signal is a single, round cable (75 ohm), then you're ready to connect to the TV. Connect the TV cable to the ANTENNA/CABLE plug on the TV.
- Page 42 Antenna 1. If your antenna has a round cable (75 ohm) on the end, then you're ready to connect it to the TV. If your antenna has flat, twin-lead wire (300 ohm), you first need to attach the antenna wires to the screws on a 300 -to 75- ohm adapter.
- Page 43 the VCR to the TV. For information on other hookups (possible when cable/ descrambler boxes are included), refer to the owner's manuals for the VCR and the cable converter. 1. Connect your antenna or Cable TV signal to the IN FROM ANT (enna) plug on the VCR.
- Page 44 Connecting A/V Outputs 1. The Composite output jacks on W2300 back cover provides the function to record your favorite program through broadcast or cable TV. 2. Connect devices (VCR, Camcorder...) with cables provided. Select TV input from OSD Menu.
- Page 45 Proper location: Dell™ W2300 LCD TV User's Guide Consider the following environmental factors when you are deciding how to position the LCD TV: Do not store or use the LCD TV in locations exposed to heat, direct sunlight, or extreme cold.
- Page 46 Maintenance: Dell™ W2300 LCD TV User's Guide Caution: To avoid risk of electric shock, do not disassemble the LCD TV cabinet. Users cannot service the LCD TV. User maintenance is restricted to cleaning. NOTE: Before cleaning the LCD TV, unplug it from the electrical outlet.
-
Page 47: Driver Installation
Setting the Optimal Resolution: Dell™ W2300 LCD TV User's Guide ® ® For optimal LCD TV performance while using the Microsoft Windows operating systems, set the display resolution to 1280 x 768 pixels by performing the following steps: 1. Click the Start button, point to Settings, and click Control Panel. - Page 48 Back to Contents Page Controls and Indicators: Dell™ W2300 LCD TV User's Guide Front Panel • On Screen Display Controls • Remote Controls • Setting Optimal Resolution Power switch On/Off Normal operation: Green. Power LED Sleeping mode: Amber. Menu Enable OSD menu...
-
Page 49: Input Select
A Main Menu B Sub-Menu name C Menu icon 1. With the menu off, push the MENU button on the remote or in font of the LCD TV to enter OSD system and display the main menu. 2. Push the buttons to move between the function icons. -
Page 50: Brightness/ Contrast
TV TUNER: Antenna or cable TV input COMPOSITE: Composite video input S-VIDEO: S-video input COMPONENT: Component video input BRIGHTNESS/ The Brightness function : CONTRAST : Push the + button to increase luminance; push the - button to decrease luminance (min 0 ~ max. 100). The Contrast function : Push the + button to increase the contrast;... - Page 51 SIZE&POSITION: Positioning moves the viewing area around on the monitor screen. EXIT: Exit this menu H.POSITION /V.POSITION: When making changes to either the 'Horizontal' or 'Vertical' settings, the image will simply be shifted in response to your selection/change. Minimum is '0' (-). Maximum is '100' (+). 4:3 ASPECT RATIO: Select 4:3 image display FULL SCREEN: Select full screen (16:9) image display Note: When operating 1280*768 in DVI mode, the positioning adjustments are not...
- Page 52 Note: Operating in DVI mode, the Pixel Clock and Phase adjustments are not available. COLOR Color Settings adjusts the color temperature. SETTING: EXIT: Exit this menu NATURE COLOR: Equivalent to original panel color. NORMAL COLOR: 6500K (Same as SRGB) default from FACTORY BLUE PRESET: Equivalent to 9300K RED PRESET: Equivalent to 5700K USER PRESET: Adjust red, green, blue three colors from 0 to 100.
- Page 53 (horizontal/vertical) provides control over this location. EXIT: Exit this menu HORIZONTAL: Adjustable from 0 to 100. VERTICAL: Adjustable from 0 to 100. OSD HOLD TIME: The OSD stays active for as long as it is in use. The range of time setting is from 5 to 60 seconds.
- Page 54 PICTURE IN Adjust picture in picture preferences. PICTURE: SIZE: Turn off and set the size of PIP. Users can chose your preferred size. SMALL MEDIUM LARGE H POSITION: Adjust the Horizontal position of PIP. V POSITION: Adjust the Vertical position of PIP. VIDEO SOURCE: Select video source of PIP: EXIT TV TUNER...
- Page 55 Composite / Component / S-Video Mode EXIT Exit from this menu INPUT SELECT Use up and down arrow button to highlight the "INPUT SELECT". Select video source for main display: PC ANALOG: PC VGA input PC DIGITAL: PC DIGITAL input TV TUNER: Antenna or cable TV input COMPOSITE: Composite video input S-VIDEO: S-video input...
- Page 56 Note: "TINT " is not available in component input. "HOR SHIFT" only function in component input. AUDIO Adjust audio characteristics to suit personal preference. EXIT: Exit from this menu. TREBLE: Adjustable from 0 to 100 BASS: Adjustable from 0 to 100 BALANCE: Adjustable from 0 to 100 VOLUME: Adjustable from 0 to 100 SURROUND: Switch Surround Sound On/ Off...
- Page 57 2) Users will see the window" Access code" when they enter this function. EXIT LOCK CHANGE CODE CLEAR ALL 3) Enter Master code "3355" (read "DELL" on telephone keypad) twice. CLOSED EXIT: Exit from this menu. CAPTION CLOSED CAPTION: ON/ OFF...
- Page 58 TXT2 TXT3 TXT4 Note: "CLOSED CAPTION" is available for composite video only. FACTORY Reset the setting to default values. RESET NO: Keep the setting as current. YES: Load factory setting TV Mode EXIT Exit from this menu INPUT SELECT Select video source for main display: PC ANALOG: PC VGA input PC DIGITAL: PC DIGITAL input TV TUNER: Antenna or cable TV input...
- Page 59 PICTURE Adjust picture characteristics to suit personal preference. EXIT: Exit from this menu BRIGHTNESS: Adjustable from 0 to 100 CONTRAST: Adjustable from 0 to 100 COLOR: Adjustable from 0 to 100 SHARPNESS: Adjustable from 0 to 100 TINT: Not available in component input. Adjustable from 0 to 100 COLOR TEMP: Select from Normal, Cool or Warm by "-"...
- Page 60 2) Users will see the window" Access code" when they enter this function. EXIT LOCK CHANGE CODE CLEAR ALL 3) Enter Master code "3355" (read "DELL" on telephone keypad) twice. CLOSED CAPTION EXIT: Exit from this menu. CLOSED CAPTION: ON/ OFF...
- Page 61 TXT3 TXT4 SETUP EXIT: Exit from this menu. TUNER MODE: ANTENNA CABLE AUTO CHANNEL SEARCH: PLEASE WAIT PROG.FOUND CHANNEL MANUAL ADJUST: FINETUNE CHANNEL EDIT: CHANNEL (UP/DOWN) SKIPPED ( - / + BUTTON) FACTORY RESET Reset the setting to default values. NO: Keep the setting as current.
-
Page 62: Using Your Remote Control
Back to Contents Page TV Controls: Dell™ W2300 LCD TV User's Guide Using your Remote Control When Programming universal remotes, please use Philips/Magnavox TV codes. Americas Remote Control Diagram Power On/Off The remote power button turns the LCD TV ON and OFF. - Page 63 Manual entry for direct access to Channel programs for a 2 digit Digit 0- 9 channel number. Selects excellent preset audio for voice, music, theatre, and SMART sound personal settings. TV sound mode selection, to access MONO, STEREO and SOUND selection SAP.