Table of Contents
Advertisement
Advertisement
Table of Contents

Related Manuals for NEC UNIVERGE SV9100 DT750


Summary of Contents for NEC UNIVERGE SV9100 DT750
- Page 1 NDA-31588 ISSUE 1.0 UNIVERGE SV9100 Terminal DT750 USER’S GUIDE...
- Page 3 NEC Corporation of America reserves the right to change the specifica- tions, functions, or features, at any time, without notice. NEC Corporation of America has prepared this document for use by its employees and customers. The information contained herein is the property of NEC Corporation of America and shall not be reproduced without prior written approval from NEC Corporation of America.
-
Page 5: Table Of Contents
TABLE OF CONTENTS 1 Introduction Face Layout ............................ 1 Technical Specifications ......................... 2 Keys and Parts ..........................3 Menu ............................... 6 DESI-less Display ........................... 8 Softkeys ............................11 Icon Display ..........................13 Shortcut Menu ..........................14 2 Terminal Setup Setup with Up/Down Key ......................15 To Adjust Handset Receiver Volume .................. - Page 6 TABLE OF CONTENTS To Reset Telephone Settings ....................40 To Download a File ......................... 42 To Backup Personal Settings ....................49 To Restore Personal Settings ....................54 3 Basic Operation To Login ............................62 To Make an External Call ......................62 To Make an Internal Call .......................
- Page 7 TABLE OF CONTENTS To Unlock the Telephone ......................78 4 Directory Operation To Add New Data .......................... 81 To Change Group Name ....................... 82 To Find a Registered Data ......................83 To Make a Call from Directory ...................... 84 To Add Prefix Number ........................85 To Set Prefix ...........................
- Page 8 TABLE OF CONTENTS How To Operate .......................... 112...
-
Page 9: Introduction
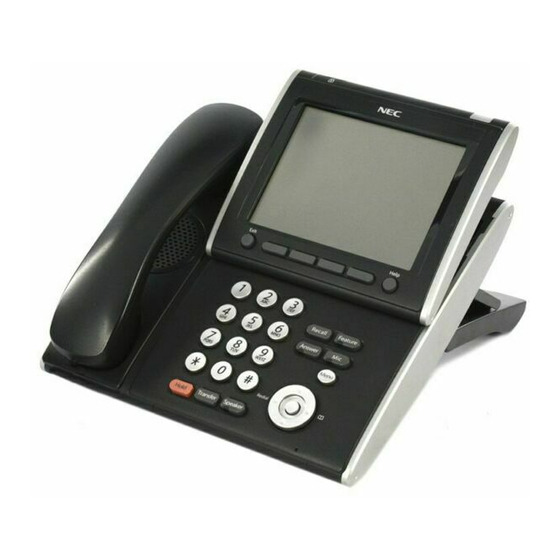
Introduction Face Layout DT750 (ITL-320C-1/2) -
Page 10: Technical Specifications
Technical Specifications ITEM DT750 (ITL-320C-1/2) Display (LCD) 5.7 inch TFT, QVGA, Touch Panel, with Backlight Display Color Color Programmable Key 32 (8 X 4) Keys (displayed on LCD) Fixed Feature Key 9 keys (with Menu/Cursor button) backlight Display and Digit Key (lit for 10 seconds when operating) Softkey 4 Keys Directory... -
Page 11: Keys And Parts
Keys and Parts (2) Call Indicator Lamp Lamp at top corner of DT750 Display flashes when a call terminates to the terminal. Also, when using Voice Mail service, the Lamp lights steadily when a message has been left. (3) LCD Color touch panel LCD (Liquid Crystal Display) provides DT750 activity information. - Page 12 (9) Answer (b) Redial When LED on this key is lit, press key to answer a (Last Number Call, Speed Calling-Station/ waiting call. Group) Press key to activate redial feature. Press (10) Mic redial and scroll back through numbers that Press key to respond hands free.
- Page 13 Move the highlighted area one line up the screen. Move the highlighted area one line DOWN down the screen. LEFT Go back to the previous screen. Go to the screen corresponds to the RIGHT highlighted menu item. Go to the screen corresponds to the Enter highlighted menu item.
-
Page 14: Menu
Menu MENU ITEM DESCRIPTION From the key, the user can use various Menu To view Call History. There are two application features such as Directory and Call types of Call History features. On the History. one hand, the history data is stored in the server (system) memory (see To Display Menu List History... - Page 15 To Use Navigational Keys The keys in this section are used to navigate between different menus and menu offerings. These keys are used by touching the LCD. NAVIGATIONAL DESCRIPTION Moves the cursor up one level. Use to navigate menu selections. Moves the cursor down one level.
-
Page 16: Desi-Less Display
DESI-less Display (a) Status Icon Status information on the Line key such as Desi-less display service provides 32 (eight keys x call termination, Call Hold or Busy can be four pages) Programmable Line/Feature keys. indicated as following Icons. Information set to each Programmable Line/ FLASHING Feature key can be displayed on the LCD. - Page 17 (b) Programmable Key Information The following shows an example of LCD display when One-Touch Speed Dial Key is Programmable Key Information is displayed assigned to a Programmable Key. For as follows: One-Touch Speed Dial Key, No status icon is NUMBER displayed.
- Page 18 Example of Page Switching Form Page 1 to 3 LINE 01 LINE 05 FLASHING LINE 02 LINE 06 LINE 03 LINE 07 LINE 04 LINE 08 Touch flashing button Switch from PAGE 1 to PAGE 3 to go to Page 3. LINE 17 LINE 21 INCOMING...
-
Page 19: Softkeys
Softkeys Help Key Press the Help Key, then desired programmable The softkeys on DT750 provide a set of functions key for helpful information about that key. on the LCD that adapts to the changing state of the telephone. While default softkey settings are List provided, desired functions can be assigned to Press the List key to access Call History. - Page 20 BUSY IDLE 2-12 THU 8:19AM 2-12 THU 8:19AM BUSY 2200 J. Jones List VMsg ExPg InPg CONNECTION DIAL TONE/DIALING 2-12 THU 8:19AM 2-13 WED 5:40PM TALKING TO STA 12345 InPg ExPg CONF TRANSFER/HOLD Line 023 2-13 WED 5:40PM 9XXXXXXXXX STA 12345678...
-
Page 21: Icon Display
Icon Display FEATURE ICON DESCRIPTION The LCD of DT750 displays Desktop Icons which This icon appears when there is provide notification when events (such as missed Missed a missed call. Once the user has call and voice mail) occur. Call checked the missed call, this icon will disappear. -
Page 22: Shortcut Menu
Shortcut Menu As shown in the figure below, DT750 has Shortcut Menu for frequently-used features. The user can access to Shortcut Menu by pressing (Enter) key. Press Enter Key [Shortcut Menu] Answer 1 Missed Calls Menu 2 Voice Mail Receive IM Presence Redial Bluetooth... -
Page 23: Terminal Setup
Terminal Setup This chapter describes operating procedures for terminal settings. Various terminal settings such 31314 31310 as display, sounds, password, and language are 31311 31315 available. 31312 31316 Setup with Up/Down Key 31313 31317 To Adjust Handset Receiver Volume 2- 9 MON 8:40AM Line 022 00:27 Press (Up) or... -
Page 24: Setup With Menu Key
Setup with Menu Key 3. Select User Setting and then press (Enter), (Right-cursor) or OK softkey (or press key). or softkey to move the cursor On the Menu, use up/down a line. [Setting] User Setting The user can also navigate through the menu with touch Download panel operation. -
Page 25: To Set Ringing Of Headset
To Set Ringing of Headset [Incoming Call] The procedure below shows how to enable/disable Ring Volume the ringing of headset. Offhook Ring Headset Ring 1. While indicating the current time on LCD, press Ring Tone key to open the Menu screen. Menu Illumination 2. -
Page 26: To Set Ringer Tone
4. Select Incoming Call and then press (Enter), (Right-cursor) or OK softkey [Headset Ring] (or press key). Disable [User Setting] 2 Enable Incoming Call Talk Display Change Password Back Security Peripherals Setting Reset Default setting is 1 Disable. Back ... - Page 27 [User Setting] Incoming Call Talk Display Setting History Directory Change Password Security 7:25 MON 26 MAR 2012 Peripherals 31313 MIC DND >>> Setting Reset Phone Back 5. Select Ring Tone and then press 3. Select User Setting and then press (Enter), (Right-cursor) or OK softkey (Enter),...
-
Page 28: Internal Call
FREQUENCY (Hz) [Ring Tone] NO. MENU ITEM REMARKS External Call Automatic 16Hz modulation Internal Call Tone Type1 16Hz modulation Tone Type2 8Hz modulation Tone Type3 1400 1100 Door Phone Tone Type4 1100 No modulation Tone Type5 No modulation Tone Type6 1100 1400 16Hz modulation... -
Page 29: To Set Illumination Pattern For Call Indication Lamp
8. The display returns to the Ring Tone screen. Continue programming or press Exit for default [Setting] display. User Setting To Set Illumination Pattern for Call Download Indication Lamp Data Backup/Restore The procedure below shows how to set the illumination pattern for the Call Indicator Lamp. 1. -
Page 30: To Enable/Disable Rtp Alarm
[External Call] [Incoming Call] Automatic Ring Volume Offhook Ring Disable Headset Ring Green Ring Tone Blue Illumination Yellow Headset Ring Volume Purple Back Light Blue 6. Select External Call when setting the Back illumination pattern for external calls. Select Internal Call when setting the illumination The default setting is 0 Automatic. - Page 31 [User Setting] Incoming Call Talk Display Setting History Directory Change Password Security 7:25 MON 26 MAR 2012 Peripherals 31313 MIC DND >>> Setting Reset Phone Back 5. Select RTP Alarm and then press 3. Select User Setting and then press (Enter), (Right-cursor) or OK softkey (Enter),...
-
Page 32: To Enable/Disable Dtmf Tone
To Enable/Disable DTMF Tone [RTP Alarm] The procedure below shows how to enable/disable Automatic RTP alarm. Disable 1. While indicating the current time on LCD, press Enable key to open the Menu screen. Menu 2. Select Setting and then press (Enter) or OK softkey (or press key). -
Page 33: Incoming Call
4. Select Talk and then press (Enter), [DTMF Tone] (Right-cursor) or OK softkey (or press key). Automatic [User Setting] Disable Enable Incoming Call Talk Display Change Password Back Security Peripherals Setting Reset MENU ITEMS DESCRIPTIONS Back Follow the setting on the System. If no ... -
Page 34: To Set Key Touch
To Set Key Touch [Setting] The procedure below shows how to set Key Touch User Setting Tone. Key Touch Tone is a tone generated when the Download digit keys are pressed while DT750 is off-hook. Data Backup/Restore 1. While indicating the current time on LCD, press key to open the Menu screen. -
Page 35: To Set Music On Hold
7. The display returns to the Talk screen. [Talk] Continue programming or press Exit for default RTP Alarm display. DTMF Tone To Set Music on Hold Key Touch Tone The procedure below shows how to set Music on Hold Music Hold to be heard by DT750 user. - Page 36 [Setting] [Talk] RTP Alarm User Setting DTMF Tone Download Data Backup/Restore Key Touch Tone Hold Music 5 Prefix Back Back 4. Select Talk and then press (Enter), 6. Select Default when the default data (Right-cursor) or OK softkey (or press (Menuet) is used as Music on Hold.
-
Page 37: To Set Clock Format
7. The display returns to the Talk screen. [Setting] Continue programming or press Exit for default User Setting display. Download To Set Clock Format Data Backup/Restore Determines whether time is displayed with a 12-hour or 24-hour clock format. This setting is available for Time Display only. Call Log feature displays the time in 24-hour format regardless of ... -
Page 38: To Enable/Disable Volume Level Display
[Display] MENU ITEM MEANING Time Format Follow the setting on the system. 0 Automatic Local Volume (default) Screen Server 1 12 hour Indication 12-hour clock Back Light 2 24 hour Indication 24-hour clock Font Size Language For the setting on the System, contact to the 7 Advanced System Administrator. - Page 39 [User Setting] Incoming Call Talk Setting History Directory Display Change Password Security 7:25 MON 26 MAR 2012 31313 MIC DND >>> Peripherals Setting Reset Phone Back 3. Select User Setting and then press 5. Select Local Volume and then press (Enter), (Right-cursor) or OK softkey (Enter),...
-
Page 40: To Set Brightness Of Backlight
2. Select Setting and then press (Enter) or OK softkey (or press key). [Local Volume] Automatic Disable Enable Setting History Directory 7:25 MON 26 MAR 2012 31313 MIC DND >>> Back Phone MENU ITEM MEANING Each volume level is displayed on LCD 0 Automatic 3. -
Page 41: To Change Character Size
[User Setting] [Back Light] Incoming Call Level 1 (Bright) Talk Level 2 Display Level 3 Change Password 4 Level 4 (Dark) Security Peripherals Setting Reset Back Back 5. Select Back Light and then press The currently enabled item is highlighted. (Enter), (Right-cursor) or OK softkey (or press... - Page 42 [User Setting] Incoming Call Talk Display Setting History Directory Change Password Security 7:25 MON 26 MAR 2012 Peripherals 31313 MIC DND >>> Setting Reset Phone Back 5. Select Font Size and then press (Enter), 3. Select User Setting and then press (Right-cursor) or OK softkey (or press (Enter), (Right-cursor) or OK softkey...
-
Page 43: To Set A Language
[Font Size] Standard (16dot) Small (12dot) Setting History Directory 7:25 MON 26 MAR 2012 31313 MIC DND >>> Phone Back The currently enabled item is highlighted. 3. Select User Setting and then press (Enter), (Right-cursor) or OK softkey 7. -
Page 44: To Enable/Disable Touch Panel Operation
[User Setting] [Language] Incoming Call Automatic Talk Japanese Display NEC English Change Password NEC Portuguese Security NEC Spanish Peripherals NEC French Setting Reset German Back Italian Back 5. Select Language and then press (Enter), (Right-cursor) or OK softkey The currently enabled item is highlighted. - Page 45 [User Setting] Incoming Call Talk Display Setting History Directory Change Password Security 7:25 MON 26 MAR 2012 Peripherals 31313 MIC DND >>> Setting Reset Phone Back 5. Select Advanced and then press 3. Select User Setting and then press (Enter), (Right-cursor) or OK softkey (Enter),...
-
Page 46: To Change Password
To Change Password [Advanced] To change an existing password, follow the Wallpaper Select procedure below. This password is used for the Touch Panel following occasions. Shortcut Icon • To lock/unlock the telephone Font Color • To delete the directory data •... - Page 47 [Change Password] [Setting] User Setting Old Pass Download New Pass Data Backup/Restore Retry Pass Cancel Back The initial password is "0000". When changing the 4. Select Change Password and then press password for the first time, enter "0000" as the old (Enter), (Right-cursor) or OK softkey password.
-
Page 48: To Reset Telephone Settings
[Password] [Change Password] Password Error Old Pass **** New Pass **** Retry Pass Cancel 9. The display returns to the User Setting screen. A maximum of 32 digits (0-9, * and #) can be set as a Continue programming or press Exit for default password. - Page 49 [User Setting] Incoming Call Talk Display Setting History Directory Change Password Security 7:25 MON 26 MAR 2012 Peripherals 31313 MIC DND >>> Setting Reset Phone Back 5. Enter the password and then press (Enter) 3. Select User Setting and then press or OK softkey.
-
Page 50: To Download A File
1. Set up the FTP/TFTP server. [Setting Reset] <FTP server> Put the downloading file into the designated Are you sure? directory of the FTP server. <TFTP server> Put the downloading file into a desired directory of TFTP server and then specify it as the directory for downloading. - Page 51 [Setting] [Protocol] User Setting Download TFTP Data Backup/Restore Back Back 5. Select Protocol and then press (Enter), (Right-cursor) or OK softkey (or press 7. The display goes back to the Download Menu key). screen. [Download Menu] When FTP is selected here, go to Step 8.
- Page 52 9. Select User ID and then press (Enter), 11. The display goes back to the FTP Settings (Right-cursor) or OK softkey (or press screen. Select Password and then press key). (Enter), (Right-cursor) or OK softkey (or press key). [FTP Settings] [FTP Settings] User ID User ID...
-
Page 53: Download Files
13. The display goes back to the FTP Settings 15. The display goes back to the FTP Settings screen. Select Folder and then press screen. Press (Left-cursor) or Back (Enter), (Right-cursor) or OK softkey softkey to display the Download Menu screen. (or press key). - Page 54 [Download Address] When downloading a file : Select Hold Music and go for Music on Hold Step 20. on page ‘*‘For‘.‘ When downloading a file : Select Ring Tone and go to for ringer tone Step 20. on page When downloading a file : Select Directory and go to for directory...
- Page 55 [Ring Tone] [Download 1/2/3] Download 1 Input a file name. Download 2 Download 3 Melody1.wav Cancel Exec Back 21. The default file name will be displayed. FILE FORMAT MAXIMUM SIZE When downloading a file for Music on Hold, the ...
- Page 56 FILE NAME Directory.csv (Fixed) CODE Unicode (UTF-8) When changing the file name, refer to Step 20. on Download Complete! page Press Exit to Reset. When not changing the file name, refer to Step 21. on page Exit 22. Press BK softkey once to delete the default file name and then enter a new file name by using 25.
-
Page 57: To Backup Personal Settings
To Backup Personal Settings DT750 user can backup personal settings of DT750 to FTP/TFTP server. To back up the setting data, the DT 750 needs to be connected to the network that has FTP (TFTP server). Setting History Directory For details on the FTP/TFTP service, contact the System Administrator. - Page 58 8. Select FTP Settings and then press (Enter), (Right-cursor) or OK softkey [Backup/Restore] (or press key). Data Backup Data Restore [Backup/Restore] Server Address Data Backup Protocol Data Restore FTP Settings Server Address Protocol Back FTP Settings 6. Select a protocol used by the destination server. After making a selection, press (Enter) or Back...
- Page 59 [User ID] [Password] Input a user ID. Input a password. Back Back For details on character entry method, see How to Input For details on character entry method, see How to Input Characters on page Characters on page 11. The display goes back to the FTP Settings 13.
- Page 60 [Folder] [Backup/Restore] Input a folder name. Data Backup Data Restore Server Address Protocol 5 FTP Settings Back Back For details on character entry method, see How to Input 17. Enter an IP address of the destination FTP/ Characters on page TFTP server.
- Page 61 For details on character entry method, see How to Input [Backup/Restore] Characters on page Data Backup A maximum of 20 characters ("0-9", "A-Z", "a-z", "*", Data Restore "#", ".", "-" or "_") can be entered as a file name. Server Address Protocol To delete an entered character, press BK softkey.
-
Page 62: To Restore Personal Settings
3. Select Setting and then press (Enter), (Right-cursor) or OK softkey (or press CHECK POINTS ACTIONS key). Incorrect IP address of FTP/ Set the proper IP address TFTP server has been of FTP/TFTP server. entered from the telephone. The power to FTP/TFTP server or network equipment Turn on the power. - Page 63 8. Select FTP Settings and then press [Backup/Restore] (Enter), (Right-cursor) or OK softkey (or press key). Data Backup Data Restore [Backup/Restore] Server Address Protocol Data Backup Data Restore FTP Settings Server Address Protocol Back FTP Settings 6. Select a protocol used by the destination server. After making a selection, press (Enter) or Back...
- Page 64 [User ID] [Password] Input a password. Input a user ID. Back Back For details on character entry method, see How to Input For details on character entry method, see How to Input Characters on page Characters on page 11. The display goes back to the FTP Settings 13.
- Page 65 [Backup/Restore] [Folder] Input a folder name. Data Backup Data Restore Server Address Protocol FTP Settings Back Back 17. Enter an IP address of the FTP/TFTP server For details on character entry method, see How to Input Characters on page which stores the backup file.
-
Page 66: Data Backup
A maximum of 20 characters ("0-9", "A-Z", "a-z", "*", [Backup/Restore] "#", ".", "-" or "_") can be entered as a file name. Data Backup To delete an entered character, press BK softkey. Data Restore Server Address Protocol 20. Press (Enter) or Exec softkey to start FTP Settings restoring the backup data to the telephone. - Page 67 CHECK POINTS ACTIONS Download file is not placed Place the download file in the in the specified directory. specified directory. A different file name is Set the same file name from specified between DT750 both DT750 and FTP/TFTP and FTP/TFTP server. server.
- Page 68 This page is for your notes.
-
Page 69: Basic Operation
Basic Operation This chapter describes the following basic operation of DT750. • To Login • To Make an External Call • To Make an Internal Call • To Answer an External Call • To Answer an Internal Call • Multiline Appearance •... -
Page 70: To Login
To Login To Make an External Call 1. When login mode is activated, the telephone 1. Lift handset or press key, receive dial Speaker prompts for Login ID and Password. tone. 2. Dial the Central Office access code, e.g., 9. Time/Feature Activity Information Area of LCD Dialed Code... -
Page 71: To Make An Internal Call
To Make an Internal Call To Answer an External Call 1. Lift handset or press key, receive dial 1. You hear the ringing tone, and Answer key and Speaker tone. Call Indicator Lamp flash red. 2. Dial a desired station number. Display indicates Line 001 the dialed number. -
Page 72: To Answer An Internal Call
Multiline Appearance Elapsed Trunk Trunk Type Number This feature allows users to accommodate the Time lines (other telephone’s station number) other than 15:39 1:25 PM TUE 18 MAR 2008 My Line on the Programmable Line/Feature Keys. When accommodating other telephone’s station number on the Programmable Line/Feature Key, To Answer an Internal Call the user can answer the call routed to the other... -
Page 73: To Hold A Call
To Hold a Call To Transfer a Call 1. During a conversation, press key. Transfer 1. Press key to hold the call in progress. HOLD Receive Special Dial Tone. The first party is placed on hold and hears the music on hold. Held Station Number Held Station Number 5:40PM... -
Page 74: One-Touch Speed Dialing Keys
One-Touch Speed Dialing Keys Speed Dialing - Station/Group To Make a Call To Set 1. Touch the desired One-Touch Speed Dial key 1. Press key. Receive Dial Tone. Speaker Speaker on the display. key lamp lights red. 2. Dial the system or group storage Code. 0821111 SET ABB key lamp lights red. -
Page 75: To Make A Call
Last Number Redial To Make a Call 1. Press (Redial) key. 1. Press (Redial) key. The last number dialed is displayed. 2. Press the desired speed calling number. REDIAL [#] / SYS 1234567890 XXXXXX Store 2. Press Volume (Up) or (Down) key 3. -
Page 76: Three-Party Conference
Three-Party Conference 6. Three-Party conference is now established. Voice Mail System 1. While Stations A and Station B are engaged in a Two-party connection, Station A presses Conf To Access softkey. 1. Press (Enter) key. The Shortcut menu screen is displayed on LCD. TALKING TO STA 12345 CONF... -
Page 77: Character Code List
Character Code List <Character Code For English (1/2)> DIGIT CASE 10th 11th 12th 13th SHIFT [SP]... - Page 78 <Character Code For English (2/2)> 10th 11st 12st 13st 14st 15st 16st 17st 18st 19st 20st & 21st 22st 23st 24st 25st 26st 27st 28st 29st 30st < > Used as a case shift key. Shifts the characters between uppercase, lowercase and numeric.
- Page 79 <Character Code For Russian> DIGIT CASE 10th 11th 12th 13th 14th 15th SHIFT & ¿ ¡ Б В Г а б в г Д Е Ё Ж З д е ё ж з И Й К Л и й к л...
- Page 80 <Character Code For Turkish> DIGIT CASE 10th 11th 12th 13th 14th 15th SHIFT & ¿ ¡ Ç ç Ğ İ ğ Ö ö Ş Ş Ü ü [SP]...
- Page 81 <Character Code For Other Languages> DIGIT CASE 10th 11th 12th 13th 14th 15th SHIFT & ¿ ¡ À Á Â Ã Ä Å Æ Ç à á â ã ä å æ ç È É Ê Ë è é ê ë...
- Page 82 <Number Code> DIGIT CASE 10th 11th 12th 13th 14th 15th SHIFT ¥ & Used as a case shift key. Shifts the characters between uppercase, lowercase and numeric. When entering password , “0-9”, “*” and “#” are available. “#” is entered by pressing key.
- Page 83 <Number Code> DIGIT CASE 10th 11th 12th 13th 14th 15th SHIFT ‘ & Used as a case shift key. Shifts characters between uppercase, lowercase and numeric.
-
Page 84: Character Entry Method
Character Entry Method 3. Enter “en” by using digit keys. Press key twice to enter “e”. As an example of character entry method, the Press key twice to enter “n“. following shows how to enter “Ken Kobus”. • Press the to switch the text input mode from [User ID] uppercase to lowercase or numeric. -
Page 85: To Delete A Character
[User ID] [User ID] Input a user ID. Input a user ID. Kobus Back Back 7. Press the to switch the text input mode from 9. Press (Enter) or OK softkey to store the uppercase to lowercase. data. To Delete a Character [User ID] Use the (Left-cursor) or... -
Page 86: Security Mode
Security Mode 2. Press (Enter) or OK softkey to place DT750 in Security mode. DT750 has the Security key which prevents 3. When the telephone is placed in Security mode, information leakage from terminal. While the Security Lamp lights red and the screen saver telephone is locked, Security Lamp lights up. - Page 87 Password Error. Retry? Cancel...
- Page 88 This page is for your notes.
-
Page 89: Directory Operation
Directory Operation This chapter explains about Personal Directory function of DT750. By using Personal Directory function, the user can make a call with simple operation. Setting History Directory Personal Directory function can register up to 500 entries. The user can add/view/edit/delete these 7:25 MON 26 MAR 2012 entries. -
Page 90: To Change Group Name
To Change Group Name 6. After entering the name or telephone, press the key. HOLD 1. Open the Directory screen (see To Add New 7. The following list appears. Select a desired Data on page 81). group by entering a number. 2. -
Page 91: To Find A Registered Data
To Find a Registered Data 4. Select Menu, then a search method from the following list. 1. While indicating the current time on LCD, press [SEARCH MENU] key to open the Menu screen. Menu 2. Select Directory and then press (Enter) or NAME OK softkey (or press... -
Page 92: To Make A Call From Directory
To Make a Call from Directory TLBK1: SEARCH MEMORY While Directory screen is being displayed, you cannot > make a call by dialing a telephone number. [0-449] MENU 1. While indicating the current time on LCD, press 6. Press Volume (Down) to search the key to open the Menu screen. -
Page 93: To Add Prefix Number
To Add Prefix Number TLBK1: SEARCH NAME To Set Prefix < When making a call, a prefix can be added to MENU telephone numbers to be dialed. Prefixes need to be 4. Select a search method (e.g., NAME, GRP, set in advance. - Page 94 [Talk] [Setting] User Setting RTP Alarm DTMF Tone Download Data Backup/Restore Key Touch Tone Hold Music Prefix Back Back 6. Select Prefix 1 and then press (Enter), 4. Select Talk and then press (Enter), (Right-cursor) or press key. (Right-cursor) or press key.
-
Page 95: To Edit Directory Data
To Edit Directory Data [Prefix 1] If multiple telephone numbers are registered to a target Input a prefix number. party, a call is made to the first priority telephone number. 1. Display the Name List screen for a target party (see To Find a Registered Data on page 83). -
Page 96: To Delete All Data
To Delete All Data 4. After 4-digit password is entered, display asks if you want to delete all the directory data. To 1. While indicating the current time on LCD, press delete, press Yes. key to open the Menu screen. Menu 5. -
Page 97: To Delete A Specific Data
Phone 1: NEC 2142622000 3. Select : Search and then press (Enter) or press key. 7. Select 1: NEC. 1: REGIST 2: SEARCH 3: SETTING 4: DeleteAll 2142622000 Dial 8. Press the DEL softkey to delete the appropriate The display will show No TELBK Data if there are no directory data. - Page 98 9. After the appropriate directory data is deleted, the following display appears. Confirm delete by pressing Yes. TLBK1: DELETE DATA DELETE DATA? 10. The following message appears confirming deletion. DELETE COMPLETE!
-
Page 99: Call History Operation
Call History Operation This chapter explains about Call History feature of DT750. By using Call History, the user can make a call with simple operation. Setting History Directory Call History feature allows the telephone to register up to 50 records into its memory. If exceeding 50 records, a record will be deleted in 7:25 MON 26 MAR 2012 31313... -
Page 100: To Make A Call From History
To Make a Call from History To Delete All Data 1. While indicating the current time on LCD, press Menu Key to open the Menu screen. While the history data is displayed, the user cannot make a call by dialing a telephone number. 2. - Page 101 6. Select One to delete a single call or All to delete all call histories. 2142622000 Jane Doe 4-28 2:40...
- Page 102 This page is for your notes.
-
Page 103: Menu List
Menu List Menu List for DT750 MENU ITEM DESCRIPTION Menu Menu key while indicating the current time on LCD. Press To view call history data. Also, the user can add the history data to the History directory. To access directory feature. There are the following three types of directory Directory features: Personal Directory, Phonebook and Corporate Directory. - Page 104 Menu List For Setting MENU ITEM DESCRIPTION DEFAULT VALUE Setting 1 User Setting Make the user setting of DT750. 1 Incoming Call Settings for incoming call. Ring Volume Not used. 2 Off-hook Ring Enable/disable Off-hook ringing. Enable 3 Headset Ring Enable/disable the ringing of headset.
- Page 105 MENU ITEM DESCRIPTION DEFAULT VALUE 3 Screen Server Not used. 4 Back Light Set the brightness of the backlight. Level 2 5 Font Size Change the displayed character size on the LCD. Standard(16dot) 6 Language Select a language to be displayed on LCD. Automatic 7 Advanced Setting for the following additional data.
- Page 106 MENU ITEM DESCRIPTION DEFAULT VALUE 1 Download Files Download the files for Music on Hold, ringer tone and 1 Hold Music Download a file for Music on Hold. MOH.wav 2 Ring Tone Download files for ringer tones (Download 1 to 3). 1 Download 1 Download a file for ringer tone (Download 1).
-
Page 107: Online Monitoring
Online Monitoring Key Operation Chart In Online Monitoring, users can see the following information on the terminal LCD. Press Help key for two seconds. QoS information (RTP Packet Loss (per 5 sec.), Payload, CODEC) System information Lost Packet Ping ... -
Page 108: System Information
XXXX 1. Network Settings 1. Last Packet : G.XXXx 2. Codec 2. SIP Settings XXms 3. Payload 3. Audio&Visual Settings Prev Prev Down Exit Lost Packet Network Settings The number of RTP packet receiving loss in SIP Settings ... - Page 109 To See Network Settings Information To See SIP Settings Information Press 1 in System Information menu. Press 2 in System Information menu. Each Network Setting can be confirmed by Each SIP Setting can be confirmed by pressing pressing Up and Down key. Up and Down key.
- Page 110 To See Audio&Visual Settings Information To See Maintenance Settings Information Press 3 in System Information menu. Press 4 in System Information menu. Each Audio&Visual Setting can be confirmed by Download address can be confirmed. pressing Up and Down key. Download Address Confirmation Tone XXX.XXX.XXX.XXX Disable/Enable...
- Page 111 To See Terminal Information Ping Press 5 in System Information menu. To Send Ping Each terminal information can be confirmed by Press 3 in main screen, and move to Ping menu. pressing Up and Down key. Enter IP address of the server to send Ping, and press OK key.
-
Page 112: Detail Of System Information Menu
Detail of System Information Menu SYSTEM INFORMATION ITEMS SYSTEM MENU INFORMATION ITEMS User ID MENU Terminal URI Connecting Server DHCP Mode 1st SIP Server Note1 IP Address Note1 2nd SIP Server Note1 Default Gateway Note1 3rd SIP Server Note1 Subnet Mask Note1 4th SIP Server Note1... - Page 113 SYSTEM INFORMATION ITEMS MENU Download Address Maintenance Download Config Version Settings Auto Config File Name Hardware Version MAC Address Terminal Firmware Version Information Bottom option Side Option 1 Side Option 2 Note 1: “(DHCP)” is indicated on the display when the parameter is obtained from the DHCP server.
- Page 114 This page is for your notes.
-
Page 115: Web Programming
Web P rogramming Web Programming allows the user to configure the terminal settings of DT750 from the PC. The user use Internet browser (Internet Explorer, etc.) to access Web Programming. It is not necessary to install any special application software onto the PC. DT750 and Web Programming PC needs to be connected to the same network. -
Page 116: To Login
To LOGIN Follow the steps below to open the Web Programming: Internet browser Start up on the PC. Enter IP address of the target DT750 on the address toolbar and then press Enter key. The Web Programming Login screen appears. Enter a user name (type “USER”) and a password (Note 1), then ... - Page 117 The following Web Programming Home screen appears. ...
-
Page 118: To Logout
To LOGOUT Follow the steps below to exit from the Web Programming. Logout Click button at the lower left of the screen. The confirmation message appears. Click button to log out of Web Programming. Back The display changes as follows. Click button. - Page 119 After the Web Programming Login screen is displayed, close the Internet browser. Make sure to perform the logout operation after the data setting of the telephone. When 15 minutes have passed leaving the PC without operation after log in to Web Programming, the user is forcibly logged out from the Web Programming.
-
Page 120: How To Operate
How To Operate As an example of setting method on the Web Programming, the following explains how to change the ringer tone for external call. Web Programming includes the same menu configuration as "Setting" of DT750 terminal. For details on each menu item, see Setup with Menu Key Chapter 2 Terminal Setup. - Page 122 NEC Corporation of America 6535 N. State Highway 161 Irving, TX 75039-2402...