
Related Manuals for NEC DT930 Series


Summary of Contents for NEC DT930 Series
- Page 1 NDA-31958 Issue 2.0 SV 9100 ® DT930 (ITK-24CG) USER GUIDE NEC Enterprise Communication Technologies, Inc. December, 2019...
- Page 3 NEC Enterprise Communication Technologies, Inc. reserves the right to change the specifications, functions, or features at any time without notice. NEC Enterprise Communication Technologies, Inc. has prepared this document for use by its employees and customers. The information contained herein is the property of NEC Enterprise Communication Technologies, Inc.
-
Page 5: Table Of Contents
TABLE OF CONTENTS INTRODUCTION General ........................1 Face Layout ....................... 2 Technical Specifications ..................3 Keys And Parts ......................4 Installation Procedure ....................6 Attaching Handset ....................6 Connecting the Line Cord..................6 Attaching the Directory Card .................. 7 Attaching or Removing Faceplate and DESI Printer Sheet ........7 Removing Faceplate and DESI Printer Sheet............ - Page 6 TABLE OF CONTENTS OUTLINE – CLASSIC Phone Start Up and Menu Screen ................. 15 Starting Up The Phone (without a home URL registered) ........15 Starting Up The Phone (with a home URL registered) ......... 16 Menu Screen ......................17 Starting Up XML Application.................
- Page 7 TABLE OF CONTENTS Setup With Feature Key ..................29 Microphone On/Off ....................29 Setup with Menu Key ....................30 Enable/Disable Off-Hook Ringing................. 30 Set Ringing of Headset..................31 Set Ringer Tone ....................32 Set Illumination Pattern for Call Indication Lamp..........35 Enable/Disable RTP Alarm...................
- Page 8 TABLE OF CONTENTS Backup Personal Settings ..................71 Restore Personal Settings..................77 OUTLINE – PORTAL Telephone Startup ....................83 Favorite Screen ....................83 Information Area ....................83 Status Icon ......................84 Ext No./Ext Name ....................84 Clock and Calender ....................84 Local Soft Key Display..................
- Page 9 TABLE OF CONTENTS Adjusting Volume ....................89 To Adjust Handset Receiver Volume..............89 To Adjust Speaker Volume................... 89 To Adjust Ringer Tone..................89 Setup With Feature Key ..................89 Microphone On/Off ....................89 Setup with Menu Key ....................90 Enable/Disable Off-Hook Ringing................. 90 To Set Ringing of Headset ...................
- Page 10 TABLE OF CONTENTS To Set Usability ....................98 Reset Telephone Settings ..................98 To Download a File....................99 Backup or Restore the Settings Data of the Terminal ........102 To Backup the Settings Data of the Terminal............. 102 To Restore the Settings Data of the Terminal ............ 104 FEATURE OPERATION Login/Logout ......................
- Page 11 TABLE OF CONTENTS Transfer a Call ....................... 111 To Transfer a Call (With Announcement) ............111 Initiate Transfer (By Ex.200) ................111 Answer to a Transferred Call (By Ex.210)............111 To Transfer a Call (Without Announcement) ............111 Initiate Transfer (By Ex.200) ................111 Answer A Transferred Call (By Ex.210) ............
- Page 12 TABLE OF CONTENTS How to Input Characters ..................116 Character Entry Mode ..................116 Character Code List.................... 118 Character Entry Method ..................124 Security Mode ....................... 124 Phonebook ......................125 System Phonebook .................... 125 Available Characters in Local Phonebook ............125 FAVORITE SCREEN OPERATION Favorite Screen .....................
- Page 13 TABLE OF CONTENTS Make a Call from Directory .................. 139 To Set Prefix ......................139 Delete All Data ....................... 140 Delete Specific Directory Data ................140 CALL HISTORY OPERATION To View Call History ..................... 143 To Make a Call from Call History ................. 143 Store Call History data to Speed Dial ..............
- Page 14 TABLE OF CONTENTS Connection ....................... 161 Maximum User Program PC Connection ............162 LAN Setting ...................... 162 User Programming Setup ................... 162 To Upload an Image ................... 164...
-
Page 15: Introduction
NTRODUCTION General CHAPTER 6 CALL HISTORY OPERATION Explains operating procedures for Call History. This guide explains how to operate DT930 Series under the following headings. CHAPTER 1 INTRODUCTION Explains the configuration of this guide and contains the following information. ❍... -
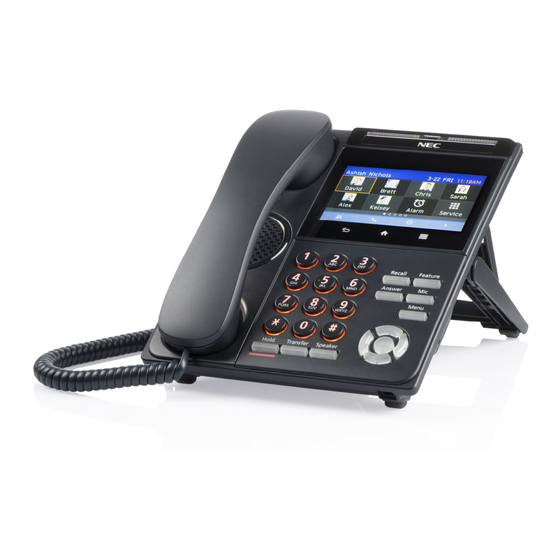
Page 16: Face Layout
Face Layout DT930 (ITK-24CG-1) -
Page 17: Technical Specifications
Technical Specifications Item ITK-24CG-1 Display LCD 4.3 inch Color (16777216 colors) TFT, with Backlight LCD Color Color (16.77milion color) Programmable Key 24 Keys Fixed Feature Key 13 (Hold, Transfer, Speaker, Recall, Feature, Answer, Mic, Menu, 4 Cursor key, Enter) Backlight LCD and digit key (lit for 10 seconds when operating) Soft Key 4 Keys... -
Page 18: Keys And Parts
Keys And Parts (1) Handset Used for sending/receiving voice. DT930 (2) Back Button Classic Mode: To exit the Menu or Help mode and go back to the time display. Portal Mode: Return to the previous screen. (3) Speaker Used when originating a handsfree call. (17) (4) Dial Keypad Dial the called party number or feature access... - Page 19 Details on Cursor Key When the desired number is displayed go off hook to activate dialing. (a-1) (c) Enter (Classic Mode Display) This accesses a shortcut menu for frequently-used features. Use this key to display the shortcut menu and determine the (a-2) selected item in the menu.
-
Page 20: Installation Procedure
Installation Procedure (11) Answer Key When LED on this key is lit, press this key to answer a waiting call. The images used in the section are for illustrative purposes. Some of the images might not be (12) Feature Key images of DT930 telephones. -
Page 21: Attaching The Directory Card
Attaching the Directory Card A directory card can be attached to DT930 multiline telephone. The directory card can be used to record often dialed numbers or other important information. (1) Insert the holder into the holder socket on the back of the multiline telephone. (2) A protective sheet is attached to the surface of the cover to prevent scratches. -
Page 22: Attaching Faceplate And Desi Printer Sheet
(1) Use the small notch at the lower right corner of the terminal to lift the faceplate up. (2) Remove the faceplate. (3) Remove the DESI Printer Sheet. BS(F)-K(WH/BK) KIT BS(S)-K(WH/BK) KIT Attaching Faceplate and DESI Printer Sheet (1) After replacing the DESI Printer Sheet on the terminal, attach the faceplate. -
Page 23: Removing/Installing The Numbered Keypad Panel
Removing/Installing the Numbered Keypad Panel. (1) Lift up on the keypad panel as shown in the diagram to remove it. Applying Power to the Telephone The DT900 series terminals support two different power sources: ❍ In-Line Power/PoE (Power over Ethernet) To prevent possible damage to the Numbered In-Line Power (sometimes called Power Over Keypad or the ITK multiline terminal during... -
Page 24: Adjusting Angle Of Tilt Legs
Adjusting Angle of Tilt Legs Connecting LAN Cable The height can be adjusted by moving the legs, which Confirm the location of AC adapter and the LAN are attached to the bottom of the telephone. connector at the back of the multiline telephone. Then connect the multiline telephone using the following steps. -
Page 25: Wall Mounting The Telephone
Wall Mounting the Telephone Mounting the Telephone to the Wall Receptacle (1) Plug line cord into the wall receptacle. Leave about You can wall mount a DT930 telephone. The WM-L eight inches of cord and bundle the rest as shown in UNIT is required when optional adapters are installed on the telephone. -
Page 26: Removing The Wall Mounted Telephone From The Wall Mounted Base Plate
Removing the Wall Mounted Telephone from the Align the two holes on the back of the multiline Wall Mounted Base Plate telephone with the two screws on the wall plate and slide downward as shown in the following diagram. (1) Push up on the telephone until it comes loose. (5) Push the spare line cord behind the telephone. -
Page 27: Wall Mounting The Base On The Wall Plate
Wall Mounting the Base on the Wall Plate (2) Hang the telephone on the base. (1) Locate the screw holes on the base and hang the cover over the screws on the wall plate as shown in the following diagram. Because of variation in wall plates, this method is not recommended. - Page 28 This page is for your notes.
-
Page 29: Phone Start Up And Menu Screen
UTLINE – LASSIC Phone Start Up and Menu Screen Desktop Screen (ITK-24CG-1) The screen that is displayed right after starting up the phone depends on whether you start up the phone by using an XML application without its home URL registered or with its home URL registered. -
Page 30: Starting Up The Phone (With A Home Url Registered)
❍ Press the menu to display the menu screen. The following XML application screen and the The screen displayed as the Portal Portal screen icon are samples. The actual icon is the Desktop screen. screen that is displayed on your phone may vary depending on the application used. -
Page 31: Menu Screen
❍ Press the menu button to display the Menu/Icon Description menu screen. To view Call History; the history The screen displayed as the Portal data stored in the server (system) (1) History: icon is the screen of the XML application that is memory (see Lowercase Character) - Page 32 Menu/Icon Description Menu/Icon Description When you select the Phone icon, a When the home URL is not registered, Phone screen icon is pop-up screen is displayed on an (5) Phone/ displayed. XML application screen. (For Portal details, see Pop-up Windows. (9) Phone icon: When the home URL is registered, a When XML application is registered...
-
Page 33: Starting Up Xml Application
Starting Up XML Application (2) XML Application will start up. DT930 has an XML browser function. You can display the information of XML application installed in an Ubiquitous Tourist external server onto the LCD of DT930 and use various services in collaboration with the XML application. The following explains how to start the XML application Hotel from DT930. -
Page 34: Status Icons
The following icons are displayed: Feature Icon Description Press Menu Key Press Enter Key This icon appears when there is a Missed Call missed call. Once you check the missed call, this icon will disappear. This icon provides notification of Voice Mail incoming Voice Mail. -
Page 35: How To Use Soft Keys
Display Samples ❍ Soft Keys provide a set of functions on the LCD CONNECTION that adapts to the changing state of the telephone. 3-18 TUE 3:49PM IDLE TALKING TO 3-18 TUE 3:49PM Conf STA 150 List VMsg CONSULTATION HOLD DIAL TONE/DIALING 3-18 TUE 3:49PM HOLD... -
Page 36: Multi-Window
(1) Press DND. (4) Select the Call Forward type. PGM/Save-Menu Call Forward Cfwd Both BUSY (2) Press Set to set DND or Cncl to cancel it. (5) Press Set to set Call Forward or Cncl to cancel. SET DND CF-ALL Cncl Cncl... - Page 37 ❍ Normally, only the Portal icon is displayed on the Desktop screen right after the phone is set up. ■ If the XM: application is not set, the most recently used XML application (i.e., Favorite, Phonebook, Terminal Settings) that the phone has by default is displayed.
-
Page 38: Switching Local Applications
❍ Switching Local Applications You can launch up to four XML applications including the Portal window. The service icons Local applications such as History, Directory, and of the running applications are displayed from Setting are displayed in one window. the left in order of their launch. Displays up to four XML application icons. -
Page 39: Launching The Fifth Application
❍ Select a desired local application from icons to launch the application or setting Menu. If you do not operate anything for 10 seconds after an error message is displayed, the trial of launching the new application is automatically canceled. If you select a local application by using a One-Touch key while launching other local application, new local application is not running. -
Page 40: Icon Display At Xml Application Update
❍ The icon for the application you quit disappears from the menu screen. The newly running application icon is added to the right. UPDATE icon NEW icon Newly Running Application Icon NEW and UPDATE icons flash every second. Icon Display at XML Application Update The service icons displayed on the menu screen are NEW/UPDATE icon and Application icon appear reduced screen images of actual XML application... -
Page 41: Launching A Pop-Up Window
If the previous page of the menu screen is the default home screen, the telephone icon of the menu screen will not be displayed. When using Help key on the POP-UP window, Help key operation setting is required. For details, see Usability. - Page 42 This page is for your notes.
-
Page 43: Setup With Up/Down Key
ERMINAL ETUP – LASSIC Adjust Ringer Tone This chapter describes operating procedures for terminal settings. Various terminal settings such as display, sounds, password and language are available. (Up) (Down) (1) Press during ringing. Setup With Up/Down Key 3-18 TUE 1:37PM Adjust Handset Receiver Volume RING (Up) -
Page 44: Setup With Menu Key
Setup with Menu Key Enable/Disable Off-Hook Ringing The procedure below shows how to enable/disable Off- hook ringing. (1) Display the Menu screen, select Setting. User Setting. (2) Select Select an item by one of the following operations. ❍ Highlight an item by using , and press or OK. -
Page 45: Set Ringing Of Headset
(5) To disable/enable the off-hook ringing, choose Disable or Enable. Select an item by one of the following operations. ❍ Highlight an item by using , and press or OK. ❍ Press , and press Incoming Call. (3) Select Select an item by one of the following operations. ❍... -
Page 46: Set Ringer Tone
Headset Ring. or OK. ❍ (4) Select Press , and press Select an item by one of the following operations. ❍ Highlight an item by using , and press or OK. ❍ Press Default setting is Disabled. Set Ringer Tone The procedure below shows how to change the ringer tone for internal call and external call. - Page 47 Ring Tone. ❍ Press (4) Select Select an item by one of the following operations. ❍ Highlight an item by using , and press or OK. ❍ Press Incoming Call. (3) Select Select an item by one of the following operations. ❍...
- Page 48 ❍ Press Frequency (Hz) Menu Item Remarks Automatic 16Hz modulation Tone Type 1 16Hz modulation Tone Type 2 8Hz modulation Tone Type 3 1400 1100 Door Phone Tone Type 4 1100 No modulation Tone Type 5 No modulation Tone Type 6 1100 1400 16Hz modulation...
-
Page 49: Set Illumination Pattern For Call Indication Lamp
Note: When selecting Automatic, the preview function will not operate. Also, when selecting Download 1/2/3, the ringer tone file must be downloaded in advance. If there is no downloaded file, you hear no tone. Note: Tone Type 1 to Tone Type 8: In the preview function, each ringer tone sounds continuously. - Page 50 Illumination. (4) Select Select an item by one of the following operations. ❍ Highlight an item by using , and press or OK. ❍ Press (6) Select a desired illumination pattern. You can preview the designated illumination pattern. Select an item by one of the following operations. ❍...
-
Page 51: Enable/Disable Rtp Alarm
Talk. Note: When selecting Automatic or not performing this (3) Select illumination setting, Red is automatically applied. Select an item by one of the following operations. You can set the illumination pattern for the telephone ❍ Highlight an item by using , and press here. -
Page 52: Enable/Disable Dtmf Tone
Automatic, Disable or Enable Enable/Disable DTMF Tone (5) Select (see the following table). The procedure below shows how to enable/disable DTMF Tone. Select an item by one of the following operations. (1) Display the Menu screen, select Setting. ❍ Highlight an item by using , and press User Setting. - Page 53 Select an item by one of the following operations. ❍ Highlight an item by using , and press or OK. ❍ Press , and press DTMF Tone. (4) Select Select an item by one of the following operations. ❍ Highlight an item by using , and press or OK.
-
Page 54: Set Key Touch Tone
Set Key Touch Tone The procedure below shows how to set the Key Touch Tone. Key Touch Tone is a tone generated when the digit keys are pressed while DT930 is off-hook. (1) Display the Menu screen, select Setting. User Setting. (2) Select Select an item by one of the following operations. -
Page 55: Set Music On Hold
Automatic, No Tone, Tone or (5) Select Voice. Select an item by one of the following operations. ❍ Highlight an item by using , and press or OK. ❍ Press , and press Talk. (3) Select Select an item by one of the following operations. ❍... -
Page 56: Set Clock Format
Hold Music. (4) Select Select an item by one of the following operations. ❍ Highlight an item by using , and press or OK. ❍ Press Note: You can preview the designated music on hold. When selecting Download, the music on hold file must be downloaded in advance. - Page 57 Calendar Format. (4) Select Select an item by one of the following operations. ❍ Highlight an item by using , and press or OK. ❍ Press Display. (3) Select Select an item by one of the following operations. ❍ Highlight an item by using , and press or OK.
-
Page 58: Enable/Disable Volume Level Display
Enable/Disable Volume Level Display Select an item by one of the following operations. ❍ Highlight an item by using , and press Determines whether or not to display the following or OK. volume levels: handset receiver volume, speaker volume, ringer tone volume and LCD contrast. ❍... - Page 59 (5) Make a selection from the following list. Select an item by one of the following operations. ❍ Highlight an item by using , and press or OK. ❍ Press , and press Local Volume. (4) Select Select an item by one of the following operations. ❍...
-
Page 60: Set Screen Saver
Set Screen Saver ❍ Press Screen Saver works after the telephone is idle for a certain period of time. The Screen Saver will be displayed from XML server when the XML server is available. If the Screen Saver cannot be downloaded from the XML server, the default Screen Saver will be displayed. -
Page 61: Set Brightness Of Backlight
Screen Saver Mode. (5) Choose Default setting is Enable. Select an item by one of the following operations. The enabled item is highlighted. ❍ Highlight an item by using , and press or OK. (7) The display returns to the Screen Saver screen. Enable is selected, on Step 7 Select When ❍... - Page 62 Back Light. (4) Select Select an item by one of the following operations. ❍ Highlight an item by using , and press or OK. ❍ Press Display. (3) Select Select an item by one of the following operations. ❍ Highlight an item by using , and press or OK.
-
Page 63: Change Character Size
Default setting is Level 3. The enabled item is highlighted. Change Character Size The following steps show how to change the displayed character size on the LCD. (1) Display the Menu screen, select Setting. User Setting. (2) Select Select an item by one of the following operations. ❍... -
Page 64: Set A Language
(5) Choose either Standard or Small. Select an item by one of the following operations. ❍ Highlight an item by using , and press or OK. ❍ Press , and press Display. (3) Select Select an item by one of the following operations. ❍... -
Page 65: Set Wallpaper
Language. (4) Select Select an item by one of the following operations. ❍ Highlight an item by using , and press or OK. ❍ Press Default setting is Automatic. When selecting Automatic, follow the setting on the System. For the setting on the System, contact to the System Administrator. - Page 66 Advanced. (4) Select Select an item by one of the following operations. ❍ Highlight an item by using , and press or OK. ❍ Press Display. (3) Select Select an item by one of the following operations. ❍ Highlight an item by using , and press or OK.
-
Page 67: Set Character Font Color
Default or Download. (6) Choose either Select an item by one of the following operations. ❍ Highlight an item by using , and press Select an item by one of the following operations. or OK. ❍ Highlight an item by using , and press ❍... - Page 68 Advanced. (4) Select (6) Select a desired color. Select an item by one of the following operations. Select an item by one of the following operations. ❍ ❍ Highlight an item by using , and press Highlight an item by using , and press or OK.
-
Page 69: Table Of Font Color
Table of Font Color The color of the character corresponds to an actual display color on the screen of the color selection. Default setting is Color 16. The enabled item is highlighted. -
Page 70: Set Turn Off Display
Set Turn Off Display The Turn off Display works after the telephone is idle for a certain period of time. The following shows how to set Turn off Display. (1) Display the Menu screen, select Setting. User Setting. (2) Select Select an item by one of the following operations. - Page 71 Turn Off Display. (5) Select Select an item by one of the following operations. ❍ Highlight an item by using , and press or OK. ❍ Press Disable, Enable or App priority. (7) Select Select an item by one of the following operations. ❍...
-
Page 72: Set Backlight Fade Control
If you select App priority, the screen saver is set to When App priority is selected for Turn Off Display Mode, if the external application does not give an external application. When the external application instructions to turn off the display, the setting of Wait orders the terminal display to turn off while the screen Time will be invalid. - Page 73 ❍ Press Advanced. (4) Select Disable or Enable. (6) Choose either Select an item by one of the following operations. Select an item by one of the following operations. ❍ Highlight an item by using , and press ❍ or OK. Highlight an item by using , and press ❍...
-
Page 74: Change Password
Change Password ❍ Press To change an existing password, follow the procedure below. This password is used for the following occasions. ❍ To lock/unlock the telephone. ❍ To delete the directory data. ❍ To reset the telephone settings. (1) Display the Menu screen, select Setting. User Setting. - Page 75 (5) Enter the new password. (7) When the password entry completes successfully, the display changes as follows. After entering the new password, press or OK. ❍ Press Set. When the password entry ends in failure, the (6) Enter the new password again. following error message is issued.
-
Page 76: Set Usability
Set Usability The procedure below shows how to set the operation of Home key while pop-up window is displayed. (1) Display the Menu screen, select Setting. User Setting. (2) Select Select an item by one of the following operations. ❍ Highlight an item by using , and press or OK. -
Page 77: Reset Telephone Settings
(5) Choose the desired Help key mode. ❍ Press Note: Select an item by one of the following operations. ❍ Highlight an item by using , and press or OK. ❍ Press , and press Setting Reset. (3) Select Select an item by one of the following operations. ❍... -
Page 78: Download A File
(4) Enter the password. or OK. After entering the password, press Download a File You can download files for Music on Hold, Ringer Tone, (5) When the password entry completes and Wallpaper. successfully, the display changes as follows. When downloading these files, the DT930 needs to be connected to the network that has FTP/TFTP/HTTPS or OK to clear the personal data off the Press... - Page 79 ❍ Put the downloading file into a desired directory Press of the HTTPS server and specify the directory for downloading. Note: Refer to the DT Resource Manual for HTTPS server. (2) Display the Menu screen, select Setting. Download. (3) Select Select an item by one of the following operations.
- Page 80 (6) The display returns to the Download Menu screen. FTP is selected here, continue with STEP 7. TFTP is selected here, proceed to STEP HTTPS is selected here, proceed to STEP Account Settings. (7) Select Select an item by one of the following operations. ❍...
- Page 81 (10) The display returns to the Account Settings Password. For details on character entry method, see How to screen. Select Input Characters. (12) The display returns to the Account Settings Select an item by one of the following operations. Folder. screen.
- Page 82 Download Address. (13) Enter the directory where the download file is (15) Select stored. Select an item by one of the following operations. or OK After entering the directory, press ❍ Highlight an item by using , and press or OK. ❍...
- Page 83 (17) The display returns to the Download Menu Ring Tone is selected at (19) When STEP 18, the Download Files. following Ring Tone screen is displayed. Select screen. Select Music Ring 1, Music Ring 2 or either Select an item by one of the following operations. Music Ring 3.
- Page 84 (20) The default file name will be displayed. When downloading a file for Wallpaper, the When downloading a file for Music on Hold, the default file name is WallPaper.bmp. default file name is MOH.wav. File Format Maximum Size File Format Maximum Size bmp/jpg/gif/png 480 X 272 Pixels...
-
Page 85: Backup Personal Settings
or Exec to start the downloading (24) The display returns to the Download Files (22) Press screen upon Exit. process. Note: When the downloading process ends in failure, While downloading a file, the LCD displays Downloading Failed! is displayed on the LCD. Check the following and retry. - Page 86 Specify a desired destination directory for the backed up file. (2) Display the Menu screen, select Setting. Data Backup/Restore. (3) Select Select an item by one of the following operations. ❍ Highlight an item by using , and press or OK. ❍...
- Page 87 (6) The display returns to the Backup/Restore screen. FTP is selected, continue to with STEP TFTP is selected, proceed to STEP HTTPS is selected, proceed to STEP Account Settings. (7) Select Select an item by one of the following operations. ❍...
- Page 88 The display returns to the Account Settings (11) The display returns to the Account Settings Password. Folder. screen. Select screen. Select Select an item by one of the following operations. Select an item by one of the following operations. ❍ Highlight an item by using , and press ❍...
- Page 89 (13) The display returns to the Account Settings (15) Enter an IP Address of the destination FTP/ or Back to display the screen. Press TFTP/HTTPS server. Backup/Restore screen. For example, to set the IP address of 10.41.208.205, enter 10*41*208*205 [separate with an asterisk (*)].
- Page 90 (16) The display returns to the Backup/Restore Note: A maximum of 20 characters (“0-9”, “A-Z”, Data Backup. “a-z”, “*”, “#”, “.”, “-” or “_”) can be entered as a screen. Select file name. Select an item by one of the following operations. When changing the default file name, press BK once to delete the default file name and enter a new file ❍...
-
Page 91: Restore Personal Settings
(20) The display returns to the Backup/Restore <HTTPS server> screen upon Exit. Put the backup file you want to restore into a desired directory of HTTPS server and specify it Note: When the data backup ends in failure, Upload as the directory for downloading. Failed! is displayed on the LCD. - Page 92 Protocol. (6) The display returns to the Backup/Restore (4) Select screen. Select an item by one of the following operations. FTP is selected, continue with ❍ STEP Highlight an item by using , and press or OK. TFTP is selected, proceed to ❍...
- Page 93 (10) The display returns to the Account Settings Password. screen. Select Select an item by one of the following operations. ❍ Highlight an item by using , and press or OK. ❍ Press (9) Enter a User ID. Enter a User ID by using digit keys, then press (11) Enter a password.
- Page 94 For details on character entry method, see How to Input Characters. (12) The display returns to the Account Settings Folder. screen. Select Select an item by one of the following operations. ❍ Highlight an item by using , and press or OK.
- Page 95 Server Address. ❍ (15) Select After entering an IP address, press Select an item by one of the following operations. (17) The display returns to the Backup/Restore ❍ Highlight an item by using , and press Data Restore. screen. Select or OK.
- Page 96 (18) The default name is displayed as follows: (20) After the download process completes, the display changes to the following: Note: Do not change the extension (.tgz) of the backup file. If the extension is changed, the file cannot be restored properly. Note: A maximum of 20 characters (“0-9”, “A-Z”, “a-z”, “*”, “#”, “.”, “-”...
-
Page 97: Outline - Portal
UTLINE – ORTAL This chapter explains the outline of a telephone in the Portal Mode. Telephone Startup The telephone displays the screen that is set as the home screen. The home screen can be set to either the Favorite screen/Call screen/Line screen. In addition, when the home URL has been set, the telephone displays the screen obtained from the URL. -
Page 98: Status Icon
Status Icon Ext No./Ext Name Ext no. is the extension number assigned to the When there is a new voice mail message or a missed call, an icon is shown in the icon information area. terminal. If the Phonebook is downloaded, Ext name is displayed from the Phonebook. -
Page 99: Local Soft Key Display
Call Screen Local Soft Key Display The following local soft keys are displayed: This screen is displayed by pressing local soft key 3 (Call screen). When pressing a digit key, a function key, or incoming call arrival, this screen is displayed. You can make a call, talk and use system services from this screen. -
Page 100: Local Soft Key Area
Local Soft Key Area If the system screen is displayed in a way that is subject to automatic termination, placing the handset on-hook The soft keys provided by the terminal are displayed in or abandoning the call will return you to the screen this area. -
Page 101: Register A Home Url
(6) Select a desired screen. The default setting is Automatic. Automatic is selected, this feature is activated using the system data setting. Register a Home URL The screen display is not only set by the Home screen settings, but the phone can also be set to access the XML application right after start up by registering the address information of the application as a Home URL. - Page 102 This page is for your notes.
-
Page 103: Terminal Setup - Portal
ERMINAL ETUP – ORTAL Terminal Setup To Adjust Handset Receiver Volume The volume level of the handset receiver can be adjusted during a call in progress using handset. While you set up the terminal, the “soft key” means local soft key. Press the Up /Down key in the Offhook status or during a call when using the handset. -
Page 104: Setup With Menu Key
Setup with Menu Key Default setting is Enabled. Enable/Disable Off-Hook Ringing The enabled item is highlighted. The procedure below shows how to enable/disable Off- To Set Ringing of Headset hook ringing. (1) Display the Menu screen, select Settings. The procedure below shows how to enable/disable the ringing of headset. -
Page 105: Set Ringer Tone
External Call when setting the ringer (5) Select Music Ring 1, 2 and 3 have been installed at Internal Call tone for external calls. Select the factory with firmware 2.1.0.0 or later. when setting the ringer tone for internal calls. When using a ring tone music source other than Music Ring 1, 2 or 3, you must download Select an item by one of the following operations. -
Page 106: To Set Illumination Pattern For Call Indicator Lamp
To Set Illumination Pattern for Call Indicator Frequency (Hz) Menu Item Remarks Lamp The procedure below shows how to set the illumination 13 Tone Type 13 – Melody 4 pattern (color of Call Indicator Lamp). 14 Tone Type 14 – Melody 5 (1) Display the Menu screen, select Settings. -
Page 107: To Enable/Disable Dtmf Tone
To Set Key Touch Tone The following explains how to set the Key Touch Tone. If the Automatic is selected, this feature is Key Touch Tone is a tone generated when the digit activated using the system data settings. If not keys are pressed while the terminal is off-hook. -
Page 108: To Set Time Format
User Settings. (2) Select Display. (3) Select For the procedure to download a ringer tone Local Volume. (4) Select file, refer to “To Download a File”. (5) Make a selection from the following list. To Set Time Format Menu Items Description Determines whether the time is displayed using a 0 Automatic... -
Page 109: To Set Brightness Of Lcd Backlight
(8) Input Wait Time (1-999 min) and press OK. (5) Select a desired language. Select an item by one of the following operations. This terminal has a screen saver enabled by default. If you disable the screen saver and the ❍... -
Page 110: To Enable/Disable Lcd Backlight Fade Control
Backlight Fade Control. (7) Select whether to launch Turn Off Display. (5) Select When GUI mode is classic, enter number When App priority is selected, the Screen Saver is set to an external application. When the external application orders the LCD to turn Disable or Enable. -
Page 111: Portal Mode
Example of display when theme is Black. If selected, Automatic follows system settings. For details, contact the system administrator. Portal Mode The following explains how to set the Portal Mode. (1) Display the Menu screen, select Settings. User Settings. (2) Select Display. -
Page 112: To Set Usability
(5) Enter the new password. Item Description Set the Home key which displays A maximum of 32 digits can be set as a Option Menu password. option menu. Set the Home key that displays Pop-up Window (6) Enter the new password again. pop-up window. -
Page 113: To Download A File
<TFTP server> Put the downloading file into a desired directory of When the password entry ends in failure, the following error message is issued. In that case, press TFTP server and specify it as the directory for OK and make a retry. downloading. - Page 114 FTP is selected here, continue with STEP For details on character entry method, see How to TFTP is selected here, proceed to STEP Input Characters. HTTPS is selected here, proceed to (12) The display returns to the Account Settings STEP Folder.
- Page 115 Select an item by one of the following operations. File Format Maximum Size ❍ Highlight an item by using , and press -law 8kHz/s wav. µ under 32 seconds or OK. ❍ Press When downloading a file for Wallpaper, the (18) Select file to be downloaded.
-
Page 116: Backup Or Restore The Settings Data Of The Terminal
Backup or Restore the Settings Data (23) When the downloading process completes, the following is displayed. of the Terminal This section explains how to make a backup of the settings data which has been entered in the terminal to FTP/TFTP/HTTPS server. The data in the FTP/TFTP/ HTTPS server can also be restored to the terminal. - Page 117 (9) Enter a Used ID using digit keys. The IP Address input screen can be switched to URI input screen by the Soft key (IP/URI) For details on character entry method, see ■ Press Soft key (IP/URI). How to Input Characters.
-
Page 118: To Restore The Settings Data Of The Terminal
(19) Press Soft key (Exec). (21) After the data backup completes, the display changes to the following: The backup is started. (20) Press Soft key (Exec). The display returns to the (Backup/Restore screen). When the backup process fails, “Upload Failed”, is displayed on the LCD. - Page 119 (8) Enter a User ID with digit keys. For details on character entry method, see For details on character entry method, see How to Input Characters. How to Input Characters. The IP Address input screen can be switched to Password. (9) Select URI input screen by the Soft key (IP/URI) (10) Enter a Password with digit keys...
- Page 120 Do not change the extension of the backup file. The setting data of the terminal can only be If the download continues to fail, it may be a backed up as a (.tgz)/(.tgz.ef) file. failure in the terminal. Contact the system (18) Press Soft key (Exec).
-
Page 121: Login/Logout
EATURE PERATION (3) Enter a password. This chapter describes how to login/logout, how to input characters and how to make a call/hold, etc. For initial setting, enter the extension number Login/Logout as password. To Login Four to 10 characters can be entered for When login mode is activated, the terminal prompts for password displayed in “*”. - Page 122 ↓ (4) Press system softkey LOGOFF. (1) Press system softkey (2) Press system softkey Prog. (5) Press system softkey Yes. ↓ The terminal goes off. (3) Press system softkey three times.
-
Page 123: Making A Call
Making a Call The Call Indicator Lamp goes off. The Speaker key lamp lights red. This section explains Preset Dialing. Before making a The Line key lamp lights green. call, the terminal user can verify the dialed number (3) Lift the handset to answer the call. displayed on the LCD. -
Page 124: To Hold
Holding a Call (Using Exclusive Call To Hold Hold) (1) With a call in progress: The Line key that is used during a call lights This feature allows a terminal user to place a call on green. Hold and to exclude all other station users from The Line key on the other terminals lights red. -
Page 125: If Unanswered
If Unanswered Answer to a Transferred Call (By Ex.210) (1) A ringing is heard. After a predetermined time, Automatic Recall is initiated and the user hears the Automatic The Call Indicator lamp flashes. Recall ringer tone. Default time is one minute. The Line key lamp flashes red. -
Page 126: Answer A Transferred Call (By Ex.210)
(4) Replace the handset. Following explains how to register a phone number to a One-touch Speed Calling key. Line key lamp goes off (1) Press the Feature key. The call is transferred. The Feature key lights red. Answer A Transferred Call (By Ex.210) (2) Press the One-touch Speed Calling key. -
Page 127: To Make A Call
(2) Press the desired One-touch Speed Calling (3) Dial the desired speed dial bin. In this example, key. “001” is dialed as the desired speed dial bin. The Feature key lamp flashes red. SYS 0001 The Speaker key lamp lights red. The registered number is displayed on the LCD. -
Page 128: Redial
(4) Press One softkey. (2) Press Soft key ( ) or Soft key ( ) to find the desired number and press the “#” key. Redial The number on the LCD is automatically redialed. XXXXX2 (3) When the party answers, lift the handset. Cancel The Speaker key lamp goes off. -
Page 129: Three-Party Conference
(4) Station A presses the Begin softkey. while station is ringing. (5) Three-Party call is now established. 3-18 TUE 8:30AM CALLING STA 101 Voice Mail System Voice VMsg (3) Press VOICE. Speak to called party. Originate ❍ Press the VMsg softkey. Three-Party Conference (1) While Station A and Station B are engaged in a DND (Do Not Disturb) -
Page 130: To Cancel
To Cancel (1) Press the Speaker key. The Call Indicator lamp goes off. The Speaker key lamp lights red. The Line key lamp lights green. (2) Press Soft key (>>>>) when Soft key is used. (3) Press Soft key (DND) or DND feature key. (4) Press the Speaker key. - Page 131 Lowercase Alphabetical Character Mode Uppercase Alphabetical Character Mode Indicates enabled character mode Press the key or local soft key 3 Aa1. Press the key or local soft key 3 Aa1. Numeric Character Mode Press the key or local soft key 3 Aa1.
-
Page 132: Character Code List
Character Code List Character Code for English (1/2) - Page 133 Character Code for English (2/2)
- Page 134 Character Code for Russian...
- Page 135 Character Code for Turkish...
- Page 136 Character Code for European Languages Other Than English...
- Page 137 Number Code...
-
Page 138: Character Entry Method
Character Entry Method Note: When the System Administrator invalidates the security mode, this function cannot be used. For details of the The following example of character entry shows how to security mode, contact the System Administrator. enter “Ken Kobus”. Note: After a third attempt (if uncorrected password is (1) Press twice to enter “K”. -
Page 139: Phonebook
After a third attempt (if incorrect password is entered three times consecutively), the following error or OK. The telephone message is issued. Press locks up, and any key operation will be disabled for 10 minutes. Wait for 10 minutes, make a retry. Please note emergency calls cannot be completed during the 10 minutes terminal lock out period. - Page 140 Uppercase Character...
- Page 141 Lowercase Character...
-
Page 142: Favorite Screen Operation
AVORITE CREEN PERATION Favorite Screen On the favorite screen, short cut icons that you registered are displayed. Calls can be easily made by using registered numbers which are frequently used. Also, it is possible to access the service URL quickly. The following four types of shortcuts are available. -
Page 143: How To Select A Shortcut
How to Select a Shortcut ❍ Redial: Use the cursor keys to move the orange focus to the desired shortcut and press the Enter key. ❍ Unregistered Shortcut: An orange frame indicates the location of the focus. It can be moved left, right, up or down using the cursor. Shortcut Name The following names are displayed with every type of shortcut. -
Page 144: To Register A Shortcut
To Register a Shortcut Dial. (2) Select The following explains how to register a shortcut. For example, when registering a telephone number that is used frequently. (1) Select an Unregistered Shortcut. Select the Unregistered Shortcut to register the number. (3) Input the desired number. From one to a maximum of 16 characters can be registered. -
Page 145: To Use The Shortcut
(4) Input the desired shortcut name. (6) The registered shortcut is added. (5) Select desired shortcut icon. After a moment, the input character and selected icon is displayed. To Use the Shortcut The following explains how to use a shortcut when calling the contact person registered in the SV9100 Internal Extension List. - Page 146 (1) Select the registered shortcut. Verify the focus is pointed to the number to be dialed. If the focus does not point to the number, the call cannot be made. To add and send a prefix: Use the cursor keys to move the orange focus to desired shortcut and press the Enter key.
-
Page 147: To Edit The Shortcut
(3) The calling screen is displayed. If using the dial shortcut: If the feature code is registered as a shortcut, press the Speaker key or pick up the handset to make a call from the shortcut. The Enter key or Speaker key is not available. To Edit the Shortcut You can edit the registered shortcut information. -
Page 148: To Delete Shortcut
(4) Edit the data. Edit the registered information, and press Enter Use the cursor keys to move the orange focus or the local soft key 4. to the desired shortcut and press the Enter key. (5) The information is refreshed. If editing is completed, the following screen is (2) Open the option menu. -
Page 149: From User Settings
After a moment the favorite screen is displayed. From User Settings Use the cursor keys to move the orange focus to the desired shortcut and press the Enter (1) From the Menu screen select Settings. key. To delete all shortcuts: Select option with Soft key 3. -
Page 150: To Change Shortcut Display
(3) Select 1 (User Settings). (4) Select 3 (Display). (5) Select 7 (Portal Mode Setting). (6) Select 5 (Shortcut Photo & Name). (7) Select a desired display method. The default setting is 2, Photo & Name. (5) To delete more shortcuts, press Soft key 3. Then displayed operation 3. -
Page 151: Add New Data
IRECTORY PERATION This chapter explains the DT930 Directory features. (5) After entering the name or telephone, press the key. HOLD Add New Data Note: The Feature key can be used to backspace and delete a character. (1) Press the key. (6) The following list appears. -
Page 152: Find Registered Data
Find Registered Data DESCRIPTION (1) Press the key. Search data from the name list registered in Name the directory. When the menu screen is displayed. Select Directory then press (Enter) or OK softkey Display the lists registered to each group Group (or press the 2 key) (01~20 groups). -
Page 153: Make A Call From Directory
Make a Call from Directory Note: While the Directory screen is being displayed, you cannot make a call by dialing a telephone number. 2142622000 (1) Press the key. Dial (4) Lift the Handset, press the Speaker key or MIC When the menu screen is displayed. Select key or press the Dial softkey while displaying the Directory then press (Enter) or OK softkey... -
Page 154: Delete All Data
(8) The display returns to the Prefix screen. Refer to (5) After the appropriate directory data is deleted, the (6) on page 139. If multiple prefixes need to be following is displayed. set, repeat and (7). In that case, select Prefix 2 and Prefix 3. - Page 155 (6) Select a specific group to be deleted (e.g., Group 01). 1: NEC 2142622000 (7) Select 1: NEC. 2142622000 Dial (8) Press the DEL softkey to delete the appropriate directory data. (9) After the appropriate directory data is deleted, the following display appears.
- Page 156 This page is for your notes.
-
Page 157: To View Call History
ISTORY PERATION This chapter explains Call History of DT930. By using Call History, you can make a call with simple operation. Call History allows the telephone to register up to 50 LIST MENU records into its memory. If the number of registered records exceeds 50, a record will be deleted in order of Redial occurrence. -
Page 158: Store Call History Data To Speed Dial
To Delete Call History Data (4) Detailed information of the last call is displayed. (1) Press the key. Redial - 01 2142622000 Store When the menu screen is displayed, select History, then press (Enter) or the OK (5) Lift the Handset or press the or MIC key key) or press the List Speaker... -
Page 159: Appendix A. Menu List
Menu List Appendix A. Menu List: DT930 (ITK-24CG-1) Menu Item Description Menu to display the Menu screen. Press History Select this option to view the Call History data. Also, you can add the history data to the directory. Select this option to access the directory feature. There are the following three types of directory Directory features: Personal Directory, Phonebook and Corporate Directory. - Page 160 Menu List for Setting - Classic Mode Menu Item Description Default Value Setting 1 User Setting Select this option to configure the user setting of DT930. – 1 Incoming Call Select this option to set up for incoming calls. – 1 Offhook Ring Select this option to specify whether to use the Off-hook ringing.
- Page 161 Menu Item Description Default Value Select this option to set the brightness of the backlight. 4 Back Light Level 2 1. Level 1 (Bright) ~ 4. Level 4 (Dark) 5 Font Size 1 Large Select this option to change the font size displayed on an LCD. Standard 2 Standard 6 Language...
- Page 162 Menu Item Description Default Value Select this option to set up for the operation of the Help key while Pop- 6 Usability – up window is displayed. Select this option to set up for Help Key Mode (1 SubMenu/2 Popup 1.
- Page 163 Menu Item Description Default Value 3 Data Backup/Restore Select this option to set the data required for a file backup/restore. – 1 Data Backup Select this option to specify the file name to be backed up. PersonalData.tgz 2 Data Restore Select this option to specify the file name to be restored.
- Page 164 Menu List for Setting - Portal Mode Menu Item Description Default Value Setting 1 User Setting Select this option to configure the user setting of DT930. – 1 Incoming Call Select this option to set up for incoming calls. – 1 Offhook Ring Select this option to specify whether to use the Off-hook ringing.
- Page 165 Menu Item Description Default Value Select this option to set the brightness of the backlight. 4 Back Light Level 2 1. Level 1 (Bright) ~ 4. Level 4 (Dark) 5 Language Select this option to select a language to be displayed on an LCD. Automatic 6 Advanced Select this option to set up for the following additional data.
- Page 166 Menu Item Description Default Value Select this option to set up for the operation of the Help key while Pop- 6 Usability – up window is displayed. Select this option to set up for Help Key Mode (1 SubMenu/2 Popup 1.
- Page 167 Menu Item Description Default Value 3 Data Backup/Restore Select this option to set the data required for a file backup/restore. – 1 Data Backup Select this option to specify the file name to be backed up. PersonalData.tgz 2 Data Restore Select this option to specify the file name to be restored.
- Page 168 This page is for your notes.
-
Page 169: Login
rogramming Appendix B. Login Web Programming allows you to configure the terminal settings of DT930 from the PC. An web Follow the steps below to open the Web browser (Internet Explorer, etc.) is used to access Programming. Web Programming. It is not necessary to install any special application software onto the PC. - Page 170 Note: Enter the same password used when logging into the Note: If the login screen does not appear, check the LAN DT930. “0000” is used as the default password connection status and entered IP address. If the problem persists, contact the System Administrator. Note: For IP address of the DT930, contact the System (4) The Web Programming Home screen appears.
-
Page 172: Logout
Logout (2) The confirmation message appears. Click button to log out of Web Programming. Follow the steps below to exit the Web Back (3) The display changes as follows. Click Programming. button. Logout (1) Click button at the lower left of the screen. - Page 173 Step 1: Click items to navigate through the menu. Click the Logout Button to exit from Web Programming. Step 2: Click the OK button to accept the selection. Step 3: Click the radio button to select a parameter (4) A confirmation dialog appears. Click button on the dialog.
- Page 174 This page is for your notes.
-
Page 175: Appendix C. To Upload An Image
To Upload an Image Appendix C. Image Upload Procedure Using the SV9100 User Programming function, you can upload an image related to the Shortcut Icon from your PC. PC Connection and Setting PC Requirements Indicate the conditions of the PC used for User Programming. OS: Microsoft Windows 8.1 / 10 (32bit and 64bit) Browser: •... -
Page 176: Maximum User Program Pc Connection
Maximum User Program PC Connection You can log in to User Programming on a maximum of 4 PCs at the same time. LAN Setting For details, contact your dealer on how to set up your PC for connecting Web/User Programming to the SV9100 system. - Page 177 (4) Press the Enter key, the following is displayed.
-
Page 178: To Upload An Image
To Upload an Image The following are specifications for uploading an image: • Physical phone Extension users are target for photo image except Virtual Extension. • A maximum of 896 images can be uploaded to the SV9100 system. • After uploading an image to the SV9100 system, the SV9100 system will automatically download the image to each DT900 terminal. - Page 179 (1) From the Home screen, click on Telephone Setting.
- Page 180 (2) In the Telephone Setting screen, click on the Details icon for the extension you want to upload an image to on the SV9100. In the example shown, 101 is the target extension.
- Page 181 (3) From the screen below, use the steps outlined to specify the image to be uploaded. 1. Specify the image file to be uploaded. 2. Click on the upload icon. 3. Preview the image. To delete the uploaded image, click the Delete icon. Note: When upload is successful, “Image upload is complete.”...
- Page 182 (4) To upload an image from another extension, click Cancel and repeat from step above.
- Page 183 (5) When image upload is complete, click Home to exit the Telephone Setting screen.
- Page 184 (6) From the Home screen, click the Logout icon to log out.
- Page 186 SV 9100 ® DT930 (ITK-24CG) User Guide NEC Enterprise Communication Technologies, Inc. December, 2019...