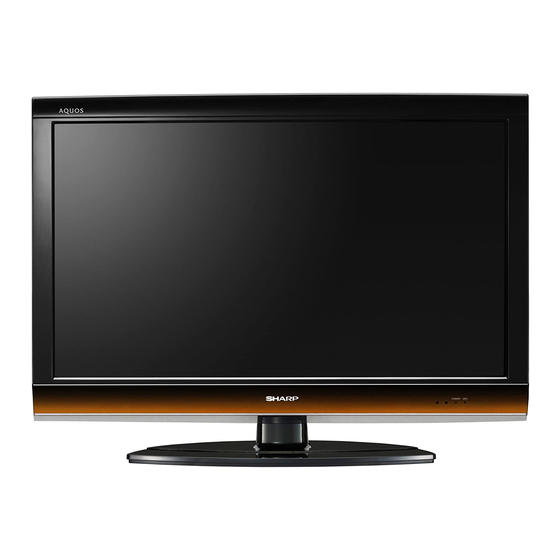
Sharp LC-40E67U Service Manual
Hide thumbs
Also See for LC-40E67U:
- Release note (2 pages) ,
- Operation manual (47 pages) ,
- Specifications (18 pages)
Table of Contents
Advertisement
TopPage
In the interests of user safety (required by safety regulations in some countries) the set should be restored to its
original condition and only parts identical to those specified should be used.
[1]
SPECIFICATIONS ................................. . ....... 1-1
[1]
OPERATION MANUAL .......................... . ....... 2-1
[1]
DIMENSIONS ........................................ . ....... 3-1
[1]
REMOVING OF MAJOR PARTS ........... . ....... 4-1
CHAPTER 5. ADJUSTMENT
[1]
ADJUSTMENT PROCEDURE ............... . ....... 5-1
[2]
PUBLIC MODE SETTING PROCEDURE . ..... 5-25
Parts marked with "
" are important for maintaining the safety of the set. Be sure to replace these parts with specified ones for maintaining the
safety and performance of the set.
SERVICE MANUAL
LCD COLOR TELEVISION
MODELS
CONTENTS
[1]
TROUBLESHOOTING TABLE ......................6-1
[1]
40E67U) ........................................................7-1
[2]
40E77U) ........................................................7-2
[3]
SYSTEM BLOCK DIAGRAM .........................7-3
[1]
KEY Unit ........................................................8-1
[2]
MAIN Unit ......................................................8-2
[3]
LED Unit ........................................................8-6
[1]
DESCRIPTION OF SCHEMATIC DIA-
[2]
SCHEMATIC DIAGRAM ................................9-2
LC-40E67U/LC-40E77U
No. S39X4LC40E67U
LC-40E67U
LC-40E77U
This document has been published to be used for
after sales service only.
The contents are subject to change without notice.
Advertisement
Table of Contents

Related Manuals for Sharp LC-40E67U


Summary of Contents for Sharp LC-40E67U
-
Page 1: Table Of Contents
TopPage LC-40E67U/LC-40E77U SERVICE MANUAL No. S39X4LC40E67U LCD COLOR TELEVISION LC-40E67U LC-40E77U MODELS In the interests of user safety (required by safety regulations in some countries) the set should be restored to its original condition and only parts identical to those specified should be used. -
Page 2: Safety Precaution Important Service Safety Pre- Caution
LC-40E67U/LC-40E77U LC40E67U Service Manual SAFETY PRECAUTION IMPORTANT SERVICE SAFETY PRECAUTION Service work should be performed only by qualified service technicians who are thoroughly familiar with all safety checks and the servicing guidelines which follow: WARNING • Use an AC voltmeter having with 5000 ohm per volt, or higher, sen- sitivity or measure the AC voltage drop across the resistor. -
Page 3: Precautions A Prendre Lors De La Reparation
LC-40E67U/LC-40E77U PRECAUTIONS A PRENDRE LORS DE LA REPARATION Ne peut effectuer la réparation qu' un technicien spécialisé qui s'est parfaitement accoutumé à toute vérification de sécurité et aux conseils suivants. AVERTISSEMENT • A l'aide de deux fils à pinces, brancher une résistance de 1.5 kΩ... -
Page 4: Precautions For Using Lead-Free Solder
LC-40E67U/LC-40E77U PRECAUTIONS FOR USING LEAD-FREE SOLDER Employing lead-free solder • “PWBs” of this model employs lead-free solder. The LF symbol indicates lead-free solder, and is attached on the PWBs and service manuals. The alphabetical character following LF shows the type of lead-free solder. -
Page 5: Chapter 1. Specifications
The dimensional drawings are shown on the inside back cover. • As part of policy of continuous improvement, SHARP reserves the right to make design and specification changes for product improvement without prior notice. The performance specification figures indicated are nominal values of production units. -
Page 6: Chapter 2. Operation Manual
LC-40E67U/LC-40E77U LC40E67U Service Manual CHAPTER 2. OPERATION MANUAL [1] OPERATION MANUAL TV (Front) Remote control sensor OPC sensor * OPC indicator POWER indicator * OPC: Optical Picture Control TV (Rear/Side) POWER button MENU AC INPUT button terminal INPUT button Channel... - Page 7 LC-40E67U/LC-40E77U TV POWER: Switch the TV power on or enter standby. Remote Control Unit DISPLAY: Display the channel information. SOURCE POWER: Turns the power of the external equipment on and off. External equipment operational buttons: Operate the external equipment. 0–9: Set the channel.
-
Page 8: Quick Reference
LC-40E67U/LC-40E77U QUICK REFERENCE Attaching the Stand • Before attaching (or detaching) the stand, unplug the AC cord from the AC INPUT terminal. • Before performing work spread cushioning over the base area to lay the TV on. This will prevent it from being damaged. -
Page 9: Removing The Stand
Setting the TV on the Wall CAUTION This TV should be mounted on the wall only with the wall mount bracket AN-52AG4 (SHARP). The use of other wall mount brackets may result in an unstable installation and may cause serious injuries. - Page 10 LC-40E67U/LC-40E77U Appendix Troubleshooting Problem Possible Solution • No power • Check if you pressed TV POWER on the remote control unit. If the indicator on the TV does not light up, press POWER on the TV. • Is the AC cord disconnected? •...
-
Page 11: Menu Items
LC-40E67U/LC-40E77U On-Screen Display Menu Menu Items For TV/INPUT 1/2/3 Mode For HDMI/PC-IN Mode Picture Menu Picture Menu Backlight Backlight Contrast Contrast Brightness Brightness Color Color Tint Tint Sharpness Sharpness Advanced Advanced C.M.S.-Hue C.M.S.-Hue C.M.S.-Saturation C.M.S.-Saturation C.M.S.-Value C.M.S.-Value Color Temp Color Temp... -
Page 12: Chapter 3. Dimensions Dimensions
LC-40E67U/LC-40E77U LC40E67U Service Manual CHAPTER 3. DIMENSIONS [1] DIMENSIONS Unit: inch (mm) (987) (116) (107) (887.8) (527) (325) (400) 3 – 1... -
Page 13: Chapter 4. Removing Of Major Parts
LC-40E67U/LC-40E77U LC40E67U Service Manual CHAPTER 4. REMOVING OF MAJOR PARTS [1] REMOVING OF MAJOR PARTS 1. Removing of Stand Unit and Rear Cabinet Ass’y. 1. Remove the 4 lock screws and detach the Stand Unit. 2. Detach the Bass Cone Cover 3. - Page 14 LC-40E67U/LC-40E77U 2. Removing of Button Cover,Speaker-L/R, Side AV Cover Ass’y, Main PWB Shield, Control Shield Ass’y. 1. Detach the Bottom Cover 2. Disconnect SP wire and detach the Speaker-L/R 3. Remove the 2 lock screws , 2 lock screws and detach the Side AV Cover Ass’y.
- Page 15 1. Disconnect the following connectors from MAIN Unit. (PD, LB1, LP, LW, KM, RA ,SP) 2. Disconnect the following connectors from POWER Unit. (PD, LB1, LW (LC-40E67U), PL (LC-40E77U)) 3. Disconnect the following connectors from LCD Control Unit. (LW, LP (LC-40E77U), PL (LC-40E77U))
- Page 16 LC-40E67U/LC-40E77U 4. Removing of and POWER Unit, MAIN Unit, KEY Unit Ass’y and R/C, LED Unit. 1. Remove the 4 lock screws and detach the POWER Unit, POWER PWB Holder. 2. Remove the 8 lock screws and detach the MAIN Unit.
- Page 17 LC-40E67U/LC-40E77U 5. Removing of Main PWB Angle, Panel Support Angle and LCD Panel Module Unit. 1. Remove the 2 lock screws and detach the 2 pieces Main PWB Angle. 2. Remove the 12 lock screws and detach the Support Angle.
- Page 18 LC-40E67U/LC-40E77U 6. Removing of LCD Panel Module, Lamp. 1. Remove the 12 lock screws , 4 lock screws , and detach the Bezel Ass’y , P Chassis Ass’y 2. Detach the DBEF , 2 pieces Lens Sheet and Diffusion Plate 3.
- Page 19 1. After replacement of any PWB unit and/or IC for repair, please note the following. • When replacing the following units, make sure to prepare the new units loaded with updated software. MAIN Unit: DUNTKF030FM10 (LC-40E67U)/DUNTKF030FM14 (LC-40E77U) • When replacing the LCD control PWB, perform the VCOM adjustment.
- Page 20 LC-40E67U/LC-40E77U 4. After the unit startup, the system upgrade screen as shown below appears within 10-40 seconds. LC-40E67U LC-40E77U 5. Even a single failure in the process will trigger the upgrade failure screen. LC-40E67U LC-40E77U Software Update Software Update Software Update...
- Page 21 LC-40E67U/LC-40E77U 2.3. Monitor microprocessor software version upgrade 1) Download “E8 Emulator” from Renesas Web site and install it. http://america.renesas.com/sensitivity.do? downloadId=C2003512 Product Name: E8 Emulator Software V.2.11 Release 01 for M16C, H8 Upgrade (Debugger package version) Oct.24.08 2) Connect E8 Emulator Debugger to PC from USB port. (Driver of “E8 Emulator Debugger” found in CD-ROM.) 3) Connect E8 writer to LCD’s 20PIN port.
- Page 22 LC-40E67U/LC-40E77U 6) In the next page input information as specified below and click “OK”. Select “Debugger only - R8C E8 SYSTEM” Specify workspace name; any name is OK. Select “M16C” (initial value) 7) Select entry as below and click “...
- Page 23 LC-40E67U/LC-40E77U 8) click means “COMPLETE”. 9) Click “OK”. 5 – 5...
- Page 24 LC-40E67U/LC-40E77U 10)Select entries as specified below and click “OK”. Select “R8C/2A Group” Select “R5F212A8” 11)Click “ (N)”. means “NEXT”. 5 – 6...
- Page 25 LC-40E67U/LC-40E77U 12)Click means “COMPLETE”. 13)In the screen below, click “Debug Settings”. 5 – 7...
- Page 26 LC-40E67U/LC-40E77U 14)Select “S-Record” and click “Add”. Select “S-Record” 15)Click “Browse” and specify the location of mot-file. 5 – 8...
- Page 27 LC-40E67U/LC-40E77U 5 – 9...
- Page 28 LC-40E67U/LC-40E77U 16) Confirm the file name of mot-file appears in the dialog entry and click “OK”. 17)From main menu, continuously click “Debug”, “Download Modules” and the mot-file location, then writing process starts. 5 – 10...
- Page 29 LC-40E67U/LC-40E77U 18)Confirm the dialog-box below appears. It means the writing process completed successfully Then shut down “High Performance Embedded Workshop”, unplug 20PIN connector, and E8 firmware updating finish. 5 – 11...
- Page 30 LC-40E67U/LC-40E77U 3. Entering and exiting the adjustment process mode 1) Before entering the adjustment process mode, the AV position RESET in the video adjustment menu. 2) While holding down the “VOL (–)” and “INPUT” keys at a time, plug in the AC cord of the main unit to turn on the power.
- Page 31 LC-40E67U/LC-40E77U 5. List of adjustment process mode menu Top hierarchical menu item Page Item Description Remarks (adjustment detail, etc.) MODEL INCH SIZE ERROR NO RESET Number of termination due to lamp error and Reset PUBLIC MODE Public mode V-CHIP CANADIAN VCHIP...
- Page 32 LC-40E67U/LC-40E77U SOUND Page Item Description Remarks (adjustment detail, etc.) SOUND4 Sub Sonic Filter Sub Sonic Filter Fc Virtual Surround Band LPF Fc Band HPF Fc AGC Switch AGC Mode AGC Gain Max AGC Gain Min AGC Threshold AGC Attack Time...
- Page 33 DVP-M2 2 N358 TV CONT N358 TV BRIGHT N358 TV COLOR N358 TV TINT N358 TV SHARP V1 OVER N358 TV SHARP V1 UNDER N358 TV SHARP V2 OVER N358 TV SHARP V2 UNDER N358 TV SHARP H1 OVER N358 TV SHARP H1 UNDER...
- Page 34 DVP-M2 3 N358 AV CONT N358 AV BRIGHT N358 AV COLOR N358 AV TINT N358 AV SHARP V1 OVER N358 AV SHARP V1 UNDER N358 AV SHARP V2 OVER N358 AV SHARP V2 UNDER N358 AV SHARP H1 OVER N358 AV SHARP H1 UNDER...
- Page 35 DVP-M2 9 DTV 525I CONT DTV 525I BRIGHT DTV 525I COLOR DTV 525I TINT DTV 525I SHARP V1 OVER DTV 525I SHARP V1 UNDER DTV 525I SHARP V2 OVER DTV 525I SHARP V2 UNDER DTV 525I SHARP H1 OVER DTV 525I SHARP H1 UNDER...
- Page 36 DVP-M2 11 DTV 1125I CONT DTV 1125I BRIGHT DTV 1125I COLOR DTV 1125I TINT DTV 1125I SHARP V1 OVER DTV 1125I SHARP V1 UNDER DTV 1125I SHARP V2 OVER DTV 1125I SHARP V2 UNDER DTV 1125I SHARP H1 OVER DTV 1125I SHARP H1 UNDER...
- Page 37 DVP-M2 15 HDMI 1125I CONT HDMI 1125I BRIGHT HDMI 1125I COLOR HDMI 1125I TINT HDMI 1125I SHARP V1 OVER HDMI 1125I SHARP V1 UNDER HDMI 1125I SHARP V2 OVER HDMI 1125I SHARP V2 UNDER HDMI 1125I SHARP H1 OVER HDMI 1125I SHARP H1 UNDER...
- Page 38 DVP-M2 20 HDMI PC (Dot) CONT HDMI PC (Dot) BRIGHT HDMI PC (Dot) COLOR HDMI PC (Dot) TINT HDMI PC (Dot) SHARP V1 OVER HDMI PC (Dot) SHARP V1 UNDER HDMI PC (Dot) SHARP V2 OVER HDMI PC (Dot) SHARP V2...
- Page 39 LC-40E67U/LC-40E77U DVP-M2 Page Item Description Remarks (adjustment detail, etc.) DVP-M2 24 SAT R SAT Y SAT G SAT C SAT B SAT M SAT R-Y SAT Y-G SAT G-C SAT C-B SAT B-M SAT M-R DVP-M2 25 BRI R BRI Y...
- Page 40 LC-40E67U/LC-40E77U 6. Video signal adjustment procedure 6.1. AD TRANSFORM LEVEL Adjustment 6.1.1 Input 1080i signal 1. Input 1080i color bar signal. Signal generation: LEADER LT448 Signal: color BAR. Setting: 02: 1080i/59.94 (30sf) H: 33.72 KHz V: 29.97Hz NOTE: Please use the third color Bar of LT448 generator.
-
Page 41: Adjustment Procedure
LC-40E67U/LC-40E77U 6.3. Tuner/V-Chip test Adjustment item Adjustment conditions Adjustment procedure Adjustment NTSC RF signal Feed the NTSC signal to RF ANTENNA input. US-7 (AIR) ch Auto adjustment Bring the cursor on [OTHERS]→[OTERRS2]→[.TUNER VCHIP TEST (*07ch)] performance and press [LEFT]. (*Select the channel according to the RF signal.) [.A-OK (***.**)/VM-OK] appears in blue when finished. - Page 42 LC-40E67U/LC-40E77U 8. Initialization of factory settings 8.1. Making factory settings Use the adjustment remote controller for the factory settings. 8.1.1 Hold on the remote controller’s FACTORY SETTING key. 8.1.2 Sever seconds later, “SETTING COMPLETE” COMPLETE” “TV VER *.**” appears at the center of the screen.
-
Page 43: Public Mode Setting Procedure
LC-40E67U/LC-40E77U [2] PUBLIC MODE SETTING PROCEDURE 1. How to start Public Mode • There are the following two ways to get the public mode setup screen displayed. In the adjustment process mode, turn on “PUBLIC MODE”. Also press the “CH ( )”... - Page 44 LC-40E67U/LC-40E77U 4. Public Mode Menu The guidance is not displayed on screen. Setup procedure • To move the cursor up and down, use the “cursor UP/DOWN” key (remote controller) and “CH ( )” key (remote controller and set). • To change the settings, use the “cursor RIGHT/LEFT” key (remote controller) and “VOL (+)/(–)” key (remote controller and set).
- Page 45 LC-40E67U/LC-40E77U 5. On Setting Items * “EZ-SETUP” discussed below indicates “EZ-SETUP after the first power-on”. 1) POWER ON FIXED Selection Selection between “Variable” and “Fixed” (loop provided) Default – (Variable) Explanation In “Fixed” setting, the power-off by the power key of the unit is invalidated and the image is kept being received.
- Page 46 LC-40E67U/LC-40E77U 6) PANEL BUTTON Selection Selection between “Respond” and “No respond” (loop provided) Default Respond Explanation All the operations by keys (except the power key) of the unit can be invalidated. Limit in Setting Exception • Adjustment process, inspection mode and hotel menu mode can be started irrespective of setting.
- Page 47 LC-40E67U/LC-40E77U 11)INPUT MODE FIXED Selection Selection between “Variable”, “Fixed”. (loop provided) Default – (Variable) Explanation The input mode is fixed at the input source or the channel set at the “Input mode start” in 10 and other input sources and chan- nels can be made non-selectable.
-
Page 48: Chapter 6. Troubleshooting Table Troubleshooting Table
LC-40E67U/LC-40E77U LC40E67U Service Manual CHAPTER 6. TROUBLESHOOTING TABLE [1] TROUBLESHOOTING TABLE No video (1) COMPOSITE: No external input video [INPUT-3] Is INPUT-3 selected on the input select menu screen? Select INPUT-3 on the input select menu screen for the right input signal. - Page 49 LC-40E67U/LC-40E77U No video (2) COMPONENT: No external input video [INPUT-1] COMPONENT: No external input video [INPUT-2] Is INPUT-1 selected on the input select menu screen? Is INPUT-2 selected on the input select menu screen? Is the INPUT-SELECT for the input signal?
- Page 50 LC-40E67U/LC-40E77U No video (3) S-VIDEO: No external input video [INPUT-2] Is INPUT-2 selected on the input select menu screen? Does the INPUT-2 S1_PLUG detection function? Check the line between pin (6) of input terminal (J506) and pin (AB11) of IC8001 (CPU).
- Page 51 LC-40E67U/LC-40E77U No video (4) No video at UHF/VHF broadcast signal reception No video at digital broadcast signal reception Is the specified TV signal selected on the input select menu screen? Is there the analog video signal output (VIDEO) at pin (19) of tuner...
- Page 52 LC-40E67U/LC-40E77U No video (5) PC: No external input video [INPUT-4] Is INPUT-4 selected on the input select menu screen? Select INPUT-4 on the input select menu screen for the right input signal. Is IC602 (EEPROM) accessed by I2C, with PC con-...
- Page 53 LC-40E67U/LC-40E77U <HDMI input> No video (6)-1 HDMI: No external input video [INPUT-5] HDMI: No external input video [INPUT-6] Is INPUT-5 selected on the input select menu screen? Is INPUT-6 selected on the input select menu screen? Select INPUT-5 on the input select menu screen for Select INPUT-6 on the input select menu screen for the right the right input signal.
- Page 54 LC-40E67U/LC-40E77U <HDMI input> No video (6)-2 HDMI: No external input video [INPUT-7] HDMI: No external input video [INPUT-8] Is INPUT-7 selected on the input select menu screen? Is INPUT-8 selected on the input select menu screen? Select INPUT-7 on the input select menu screen for Select INPUT-8 on the input select menu screen for the right the right input signal.
- Page 55 LC-40E67U/LC-40E77U No audio (1)-1 INPUT-1 No audio. INPUT-2 No audio. Is INPUT-1 selected on the input select menu screen? Is INPUT-2 selected on the input select menu screen? Refer to “: No external input video [INPUT-1]”. Refer to “: No external input video [INPUT-2]”...
- Page 56 LC-40E67U/LC-40E77U No audio (1)-2 INPUT-3 No audio. Is INPUT-3 selected on the input select menu screen? Refer to “: No external input video [INPUT-3]”. Is the audio output selected for “VARIABLE” on the menu screen? Set the audio output to “FIXED”.
- Page 57 LC-40E67U/LC-40E77U No audio (2) [PC analog audio input] INPUT-4 No audio. [HDMI analog audio input] INPUT-6 No audio. Is INPUT-4 selected on the input select menu screen? Is INPUT-6 selected on the input select menu screen? Refer to “: No external input video [INPUT-4]”.
- Page 58 LC-40E67U/LC-40E77U No audio (3) No audio at UHF/VHF broadcast signal reception. No audio at digital broadcast signal reception. Is TV selected on the input select menu screen? Is TV selected on the input select menu screen? Refer to “No video at UHF/VHF broadcast signal Refer to “No video at digital broadcast signal reception”.
- Page 59 LC-40E67U/LC-40E77U No audio (4) INPUT-5 No audio (HDMI connected) INPUT-6 No audio (HDMI connected) INPUT-7 No audio (HDMI connected) INPUT-8 No audio (HDMI connected) [INPUT-5 input] Is INPUT-5 selected on the input select menu screen? [INPUT-6 input] Is INPUT-6 selected on the input select menu screen?
- Page 60 LC-40E67U/LC-40E77U No audio signal at Digital Audio Output terminal (Analog sound heard) No INPUT-5/6/7/8(HDMI) audio. No audio at digital broadcast signal reception. If no video appears, refer to “No external input video (HDMI) If no video appears, refer to “No video at digital broadcast signal reception”.
- Page 61 LC-40E67U/LC-40E77U No monitor audio output Is the audio output from the monitor set at “VARIABLE” or Check IC8001 (CPU) and its peripheral circuits. “FIXED” on the menu screen? Are there the audio signal outputs (I2S Line) at pins (H4) Check IC8001 (CPU) and its peripheral circuits.
- Page 62 LC-40E67U/LC-40E77U LED flashing timing chart for error notification. 250ms 1sec Unused 1) Power LED (Large classification) Error type Power green LED operation (1 cycle) Pins are monitor microprocessor (IC2002) pins. Lamp error H: On Judged by the ERR_PNL port. Confirmed after 10 consecutive...
- Page 63 LC-40E67U/LC-40E77U 2) Power error details (Power LED flashes twice and OPC LED flashes) Pins are monitor microprocessor pins unless otherwise Error type OPC LED operation (1 cycle) specified. DET_POW1 error H: On DET_POW1 error (L). Flashes once Detected by the above polling.
- Page 64 LC-40E67U/LC-40E77U - MEMO - 6 – 17...
-
Page 65: Chapter 7. Overall Wiring/Block Diagram Overall Wiring Diagram (Lc- 40E67U)
LC-40E67U/LC-40E77U Service Manual LC40E67U CHAPTER 7. OVERALL WIRING/BLOCK DIAGRAM [1] OVERALL WIRING DIAGRAM (LC-40E67U) 7 – 1... -
Page 66: Overall Wiring Diagram (Lc-40E77U)
LC-40E67U/LC-40E77U [2] OVERALL WIRING DIAGRAM (LC-40E77U) 7 – 2... -
Page 67: System Block Diagram
LC-40E67U/LC-40E77U [3] SYSTEM BLOCK DIAGRAM 7 – 3... -
Page 68: Chapter 8. Printed Wiring Board Assemblies
LC-40E67U/LC-40E77U Service Manual LC40E67U CHAPTER 8. PRINTED WIRING BOARD ASSEMBLIES [1] KEY Unit KEY Unit (Side-A) KEY Unit (Chip Parts Side-A) R154 D155 R152 P151 8 – 1... -
Page 69: Main Unit
LC-40E67U/LC-40E77U [2] MAIN Unit MAIN Unit (Side-A) 8 – 2... - Page 70 LC-40E67U/LC-40E77U MAIN Unit (Chip Parts Side-A) D2504 P2501 P2603 P2602 R2510 P9601 D2506 D2505 IC9003 IC9609 R2512 FB9613 D9602 Q2502 IC2603 R9017 Q9602 R9016 R2005 R9032 C2601 C9004 C2001 D2003 C2602 R8080 Q8001 IC9002 D9609 D9604 D9610 R8081 R2002 R9015...
- Page 71 LC-40E67U/LC-40E77U MAIN Unit (Side-B) 8 – 4...
- Page 72 LC-40E67U/LC-40E77U MAIN Unit (Chip Parts Side-B) TL2669 TL2612 TL2608 TL2606 TL2638 TL2648 TL2650 TL2670 R9646 TL9611 TL2613 TL2611 TL2607 TL2604 TL2673 TL2649 TL2671 FB2611 TL2609 TL2621 TL2672 TL9610 FB9612 TL9613 TL9609 TL9601 TL9602 TL9603 TL9604 TL9605 TL9606 TL9607 TL9608 TL9612...
-
Page 73: Led Unit
LC-40E67U/LC-40E77U [3] LED Unit LED Unit (Side-A) LED Unit (Chip Parts Side-A) R116 C102 C104 R106 Q102 R120 R113 R109 C101 R115 R103 RMC101 P102 P101 SLD101 D102 D103 IC101 C103 R110 R114 D104 8 – 6... -
Page 74: Chapter 9. Schematic Diagram
LC-40E67U/LC-40E77U Service Manual LC40E67U CHAPTER 9. SCHEMATIC DIAGRAM [1] DESCRIPTION OF SCHEMATIC DIAGRAM 1. VOLTAGE MEASUREMENT CONDITION: 1) The voltages at test points are measured on exclusive AC adaptor and the stable supply voltage of AC 120V. Signals are fed by a color bar signal genera- tor for servicing purpose and the above voltages are measured with a 20k ohm/V tester. - Page 75 LC-40E67U/LC-40E77U [2] SCHEMATIC DIAGRAM 1. KEY Unit 9 – 2...
- Page 76 LC-40E67U/LC-40E77U 2. MAIN Unit-1 MAIN1 (TUNER) R1116 TO MAIN8(CPU) TU1101 TV_CVBS AA033WJQZ VIDEO TO MAIN8(CPU) TO MAIN13(POWER) R1103 AFT_OUT R1113 R1118 2.7K C1107 Q1102 R1146 1000P R1109 KTC3875SG C1112 C1132 C1123 C1124 R1115 4700P L1108 KZA510WJPZ 10uH TO MAIN8(CPU) 60mAmax...
- Page 77 LC-40E67U/LC-40E77U 3. MAIN Unit-2 MAIN2(A_TERM) INPUT3 INPUT1 INPUT2 MAIN UNIT 2/14 J501 J503 J504 GA079WJ GA108WJ GA108WJ J505 J506 DUNTKF030WE FA039WJ DA035WJ J507 J502 FA039WJ FA039WJ (PWBXF030WJ) R501 R549 R545 R574 R576 R547 R550 R551 R552 R571 C533 R573 R548...
- Page 78 LC-40E67U/LC-40E77U 4. MAIN Unit-3 MAIN3 (AMP IF) TO MAIN13(POWER) MAIN UNIT 3/14 UR13V R1337 C1314 R1335 DUNTKF030WE 5.6K KZA098WJ (PWBXF030WJ) D1311 D3.3V EXA523WJ 5.6V R1338 Q1309 3.3K Q1305 KTC3875SG R1324 KRC404E TO MAIN8(CPU) 4.7K TO MAIN4(AMP) AMP_PROTECT PROTECT_N AMP_STANDBY_N AMP_STANDBY_N...
- Page 79 LC-40E67U/LC-40E77U 5. MAIN Unit-4 MAIN4(AMP) MAIN UNIT 4/14 TO MAIN3(AMP IF) DUNTKF030WE AMP_STANDBY_N (PWBXF030WJ) PROTECT_N C2725 R2752 0.1u 220K AMP_MUTE_D L2701 22uH Q2704 C2730 PA343WJPZ 0.22u KRC404E L2702 C2726 22uH 0.1u TO MAIN13(POWER1) PA343WJPZ UR13V FB2706 A206WJ C2717 C2710 C2724...
- Page 80 LC-40E67U/LC-40E77U 6. MAIN Unit-5 MAIN5 (HDMI_SW1) MAIN UNIT 5/14 TO MAIN13(POWER1) D3.3V DUNTKF030WE (PWBXF030WJ) TO MAIN7(UCOM) TO MAIN13(POWER) BU3.3V *D1601 *R1602 RB520S30 D1608 *R1667 *R1665 MA152WK *R1609 TO MAIN7(UCOM) TO MAIN13(POWER) CEC2 TO MAIN14(SP_IF) *D1610 *D1612 1PS226 1PS226 *Q1623 *R1663...
- Page 81 LC-40E67U/LC-40E77U 7. MAIN Unit-6 MAIN6 (PANEL) TO_MAIN13(POWER1) MAIN UNIT 6/14 DUNTKF030WE D3.3V L2606 (PWBXF030WJ) PNL_12V FA154WJ P2601 WA659WJQZ TO_MAIN8(CPU) TO LCDCONT LV0OUT0M L2601 FA154WJ LV0OUT0P FB2604 A375WJQZ LV0OUT1M TA1- L2607 FA154WJ TA1+ LV0OUT1P TB1- LV0OUT2M L2602 TB1+ FA154WJ LV0OUT2P TC1-...
- Page 82 LC-40E67U/LC-40E77U 8. MAIN Uuit-7 MAIN7 (UCOM) MAIN UNIT 7/14 DUNTKF030WE (PWBXF030WJ) TO MAIN12(CONN) TO MAIN13(POWER1) P2003 D3.3V NA330WJ TO R/C FB2005 BU3.3V A378WJQZ BU+3.3V C2001 FB2006 A378WJQZ OPT+3.3V KZA510WJPZ FB2014 R2075 A378WJQZ FB2007 A375WJQZ TO MAIN12(CONN) FB2008 PNL_DET0 R2044 LED_G...
- Page 83 LC-40E67U/LC-40E77U 9. MAIN Unit-8 MAIN8 (CPU) TO_MAIN13 (POWER1) D1.2V TO MAIN14(SP_IF) D1.8V A1.8V 380mA A1.8V RX02P RX02M D3.3V RX12P A3.3V 400mA D8002 A3.3V MA111G RX12M RX22P FB8018 FB8019 RX22M FB8020 R8080 A375WJQZ A206WJ FB8013 FB8017 A206WJ RXC2P FB8016 C8079 A375WJQZ...
- Page 84 LC-40E67U/LC-40E77U 10. MAIN Unit-9 MAIN9 (DDR) TO MAIN13(POWER1) D1.8V MAIN UNIT 9/14 C8251 C8253 C8255 C8257 C8259 C8261 C8263 C8265 C8267 0.1u 0.1u 0.1u 0.1u 0.1u 0.1u 0.1u 0.1u 0.1u DUNTKF030WE (PWBXF030WJ) C8252 KZA237WJ C8254 C8256 C8258 C8260 C8262 C8264...
- Page 85 LC-40E67U/LC-40E77U 11. MAIN Unit-10 MAIN10 (EPROM) MAIN UNIT 10/14 DUNTKF030WE (PWBXF030WJ) TO MAIN13(POWER1) BU3.3V D3.3V C8451 R8453 R8456 0.1u GND_B HOLD# C8460 0.1u R8454 R8452 IC8451 R8474 TO MAIN12(CONN) S25FL064 I2C_SCL_UCOM R8475 I2C_SDA_UCOM TO MAIN8(CPU) IC8454 R8457 SFCS_N HN24256A SFRX...
- Page 86 LC-40E67U/LC-40E77U 12. MAIN Unit-11 MAIN11 (EXBUS) MAIN UNIT 11/14 WA562WJQZ SC9301 DUNTKF030WE (PWBXF030WJ) TO PC-CARD (Flash Memory Card) TO MAIN8(CPU) ASEBRKAK_N ASEBRKAK_N +3.3V OPT_MUTE OPT_MUTE N_CPU_RST OPT_MUTE OPT_MUTE ASEBRKAK_N ASEBRKAK_N ASEBRKAK_N ASEBRKAK_N OPT_MUTE OPT_MUTE TO MAIN6(PANEL) TO MAIN13(POWER1) LVDS_SEL LVDS_SEL D3.3V...
- Page 87 LC-40E67U/LC-40E77U 13. MAIN Unit-12 MAIN12 (CONN) TO MAIN13(POWER1) MAIN UNIT 12/14 D3.3V DUNTKF030WE BU3.3V (PWBXF030WJ) BU5V *IC9001 TC7W00U TO MAIN7(UCOM) IRPASS *C9003 0.1u *D9002 MA111G *R9002 R9035 *Q9001 R9004 4.7K 4.7K R9006 RN1102 TO MAIN7(UCOM) RXD1_UCOM_RS R9009 TXD1_UCOM_RS R9016 TO MAIN8(CPU)
- Page 88 LC-40E67U/LC-40E77U 14. MAIN Unit-13 * This model is not used MAIN Unit-14. MAIN13 (POWER) MAIN UNIT 13/14 *R9636 TO MAIN1(TUNER) IC9603 DUNTKF030WE10 PQ1LAX95 (PWBXF030WJ) R9615 5.6K A3.3V P9601 NA181WJ TO MAIN2(A_TERM) *R9637 R9617 To Power Unit FB9601 Vadj A375WJQZ UR13V...
- Page 89 LC-40E67U/LC-40E77U 15. LED Unit 9 – 16...
- Page 90 LC-40E67U/LC-40E77U - MEMO - 9 – 17...
-
Page 91: Parts Guide
LC-40E67U/LC-40E77U PartsGuide PARTS GUIDE No. S39X4LC40E67U LCD COLOR TELEVISION LC-40E67U LC-40E77U MODELS Note: The reference numbers on the PWB are arranged in alphabetical order. CONTENTS PRINTED WIRING BOARD CABINET AND MECHANICAL ASSEMBLIES PARTS LCD PANEL MUDULE LCD MODULE Assembly DUNTKE266FM02 (KEY Unit) - Page 92 SWITCH QSW-K0003AJZZ+ S154 SWITCH QSW-K0003AJZZ+ S155 SWITCH QSW-K0003AJZZ+ S156 SWITCH QSW-K0003AJZZ+ S157 SWITCH QSW-K0003AJZZ+ [4] DUNTKF030FM10(LC-40E67U)/FM14 (LC-40E77U) (MAIN Unit) C501 1 10V Ceramic VCKYCY1AB105KY C509 1 10V Ceramic VCKYCY1AB105KY C511 1 10V Ceramic VCKYCY1AB105KY C513 1 10V Ceramic VCKYCY1AB105KY C523...
- Page 93 LC-40E67U/LC-40E77U PRICE PARTS CODE PART DESCRIPTION RANK MARK DELIVERY [4] DUNTKF030FM10(LC-40E67U)/FM14 (LC-40E77U) (MAIN Unit) C1614 0.1 10V Ceramic VCKYCZ1AB104KY C1615 1000p 50V Ceramic VCKYCZ1HB102KY C1616 CAPACITOR RC-KZA510WJPZY C1617 0.1 10V Ceramic VCKYCZ1AB104KY C1618 0.1 10V Ceramic VCKYCZ1AB104KY C1619 VCKYCZ1HB102KY 1000p 50V Ceramic...
- Page 94 LC-40E67U/LC-40E77U PRICE PARTS CODE PART DESCRIPTION RANK MARK DELIVERY [4] DUNTKF030FM10(LC-40E67U)/FM14 (LC-40E77U) (MAIN Unit) C8055 0.1 10V Ceramic VCKYCZ1AB104KY C8057 0.1 10V Ceramic VCKYCZ1AB104KY C8058 0.1 10V Ceramic VCKYCZ1AB104KY C8062 0.1 10V Ceramic VCKYCZ1AB104KY C8063 0.1 10V Ceramic VCKYCZ1AB104KY C8064 VCKYCZ1AB104KY 0.1 10V Ceramic...
- Page 95 LC-40E67U/LC-40E77U PRICE PARTS CODE PART DESCRIPTION RANK MARK DELIVERY [4] DUNTKF030FM10(LC-40E67U)/FM14 (LC-40E77U) (MAIN Unit) C9002 0.1 25V Ceramic VCKYCY1EF104ZY C9003 0.1 25V Ceramic VCKYCZ1EF104ZY C9004 0.1 10V Ceramic VCKYCZ1AB104KY C9006 0.1 25V Ceramic VCKYCY1EB104KY C9007 0.1 25V Ceramic VCKYCY1EB104KY C9008 VCKYCY1EB104KY 0.1 25V Ceramic...
- Page 96 LC-40E67U/LC-40E77U PRICE PARTS CODE PART DESCRIPTION RANK MARK DELIVERY [4] DUNTKF030FM10(LC-40E67U)/FM14 (LC-40E77U) (MAIN Unit) D9001 MAZ91200H0L VHDMAZ9120H-1Y D9002 MA2J1110GL VHDMA111G++-1Y D9005 MAZ91200H0L VHDMAZ9120H-1Y D9007 PDZ7.5B,115 RH-EX0262TAZZY D9304 1PS184,115 VHD1PS184++-1Y D9601 VHDMA111G++-1Y MA2J1110GL D9603 MA2J1110GL VHDMA111G++-1Y D9604 D1FH3-5053 VHDD1FH3+++-1Y D9605 MA2J1110GL...
- Page 97 LC-40E67U/LC-40E77U PRICE PARTS CODE PART DESCRIPTION RANK MARK DELIVERY [4] DUNTKF030FM10(LC-40E67U)/FM14 (LC-40E77U) (MAIN Unit) FB2626 BALUN RBLN-A074WJZZY FB2627 BALUN RBLN-A074WJZZY FB2628 BALUN RBLN-A074WJZZY FB2629 BALUN RBLN-A074WJZZY FB2630 BALUN RBLN-A074WJZZY FB2631 RBLN-A074WJZZY BALUN FB2633 BALUN RBLN-A375WJQZY FB2634 BALUN RBLN-A375WJQZY FB2635 BALUN...
- Page 98 LC-40E67U/LC-40E77U PRICE PARTS CODE PART DESCRIPTION RANK MARK DELIVERY [4] DUNTKF030FM10(LC-40E67U)/FM14 (LC-40E77U) (MAIN Unit) IC9602 LV5893M-TE-L-E VHILV5893M+-1Y IC9603 PQ1LAX95MSPQ VHIPQ1LAX95-1Y IC9604 LV5893M-TE-L-E VHILV5893M+-1Y IC9605 LV5893M-TE-L-E VHILV5893M+-1Y IC9606 PQ1LA185MSPQ VHIPQ1LA185-1Y IC9607 VHIMM3441JF-1Y MM3441JFBE IC9608 PQ1LA355MSPQ VHIPQ1LA335-1Y J501 JACK QJAKGA079WJZZ J502 JACK...
- Page 99 LC-40E67U/LC-40E77U PRICE PARTS CODE PART DESCRIPTION RANK MARK DELIVERY [4] DUNTKF030FM10(LC-40E67U)/FM14 (LC-40E77U) (MAIN Unit) Q2704 KRC404E-RTK VSKRC404E++-1Y Q8001 RN1904(TE85L,F) VSRN1904///-1Y Q8003 RT1N141U-T111-1 VSRT1N141U/-1Y Q9001 RN1102(TE85L,F) VSRN1102///-1Y Q9601 RN4982(TE85L,F) VSRN4982///-1Y Q9603 VSRN4982///-1Y RN4982(TE85L,F) Q9604 RT1N141U-T111-1 VSRT1N141U/-1Y Q9605 Transistor VSKTC3875SG-1Y Q9608 RN2408(T5L,F,T)
- Page 100 LC-40E67U/LC-40E77U PRICE PARTS CODE PART DESCRIPTION RANK MARK DELIVERY [4] DUNTKF030FM10(LC-40E67U)/FM14 (LC-40E77U) (MAIN Unit) R1125 3.9k 1/16W Metal Oxide VRS-CZ1JF392JY R1128 2k 1/16W Metal Oxide VRS-CZ1JF202JY R1130 470 1/16W Metal Oxide VRS-CZ1JF471JY R1140 47 1/16W Metal Oxide VRS-CZ1JF470JY R1141 47 1/16W Metal Oxide...
- Page 101 LC-40E67U/LC-40E77U PRICE PARTS CODE PART DESCRIPTION RANK MARK DELIVERY [4] DUNTKF030FM10(LC-40E67U)/FM14 (LC-40E77U) (MAIN Unit) R1676 10 1/16W Metal Oxide VRS-CZ1JF100JY R1677 10 1/16W Metal Oxide VRS-CZ1JF100JY R1679 10 1/16W Metal Oxide VRS-CZ1JF100JY R1680 10 1/16W Metal Oxide VRS-CZ1JF100JY R1710 10k 1/16W Metal Oxide...
- Page 102 LC-40E67U/LC-40E77U PRICE PARTS CODE PART DESCRIPTION RANK MARK DELIVERY [4] DUNTKF030FM10(LC-40E67U)/FM14 (LC-40E77U) (MAIN Unit) R8019 10k 1/16W Metal Oxide VRS-CZ1JF103JY R8020 100 1/16W Metal Oxide VRS-CZ1JF101JY R8021 22 1/16W Metal Oxide VRS-CZ1JF220JY R8023 22 1/16W Metal Oxide VRS-CZ1JF220JY R8025 22 1/16W Metal Oxide...
- Page 103 LC-40E67U/LC-40E77U PRICE PARTS CODE PART DESCRIPTION RANK MARK DELIVERY [4] DUNTKF030FM10(LC-40E67U)/FM14 (LC-40E77U) (MAIN Unit) R9003 10k 1/16W Metal Oxide VRS-CZ1JF103JY R9004 4.7k 1/16W Metal Oxide VRS-CZ1JF472JY R9005 4.7k 1/16W Metal Oxide VRS-CZ1JF472JY R9006 22 1/16W Metal Oxide VRS-CZ1JF220JY R9007 10k 1/16W Metal Oxide...
- Page 104 LC-40E67U/LC-40E77U PRICE PARTS CODE PART DESCRIPTION RANK MARK DELIVERY [5] DUNTKF096FM01 (LED Unit) C101 0.01 50V Ceramic VCKYCY1HF103ZY C102 10 16V Electrolytic VCEASX1CN106MY C103 100 16V Electrolytic VCEASY1CN107MY C104 2.2 16V Ceramic VCKYTV1CF225ZY D102 CL-165HR/YG-D-T RH-PX0421CEZZY D103 RH-PX0421CEZZY CL-165HR/YG-D-T D104...
- Page 105 LC-40E67U/LC-40E77U [6] CABINET AND MECHANICAL PARTS LCD Module Assembly R/C, LED Unit 1-2-1 1-2-2 KEY Unit POWER Unit * LC-40E77U only * LC-40E77U only MAIN Unit * LC-40E77U only * LC-40E67U only * LC-40E77U only...
- Page 106 LC-40E67U/LC-40E77U PRICE PARTS CODE PART DESCRIPTION RANK MARK DELIVERY [6] CABINET AND MECHANICAL PARTS Front Cabinet Ass'y (LC-40E67U) CCABAC293WJ02 Front Cabinet Ass'y (LC-40E77U) CCABAC293WJ01 Front Cabinet Not Available Bottom Decoration-A Ass'y (LC-40E67U) Not Available Bottom Decoration-A Ass'y (LC-40E77U) Not Available...
- Page 107 LC-40E67U/LC-40E77U [7] LCD MODULE Assembly...
- Page 108 LC-40E67U/LC-40E77U PRICE PARTS CODE PART DESCRIPTION RANK MARK DELIVERY [7] LCD MODULE Assembly LCD Module Ass'y (LC-40E67U) R1LK400D3LW10Z LCD Module Ass'y (LC-40E77U) R1LK400D3LW20Z Bezel Ass'y Top CANGK4391TP02 Bezel Ass'y Bottom CANGK4390TP02 Bezel Ass'y L/R, x2 CANGK4392TP02 P Chassis Ass'y Top...
- Page 109 LC-40E67U/LC-40E77U [9] PACKING PARTS (NOT REPLACEMENT ITEM) Not Replacement item...
- Page 110 [10] SERVICE JIG (USE FOR SERVICING) Connecting Cord (100cm 80pin) QCNW-C222WJQZ LCD Control-LCD Panel, x2 Connecting Cord (100cm 41-5-4pin) QCNW-J554WJQZ Main-LCD Control (LW) (for LC-40E67U) Connecting Cord (100cm 41pin) QCNW-F676WJQZ Main-LCD Control (LW) (for LC-40E77U) Connecting Cord (100cm 4-5pin) QCNW-G401WJQZ...
- Page 111 LC-40E67U/LC-40E77U...
- Page 112 LC-40E67U/LC-40E77U © COPYRIGHT 2009 BY SHARP CORPORATION ALL RIGHTS RESERVED. No part of this publication may be reproduced, stored in a retrieval system, or transmitted in any form or by any means, electronic, mechanical, photocopying, recording, or otherwise, without prior written permission of the publisher.