Makita LS1017 Instruction Manual
Hide thumbs
Also See for LS1017:
- Instruction manual (120 pages) ,
- Instruction manual (68 pages) ,
- Instruction manual (77 pages)

Related Manuals for Makita LS1017


Summary of Contents for Makita LS1017
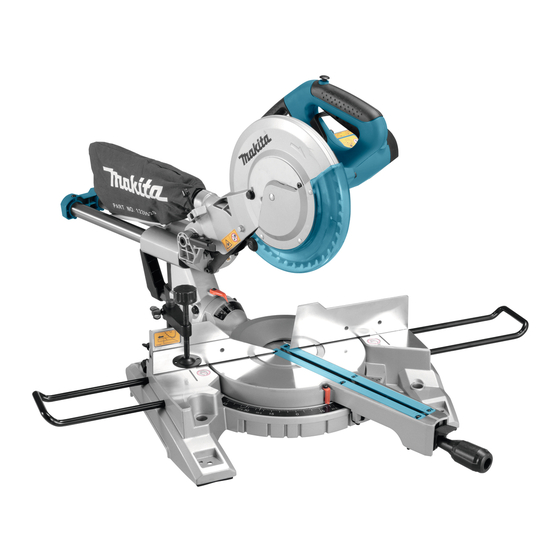
- Page 1 INSTRUCTION MANUAL Slide Compound Miter Saw LS1017 LS1017L 011345 DOUBLE INSULATION IMPORTANT: Read Before Using.
-
Page 2: Table Of Contents
ASSEMBLY ................................10 OPERATION................................14 MAINTENANCE ................................ 18 OPTIONAL ACCESSORIES ............................20 SPECIFICATIONS Model LS1017 / LS1017L Blade diameter 255 mm - 260 mm Blade body thickness 1.6 mm - 2.4 mm Hole diameter For all countries other than European countries 25.4 mm... - Page 3 EC Declaration of Conformity The tool is intended for accurate straight and miter Makita Corporation responsible cutting in wood. With appropriate saw blades, aluminum manufacturer declare that the following Makita can also be sawed. machine(s): ENF002-2 Designation of Machine: Power supply...
-
Page 4: Additional Safety Rules For Tool
Store idle tools. 18. Use outdoor extension leads. When not in use, tools should be stored in a dry, When tool is used outdoors, use only extension high or locked up place, out of reach of children. cords intended for outdoor use. Do not force the tool. -
Page 5: Save These Instructions
Unplug tool before changing blade 28. Connect miter saws to a dust collecting device servicing. when sawing. Always secure all moving portions before 29. Select saw blades in relation to the material to carrying the tool. be cut. Stopper pin which locks the cutter head down 30. -
Page 6: Installation
Blade guard INSTALLATION Bench mounting 1. Blade guard 1. Stopper pin 010386 When lowering the handle, the blade guard rises automatically. The blade guard returns to its original 010228 When the tool is shipped, the handle is locked in the position when the cut is completed and the handle is lowered position by the stopper pin. -
Page 7: Positioning Kerf Board
UV light Unplug the tool before any adjustment is attempted. exposure, contact a Makita service center for a new When installing a new blade, always check the lower guard. DO NOT DEFEAT OR REMOVE GUARD. -
Page 8: Adjusting The Miter Angle
Stopper arm NOTE: Lever can be adjusted to a different lever angle by • 1. Stopper arm removing the screw holding the lever and securing 2. Adjusting screw the lever at a desired angle. 1. Lever 2. Arm 3. Pointer 4. - Page 9 Before plugging in the tool, always check to • injury. Return tool to a Makita service center for see that the switch trigger actuates properly proper repairs BEFORE further usage. and returns to the "OFF" position when NEVER defeat the lock-off button by taping down or •...
-
Page 10: Assembly
CAUTION: Replacing the dry cells for laser unit When not in use, be sure to turn off the laser • 1. Switch for laser 010399 010257 1. Dry cell CAUTION: Never look into the laser beam. Direct laser beam • may injure your eyes. - Page 11 Accidental start up of the tool may result in 4. Saw blade serious personal injury. Use only the Makita socket wrench provided to • install or remove the blade.Failure to use the wrench may result in overtightening or insufficient tightening of the hex bolt and serious personal injury.
-
Page 12: Securing Workpiece
arbor hole you intend to use is installed Securing workpiece between the inner and the outer flanges. Use of the incorrect arbor hole ring may result in the WARNING: improper mounting of the blade causing blade It is extremely important to always secure the •... - Page 13 travel. If the tool or blade makes contact with the WARNING: fence this may result in kickback or unexpected The workpiece must be secured firmly against • movement of the material and serious personal the turn base and guide fence with the vise injury.
-
Page 14: Operation
horizontal vise. Press cutting (cutting small workpieces) Holders 1. Holder 011340 The holders can be installed on either side as a convenient means of holding workpieces horizontally. Slip fully the holder rods into the holes in the base. Then tighten the holders securely with the screws. WARNING: Always support a long workpiece so it is level •... - Page 15 Slide (push) cutting (cutting wide workpieces) Miter cutting Refer to the previously covered "Adjusting the miter angle". Bevel cut 010396 Loosen the lever and tilt the saw blade to set the bevel angle (Refer to the previously covered "Adjusting the bevel angle"). Be sure to retighten the lever firmly to secure the selected bevel angle 1.
-
Page 16: Measuring
direction is changed during a cut, the precision of 1. Inside corner the cut will be impaired. 2. Outside corner Before bevel-cutting, an adjustment of the upper • fence and lower fence maybe required. Refer to the section titled "Guide fence adjustment". Compound cutting Compound cutting is the process in which a bevel angle is made at the same time in which a miter... - Page 17 against the guide fence on the saw. CAUTION: The finished piece to be used will • Use straight wood of even thickness as the wood • always be on the LEFT side of the blade facing. after the cut has been made. WARNING: Cutting aluminum extrusion Use screws to attach the wood facing to the...
-
Page 18: Maintenance
injury. CAUTION: NOTICE: Be sure to return the stopper arm to the original • Never use gasoline, benzine, thinner, alcohol or the • position when performing other than groove cutting. like. Discoloration, deformation or cracks may Carrying tool result. Adjusting the cutting angle This tool is carefully adjusted and aligned at the factory, but rough handling may have affected the alignment. -
Page 19: Replacing Carbon Brushes
Carefully square the side of the blade with the 1. Screw top surface of the turn base using the 2. Pointer triangular rule, try-square, etc. by turning the 3. Miter scale hex bolt on the right side of the arm clockwise. Then tighten the lever securely. -
Page 20: Optional Accessories
Misuse of an accessory or attachment may result in serious personal injury. If you need any assistance for more details regarding these accessories, ask your local Makita Service Center. Steel & Carbide-tipped saw blades • Miter saw blades For smooth and precise cutting in various materials. - Page 24 Makita Corporation Anjo, Aichi, Japan www.makita.com JM2318C030...