Table of Contents
Advertisement
User Manual for your
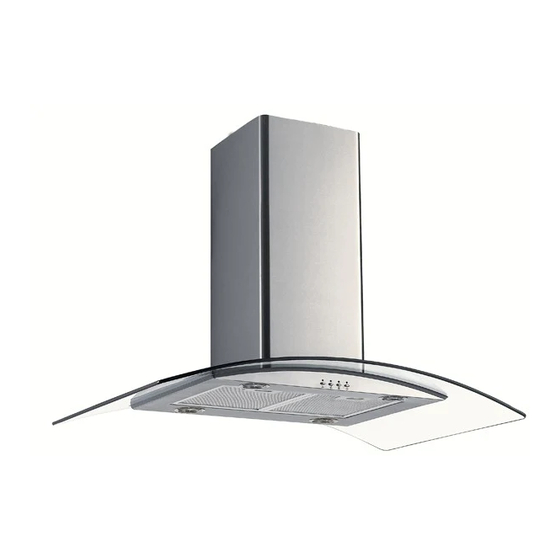
BAH9009G Cooker Hood
90 cm Island Chimney Hood in Stainless
Steel
NOTE
: This User Instruction Manual contains important
information, including safety & installation points, which will
enable you to get the most out of your appliance. Please keep it
in a safe place so that it is easily available for future reference.
Advertisement
Table of Contents

Related Manuals for Baumatic BAH9009G


Summary of Contents for Baumatic BAH9009G
- Page 1 User Manual for your BAH9009G Cooker Hood 90 cm Island Chimney Hood in Stainless Steel NOTE : This User Instruction Manual contains important information, including safety & installation points, which will enable you to get the most out of your appliance. Please keep it...
- Page 2 CONTENTS YOUR COOKER HOOD’S SPECIFICATIONS ….……………..………….2 IMPORTANT SAFETY INFORMATION……………………………….…3-4 CARING FOR THE ENVIRONMENT…………………………………………5 USING YOUR COOKER HOOD………………………………..……………..6 MAINTAINING AND CLEANING YOUR COOKER HOOD ……….7-9 INSTALLATION INSTRUCTIONS ……………………….……...….10-17 CARBON FILTER …………..10 ELECTRICAL CONNECTION……………11 INSTALLING THE COOKER HOOD….….12-13 INSTALLATION NOTES – EXTRACTION / PURIFYING VERSION .….14 TROUBLESHOOTING ……………………………………………15 HT21/10/06...
- Page 3 Specifications of your LOH9009 Cooker Hood Congratulations on purchasing a Cooker Hood! To fully enjoy using your appliance long into the future, please firstly familiarise yourself with its specifications, safety advice and operational instructions included in this manual. You will also need this manual to ensure that your Cooker Hood has been installed properly.
- Page 4 Important Safety Information: Please Read this before installing & using. Any installation work must be DO NOT SET YOUR * NOTE - carried out by a qualified COOKER HOOD LESS THAN electrician or competent person. 600mm ABOVE YOUR COOKER! o When installed between The hood must be installed in adjoining wall cabinets, accordance with the installation...
- Page 5 ventilation measures are o Ensure the ducting for being observed. Note the extractor function that it removes odours has the same diameter as from your room, not the outlet hole all the steam. way through. Keep young children from o Warning - Always ensure using, playing with or that the cooker hood has tampering with the...
-
Page 6: Environmental Note
fitted or if the filters are Never flambé cook under excessively greasy! this cooker hood . Environmental Note Note : Before discarding an old appliance, switch off and disconnect it from the power supply. Cut off and render any plug useless. -
Page 7: Using Your Cooker Hood
Using your Cooker Hood: To use your cooker hood: Make sure it has been properly installed. Find the CONTROL PANEL. It is located at the front of the canopy. You have a Pushbutton control panel that looks like the one pictured below. The CONTROL PANEL’s buttons all perform separate functions. -
Page 8: Cleaning Your Cooker Hood
5. Push the light button; the indicating light 4 on, and the two lighting lamps will come on. Push it again and the lamps will turn off, with every push the buzzer will buzz one time. Cleaning your Cooker Hood: Before cleaning, always ensure that you have IMPORTANT: switched your cooker hood OFF at the power switch, set at... - Page 9 To prevent this fire hazard, the grille should be cleaned regularly (depending on use) every 10-15 days and at least once a month in hot water with normal washing-up detergent. DO NOT USE A DISHWASHER TO ACHIEVE THIS. Maintenance - Cleaning the Anti-grease Filters Please Read this before installing &...
- Page 10 Maintenance – Changing the Light Bulb and Carbon Filter Changing the light bulb Before changing the light bulb, ensure that the appliance is not live (i.e., ensure that you have switched it off so that it‟s in the „0‟ position). Remove the metal anti-grease filters (see Figure 2 below) and find the old bulb ...
- Page 11 * PLEASE NOTE - Defective bulbs should be replaced immediately. Replace the metal anti-grease filters. Installing / Changing the Carbon Filter ______________________________________________________________________________________ Installing / Changing the Carbon Filter. Your Cooker Hood uses CARBON FILTERS to purify the air for the air recirculation function. You will find two filters that will attach to both sides of the fan motor (please see figures at bottom of page).
- Page 12 1) Press the handle of the metal grease filter towards the rear part of the unit until it is released from the front housing, and remove it by pressing downwards (Fig. 2 - above). 2) Remove the old carbon filters by twisting them anticlockwise until they unlatch from the sides of the motor.
-
Page 13: Installation Instructions
If you can only find two wires in the cable (blue and brown), neither must be connected to the Earth terminal! As the colours of the wires in the appliance‟s mains lead may not correspond with the coloured markings identifying the terminals in your spur box, please proceed as follows: 1)... - Page 14 8. Put the extendable pipe on the outlet; after ensuring everything is ok, put down the hook and the external chimney, then the installation is complete, see pic 9. Installation Instructions...
- Page 15 Extraction / Air Purifier Modes of Operation Ensure that you have fitted the union (‘N’) (below and to the right) see to the upper part of the hood using the packaged two screws supplied inside the packing (Fig. 1 –...
- Page 16 Fig.2 AIR PURIFIER OPERATION - INSTALLATION Instructions The cooker hood can be converted to work as an air purifier in the event that there is no provision for an external air discharge duct. In this case, air is recycled through the union „N‟ (Fig. 1 – above). When using the unit as an air purifier, you need to install two active carbon filters to absorb cooking vapours (please see page 10).
-
Page 17: Troubleshooting
Troubleshooting If something has gone wrong with your Cooker Hood, checking against this chart might keep you from having to call for service. Symptom Solution Check that the hood is connected to the electricity supply. The cooker hood will not start! ... - Page 18 CONDITIONS OF GUARANTEE Dear Customer, The conditions of guarantee which apply to your appliance are as follows:This product is guaranteed for 3 years from the date of original purchase.Think Appliances will repair any defect that arises due to faulty manufacturing or workmanship free of charge during this period.
- Page 19 This guarantee does not cover: 1 Sinks and taps 2 Failure to comply with the manufacturer’s instructions for use. 3 The replacement of cosmetic components or accessories 4 Accidental damage or wilful abuse. 5 Subsequent loss or damage owing to the failure of the appliance or electrical supply.