Table of Contents
Advertisement
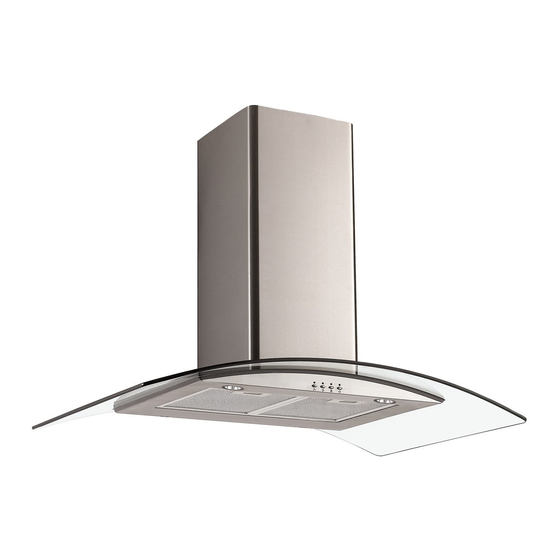
User Manual for your
BAH9008G Cooker
Hood
90 cm Chimney Hood in Stainless Steel
NOTE
: This User Instruction Manual contains important
information, including safety & installation points, which will
enable you to get the most out of your appliance. Please keep it
in a safe place so that it is easily available for future reference.
Advertisement
Table of Contents

Related Manuals for Baumatic BAH9008G


Summary of Contents for Baumatic BAH9008G
- Page 1 User Manual for your BAH9008G Cooker Hood 90 cm Chimney Hood in Stainless Steel NOTE : This User Instruction Manual contains important information, including safety & installation points, which will enable you to get the most out of your appliance. Please keep it...
-
Page 2: Table Of Contents
CONTENTS YOUR COOKER HOOD’S SPECIFICATIONS ….……………..………….3 IMPORTANT SAFETY INFORMATION……………………………….…4-5 CARING FOR THE ENVIRONMENT…………………………………………6 USING YOUR COOKER HOOD………………………………..……………..7 MAINTAINING AND CLEANING YOUR COOKER HOOD ……….8-10 INSTALLATION INSTRUCTIONS ……………………….……...….12-19 ELECTRICAL CONNECTION……………12 INSTALLING THE COOKER HOOD………13-15 FITTING THE CHIMNEY…………………16-17 ATTACHING THE GLASS…..18 INSTALLATION NOTES – EXTRACTION / PURIFYING VERSION .….19 NOTE ON INSTALLING THE VERSION WITH LOWER BRACKET..……20 TROUBLESHOOTING ……………………………………………21 CONDITIONS OF GUARANTEE……………………………………………22... - Page 3 Specifications of your LOH9008G Cooker Hood Congratulations on purchasing a Cooker Hood! To fully enjoy using your appliance long into the future, please firstly familiarise yourself with its specifications, safety advice and operational instructions included in this manual. You will also need this manual to ensure that your Cooker Hood has been installed properly.
-
Page 4: Important Safety Information
Important Safety Information: Please Read this before installing & using. Any installation work must be DO NOT SET YOUR * NOTE - carried out by a qualified COOKER HOOD LESS THAN electrician or competent person. 600mm ABOVE YOUR COOKER! o When installed between The hood must be installed in adjoining wall cabinets, accordance with the installation... -
Page 5: Important Safety Information
Important Safety Information: Please Read this before installing & using. o Ensure the ducting for ventilation measures are the extractor function being observed. Note has the same diameter as that it removes odours the outlet hole all the from your room, not way through. -
Page 6: Environmental Note
fitted or if the filters are Never flambé cook under excessively greasy! this cooker hood . Environmental Note Note : Before discarding an old appliance, switch off and disconnect it from the power supply. Cut off and render any plug useless. -
Page 7: Using Your Cooker Hood
Using your Cooker Hood: To use your cooker hood: Make sure it has been properly installed. Find the CONTROL PANEL. It is located at the front of the canopy, to the right. The CONTROL PANEL contains buttons as shown in the Figure below. -
Page 8: Cleaning Your Cooker Hood
Cleaning your Cooker Hood: Before cleaning, always ensure that you have IMPORTANT: switched your cooker hood OFF at the omni-polar switch, set at the wall from the cable: Cleaning Clean the external parts with Be sure to replace the mild liquid detergents on a carbon filters at the damp cloth. - Page 9 Maintenance - Cleaning the Anti-grease Filters Please Read this before installing & using. First remove the grille by pulling down on it. Undo the side catches. You can now clean the anti-grease filter grilles. Soak them for about one hour in hot water with a grease-loosening detergent then rinse off thoroughly with hot water.
- Page 10 Do not worry about the slight discolouration of the grille –its performance won‟t be affected. Let the filter grilles dry thoroughly before refitting them. Maintenance – Changing the Light Bulb and Carbon Filter Changing the light bulb Before changing the light bulb, ensure that the appliance is not live (i.e., ensure ...
-
Page 11: Carbon Filter
* PLEASE NOTE - Defective bulbs should be replaced immediately. once every three months, to allow normal operation. Replace the metal anti-grease filters. Before starting to fit the carbon filter, turn the omni-polar switch off at the wall. Installing / Changing the Carbon Filter Installing / Changing the Carbon Filter. - Page 12 CHANGING THE CARBON FILTER 1) Press the handle of the metal grease filter towards the rear part of the unit until it is released from the front housing, and remove it by pressing downwards (Fig. 2 - below). 2) Remove the old carbon filters by twisting them anticlockwise until they unlatch from the sides of the motor.
-
Page 13: Installation Instructions
electrical connection using an distance of at least 3mm. omni-polar switch with a contact NOTE: WARNING – THIS APPLIANCE MUST BE EARTHED. It should only be connected by a competent person using fixed wiring via a DOUBLE POLE SWITCHED FUSED SPUR OUTLET. See the bottom picture on right –... - Page 14 2) Position the hood against the wall and mark the position of the support holes that are to be drilled as shown in the figure below. These support holes can be found on Fig. 4 on next page marked as „D‟ with the anchoring holes marked as „E‟...
- Page 15 INSTALLATION INSTRUCTIONS – Attaching the Hood Rear view of your cooker hood. -------------------------------------------------------------------------- 3) Using a drill bit with a 6 mm diameter, make holes in the wall where you have marked these positions (see below). -------------------------------------------------------------------------------------------------------------------------------------------------------------------------------------------------------------------------------------------------- 4) Insert the expansion fixings (rawlplugs) in the holes and then screw the support screws halfway in (see below figure, at right).
-
Page 16: Installation Instructions – Attaching The Hood
INSTALLATION INSTRUCTIONS – Attaching the Hood ------------------------------------------------------------------------------------------- ------------------------------------------------------------------------------------------- 6) (EXTRACTION FUNCTION ONLY) Connect the coupling to the top of the cooker hood (see below). Then connect the discharge pipe to the coupling as shown below. Remember that your ducting will have to match the specifications shown in the notes on Extraction / Air Purifier (Recirculation) Modes on p.18. -
Page 17: Installation Instructions - Fitting The Chimney
INSTALLATION INSTRUCTIONS – Fitting the Chimney FITTING THE PIPE – Once your Cooker Hood has been installed, you can now fit the pipe. 1) Take the two casings „A‟ and „B‟: 2) Rest the bottom of the casing „A‟ on the top of the hood, taking care to position the tabs of the casing correctly on the back of the hood as shown as part „X‟... - Page 18 INSTALLATION INSTRUCTIONS – Fitting the Chimney 6) Take the fixing bracket „G‟ (Fig. 4 – previous page), centre it with respect to the mark you previously made, keeping it in contact with the ceiling, and then mark the anchoring holes („H‟).
-
Page 19: Attaching The Glass
ATTACHING THE GLASS Remove the metal grease filters from the hood Slacken both anchoring screws “F” Place the glass „Q‟ on the upper shelf of the hood, pushing it in towards the wall. Tightening the screws „F‟ again in the hole and connecting them to the unit. - Page 20 Extraction / Air Purifier Modes of Operation EXTRACTION OPERATION – Installation Instructions Ensure that you have fitted the union (‘N’) to the upper part of the hood using the packaged two screws supplied inside the packing (Fig. 1 – on right). Using a 125 mm diameter pipe, connect the union (N) on the upper part of the hood (see Fig.
-
Page 21: If Your Cooker Hood Comes With A Lower Bracket
If your Cooker Hood comes with a Lower Bracket * Note on what to do if your Cooker Hood is the version that comes with a BRACKET. Please note that your cooker hood may include a lower bracket. If this is the case, you will need to have it installed as such. This will mean a slight change in how the cooker hood is to be installed from the process shown on page 13. -
Page 22: Troubleshooting
Troubleshooting If something has gone wrong with your Cooker Hood, checking against this chart might keep you from having to call for service. Symptom Solution Check that the hood is connected to the electricity supply. The cooker hood will not start! ... -
Page 23: Conditions Of Guarantee
Think Appliances will provide free of charge the parts required to repair the appliance during the warranty period,only if they are fitted by a qualified technician(for this phone Think appliances),for any... - Page 24 This guarantee is in addition to and does not diminish your statutory or legal rights. If you have any further questions please contact Think Appliances Pty Ltd: SERVICE DEPARTMENT Phone:1800 444 357 Fax:1300 133 279 Email:service@thinkappliances.com...