
Related Manuals for Siemens HV531ANS0


Summary of Contents for Siemens HV531ANS0
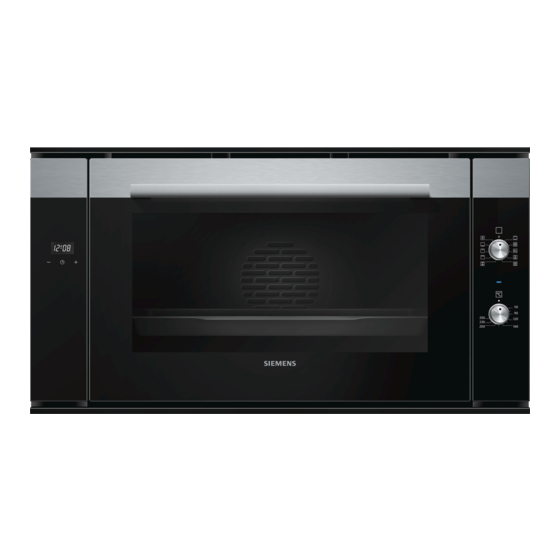
- Page 1 Built-in oven HV531ANS0 siemens-home.com/welcome siemens-home.bsh-group.com/welcome [en] Instruction manual Register your product online...
-
Page 3: Table Of Contents
Additional information on products, accessories, replacement Additional information on products, accessories, replacement Cleaning agents ..................8 parts and services can be found at www.siemens-home.com parts and services can be found at www.siemens-home.bsh- Removing and installing the door panels ........9 and in the online shop www.siemens-eshop.com group.com and in the online shop www.siemens-home.bsh-... -
Page 4: Causes Of Damage
A draught is created when the appliance The cable insulation on electrical ■ ■ door is opened. Greaseproof paper may appliances may melt when touching hot come into contact with the heating parts of the appliance. Never bring element and catch fire. Do not place electrical appliance cables into contact greaseproof paper loosely over with hot parts of the appliance. -
Page 5: Your New Appliance
Your new appliance Get to know your appliance. You will find information on the Setting control panel, the oven, types of heating and accessories. Centre-area grill For grilling small amounts of steak, sausages, toast and pieces of fish. The centre part of the grill heating element becomes hot. -
Page 6: Accessories
Accessories You can pull out the accessories two thirds of the way without them tipping. This allows dishes to be removed easily. The accessories can be inserted into the cooking compartment The accessories may become deformed when they become at 4 different levels. Always insert them as far as they will go so hot. -
Page 7: How To Operate Your Oven
How to operate your oven Pop-out operating controls Notes To change the remaining time, press the button until the The function selector and the temperature selector can be ■ symbol flashes on the display. Then change the remaining popped out. Press the operating control in question to pop it in time with the "+"... -
Page 8: Displaying And Changing Set Values
The cooking time has elapsed Displaying and changing the cooking time and switch-off time. An audible signal sounds, the symbol disappears from the Û display panel and the A symbol flashes. Press the button until the symbol flashes on the display panel. -
Page 9: Removing And Installing The Door Panels
Removing and installing the door panels Note: The middle panel is kept in place with rubber bushings rather than retaining pins. To facilitate cleaning, you can remove the glass panels from the oven door. Removing the door panels Open the oven door fully. Lock both hinges on the left and right using the locking pin. -
Page 10: Removing And Inserting The Hook-In Racks
Removing and inserting the hook-in racks Fitting the appliance door Grip the oven door on either side with both hands. You can remove the hook-in racks for easier cleaning. Slide the hinges into the slots in the oven (a). Removing the hook-in racks Note: The notch below the hinges must engage into the The hook-in racks are each fixed to the side panels of the frame of the oven (b). -
Page 11: After-Sales Service
Replace the oven light bulb with a bulb of the same type: Refit the glass cover for the oven light bulb. Voltage: 230 V; Refit the hook-in racks. Power: 40 W; Remove the tea towel. Fitting: G9; Switch the circuit breaker back on. Temperature resistance: 300 °C Check that the oven lighting is working again. -
Page 12: Acrylamide In Foodstuffs
Acrylamide in foodstuffs Acrylamide is mainly produced in grain and potato products prepared at high temperatures, such as potato crisps, chips, toast, bread rolls, bread or fine baked goods (biscuits, gingerbread, cookies). Tips for keeping acrylamide to a minimum when preparing food Keep cooking times to a minimum. -
Page 13: Roasting And Grilling
Roasting and grilling Grilling tips If possible, grill items should be of equal thickness. They Ovenware ■ should be at least 2 to 3 cm thick. This ensures that they You may use any heatresistant ovenware. Always place the brown evenly while also remaining succulent. ovenware in the middle of the wire rack. -
Page 14: Tested For You In Our Cooking Studio
Tested for you in our cooking studio. Notes The times specified in the tables are only guidelines. They will ■ Here, you can find a selection of dishes and the ideal settings depend on the quality and composition of the food. for them. - Page 16 BSH Hausgeräte GmbH Carl-Wery-Straße 34, 81739 München, GERMANY siemens-home.com siemens-home.bsh-group.com *9000971614* 9000971614 960701...