
Related Manuals for Siemens HS636GD.1I


Summary of Contents for Siemens HS636GD.1I
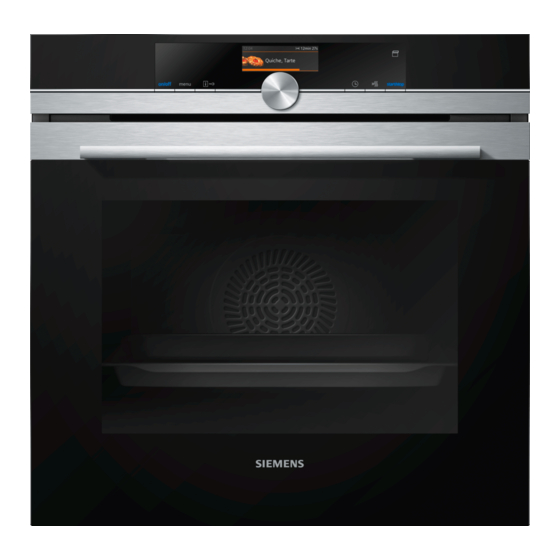
- Page 1 Oven HS636GD.1I User manual and installation instructions Register your product on My Siemens and discover exclusive ser- vices and offers. siemens-home.bsh-group.com/welcome The future moving in. Siemens Home Appliances...
-
Page 2: Table Of Contents
en Safety Table of contents ¡ Keep the instruction manual and the product information safe for future refer- ence or for the next owner. ¡ Do not connect the appliance if it has been USER MANUAL damaged in transit. Safety .............. 2 1.2 Intended use Preventing material damage ....... -
Page 3: Safety
Safety en on the oven door, as they may scratch the Loose food remnants, fat and meat juices surface. may catch fire. ▶ Before using the appliance, remove the The appliance and its parts that can be touched may have sharp edges. worst of the food residues and remnants ▶... -
Page 4: Preventing Material Damage
en Preventing material damage Hot liquid may spill over the sides of the ac- WARNING ‒ Risk of suffocation! cessory when it is removed from the cooking Children may put packaging material over compartment. their heads or wrap themselves up in it and ▶... -
Page 5: Environmental Protection And Saving En- Ergy
Environmental protection and saving energy en ▶ Never operate the appliance if the seal is damaged Dripping liquids make the cooking compartment floor or missing. dirty. Sitting or placing objects on the appliance door may ▶ When steaming with a perforated cooking container, damage it. - Page 6 en Familiarising yourself with your appliance 4 Familiarising yourself with your appliance 4.1 Control panel Buttons The buttons on the left- and right-hand side of You can use the control panel to configure all functions the control panel have a pressure point. Press of your appliance and to obtain information about the a button to execute its function.
-
Page 7: Familiarising Yourself With Your Appliance
Familiarising yourself with your appliance en If you have set a cooking time and the cooking time is If the self-cleaning surfaces no longer clean themselves deleted, the countdown time takes over from the time adequately during operation, heat up the cooking com- that has already elapsed from the cooking time. -
Page 8: Operating Modes
en Operating modes 5 Operating modes This is where you can find an overview of your appli- Operating ance's operating modes and main functions. mode Press to open the menu. Steam Gently prepare food with types of steam heating. Operating mode Drying func-... -
Page 9: Accessories
Accessories en Symbol Type of heating Temperature What it's used for and how it works range Possible additional options Slow cooking 70–120 °C Slowly and gently cook seared, tender pieces of meat in un- covered cookware. The heat is emitted evenly from above and below at a low tem- perature. - Page 10 en Accessories Accessories Unperforated steam con- Cooking: tainer, size S ¡ Rice ¡ Pulses ¡ Cereals Place the steam container on the wire rack. Perforated steam container, ¡ Steaming vegetables. size S ¡ Juicing berries. ¡ Defrosting. Place the steam container on the wire rack. Perforated steam container, Steaming large quantities of food.
-
Page 11: 7.1 Before Using For The First Time
In so doing, the wire rack is on your appliance in our brochures and online: top of the upper guide rod. www.siemens-home.bsh-group.com Accessories vary from one appliance to another. When Wire rack purchasing accessories, always quote the exact on univer- product number (E no.) of your appliance. -
Page 12: Basic Operation
button lights up blue. ATTENTION! ‒ a The Siemens logo appears in the display. A type of If there is water on the cooking compartment floor heating and a temperature are then displayed. when operating the appliance at temperatures above 120 °C, this will damage the enamel. -
Page 13: Rapid Heating
Rapid heating en Briefly press . When the food is ready, press to switch the ‒ appliance off. To continue the operation, press . ‒ To cancel the operation, press . Tip: The most suitable type of heating for your food a The operation stops and all of the settings are reset. - Page 14 en Time-setting options 10 Time-setting options 10.3 Setting the cooking time Your appliance has different time-setting options, with which you can control its operation. You can set a cooking time for operation of up to 23 hours 59 minutes. 10.1 Overview of the time-setting options Requirement: The type of heating and a temperature You can set a cooking time and an operation end time or setting have been set.
- Page 15 Steam en Cancelling the end time To set a later end time, turn the rotary selector. Press to start the operation. The set end time can only be changed when the oven a The status bar shows a notification when the opera- is in standby mode.
-
Page 16: Steam
en Steam Slide the full water tank back into the recess . Note: If the water tank runs dry during operation, a When doing so, make sure that the water tank clicks notification appears in the display. Operation is into place in the retainers . stopped. - Page 17 Steam en Press the temperature. Note: Once the appliance has been switched off, the Use the rotary selector to set the temperature. button remains lit for a little longer to remind you to Press the steam injection. empty the water tank. Use the rotary selector to set the steam injection.
- Page 18 en Meat probe Requirement: The cooking compartment must have Leave the cooking compartment to dry with the ap- cooled down. pliance door open for 1 hour. Remove limescale marks with a cloth soaked in vin- Remove any food remnants from the cooking com- egar, then wipe with clean water and dry with a soft partment.
- Page 19 Meat probe en ¡ Do not remove the meat probe when turning the Use the rotary selector to adjust the core temperat- food. Once you have turned the food, check that the ure. meat probe is correctly positioned in the food. Press ...
-
Page 20: Meat Probe
en Dishes Other Core temperature Other Core temperature in °C in °C Meat loaf, all kinds of meat 80 - 90 Heating food, reheating 65 - 75 13 Dishes The "Dishes" operating mode helps you to use your ap- You can adjust the temperature and the core temperat- pliance to prepare different meals by selecting the op- ure. -
Page 21: Childproof Lock
Childproof lock en For some dishes, you can set the weight directly Category Foods ‒ using the rotary selector. Side dishes, Vegetables For information about the accessory and shelf posi- vegetables Potatoes tion, press "Tip". Rice Press to start the operation. Cereals a The appliance starts to heat and the time starts to Pulses... -
Page 22: Sabbath Mode
en Sabbath mode 15 Sabbath mode You can set a cooking time of up to 74 hours using Press the temperature. Sabbath mode. You can use top/bottom heating to The temperature is preset to 85 °C. keep food warm between 85 °C and 140 °C during Use the rotary selector to set the desired temperat- this time without having to switch the appliance on or ure. -
Page 23: Cleaning And Servicing
Cleaning and servicing en Press "Discard" . a All your changes are discarded and not saved. 17 Cleaning and servicing ▶ Do not use cleaning products with a high alcohol To keep your appliance working efficiently for a long content. time, it is important to clean and maintain it carefully. ▶... - Page 24 en Cleaning and servicing Cooking compartment Area Suitable cleaning agents Information Enamel surfaces ¡ Hot soapy water Soak any heavily soiled areas and use a brush or steel wool. Leave the appliance door open to dry the cooking compartment ¡ Vinegar water after cleaning it.
-
Page 25: Descaling
Cleaning assistance en ▶ Do not use oven cleaner or abrasive cleaning aids. Remove any objects from the cooking compartment. If oven cleaner accidentally comes into contact with The cooking compartment must be empty. the self-cleaning surfaces, dab it off immediately us- Set the 4D hot air heating function. -
Page 26: Drying
en Drying If descaling is interrupted, you can no longer set any 19.2 Setting the descaling function operation. To ensure that the appliance is ready for op- Requirement: → "Preparing descaling", Page 26 eration again, carry out two rinse cycles. Press . In the operating mode menu, select "Descaling". 19.1 Preparing descaling a The duration appears in the display. - Page 27 Appliance door en 21 Appliance door To clean the appliance door thoroughly, you can disas- Press on the right-hand pressure surface until semble the appliance door. the hook is released. 21.1 Detaching the appliance door WARNING ‒ Risk of injury! Components inside the appliance door may have sharp edges.
- Page 28 en Appliance door Snap the hooks on the left and right of the con- Open the locking levers on the left- and right-hand densate tray into the gap . hinges . a The locking levers are open. The hinges are now se- cured and cannot snap shut.
- Page 29 Appliance door en If necessary, you can remove the condensate Slide the intermediate pane into the left- and right- trough for cleaning. hand retainers . Open the appliance door. ‒ Tilt the condensate trough upwards and remove ‒ Push the intermediate pane upwards until it is in the left- and right-hand retainers ...
-
Page 30: Troubleshooting
en Rails Push the inner pane upwards until it is in the left- Close the locking levers on the left- and right-hand and right-hand retainers . hinges . Put the door cover in position and push down on a The locking levers are closed. - Page 31 Troubleshooting en 23.1 Malfunctions Fault Cause and troubleshooting The appliance is not The circuit breaker is faulty. working. ▶ Check the circuit breaker in the fuse box. There has been a power cut. ▶ Check whether the lighting in your kitchen or other appliances are working. "Sprache Deutsch"...
- Page 32 Setting values, e.g. temperature or cooking time, depend on the recipe, quantity and food. ▶ Next time, set lower or higher values. Tip: A lot of information about the food preparation and corresponding setting values can be found on our website www.siemens-home.bsh-group.com .
-
Page 33: Disposal
Disposal en 24 Disposal Find out here how to dispose of old appliances cor- This appliance is labelled in accord- rectly. ance with the guidelines on e-waste Management and Handling Rules 24.1 Disposing of old appliance 2016 concerning used electrical and electronic appliances. Valuable raw materials can be reused by recycling. - Page 34 en How it works This product contains light sources from energy effi- 25.1 Product number (E-Nr.) and production ciency class G. These light sources are available as a number (FD) spare part and should only be replaced by trained spe- You can find the product number (E-Nr.) and the pro- cialist staff.
-
Page 35: How It Works
How it works en ¡ The meat probe allows you to cook with absolute ¡ To catch any liquids that drip down, place the uni- precision. Please take note of the important informa- versal pan into the cooking compartment at least tion on using it correctly. - Page 36 en How it works 26.7 List of foods Recommended settings for a variety of foods, sorted into food categories. Recommended settings for various types of food Food Accessories/cook- Shelf pos- Heating Temperature in Steam in- Cooking time ware ition function °C tensity in mins → Page 8 Sponge cake, 2 levels...
- Page 37 How it works en Food Accessories/cook- Shelf pos- Heating Temperature in Steam in- Cooking time ware ition function °C tensity in mins → Page 8 Pizza, fresh, on a baking Universal pan 180 - 200 35 - 45 tray, on 2 levels Baking tray Pizza, fresh, thin-crust, on Pizza tray...
- Page 38 en How it works Food Accessories/cook- Shelf pos- Heating Temperature in Steam in- Cooking time ware ition function °C tensity in mins → Page 8 Fish, baked, whole, Universal pan 1. 1. 170–180 1. 15–20 2. 2. 160–170 2. 5–10 300 g, e.g.
- Page 39 How it works en ¡ Place the food with the longest cooking time into the cooking compartment first. Add the rest of the food at the appropriate times. This means that all the food will be ready at the same time. ¡...
- Page 40 en How it works Food Accessory/cook- Shelf pos- Searing Heating function Temperature Cooking ware ition time in → Page 8 in °C time in mins mins Veal medallions, 4 cm Uncovered cook- 30 - 50 thick ware Saddle of lamb, bone- Uncovered cook- ...
- Page 41 How it works en ¡ Accessory/cookware: Tips for reheating food – Place frozen fruit and vegetables into the perfor- ¡ Use uncovered, heat-resistant cookware that is suit- ated steaming tray (size XL). To catch any liquids able for cooking with steam. that drip down, place the universal pan into the ¡...
- Page 42 en How it works Recommended settings for baking Food Accessories/cook- Shelf pos- Heating Temperature in Steam intens- Cooking ware ition function °C time in → Page 8 mins Viennese whirls Baking tray 140 - 150 25 - 40 Viennese whirls Baking tray ...
-
Page 43: Installation Instructions
Installation instructions en Food Accessory/cookware Shelf posi- Heating Temperature in °C Cooking time tion function in mins → Page 8 Broccoli, fresh, 300 g Steam containers, XL 7–8 size Broccoli, fresh, one con- Steam containers, XL 7–8 tainer size The test is over when 85 °C is reached at the coldest spot (see IEC 60350-1). The test is over when 85 °C is reached at the coldest spot (see IEC 60350-1). - Page 44 en Installation instructions 27.2 Appliance dimensions ¡ Wear protective gloves so that you do not cut yourself. Parts that are accessible dur- You will find the dimensions of the appliance here ing installation may have sharp edges. ¡ Dimensions of the figures in mm. WARNING ‒ Risk of fire! It is dangerous to use an extended power cord and non-approved adapters.
- Page 45 Installation instructions en Hob type a raised in mm a flush in mm b in mm Full-surface induction hob Gas hob Electric hob 27.5 Installation in a tall unit ¡ Ensure that air exchange is guaranteed in accord- ance with the diagram. Observe the installation dimensions and the installation instructions when installing in a tall unit.
- Page 46 en Installation instructions ¡ The power cable must be plugged in at the rear of Screw the appliance into place. the appliance until you hear a clicking sound. A 3 m power cable can be obtained from the after-sales service. ¡ The power cable must only be replaced with a cable from the original manufacturer.
- Page 48 BSH Hausgeräte GmbH Carl-Wery-Straße 34 81739 München, GERMANY www.siemens-home.bsh-group.com Manufactured by BSH Hausgeräte GmbH under the trademark licence of Siemens AG *9001666462* 9001666462 (020203)