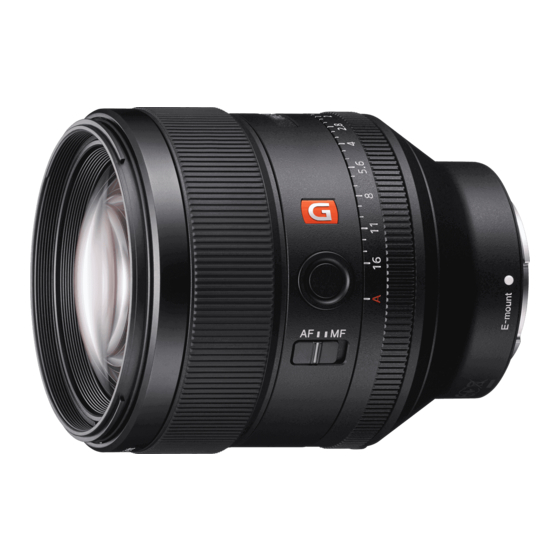
Sony SEL85F14GM Service Manual
Interchangeable
Hide thumbs
Also See for SEL85F14GM:
- Operating instructions (2 pages) ,
- Service manual (59 pages) ,
- Operating instructions manual (7 pages)
Table of Contents
Advertisement
Quick Links
SERVICE MANUAL
Ver. 1.2 2016.07
Revised-2
Replace the previously issued
SERVICE MANUAL 9-896-776-12
with this Manual.
Link (English)
SPECIFICATIONS
SERVICE NOTE
REPAIR PARTS LIST
ADJUSTMENT
Link (Japanese)
SPECIFICATIONS
SERVICE NOTE
REPAIR PARTS LIST
ADJUSTMENT
分解図につきましては,英語版を
ご参照下さい。
SEL85F14GM (FE 1.4 / 85 GM) (FE 85mm F1.4 GM)
9-896-776-13
SEL85F14GM
(FE 1.4 / 85 GM) (FE 85mm F1.4 GM)
US Model
Canadian Model
AEP Model
Chinese Model
Japanese Model
DISASSEMBLY
DISASSEMBLY
INTERCHANGEABLE LENS
INTERCHANGEABLE LENS
Sony Corporation
Revision History
Ver.
Date
History
1.0
2016.02
Official Release
1.1
2016.03
Revised-1
• Change of ADJUSTMENT.
English: Page
(A1 15-146)
Japanese: Page
1.2
2016.07
Revised-2
• Revision of DISASSEMBLY.
(A2 15-190)
English: Page 2-1, 2-2, 2-4,
Japanese: Page 2-1, 2-2, 2-4,
• Revision of ADJUSTMENTS.
English: Page
Japanese: Page
989677613.pdf
S.M. Rev.
Contents
—
4-1
4-1
2-12
2-12
4-1
4-1
Published by Sony Techno Create Corporation
issued
—
Yes
Yes
2016G08-1
© 2016.07
Advertisement
Table of Contents

Related Manuals for Sony SEL85F14GM


Summary of Contents for Sony SEL85F14GM
- Page 1 SPECIFICATIONS SERVICE NOTE DISASSEMBLY REPAIR PARTS LIST ADJUSTMENT INTERCHANGEABLE LENS INTERCHANGEABLE LENS 分解図につきましては,英語版を ご参照下さい。 2016G08-1 SEL85F14GM (FE 1.4 / 85 GM) (FE 85mm F1.4 GM) © 2016.07 Sony Corporation 9-896-776-13 Published by Sony Techno Create Corporation...
-
Page 2: Specifications
Lens (1), Front lens cap (1), Rear lens cap (1), Lens hood (1), Lens case (1), Set of printed documentation 仕様および外観は、改良のため予告なく変更することがありますが、ご了承ください。 Design and specifications are subject to change without notice. SEL85F14GM (FE 1.4 / 85 GM) (FE 85mm F1.4 GM) – 2 –... - Page 3 “ Command ” of E-Mount Lens Adjustment (Adjustment Application for Service) is set to [READ] to implement the [Adjustment Data Backup]. • After main board replacement “ Command ” of E-Mount Lens Adjustment (Adjustment Application for Service) is set to [WRITE(SAVE)] to implement the [Adjustment Data Backup]. SEL85F14GM (FE 1.4 / 85 GM) (FE 85mm F1.4 GM) 1-1E...
-
Page 4: Operation Notes
If you push on the wires, they might be broken. SERVICE TOOLS B-10 Adhesive bond (B-10): J-6082-612-A B-110 Adhesive bond (B-110): J-6082-617-A Grease (FT-210): 9-913-200-37 FT-210 G-85 J-6082-626-A Grease (G-85): G-345 Grease (G-345): J-6082-755-A SEL85F14GM (FE 1.4 / 85 GM) (FE 85mm F1.4 GM) - Page 5 G-85 G-345 Click Lever (9139) Hold Button Washer (9126) Iris (ATS-40B-F1) Focus Hold Button (9126) Selection Lever Gom Bush B (9109) LF-2141 Flexible Board HELP08 CL-1040 Board SEL85F14GM (FE 1.4 / 85 GM) (FE 85mm F1.4 GM) FPC Holder (9139)
- Page 6 1. Attach the Protection Rubber GD (9139) and apply the adhesive bond (B-10) to three grooves. Protection Rubber GD (9139) Apply the adhesive bond (B-10) Filter Screw Barrel Index Assy (9139) Groove Groove Aperture value scale Groove SEL85F14GM (FE 1.4 / 85 GM) (FE 85mm F1.4 GM)
- Page 7 2. Attach the MF Spacer (9139) to the Focus Ring (9139) and apply the grease (G-85) to the specified locations. MF Spacer (9139) GD Lens Barrel Assy (9139) Apply the grease (G-85) Apply the adhesive bond (B-110) Focus Ring (9139) SEL85F14GM (FE 1.4 / 85 GM) (FE 85mm F1.4 GM)
- Page 8 1. Apply the grease (G-85) to the specified locations of Rear Barrel Assy (9139). Apply the grease (G-85) Apply the Iris Ring Assy (9139) grease (G-85) Apply the grease (G-85) Rear Barrel Assy (9139) SEL85F14GM (FE 1.4 / 85 GM) (FE 85mm F1.4 GM)
- Page 9 At that time, the slider is fit into the groove of the Iris Ring Assy (9139). Apply the Iris Ring Assy (9139) grease (G-345) Iris Ring Assy (9139) Outer Assy (9139) △ Index Slider Apply the Apply the grease (G-345) grease (G-345) SEL85F14GM (FE 1.4 / 85 GM) (FE 85mm F1.4 GM)
- Page 10 Install the Flexible Board (Stator Assy B) as shown in the figure below. (Main FPC Assy (9139)) Flexible Board (Stator Assy B) Convex portion Hole CL-1040 Board Flexible Board (Stator Assy B) SEL85F14GM (FE 1.4 / 85 GM) (FE 85mm F1.4 GM)
- Page 11 1. Apply the grease (G-85) to the gear portion of the MR Encoder (1740). Apply the grease (FT-210) Apply the grease (G-85) (All circumference) Pressure Spring Pressure Spring MR Encoder (1740) SEL85F14GM (FE 1.4 / 85 GM) (FE 85mm F1.4 GM)
- Page 12 Screw Ring (9139) which is not affected the groove of Straight Fixed Barrel (9139). Apply the adhesive bond (B-10) Stator Screw Ring (9139) Stator Screw Ring (9139) Stator Screw Ring (9139) Straight Fixed Barrel (9139) Groove (4 locations) SEL85F14GM (FE 1.4 / 85 GM) (FE 85mm F1.4 GM)
- Page 13 (B-10) Wide convex portion Rotor Rotor Rubber Y HELP16 Wide groove 1. Attach the Flat Plate (9139) to the Cam Barrel (9139). Flat Plate (9139) Cam Barrel (9139) SEL85F14GM (FE 1.4 / 85 GM) (FE 85mm F1.4 GM) 2-10...
- Page 14 Cam Barrel (9139) Apply the grease (FT-210) Apply to the both sides Straight Fixed Barrel (9139) Steel Ball Holding (9139) Wide concave portion Flat Plate (9139) Straight Fixed Barrel (9139) SEL85F14GM (FE 1.4 / 85 GM) (FE 85mm F1.4 GM) 2-11...
- Page 15 Be careful the gap of the seat and the bite of the Pressure Spring. Note 2: To perform the ultrasonic motor height adjustment, do not fully tighten the Stator Screw Ring (9139). SEL85F14GM (FE 1.4 / 85 GM) (FE 85mm F1.4 GM) 2-12E...
-
Page 16: Repair Parts List
Select the part referring to “ 3-1-3. SELECTION 3-1-3. SELECTION PARTS ”を参照して選択してくださ “ PARTS ” . い。 (Note 3) Note 4: These parts attach the same quantity as that was Note 4: これらの部品は取り付いていた量と同じ量を元の位置に取り attached. 付けてください。 SEL85F14GM (FE 1.4 / 85 GM) (FE 85mm F1.4 GM) -
Page 17: Optical Block Section
STEEL BALL HOLDING (9139) 4-568-760-01 STATOR SCREW RING (9139) 4-568-759-01 STEEL BALL (2.5) 4-581-352-01 PRESSURE PLATE (9139) 2-691-576-02 SHEET(STATOR HOLD SHEET B) 4-462-388-01 WASHER, SSM ADJUSTMENT 4-300-115-21 TAPPING (1.7) (CH) 2-691-125-11 PLATE(SHEET) SEL85F14GM (FE 1.4 / 85 GM) (FE 85mm F1.4 GM) - Page 18 取扱説明書 , ウクライナ語 ) * 905 4-575-277-21 Operating Instructions (RUSSIAN, ARABIC, 韓国語 TRADITIONAL CHINESE, KOREAN, UKRAINIAN) 4-575-277-31 ( 中国語 (簡体字) ) 取扱説明書 * 905 4-575-277-31 Operating Instructions (SIMPLIFIED CHINESE) SEL85F14GM (FE 1.4 / 85 GM) (FE 85mm F1.4 GM) 3-3E...
-
Page 19: Preparations Before Adjustment
Lens Device (S) Lens Sleep Section 4-6 Lens Device 2 (S) Flange Back (S) F Number (S) Rom Check Adjustment execute Check Iris Close Replace the Service Exclusive Optics Block Lens Sleep SEL85F14GM (FE 1.4 / 85 GM) (FE 85mm F1.4 GM) - Page 20 USB port: USB 2.0 recommended (also compatible with 1.1) Two connectors are required. Run time: .NET Framework 2.0 (.NET Framework 2.0 is installed at lens adjustment program installation, if it is not installed.) SEL85F14GM (FE 1.4 / 85 GM) (FE 85mm F1.4 GM)
-
Page 21: Optical Axis Check/Adjustment
5. Turn the scale ring of the dial gauge until the long pointer indicates “0”. Note: This position is the flange back (f’F) = 43.50 mm. Memorize the position of the short pointer. SEL85F14GM (FE 1.4 / 85 GM) (FE 85mm F1.4 GM) - Page 22 The cause depends on individual lens. Specification (Reference) CB (Center Blur) AS (Astigmatism) 0.04 mm or less 0.03 mm or less 7. If the specifications are not satisfied, perform the “4-2-3. Optical Axis Adjustment”. SEL85F14GM (FE 1.4 / 85 GM) (FE 85mm F1.4 GM)
- Page 23 Note: Check if the circle in the center is resolved clearly. Then, check to ensure the other circles (24 circles) are resolved symmetrically in vertical and horizontal directions. (A circle and its counterpart on the diametrically opposite side are resolved equally.) * Use Adobe Photoshop to check the image resolution. SEL85F14GM (FE 1.4 / 85 GM) (FE 85mm F1.4 GM)
- Page 24 USB to Serial Cable 2. Download the file “BLG-TestProgramV[][][].zip”, save and extract it. 3. Save “BLG-TestProgramV[][][].exe” in an any folder. Note: The version of “BLG-TestProgram” may be updated without notice. SEL85F14GM (FE 1.4 / 85 GM) (FE 85mm F1.4 GM)
- Page 25 Motorized zoom: Set the focal length and zoom speed from the lens adjustment program, and click [Zoom(Focal Dist.)]. (If a time-out error occurs, increase the zoom speed.) Select focal length Enter focal length (Select “ Input ” from the left pull-down menu.) Execute zoom Select zoom speed SEL85F14GM (FE 1.4 / 85 GM) (FE 85mm F1.4 GM)
- Page 26 In this case, black and white of three stripes are reversed and seen as if they are two or four lines in some cases. Be careful not to confuse this phenomenon with the resolution limit. Correct resolution Spurious resolution SEL85F14GM (FE 1.4 / 85 GM) (FE 85mm F1.4 GM)
-
Page 27: Flange Back Check
2. Check that there is no notable image blur, center shifting, image shaking or image jumping. Note: Replace the Optical Block For Service when there is notable image blur, center shifting, image shaking or image jumping. SEL85F14GM (FE 1.4 / 85 GM) (FE 85mm F1.4 GM) - Page 28 To USB connector • Just me: Only for the user who logs in the PC now. To tripod screw USB cable Tripod (optional) HASP key Personal computer To USB connector SEL85F14GM (FE 1.4 / 85 GM) (FE 85mm F1.4 GM) 4-10...
- Page 29 If the “PUSH ENTER” does not disappear even after pressing the ENTER key, press it again. Do not touch the focus ring when performing operations on lens side, as the focus is on ∞ status during adjustment. SEL85F14GM (FE 1.4 / 85 GM) (FE 85mm F1.4 GM) 4-11...
- Page 30 Click the [Clear] button, the histories displayed on the Message History window will be deleted. 2. Click the [×] button on the upper right of the main window to finish. 3. Turn off the power of camera. SEL85F14GM (FE 1.4 / 85 GM) (FE 85mm F1.4 GM) 4-12...
- Page 31 6. Match the iris ring to the iris scale “A”, and push the ENTER key. 3. After “PLEASE ROTATE MF RING” is displayed, rotate the focus ring to one direction continuously. SEL85F14GM (FE 1.4 / 85 GM) (FE 85mm F1.4 GM) 4-13...
- Page 32 11. After “Select the MF.” is displayed, set the focus mode switch to MF. 9. After “START” is displayed, push the ENTER key. 12. After “Select the AF.” is displayed, set the focus mode switch to AF. SEL85F14GM (FE 1.4 / 85 GM) (FE 85mm F1.4 GM) 4-14...
- Page 33 3. Recording the adjustment data and releasing the adjustment mode are performed automatically by pushing the ENTER key. After processing, “FINISHED” is displayed. 16. Recording the adjustment data and releasing the adjustment mode are performed automatically by pushing the ENTER key. After processing, “FINISHED” is displayed. SEL85F14GM (FE 1.4 / 85 GM) (FE 85mm F1.4 GM) 4-15...
- Page 34 • Iris value: F1.4 3. Set the iris value to F8. 4. Confirm that the image change is less than 0.02 mm when setting the iris value to F8. SEL85F14GM (FE 1.4 / 85 GM) (FE 85mm F1.4 GM) 4-16...
- Page 35 2. After completing the adjustment, “SW CHECK OK” is displayed. 3. Recording the adjustment data and releasing the adjustment mode are performed automatically by pushing the ENTER key. After processing, “FINISHED” is displayed. SEL85F14GM (FE 1.4 / 85 GM) (FE 85mm F1.4 GM) 4-17E...
-
Page 36: Service Note
[Adjustment Data Backup] を実施する。 • メイン基板交換後 レンズ調整プログラム ( E-Mount Lens Adjustment ( Adjustment Application for Service ) ) の, “ Command ”を [WRITE(SAVE)] に設定し て [Adjustment Data Backup] を実施する。 SEL85F14GM (FE 1.4 / 85 GM) (FE 85mm F1.4 GM) 1-1E... - Page 37 • 線材部 (極細) を押さえながらコネクターを差し込むと,線材 部 (極細) が断線する恐れがありますので,絶対に線材部 (極細) には負担をかけないでください。 副資材について B-10 ボンド (B-10): J-6082-612-A B-110 ボンド (B-110): J-6082-617-A FT-210 グリス (FT-210): 9-913-200-37 J-6082-626-A G-85 グリス (G-85): G-345 グリス (G-345): J-6082-755-A SEL85F14GM (FE 1.4 / 85 GM) (FE 85mm F1.4 GM)
- Page 38 ダミー枠 (9139) HELP09 B-10 HELP17 HELP06 F付勢用ワッシャ (9139) 後外装部組 (9139) 外装部組 (サービス)(9139) FT-210 G-85 2群部組 (9139) アイリスリング部組 (9139) スライドレバー HELP07 フォーカスフォールド 防滴シートB (9133) ゴムリング (9126) G-85 G-345 クリックレバー (9139) フォーカスフォールド アイリス (ATS-40B-F1) ボタン座 フォーカスフォールドボタン (9126) 切替レバー 基板ゴムブッシュB (9109) LF-2141フレキシブル基板 HELP08 CL-1040基板 SEL85F14GM (FE 1.4 / 85 GM) (FE 85mm F1.4 GM) フレキ押さえ (9139)
- Page 39 ボンド ( B-10 ) : J-6082-612-A 1. GD 防滴ゴム ( 9139 ) を取り付け , 溝 3 箇所にボンド ( B-10 ) を塗布する。 GD防滴ゴム (9139) ボンド(B-10) を塗布 フィルターネジ環 ASSY (9139) 指標 溝 溝 絞り値目盛り 溝 SEL85F14GM (FE 1.4 / 85 GM) (FE 85mm F1.4 GM)
- Page 40 穴 (2つ) フォーカス操作環 (9139) 1群部組 (9139) MRエンコーダ (1740) 2. フォーカス操作環 ( 9139 ) に MF スペーサ ( 9139 ) を取り付けた後 , 指示部にグリス ( G-85 ) を塗布する。 GDレンズ枠ASSY (9139) MFスペーサ (9139) グリス (G-85) を塗布 ボンド(B-110) を塗布 フォーカス操作環 (9139) SEL85F14GM (FE 1.4 / 85 GM) (FE 85mm F1.4 GM)
- Page 41 グリス (G-85) を塗布 HELP06 グリス ( G-85 ) : J-6082-626-A 1. 後外装部組 ( 9139 ) の指示部にグリス ( G-85 ) を塗布する。 グリス (G-85) を塗布 グリス (G-85) アイリスリング部組 (9139) を塗布 グリス (G-85) を塗布 後外装部組 (9139) SEL85F14GM (FE 1.4 / 85 GM) (FE 85mm F1.4 GM)
- Page 42 6. ア イリスリング部組 ( 9139 ) を 「 1.4 」 と指標の位置を合わせながら , 取り付ける。 その際 , ア イリスリング部組 ( 9139 ) の溝にスライ ダーがはまること。 グリス (G-345) アイリスリング部組 (9139) を塗布 アイリスリング部組 (9139) 外装部組 (9139) △マーク 指標 スライダー グリス (G-345) グリス (G-345) を塗布 を塗布 SEL85F14GM (FE 1.4 / 85 GM) (FE 85mm F1.4 GM)
- Page 43 外装部組 (サービス) ( 9139) コネクター 溝 メインフレキASSY (9139) フレキシブル基板 フレキシブル基板 フレキシブル基板 (ステータASSY B) (ステータASSY B) CL-1040基板 (ステータASSY B) 3. CL-1040 基板の穴と凸部を合わせて基板を取り付ける。 その後 , フレキシブル基板 (ステータ ASSY B ) を図のように処理する。 コネクター部 (メインフレキASSY (9139)) フレキシブル基板 (ステータASSY B) 凸部 穴 CL-1040基板 フレキシブル基板 (ステータASSY B) SEL85F14GM (FE 1.4 / 85 GM) (FE 85mm F1.4 GM)
- Page 44 1. 加圧バネの両面にグリス ( FT-210 ) を塗布する。 HELP11 グリス ( G-85 ) : J-6082-626-A グリス (FT-210) を塗布 1. MR エンコーダー ( 1740 ) のギア部にグリス ( G-85 ) を塗布する。 グリス (G-85) を塗布 (全周に塗布) 加圧バネ 加圧バネ MRエンコーダー (1740) SEL85F14GM (FE 1.4 / 85 GM) (FE 85mm F1.4 GM)
- Page 45 フレキシブル基板 ステータ押さえリングネジ (9139) 直進固定環 (9139) 加圧バネ 大きい溝 4. 「 4-9. 超音波モータの高さ調整」の後 , 直進固定環 (9139) の溝に影響しないステータ押さえリングネジ ( 9139 ) の溝にボンド ( B-10 ) を塗布 する。 ボンド(B-10) を塗布 リングネジ (9139) リングネジ (9139) リングネジ (9139) 直進固定環 (9139) 溝 (4か所) SEL85F14GM (FE 1.4 / 85 GM) (FE 85mm F1.4 GM)
- Page 46 1. ローターラバー Y, ローター , ステータ回り止め環 ( 9139 ) , ステータ回り止めリングネジ ( 9139 ) の順に取り付ける。 ステータ回り止めリングネジ (9139) ボンド(B-10) ステータ回り止め環 を塗布 (9139) 広い凸部 ローター ローターラバーY HELP16 広い溝 1. カム環 ( 9139 ) に平板軌道盤 (9139) を取り付ける。 平板軌道盤(9139) カム環 (9139) SEL85F14GM (FE 1.4 / 85 GM) (FE 85mm F1.4 GM) 2-10...
- Page 47 3. 直進固定環 ( 9139 ) に鋼球保持器 ( 9139 ) を取り付ける。 4. 鋼球 ( 2.5 ) 50 個を鋼球保持器 ( 9139 ) の穴に入れる。 鋼球 (2.5) カム環 (9139) グリス (FT-210)を塗布 直進固定環 (9139) 両面に塗布する。 鋼球保持器 (9139) 広い凹部 平板軌道盤 (9139) 直進固定環 (9139) SEL85F14GM (FE 1.4 / 85 GM) (FE 85mm F1.4 GM) 2-11...
- Page 48 ここに重りを入れる リングネジ (9139) (両側均等に入れること) 直進固定環 (9139) 溝 (4か所) SSM高さ調整治具 4. SSM 高さ測定治具から取り外す。 5. SSM 高さ調整治具と SSM 高さ調整重り治具を取り外す。 6. 「準備」 の手順 2 で取り外したステータ押さえリングネジ (9139) と加圧バネを取り付ける。 注意 シートのずれ, 加圧バネの噛み込みに注意してください。 (9139) を完全に締めないでください。 注意 超音波モータ高さ調整を行うため, ステータ押さえリングネジ SEL85F14GM (FE 1.4 / 85 GM) (FE 85mm F1.4 GM) 2-12E...
- Page 49 ● ● ● ● ● ● ● ● Lens Sleep ● ● ● ● ● ● ● ● ● ● ● ● Lens Device 2 (S) Flange Back (S) F Number (S) Rom Check Adjustment execute Check Iris Close サービス専用光学ブロックを交換 Lens Sleep 終了 SEL85F14GM (FE 1.4 / 85 GM) (FE 85mm F1.4 GM)
- Page 50 OS: Windows Vista / 7 RAM: 256 MB またはそれ以上を推奨 ( Windows 7) 1 GB またはそれ以上を推奨 ( Windows Vista) USB port: USB 2.0 を推奨 ( USB 1.1 でも使用可能) ポートは2個必要 Run time: . NET Framework 2.0 (.NET Framework 2.0がインストールされていないPCには,レンズ調整プログラムインストール時にインス トールされます) SEL85F14GM (FE 1.4 / 85 GM) (FE 85mm F1.4 GM)
- Page 51 準備 1. 測定器を下図のように設定する。 チャート フランジバックゲージ(43.50 mm) ダイヤルゲージ Aマウントアタッチメント (最小目盛り: 0.01 mm) 対物レンズ(10x) 1000 mmコリメータ 視度調節リング 接眼レンズ(7x) 目盛りリング 2. フランジバック測定器の視度調節リングを回し,接眼レンズ内の十字線または目盛りがはっきりと見えるように調節する。 3. フランジバックゲージ (43.50 mm) をAマウントアタッチメントに密着させ,保持する。 4. フランジバックゲージに光を投じながらフランジバック測定器のノブを回転させて,細かい線が出るようにピントを合わせる。 注意: 必ず下図の矢印方向にピント合わせを行ってください。 ピント合わせ方向 ノブ 中心付近の細かい線にピントを合わせる 5. ダイヤルゲージの目盛りリングを回して,ダイヤルゲージの指針を“0”に合わせる。 注意: この位置がフランジバック値 (fʼF) = 43.50 mmとなります。短針の位置を記憶しておいてください。 SEL85F14GM (FE 1.4 / 85 GM) (FE 85mm F1.4 GM)
- Page 52 4. 被検レンズのフォーカスが∞になるように,フォーカスリングを∞方向に回転させる。そして顕微鏡を覗きながらチャート像が 中央に見えるように光軸を合わせる。 5. 顕微鏡を覗きながらフランジバック測定器のノブを回転させ,ピントが合う位置で止める。 また,同時に光軸の見え方を確認する。 (下図参照) 注意: 図は一例を示しています。実際のチャートの見え方とは異なる場合があります。 センターブレおよびアス 最良の状態 フランジバック測定器のダイヤルを回して ピント合わせを行うと, チャート像がずれる。 規格値 (参考値) CB ( センターブレ) AS ( 軸上アス) 0.04 mm 以下 0.03 mm 以下 7. 規格値を満足していない場合は, 「4-2-3 光軸の調整」 を行う。 SEL85F14GM (FE 1.4 / 85 GM) (FE 85mm F1.4 GM)
- Page 53 1. 「使用機器の設置」 の状態で,マニュアルフォーカスに設定する。 ねじ 2. ピントを合わせて,セルフタイマーで撮影する。 ねじ 3. ピントは手順2の状態のままで,撮影距離を手順1の位置から±100 mmの位置にし,2枚セルフタイマーで撮影する。 4. 撮影画像3枚の結果から,周辺の解像が以下の基準を満たしているか確認する。 ※中心(赤枠)のサークルと中心以外(青枠)のサークルを等倍で確認してください。 ボンド(B-110) を塗布 1125mm x 750mm 3:2 2015.12.15 LENS Gp 注意: 中心のサークルが解像していることを確認し,周辺のサークル (24個) は上下左右が均等に解像していることを確認してください。 (任意のサークルその直径方向で反対にあるサークルは同等に解像されていること) Adobe Photoshop等を使用して,解像の確認を行ってください。 SEL85F14GM (FE 1.4 / 85 GM) (FE 85mm F1.4 GM)
- Page 54 B-L コントロールボックス 1. レンズ調整プログラム 「BLG-TestProgramV[][][].exe」 を起動する。 D-sub 9ピン(オス) ACコード RS-232Cケーブル D-sub 9ピン(メス) USB to シリアルケーブル 2. 「BLG-TestProgramV[][][].zip」 をダウンロードして解凍する。 3. 「BLG-TestProgramV[][][].exe」 を任意のフォルダに保存する。 注意: 「BLG-TestProgram」 のバージョンは更新されることがあります。 2. [Open]をクリックし,パソコンとB-L コントロールボックスの通信が接続されるとボタン名が[Close]に変わり,[Power]ボタンが SEL85F14GM (FE 1.4 / 85 GM) (FE 85mm F1.4 GM) アクティブになる。...
- Page 55 6. 絞り選択メニューより“Open”を選択し,[Iris]をクリックする。 y' = 0 手振れ設定:Center Hold 絞り設定:Open 7. ズーム位置を変更する場合は,指定された値にズーム位置を設定する。 注意: 本機は単焦点レンズのため,手順7を行う必要がありません。 手動ズーム: 手動にてズーム位置を設定する。 電動ズーム: レ ンズ調整プログラムより焦点距離とズーム速度を設定し,[Zoom(Focal Dist.)]をクリックする。 (タイムアウトエ ラーになる場合はズーム速度を上げてください。 ) 焦点距離選択 焦点距離入力(入力時は左のプルダウンで「Input」を選択) ズーム開始ボタン ズーム速度選択 SEL85F14GM (FE 1.4 / 85 GM) (FE 85mm F1.4 GM)
- Page 56 10. 中心投影像 (y'=0) の投影解像力本数 (最高解像力) の数値 (投影解像力本数) を読み取る。 11. 周辺投影像 (y'=15, 18) のサジタル (S) 像,およびメリジオナル (M) 像 (3本の線) の明暗が確認可能な最も細かな線 (解像限界) の数 値 (投影解像力本数) を読み取る。 注意: 解像限界確認時は,偽解像に注意してください。 偽解像とは解像力を超えた細かな線が,あたかも解像しているかのように黒/白の条線として見える現象です。 この場合,下図のように3本の条線の白黒が反転して2本または4本に見えることがありますので,解像限界と混同しないように注意して ください。 正常 偽解像 SEL85F14GM (FE 1.4 / 85 GM) (FE 85mm F1.4 GM)
- Page 57 0.07 ± 0.007 4. カメラをAVCHD動画モードに設定する。 4-571-212-31 0.1 ± 0.01 5. 再度,被検レンズを装着し直す。 (フォーカスが∞となる) バックワッシャ (9139) 4-571-212-41 0.2 ± 0.01 注意: フォーカスリングには絶対に触れないでください。 10mm以内 フランジバック調整用治具 被検レンズ カメラ 4-5-2. フランジバック確認用映像の撮影 1. 「4-5-1. 準備」 の設定で動画撮影する。 4-5-3. 確認 1. 撮影した動画を液晶モニタで再生する。 2. 著しいピントボケ,中心像移動,像ユレ,像トビがないことを確認する。 注意: 著しいピントボケ,中心像移動,像ユレ,像トビがある場合は,サービス専用光学ブロックを交換してください。 SEL85F14GM (FE 1.4 / 85 GM) (FE 85mm F1.4 GM)
- Page 58 被検レンズ ACアダプター 被検レンズ カメラ 4. インストール先フォルダを選択する画面が表示されるので,インストールするユーザーを選択して, [次へ] ボタンをクリックす USBコネクタへ る。 ・ すべてのユーザー: インストールを行うPC内すべてのユーザーにインストール 三脚ネジへ USBケーブル ・ このユーザーのみ: 現在ログインしているユーザーのみにインストール 三脚 (任意) HASPキー パーソナルコンピュータ USBコネクタへ SEL85F14GM (FE 1.4 / 85 GM) (FE 85mm F1.4 GM) 4-10...
- Page 59 ・ E-Mount Lens Adjustmentを起動するとSeusEXも起動します。 1. カメラの電源を入れる。 2. E-Mount Lens Adjustmentを起動する。 3. カメラ選択画面が表示されるので“ILCE-5000”を選択する。 注意: 本機の調整で使用できるカメラはILCE-5000のみです。 6. インストールが完了すると,下記画面が表示されるので, [閉じる] ボタンをクリックする。 4. [Connect]ボタンをクリックし,Connection Statusが “Connect” に変化することを確認する。 7. デスクトップにE-Mount Lens Adjustment (Adjustment Application for Service) のショートカットアイコンが作成される。 4-6-2. 使用上の注意 ENTERを押しても“PUSH ENTER”が消えない場合は,再度ENTERを押してください。 調整時はフォーカスが∞となりますので,レンズ側での操作の際にフォーカスリングを触らないでください。 SEL85F14GM (FE 1.4 / 85 GM) (FE 85mm F1.4 GM) 4-11...
- Page 60 E-Mount Lens Adjustmentの終了方法 4-6-4. 各項目の調整方法 1. [Disconnect] ボタンをクリックし,Connection Statusが “Disconnect” に変化することを確認する。 調整方法 1. 「E-Mount Lens Adjustmentの起動方法」 を参照し,E-Mount Lens Adjustmentを起動する。 2. Adjustment and Inspectionから,該当する調整項目のボタンをクリックする。 3. 画面の指示に従って,調整を行う。 注意: レンズ側での操作が必要な調整項目の調整方法は,次項目以降を参照してください。 4. 調整が終了すると,ポップアップウィンドウにて“FINISHED”と表示されるので,[OK]ボタンをクリックする。 注意: 調整結果はMessage Historyに表示されます。 [Clear] ボタンをクリックすると,Message Historyに表示されている履歴が消去されます。 2. メインウインドウ右上の [×] ボタンをクリックし,E-Mount Lens Adjustmentを終了する。 3. カメラの電源を切る。 SEL85F14GM (FE 1.4 / 85 GM) (FE 85mm F1.4 GM) 4-12...
- Page 61 “Lens Device (S)”の調整方法 4. 調整が完了すると“MF ROTATION STOP”と表示されるので,リングの回転を止めてENTERキーを押す。 “Lens Device (S)”の項目については,レンズ側での操作が必要となります。 注意: レンズ操作時は,レンズの位置が動かないように,カメラ本体等をしっかりと手で保持しながら操作してください。その際に,フォーカスリン グには絶対に触れないでください。 1. [Lens Device (S)] ボタンをクリックするとSTART画面が表示されるので,調整の準備が完了したらENTERキーを押す。 5. 絞りリングクリック切換スイッチをONにして絞りリングを絞り目盛“1.4”に合わせ,ENTERキーを押す。 2. “MF ROTATION START”と表示されたらENTERキーを押す。 6. 絞りリングを絞り目盛“A”に合わせ,ENTERキーを押す。 3. “PLEASE ROTATE MF RING!”と表示されたらフォーカスリングを連続的に一方向へ回転させる。 SEL85F14GM (FE 1.4 / 85 GM) (FE 85mm F1.4 GM) 4-13...
- Page 62 7. 絞りリングクリック切換スイッチをONにして絞りリングを絞り目盛“A”に合わせ,ENTERキーを押す。 10. “Push the FH Button (Pos1).”と表示されたらフォーカスホールドボタンを押す。 8. 画面の指示に従いながら,目盛り“1.4”から“A”の順に調整を行う。 11. “Select the MF.”と表示されたらフォーカスモードスイッチをMF側にする。 9. “START”と表示されたらENTERキーを押す。 12. “Select the AF.”と表示されたらフォーカスモードスイッチをAF側にする。 SEL85F14GM (FE 1.4 / 85 GM) (FE 85mm F1.4 GM) 4-14...
- Page 63 13. “FOCUS SSM Noise Check START”と表示されたらENTERキーを押す。 “Lens Device 2 (S)”の調整方法 “Lens Device 2 (S)”の項目については,レンズ側での操作が必要となります。 注意: レンズ操作時は,レンズの位置が動かないように,カメラ本体等をしっかりと手で保持しながら操作してください。その際に,フォーカスリン グには絶対に触れないでください。 1. [Lens Device 2 (S)] ボタンをクリックすると“PLEASE INPUT DRIVE FREQUENCY”と“***”が表示されるので,“***”に超音波 モーター(ステータ) のフレキシブル基板に書かれた数値 (3桁)を入力する。 14. レンズから異音が聞こえないことが確認できたら,ENTERキーを押す。 2. 調整が完了すると“LENS DEVICE (FOCUS SSM LOAD) ADJUSTMENT OK”と表示される。 15. “LENS DEVICE (FOCUS SSM Noise) CHECK COMP”と表示される。 3. ENTERキーを押すと自動的に調整データの記録と調整モードの解除が行われ,処理が終わると“FINISHED”のメッセージが表示さ れる。 16. ENTERキーを押すと自動的に調整データの記録と調整モードの解除が行われ,処理が終わると“FINISHED”のメッセージが表示さ れる。 SEL85F14GM (FE 1.4 / 85 GM) (FE 85mm F1.4 GM) 4-15...
- Page 64 ENTERキーを押す。 5. 調整が完了すると“FNO COMPENSATION ADJUSTMENT OK”と表示される。 2. “START”と表示されたらENTERキーを押す。 6. ENTERキーを押すと自動的に調整データの記録と調整モードの解除が行われ,処理が終わると“FINISHED”のメッセージが表示さ れる。 調整後の確認 1. 「4-2. 光軸の確認/調整」 を参照し,被検レンズを1000 mmコリメータに設置する。 2. 以下の項目を設定してピントを合わせ,1000 mmコリメータで∞ (無限) 端F1.4の像面位置を測定する。 3. “Set to IrisRing [Auto] position.”と表示されたら絞りリングを絞り目盛“A”に合わせ,ENTERキーを押す。 ・フォーカスモード: マニュアルフォーカス ・撮影モード: Aモード ・絞り値: F1.4 3. 絞り値をF8まで絞る。 4. 絞った時の像面変動が0.02 mm以内であることを確認する。 SEL85F14GM (FE 1.4 / 85 GM) (FE 85mm F1.4 GM) 4-16...
- Page 65 “ROM Check”の調整方法 “ROM Check”の項目については,レンズ側での操作が必要となります。 注意: レンズ操作時は,レンズの位置が動かないように,カメラ本体等をしっかりと手で保持しながら操作してください。その際に,フォーカスリン グには絶対に触れないでください。 1. [ROM Check] ボタンをクリックすると“APERTURE̲RING̲MODE SW set to [CLICK ON].”が表示されるので,絞りリングクリック 切換スイッチをONにしてENTERキーを押す。 2. 調整が完了すると“SW CHECK OK”と表示される。 3. ENTERキーを押すと自動的に調整データの記録と調整モードの解除が行われ,処理が終わると“FINISHED”のメッセージが表示さ れる。 SEL85F14GM (FE 1.4 / 85 GM) (FE 85mm F1.4 GM) 4-17E...