Table of Contents
Advertisement
Quick Links
Advertisement
Table of Contents

Related Manuals for Bosch CSG656R.1A


Summary of Contents for Bosch CSG656R.1A
- Page 1 Oven CSG656R.1A User manual and installation instructions [en]...
-
Page 2: Table Of Contents
en Safety Table of contents 1 Safety Observe the following safety instructions. 1.1 General information USER MANUAL ¡ Read this instruction manual carefully. Safety .............. 2 ¡ Keep the instruction manual and the Preventing material damage ....... 4 product information safe for future refer- ence or for the next owner. -
Page 3: Safety
Safety en ▶ If smoke is emitted, the appliance must be WARNING ‒ Risk of injury! switched off or the plug must be pulled out Scratched glass in the appliance door may and the door must be held closed in order develop into a crack. to stifle any flames. -
Page 4: Preventing Material Damage
en Preventing material damage electronic implants, e.g. heart pacemakers or Hot liquid may spill over the sides of the ac- insulin pumps. cessory when it is removed from the cooking ▶ Wearers of electronic implants must stay at compartment. least 10 cm away from the control panel. ▶... -
Page 5: Environmental Protection And Saving En- Ergy
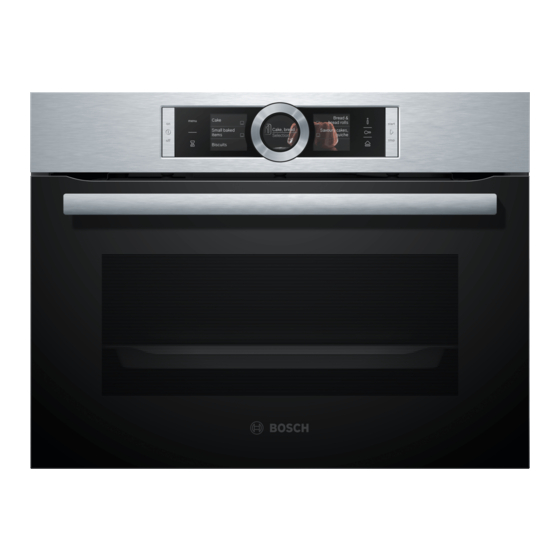
Environmental protection and saving energy en Only leave the cooking compartment to dry with the ▶ 2.2 Steam door open if a lot of moisture was produced during Follow these instructions when using the steam func- operation. tion. Fruit juice dripping from the baking tray leaves stains that cannot be removed. - Page 6 en Familiarising yourself with your appliance 4 Familiarising yourself with your appliance 4.1 Control panel Buttons The buttons on the left- and right-hand side of You can use the control panel to configure all functions the control panel have a pressure point. Press- of your appliance and to obtain information about the ing a button will execute its function.
-
Page 7: Familiarising Yourself With Your Appliance
Familiarising yourself with your appliance en ¡ Heating line 4.4 Touch displays Once operation has started, the white line below the The touch displays act as both displays and controls. temperature turns red as the cooking compartment The touch displays are divided into several text fields. heats up. - Page 8 en Operating modes Lighting Water tank One or more oven lights illuminate the cooking com- You need the water tank for the types of steam heating. partment. The water tank is behind the control panel. When you open the appliance door, the light in the → "Filling the water tank", Page 16 cooking compartment switches on.
-
Page 9: Operating Modes
Operating modes en Symbol Type of heating Temperature What it's used for and how it works range Possible additional options 4D hot air 30–250 °C Bake and roast on one or more levels. The fan distributes the heat from the ring-shaped heating element in the back wall evenly around the cooking compartment. -
Page 10: Accessories
en Accessories Symbol Type of heating Temperature Dough proving 30–50 °C Prove dough or culture yoghurt. The dough rises considerably more quickly than at room temper- ature. The surface of the dough will not dry out. Defrosting 30–60 °C Gently defrost vegetables, meat, fish and fruit. Thanks to the moisture, the food does not dry out or use its shape. - Page 11 You will find a comprehensive range of products for your appliance in our brochures and online: www.bosch-home.com Accessories vary from one appliance to another. When purchasing accessories, always quote the exact product number (E no.) of your appliance.
-
Page 12: 7.1 Before Using For The First Time
en Before using for the first time 7 Before using for the first time Implement the settings for the initial configuration. Calibrate the appliance. Clean the appliance and accessories. 7.1 Before using for the first time Malfunctions may occur when using filtered or deminer- Before using the appliance for the first time, ask your alised water. -
Page 13: Basic Operation
You can briefly pause operation and then continue. If ▶ you cancel operation completely, the settings will be re- a The Bosch logo appears in the display. The types of set. heating then appear. To pause operation briefly: Briefly press ... -
Page 14: Rapid Heating
en Rapid heating Press to start. Press the type of heating that you want to use. a The appliance starts heating. a The corresponding default temperature appears in the display. a The target temperature, the time and how long the appliance has already been in operation are shown Changing the temperature in the display. - Page 15 Time-setting options en minutes. The timer has its own audible signal so that To continue without setting a cooking time, press ‒ you can tell whether it is the timer or a cooking time to start. which has elapsed. When the food is ready, press to switch the ‒...
- Page 16 en Steam 11 Steam Food can be cooked particularly gently using steam. Fill the water tank with water up to the "max" You can use the special types of steam heating, or use mark. steam assistance with certain types of heating. WARNING ‒ Risk of scalding! Hot steam may escape when you open the appliance door.
- Page 17 Steam en ¡ A cooking time must always be set for the types of 11.3 Steam assistance steam heating. When you cook with steam assistance, the appliance For the steam type of heating, the cooking time only introduces steam into the cooking compartment at vari- begins when the cooking compartment is heated ous intervals.
- Page 18 en Meat probe Press "Types of heating". Place the lid on the water tank and push down on it. Press the type of heating that you want to use. Insert the water tank and close the control panel. a The corresponding default temperature appears in Drying the drip trough the display.
-
Page 19: Steam
Meat probe en For some types of heating, you can set added Thin Insert the meat probe into the thickest steam. pieces part of the meat from the side. → "Steam", Page 16 of meat Press to start. Thick Insert the meat probe diagonally into the a The appliance starts heating. -
Page 20: Meat Probe
en Assist Food Core temperature Food Core temperature in °C in °C Beef, medium Lamb Beef, well done Heating food, reheating 65–75 13 Assist The "Assist" operating mode helps you to use your ap- for type of heating, temperature and core temperature. pliance to prepare different dishes by selecting the op- You can adjust the temperature and the core temperat- timum settings automatically. - Page 21 Assist en Requirement: To start the operation, the cooking com- Category Foods partment must be cooled down. Side dishes, Vegetables Press . vegetables Potatoes Press "Assist". Rice Press the required category. Cereals Press the required food. Pulses Press the required meal. Pasta, dumplings a The settings for the dish appear in the display.
-
Page 22: Assist
en Childproof lock 14 Childproof lock You can secure your appliance to prevent children a A confirmation note appears on the display. from accidentally switching it on or changing the set- a The control panel is locked. The appliance can only tings. -
Page 23: Sabbath Mode
Cleaning and servicing en The red bar next to the text field identifies the basic Basic setting Selection setting that is currently selected. Its corresponding Brand logo Display value is shown in the display. Do not display Use "Further settings" to scroll through the basic Fan run-on time Recommended settings and, if required, use the control ring to... - Page 24 en Cleaning and servicing Appliance door Area Suitable cleaning agents Information Door panels ¡ Hot soapy water Do not use a glass scraper or a stainless steel wool. Tip: Remove the door panels in order to clean them thoroughly. → "Appliance door", Page 28 Door cover ¡...
- Page 25 Cleaning function EcoClean en For some surfaces, you can use alternative 17.2 Cleaning the appliance ‒ cleaning agents. In order to avoid damaging the appliance, you must → "Suitable cleaning agents", Page 23 clean your appliance only as specified, and with suit- Dry with a soft cloth. able cleaning products.
-
Page 26: Cleaning Assistance
en Cleaning assistance Remove accessories and cookware from the cook- Press "EcoClean". ing compartment. a The duration appears in the display. The duration of Detach the shelf supports and remove them from one hour cannot be changed. the cooking compartment. Press to start. → "Rails", Page 28 Note: Do not open the appliance door while the Remove coarse dirt using soapy water and a soft... -
Page 27: Descaling
Descaling en 20 Descaling To ensure that your appliance continues to operate cor- Remove the water tank and pour the descaling solu- rectly, it must be descaled regularly. tion into it. How frequently you need to run the descaling pro- Once the descaling solution has been poured into gramme will depend on the water hardness and how the water tank, slide the tank back in. - Page 28 en Rails 22 Rails To thoroughly clean the rails and the cooking compart- 22.2 Attaching the rails ment, or to replace the rails, you can remove the rails. Notes ¡ The rails only fit on the right or left. 22.1 Detaching the rails ¡...
- Page 29 Appliance door en Note: Ensure that the appliance door slides onto the WARNING ‒ Risk of injury! hinges without any resistance. If you feel any resist- When the hinges are not secured, they can snap ance, check whether you are sliding it in at the cor- shut with great force.
-
Page 30: Troubleshooting
en Troubleshooting Components inside the appliance door may have sharp Dry the door panes and refit them. edges. Wear protective gloves. ▶ 23.4 Fitting the door panes Open the appliance door slightly. WARNING ‒ Risk of injury! Push on the left- and right-hand side of the door The hinges on the appliance door move when the door cover from the outside ... - Page 31 Troubleshooting en If the power cord of this appliance is damaged, it ▶ must be replaced by trained specialist staff. 24.1 Malfunctions Fault Cause and troubleshooting The appliance is not working. The circuit breaker is faulty. Check the circuit breaker in the fuse box. ▶...
- Page 32 en Troubleshooting Fault Cause and troubleshooting The control panel cannot be Malfunction opened. Call the after-sales service. → "Customer Service", Page 33 If there is water in the water tank, empty the water tank: Open the appliance door. ‒ Grip on the right and left below the control panel. ‒...
-
Page 33: Disposal
Next time, set lower or higher values. ▶ Tip: A lot of information about the food preparation and corresponding set- ting values can be found on our website www.bosch-home.com. 25 Disposal Find out here how to dispose of old appliances cor- This appliance is labelled in accord- rectly. - Page 34 en How it works 27 How it works Here, you can find the ideal settings for various types 27.3 Roasting, braising and grilling tips of food as well as the best accessories and cookware. ¡ The recommended settings are for fridge-temperat- We have perfectly tailored these recommendations to ure food and unstuffed, oven-ready poultry.
-
Page 35: How It Works
How it works en ¡ Follow the manufacturer's instructions on the pack- WARNING ‒ Risk of scalding! aging. Very hot steam may escape when the lid is opened after cooking. Steam may not be visible, depending on 27.5 Steaming the temperature. Lift the lid in such a way that the hot steam can es- ▶... - Page 36 en How it works 27.6 List of foods Recommended settings for a variety of foods, sorted into food categories. Recommended settings for various types of food Food Accessories/cook- Shelf pos- Heating Temperature in Steam in- Cooking time ware ition function °C tensity in mins → Page 8 Victoria sponge cake...
- Page 37 How it works en Food Accessories/cook- Shelf pos- Heating Temperature in Steam in- Cooking time ware ition function °C tensity in mins → Page 8 Turkey, crown Wire rack 150 - 160 20 + 15 Turkey, crown, 3 kg Uncovered cook- 140 - 150 100 - 140 ware Turkey, whole, 4-8 kg...
- Page 38 en How it works Food Accessories/cook- Shelf pos- Heating Temperature in Steam in- Cooking time ware ition function °C tensity in mins → Page 8 1. Boiled potatoes 1. Perforated 1. 3 1. 25 2. Frozen salmon fillet steaming tray, size 2. 3 2.
- Page 39 How it works en Food Accessory/cook- Shelf pos- Searing Heating function Temperature Cooking ware ition time in → Page 8 in °C time in mins mins Veal medallions, 4 cm Uncovered cook- 40 - 60 thick ware Saddle of lamb, bone- Uncovered cook- 30 - 45 less, 200 g each ware Preheat the appliance.
- Page 40 en How it works Recommended settings for reheating Food Accessories/cook- Shelf pos- Heating Temperature in Steam intens- Cooking ware ition function °C time in → Page 8 mins Pizza, cooked Wire rack 170 - 180 5 - 15 Bread rolls, baguette, Wire rack 160 - 170 10 - 20 baked...
-
Page 41: Installation Instructions
Installation instructions en ¡ Perforated steaming tray, size XL: Shelf position 2 Recommended settings for steaming Food Accessory/cookware Shelf posi- Heating Temperature in °C Cooking time tion function in mins → Page 8 1, 2 Peas, frozen, two containers 2 pcs 3+2+1 Steam containers, XL size Universal pan Broccoli, fresh, 300 g... - Page 42 en Installation instructions ATTENTION! Carrying the appliance by the door handle could break it. The door handle cannot sup- port the weight of the appliance. ▶ Do not carry or hold the appliance by the door handle. 28.2 Appliance dimensions You will find the dimensions of the appliance here ¡...
- Page 43 Installation instructions en 28.4 Installation underneath a hob If the appliance is installed under a hob, the following minimum dimensions must be adhered to (including substructure, if applicable). The minimum worktop thickness a is based on the required minimum clearance . Hob type a raised in mm a flush in mm...
- Page 44 en Installation instructions ¡ The appliance must only be connected using the Screw the appliance into place. power cable provided. ¡ The power cable must be plugged in at the rear of the appliance until you hear a clicking sound. A 3 m power cable can be obtained from the after-sales service.
- Page 48 Expert advice for your Bosch home appliances, help with problems or a repair from Bosch experts. Find out everything about the many ways Bosch can support you: www.bosch-home.com/service Contact data of all countries are listed in the attached service directory.