
Related Manuals for Siemens HB556AB.0


Summary of Contents for Siemens HB556AB.0
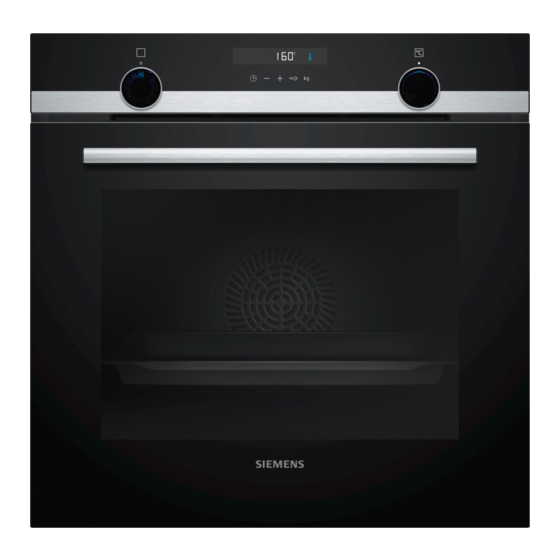
- Page 1 Oven HB556AB.0 User manual and assembly instructions Register your product on My Siemens and discover exclusive services and offers. siemens-home.bsh-group.com/welcome The future moving in. Siemens Home Appliances...
-
Page 2: Table Of Contents
en Safety ¡ Follow the safety instructions and warnings. Table of contents ¡ Keep the instruction manual and the product information safe for future refer- ence or for the next owner. USER MANUAL ¡ Check the appliance after unpacking it. Do not connect the appliance if it has been Safety .............. - Page 3 Safety en ▶ Never store combustible objects in the Hot steam may escape when you open the cooking compartment. appliance door. Whether or not you can see ▶ Never open the appliance door if there is steam depends on its temperature. smoke inside.
-
Page 4: Preventing Material Damage
en Preventing material damage ▶ Never operate an appliance with a cracked ▶ Do not touch the glass cover. or fractured surface. ▶ Avoid contact with your skin when cleaning. ▶ Never pull on the power cord to unplug the WARNING ‒ Risk of electric shock! appliance. -
Page 5: Environmental Protection And Saving Energy
Environmental protection and saving energy en Do not place cookware or accessories on the appli- ▶ If the seal is very dirty, the appliance door will no ance door. longer close properly during operation. This may dam- With certain models, accessories may scratch the door age the front of adjacent kitchen units. -
Page 6: Familiarising Yourself With Your Appliance
en Familiarising yourself with your appliance 4 Familiarising yourself with your appliance Familiarise yourself with the parts of your appliance. Buttons and display The buttons are touch-sensitive surfaces. To se- 4.1 Controls lect a function, simply press lightly on the relev- ant field. The controls are used to configure all functions of your The display shows symbols for active functions appliance and to obtain information about the operat-... - Page 7 Familiarising yourself with your appliance en Symbol Type of heating What it's used for/how it works Hot air gentle Cook selected dishes gently on one level without preheating. The fan distributes the heat from the ring-shaped heating element in the back wall evenly around the cooking compartment.
-
Page 8: Accessories
en Accessories Heat-up indicator Self-cleaning surfaces The appliance indicates when it is heating up. The self-cleaning surfaces in the cooking compartment When the appliance is heating, the symbol lights up are coated with a porous, matt ceramic layer and have on the display. This symbol goes out when heating is a rough surface. - Page 9 You will find a comprehensive range of products for your appliance in our brochures and online: www.siemens-home.bsh-group.com Accessories vary from one appliance to another. When Baking tray Slide the tray, e.g. the universal pan, purchasing accessories, always quote the exact E.g.
-
Page 10: Before Using For The First Time
en Before using for the first time 6 Before using for the first time Configure the settings for initial start-up. Clean the ap- 6.2 Cleaning the appliance before using it pliance and accessories. for the first time Clean the cooking compartment and accessories be- 6.1 Initial use fore using the appliance to prepare food for the first You need to make settings for initial use before you... -
Page 11: Time-Setting Options
Time-setting options en 8.1 Setting rapid heating a Rapid heating starts after a few seconds. a When the rapid heating process ends, an audible To ensure an even cooking result, do not place the signal sounds and the heating indicator goes out. food in the cooking compartment until rapid heating Use the function selector to set a suitable type of has come to an end. -
Page 12: Programme
en Programme Reset the cooking time to zero using the button. Changing the end time ▶ a After a few seconds, the appliance applies the In order to achieve a good cooking result, you can only change and continues to heat without a cooking change the set end time before operation starts and time. - Page 13 Programme en No. Food Cookware Weight setting Add liquid Shelf Information posi- tions Roasting dish with Chicken weight Place in the cook- 01 Chicken, unstuffed Ready to cook, glass lid ware with the breast seasoned facing up Roasting dish with Turkey breast Cover the Do not sear the meat 02 Turkey breast...
-
Page 14: Childproof Lock
en Childproof lock Press the button. 10.3 Preparing food for the programme Use the or button to set the weight of your Use fresh and, ideally, chilled food. food. Always set the next higher weight. Weigh the food. The display shows the calculated cooking time. ‒... -
Page 15: Cleaning And Servicing
Cleaning and servicing en Display Basic setting Selection Waiting time until a setting is applied = 3 seconds = 6 seconds = 10 seconds Childproof lock can be adjusted = no = yes Factory setting (may vary according to model) To save the changes, press and hold the button 12.2 Changing basic settings... - Page 16 en Cleaning and servicing Area Suitable cleaning agents Information Door cover ¡ Made of stainless Do not use glass cleaner or a glass scraper. steel: Tip: Remove the door cover for thorough cleaning. Stainless steel cleaner → "Appliance door", Page 19 ¡ Made of plastic: Hot soapy water Door handle ¡...
-
Page 17: Cleaning Function
Cleaning function en Use the cleaning function. ▶ → "Cleaning function ", Page 17 14 Cleaning function Use the cleaning function regularly to help retain the 14.2 Preparing the appliance for the cleaning ability of the self-cleaning surfaces and pre- cleaning function vent damage. In order to achieve a good cleaning result, prepare the The self-cleaning surfaces in the cooking compartment appliance carefully. -
Page 18: Cleaning Aid Humidclean
en Cleaning aid humidClean Wipe the cooking compartment clean with a damp dish patches may be left over from salty food – the cloth. spots are not rust. These spots are not harmful. These marks do not impair the cleaning ability of Note: Marks may appear on the self-cleaning sur- the self-cleaning surfaces. -
Page 19: Appliance Door
Appliance door en Push the rail into the front socket until the rail 16.2 Attaching the shelf supports also rests against the cooking compartment wall, Notes and then press this downwards . ¡ The rails only fit on the right or left. ¡... - Page 20 en Appliance door Close the appliance door fully . Grab hold of the Open the locking levers on the left- and right-hand appliance door with both hands (on the left and hinges . right) and pull it upwards and out . a The locking levers are open.
- Page 21 Appliance door en If necessary, you can remove the condensate Slide the intermediate pane into the left- and right- trough for cleaning. hand retainers . Open the appliance door. ‒ Tilt the condensate trough upwards and remove ‒ Push the intermediate pane upwards until it is in the left- and right-hand retainers ...
-
Page 22: Troubleshooting
en Troubleshooting Close the locking levers on the left- and right-hand Close the appliance door. hinges . Note: Do not use the cooking compartment again until the door panes have been correctly fitted. a The locking levers are closed. The appliance door is secured and cannot be detached. -
Page 23: Disposal
Disposal en Fault Cause & troubleshooting appears in the display. Cleaning recommendation Run the cleaning function in full. ▶ → "Cleaning function ", Page 17 You can temporarily dismiss the information in the display by pressing any button. → "Cleaning recommendation", Page 17 A message with appears in the Electronics fault display, e.g. -
Page 24: Customer Service
en Customer Service 20 Customer Service If you have any queries on use, are unable to rectify The contact details for Customer Service can be found faults on the appliance yourself or if your appliance in the enclosed Customer Service directory or on our needs to be repaired, contact Customer Service. - Page 25 How it works en ¡ Keep the appliance door closed when using the Cookware with lid grill. ¡ Place the cookware onto the wire rack. Never grill with the appliance door open. ¡ Meat, poultry and fish can also become crispy in a ¡...
- Page 26 en How it works Food Accessories/cookware Shelf pos- Type of Temperature Cooking ition heating in °C/grill set- time in mins ting Sirloin, medium, 1.5 kg Wire rack 200-220 60-70 Universal pan Burger, 3–4 cm thick Wire rack 25-30 Lamb leg, boned, medium, 1.0 kg Cookware without lid 170-190 70-80...
-
Page 27: Installation Instructions
Installation instructions en Baking Food Accessories/cookware Shelf pos- Type of Temperature in Cook- ition heating °C ing time in mins Viennese whirls Baking tray 140–150 25–35 Viennese whirls Baking tray 140–150 20–30 Viennese whirls, 2 levels Universal pan 3 + 1 140–150 25–35 Baking tray Viennese whirls, 3 levels... - Page 28 en Installation instructions ¡ Cut-out work on the units should be carried 22.3 Installation below a worktop out before installing the appliance. Remove Observe the installation dimensions and the installation any shavings. Otherwise, the correct opera- instructions when installing below a worktop. tion of electrical components may be ad- versely affected.
- Page 29 Installation instructions en 22.5 Corner installation Electrically connecting an appliance without a protective contact plug Observe the installation dimensions and the installation Note: Only a licensed professional may connect the ap- instructions when installing in a corner. pliance. Damage caused by incorrect connection is not covered under the warranty.
- Page 32 BSH Hausgeräte GmbH Carl-Wery-Straße 34 81739 München GERMANY www.siemens-home.bsh-group.com Manufactured by BSH Hausgeräte GmbH under Trademark License of Siemens AG *9001575516* 9001575516 (000805)