Table of Contents
Advertisement
Available languages
Available languages
Quick Links
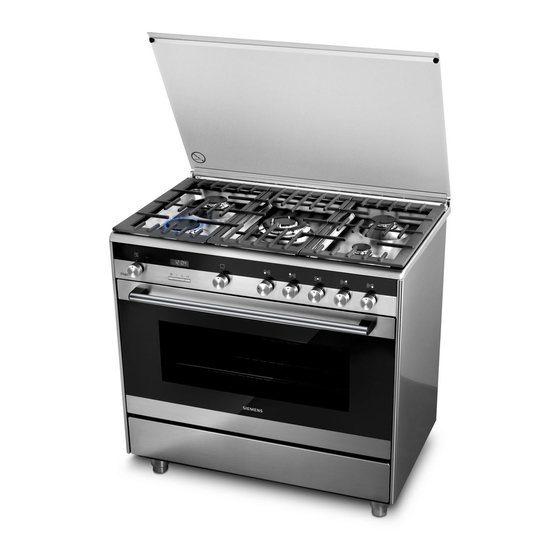
Free standing cooker
Cuisinière
π≤à°ùªdG óbƒªdG
HY738356M
siemens-home.com/welcome
siemens-home.com/welcome
[en] Instruction manual . . . . . . . . . . . . . 3
[fr] Notice d'utilisation . . . . . . . . . . . . . 18
[ar]
. . . . . . . . . . . . . . . . . . 3
∫ɪ©à°S'G π«dO
Register
your
product
online
Advertisement
Chapters
Table of Contents

Related Manuals for Siemens HY738356M


Summary of Contents for Siemens HY738356M
- Page 1 Free standing cooker Cuisinière π≤à°ùªdG óbƒªdG HY738356M siemens-home.com/welcome siemens-home.com/welcome [en] Instruction manual ... . . 3 Register [fr] Notice d’utilisation ... . . 18...
-
Page 3: Table Of Contents
Energy and environment tips ..........17 Saving energy with your oven ............17 Saving energy with the hob ............17 Environmentally-friendly disposal..........17 Produktinfo Additional information on products, accessories, replacement parts and services can be found at www.siemens-home.com and in the online shop www.siemens-eshop.com... -
Page 4: Important Safety Information
: Important safety information Read these instructions carefully. Only then Risk of fire! will you be able to operate your appliance Combustible items stored in the cooking ■ safely and correctly. Retain the instruction compartment may catch fire. Never store manual and installation instructions for combustible items in the cooking future use or for subsequent owners. - Page 5 Risk of burns! Risk of injury! The appliance becomes very hot. Never Scratched glass in the appliance door ■ ■ touch the interior surfaces of the cooking may develop into a crack. Do not use a compartment or the heating elements. glass scraper, sharp or abrasive cleaning Always allow the appliance to cool down.
-
Page 6: Causes Of Damage
Causes of damage Damage can occur if hard or pointed objects fall on the hob. ■ Aluminium foil and plastic containers melt on hot hotplates. ■ Oven protective foil is not suitable for your hob. Caution! Overview Rough pot and pan bases scratch the ceramic. ■... -
Page 7: Your New Appliance
Your new appliance Get to know your appliance. You will find information about the Explanation control panel and hob, as well as the oven, types of heating and accessories. Splatter guard Depending on the appliance model, individual details may differ. Control panel Oven Storage compartment... -
Page 8: Buttons And Display
Buttons and display The oven The buttons are used to set the various additional functions. In order to operate the oven, you require two operating knobs: You can read the values that you have set on the display. The function selector and the temperature selector. Control knob for oven Button Function selector... -
Page 9: Accessories
Accessories You can pull out the accessories two thirds of the way without them tipping. This allows dishes to be removed easily. The accessories can be inserted into the cooking compartment The accessories may become deformed when they become at 4 different levels. Always insert them as far as they will go so that the accessories do not touch the door panel. -
Page 10: Setting The Hob
Setting the hob Large dual-circuit hotplate and extended In this section, you can find out how to set the hotplates. cooking zone Switching the hob on and off The size of these hotplates can be altered. You can switch the hotplate on and off with the control knobs. Switching on the large area Setting a hotplate Turn the hotplate control to position 9 - where you will feel a... -
Page 11: Setting The Time-Setting Options
Inserting the rotary spit Removing the rotary spit Risk of burns! Risk of burns! Never touch the hot surfaces of the cooking compartment or Never touch the hot surfaces of the cooking compartment or the heating elements. Children must be kept at a safe distance the heating elements. -
Page 12: Cooking Time
Cancelling the timer duration Cancelling the cooking time Use the button to reset the timer duration to 0:00. The Use the button to reset the cooking time to 0:00. After a few change will be adopted after a few seconds. The timer is seconds, the change is adopted. -
Page 13: Clock
Clock Changing the end time Use the button to change the end time. After a few After connecting the appliance to the mains or after a power seconds, the change is adopted. If the timer has been set, first cut, the symbol and three zeros flash in the display. -
Page 14: Care And Cleaning
Care and cleaning With good care and cleaning, your oven will remain clean and Area Cleaning agents fully-functioning for a long time to come. Here we will explain how to maintain and clean your oven correctly. Appliance exterior Hot soapy water: Clean with a dish cloth and dry with a Notes soft cloth. -
Page 15: Removing And Fitting The Appliance Door
Removing and fitting the appliance door Removing and inserting the hook-in racks You can remove the appliance door to clean it more You can remove the hook-in racks for easier cleaning. thoroughly. Removing the hook-in racks Removing the appliance door Unscrew the right and left-hand screws on the hook-in rack. -
Page 16: Troubleshooting
Troubleshooting Malfunctions often have simple explanations. Refer to the table Risk of injury! before calling the after-sales service, as you may be able to Incorrect repairs may cause serious hazards. Repairs to the remedy the fault yourself. appliance may only be performed by a qualified technician. If repairs are required, contact the after-sales service. -
Page 17: After-Sales Service
After-sales service Our after-sales service is there for you if your appliance needs Please be aware that a visit by an after-sales engineer will be to be repaired. We will always find the right solution in order to charged if a problem turns out to be the result of operator error, avoid unnecessary visits from a service technician. - Page 18 Économiser de l'énergie sur la table de cuisson ...... 33 Elimination écologique..............33 Produktinfo Vous trouverez des informations supplementaires concernant les produits, accessoires, pièces de rechange et services sur Internet sous : www.siemens-home.com et la boutique en ligne : www.siemens-eshop.com...
-
Page 19: Précautions De Sécurité Importantes
: Précautions de sécurité importantes Lire attentivement ce manuel. Ce n'est Risque d'incendie ! qu'alors que vous pourrez utiliser votre Tout objet inflammable entreposé dans le ■ appareil correctement et en toute sécurité. compartiment de cuisson peut Conserver la notice d'utilisation et de s'enflammer. - Page 20 Risque de brûlure ! Risque de blessure ! L'appareil devient très chaud. Ne jamais Un verre de porte d'appareil rayé peut se ■ ■ toucher les surfaces intérieures chaudes fendre. Ne pas utiliser de racloir à verre, ni du compartiment de cuisson ni les de produit de nettoyage agressif ou résistances chauffantes.
-
Page 21: Causes De Dommages
Causes de dommages Si des objets durs ou pointus tombent sur la table de ■ cuisson, ils peuvent occasionner des dommages. Table de cuisson Les feuilles en aluminium ou les récipients en plastique ■ fondent sur les foyers chauds. Les feuilles de protection pour Attention ! cuisinières ne sont pas appropriées pour votre table de Les dessous rugueux des casseroles et des poêles rayent la... -
Page 22: Votre Nouvel Appareil
Votre nouvel appareil Les informations qui suivent vont vous permettre de vous Explication familiariser avec votre nouvel appareil. Elles se rapportent au bandeau de commande et à la table de cuisson ainsi qu'au Protection contre les éclaboussures four, aux différents modes de cuisson et aux accessoires Table de cuisson fournis. -
Page 23: Touches Et Affichage
Touches et affichage Le four Avec les touches vous réglez différentes fonctions Pour utilisez le four vous avez besoin de deux manettes de additionnelles. Dans l'affichage vous pouvez lire les valeurs commande. Le sélecteur des fonctions et le thermostat. réglées. Manette de commande du four Touche Emploi... -
Page 24: Accessoire
Accessoire Vous pouvez sortir l'accessoire aux deux tiers sans qu'il ne bascule. Il est ainsi plus facile de retirer les plats du four. Les accessoires peuvent être enfournés à 4 niveaux différents. Lorsque l'accessoire devient chaud il peut se déformer. Cela Introduisez-le toujours jusqu'en butée, afin que l'accessoire ne n'a aucune influence sur le fonctionnement, il reprend sa forme touche pas la vitre de la porte. -
Page 25: Réglage De La Table De Cuisson
Réglage de la table de cuisson Grand foyer à deux zones et zone pour Dans ce chapitre vous apprendrez comment régler les foyers. poissonnière Allumer et éteindre la table de cuisson Vous pouvez modifier la dimension de ces foyers. Vous allumez et éteignez la table de cuisson au moyen des Enclenchement de la grande surface manettes de commande des foyers. -
Page 26: Commande Du Tournebroche
Commande du tournebroche Retirer la broche Le tournebroche est idéal pour le rôtissage, comme pour Risque de brûlure ! préparer du rôti roulé et de la volaille. La viande sera cuite Ne jamais toucher les surfaces chaudes du compartiment de uniformément. -
Page 27: Réglage Des Fonctions De Temps
Réglage des fonctions de temps Votre four possède différentes fonctions de temps. La Appuyer deux fois sur la touche touche permet d'appeler le menu et de commuter entre les Dans l'affichage apparaît 0:00. Les symboles de temps différentes fonctions. Les symboles de temps sont allumés s'allument, la flèche précède aussi longtemps que vous pouvez régler. -
Page 28: Heure De La Fin
Heure de la fin La durée est écoulée Un signal retentit. Le four s'arrête de chauffer. Dans l'affichage Vous pouvez différer l'heure à laquelle votre mets doit être prêt. apparaît 0:00. Appuyer sur la touche . Vous pouvez régler Le four démarre automatiquement et la cuisson est terminée au une nouvelle durée au moyen de la touche . -
Page 29: Modifier Les Réglages De Base
Modifier les réglages de base Votre four possède différents réglages de base. Vous pouvez adapter ces réglages à vos habitudes. Aucune autre fonction de temps ne doit avoir été réglée. Appuyer sur la touche pendant 4 secondes env. Réglage de base Sélection 1 Sélection 2 Sélection 3 Le réglage de base actuel pour la durée du signal, p.ex. -
Page 30: Panneaux Catalytiques Du Compartiment De Cuisson
Panneaux catalytiques du compartiment de Niveau Nettoyants cuisson Extérieur de l'appa- Eau chaude additionnée de produit à Les panneaux catalytiques du compartiment de cuisson sont reil vaisselle : revêtus d'un émail autonettoyant. Nettoyer avec une lavette et sécher avec un chiffon doux. Ne pas utiliser de net- Les parois se nettoient automatiquement pendant le toyant pour vitres ni de racloirs à... -
Page 31: Retrait Et Montage Des Grilles Supports
Retrait et montage des grilles supports Accrocher la porte de l'appareil Saisir la porte du four sur les côtés avec les deux mains. Pour pouvez décrocher les grilles supports pour faciliter le nettoyage. Pousser les charnières dans les évidements du four (a). Retrait des grilles supports Remarque : L'encoche en bas aux charnières doit s'encranter dans le cadre du four (b). -
Page 32: Messages D'erreur
Messages d'erreur Retirer la fiche secteur ou couper le fusible dans le boîtier à fusibles avant de procéder au remplacement. Si un message d'erreur accompagné de “ apparaît dans l'affichage, appuyez sur la touche . Le message disparaît. Couper le courant par le fusible ou retirer la fiche de la prise Une fonction de temps réglée sera effacée. -
Page 33: Conseils Concernant L'énergie Et L'environnement
Conseils concernant l'énergie et l'environnement Vous trouverez ici des conseils sur la manière d'économiser de l'énergie lors de la cuisson et du rôtissage dans le four et sur la table de cuisson et d'éliminer correctement votre appareil. Économiser de l'énergie dans le four Préchauffez le four seulement si cela est indiqué... - Page 36 خدمة العمالء يراعى ا أن زيارة فني خدمة العمالء لي�ست بالمجان في حالة اال�ستعمال الخاطئ ا إذا احتاج جهازك ل ال إ�سالح، فمركزنا لخدمة العمالء هو وجهتك المنا�سبة. ونحن .حتى ا أثناء فترة ال�سمان نتو�سل دائما ا إلى الحل المنا�سب للم�سكلة، و ا أي�سا لتجنيبك ا أية زيارات غير .�سرورية من فني الخدمة تجد هنا ا أو في الدليل المرفق لمراكز خدمة العمالء بيانات االت�سال ب ا أقرب مركز (FD-Nr.) (E-Nr.) .لخدمة العمالء في جميع البلدان ورقم ال�سنع عند االت�سال بمركز الخدمة يرجى ذكر رقم المنتج حتى ن�ستطيع ا أن نقدم لك الم�سورة ال�سحيحة. و�سوف تجد لوحة ال�سنع المدون بها طلب ا ل إ�سالح والم�سورة في حالة الختاللت .ا...
- Page 37 ما العمل عند حدوث خلل؟ في حالة ظهور خلل، يعود ذلك في ا أغلب ا ال أحيان ا إلى ا أ�سياء ب�سيطة. راجع الجدول .قبل ا أن تت�سل بخدمة العمالء. فربما يكون ب ا إمكانك التغلب على الخلل بنف�سك !خطر ا ل إ�سابة القيام با ال إ�سالحات بطريقة غير �سليمة يمكن ا أن يت�سبب في ا أخطار بالغة. لذا ال يجوز ا إجراء ا إ�سالحات على الجهاز ا إال بمعرفة الفنيين المتخ�س�سين. وعند .الحاجة ال إجراء ا إ�سالح، ات�سل بمركز خدمة العمالء جدول...
- Page 38 تركيب باب الجهاز البطانة الحفازة لحيز الطهي .ا أم�سك باب الفرن بكلتا يديك من الجانبين .)البطانات الحفازة لحيز الطهي مغطاة بطبقة ذاتية التنظيف من المينا (ا ال إيناميل ا أدخل المف�سالت في تجاويف الفرن ف ا أثناء ت�سغيل الفرن، يتم تنظيف ا ال أ�سطح تنظي ف ً ا ذاتي ً ا. ويراعى ا أن قطرات الرذاذ :مالحظة .الكبيرة ن�سبي ً ا ال تختفي ا إال بعد ت�سغيل الفرن عدة مرات احلز ال�سفلي باملف�سالت يجب ا أن يثبت يف ا إطار الفرن الجدار الخلفي والجدران الجانبية مطلية ببطانة حفازة. ال تنظف هذه ا ال أ�سطح با�ستخدام مواد تنظيف ا...
- Page 39 العناية والتنظيف مع الفرن العناية الجيدة بالفرن وتنظيفه باهتمام تحافظ على جماله وكفاءته الوظيفية لفترة .طويلة. ونو�سح لك فيما يلي كيفية العناية بالفرن وتنظيفه بطريقة �سحيحة ،ا أية منظفات خ�سنة ا أو خاد�سة ■ ■ مالحظات ا أية منظفات قوية تحتوي على الكحول ■ ■ الفروق الطفيفة في ا ألوان واجهة الفرن ترجع ال�ستخدام خامات مختلفة مثل ،ا أية ليفات ا أو ا إ�سفنجات تنظيف خ�سنة ■ ■ ■ ■ .الزجاج والبال�ستيك والمعدن .ا أية ا أجهزة تنظيف بال�سغط العالي ا أو بالبخار ■ ■ الظالل الموجودة على لوح الباب والتي تبدو كالخطوط ترجع ا إلى انعكا�سات ■...
- Page 40 الوقت تغيير وقت النتهاء . وبعد ثوان قليلة يتم اعتماد ا أو قم بتغيير وقت االنتهاء با�ستخدام الزر وثالثة بعد تو�سيل الجهاز ا أو عند عودة التيار بعد انقطاعه، ي�سيء الرمز مرتين مقدما. وال تقم بتغيير التغيير. ا إذا كان المنبه م�سبوط ً ا، ا�سغط على الزر .ا أ�سفار في وحدة العر�ض. ا�سبط ال�ساعة مجددا وقت االنتهاء بعد بدء العد التنازلي لمدة الت�سغيل بالفعل. فقد ال تح�سل على ا�سغط على الزر .نتيجة طهي �سحيحة 12:00 . ت�سيء رموز الوقت، ويظهر يظهر في وحدة العر�ض بيان ال�ساعة محو وقت النتهاء قبل ال�سهم قم ب ا إعادة �سبط وقت االنتهاء على الوقت الحالي. وبعد ثوان با�ستخدم الزر ا أو ا�سبط ال�ساعة با�ستخدام الزر قليلة يتم اعتماد التغيير. فيبد...
- Page 41 محو مدة الت�سغيل محو زمن المنبه 00:00 00:00 . وبعد ثوان قليلة حتى ت�سبح قم بت�سفير مدة الت�سغيل با�ستخدم الزر . وبعد ثوان قليلة و�سبطه على قم بت�سفير زمن المنبه با�ستخدم الزر يتم اعتماد التغيير. ويتم محو مدة الت�سغيل. ا إذا كان المنبه م�سبوط ً ا، ا�سغط على .يتم اعتماد التغيير. المنبه متوقف . مقدما الزر ال�ستعالم عن ا أو�ساع �سبط الوقت ال�ستعالم عن ا أو�ساع �سبط الوقت عندما يتم �سبط العديد من وظائف الوقت، ت�سيء الرموز المعنية في وحدة عندما يتم �سبط العديد من وظائف الوقت، ت�سيء الرموز المعنية في وحدة العر�ض. ويظهر ا أمام رمز وظيفة الوقت ال�سهم العر�ض. ويظهر ا أمام رمز وظيفة الوقت ال�سهم ...
- Page 42 ا إخراج ال�سيخ الدوار تركيب ال�سيخ الدوار !خطر الحتراق !خطر الحتراق ال تقم ا أبد ً ا بلم�ض ا ال أ�سطح ال�ساخنة لحيز الطهي ا أو عنا�سر الت�سخين. ا أبعد ا ال أطفال ال تقم ا أبد ً ا بلم�ض ا ال أ�سطح ال�ساخنة لحيز الطهي ا أو عنا�سر الت�سخين. ا أبعد ا ال أطفال .دائم ً ا عن الجهاز. افتح باب الجهاز بحر�ض. فقد يت�سرب بخار �ساخن .دائم...
- Page 43 �سبط الموقد مو�سع الطهي الكبير ثنائي الدائرة ونطاق ا آلة الطهي .تتعرف في هذا الف�سل على كيفية �سبط موا�سع الطهي ت�سغيل و ا إطفاء الموقد .يمكن تغير حجم موا�سع الطهي هذه ت�سغيل الحيز الكبير .يتم ت�سغيل و ا إطفاء الموقد بوا�سطة طارات ا�ستعمال موا�سع الطهي - حيث �ست�سعر بمقاومة خفيفة - وا�سل ا أدر مفتاح موا�سع الطهي ا إلى المو�سع �سبط مو�سع الطهي = مو�سع الطهي الكبير ثنائي الدائرة ا أو نطاق ا آلة الطهي ç õ ا ال إدارة حتى الرمز .يمكنك با�ستخدام طارات ا�ستعمال موا�سع الطهي �سبط قدرة ت�سخين موا�سع الطهي...
- Page 44 يمكنك �سحب الكماليات للخارج بمقدار الثلثين دون ا أن تنقلب. وبذلك يتاح لك الكماليات .ا إخراج ا ال أطعمة ب�سهولة م�ستويات ارتفاع مختلفة. احر�ض يمكن ا إدخال الكماليات في حيز الطهي على قد يحدث ت�سوه للكماليات عندما ت�سخن. وبمجرد ا أن تبرد مرة ا أخرى، يختفي هذا دائما على ا إدخال الكماليات حتى النهاية حتى ال تالم�ض زجاج الباب. يراعى .الت�سوه بدون ترك ا أي ت ا أثير على وظيفتها .دائما ا إدخال الكماليات في حيز الطهي ب�سكل �سحيح يمكنك الح ق ً ا �سراء الكماليات من خدمة العمالء ا أو من المتاجر المتخ�س�سة ا أو عبر .ا ال إنترنت ال�سرح الكماليات...
- Page 45 الفرن الموقد ال�ستخدام فرن الطهي تحتاج ا إلى طارتي ا�ستعمال. مفتاح اختيار الوظائف .ومفتاح اختيار درجة الحرارة طارة ا�ستعمال الفرن مفتاح اختيار الوظيفة .يمكنك �سبط طريقة الت�سغيل با�ستخدام مفتاح اختيار الوظائف المعنى الرمز و�سع ال�سفر الت�سخين العلوي/ال�سفلي الت�سخين ال�سفلي ال�سواية/ال�سيخ الدوار ال�سواية الكبيرة ال�سرح �سواية بتدوير الهواء مم مو�سع الطهي ال�سخونة العلوية/ال�سفلية والهواء ال�ساخن 265 x 170 مم نطاق ا آلة الطهي الهواء ال�ساخن مم مو�سع الطهي مرحلة ا إذابة التجمد مم و مو�سع الطهي ثنائي الدائرة...
- Page 46 جهازك الجديد تتعرف هنا على جهازك الجديد. كما تجد هنا المزيد من المعلومات حول لوحة ال�سرح .اال�ستعمال و�سطح الموقد والفرن و ا أنواع الت�سخين والكماليات واقية الرذاذ .من الوارد ا أن تكون هناك بع�ض االختالفات في التفا�سيل ح�سب موديل الجهاز الموقد لوحة اال�ستعمال الفرن درج الحفظ لوحة ال�ستعمال ا ل أزرار ووحدة العر�س ال�سرح يمكنك با�ستخدام ا ال أزرار �سبط الوظائف ا ال إ�سافية المختلفة. ويمكنك قراءة القيم طارة ا�ستعمال درجة حرارة الفرن .الم�سبوطة في وحدة العر�ض لمبة بيان فرن الطهي ا ال أزرار ووحدة العر�ض ال�ستخدام الزر طارة ا�ستعمال وظائف الفرن ووقت ومدة الت�سغيل اختيار المنبه وظائف الوقت...
- Page 47 ا أ�سباب ا ل أ�سرار الموقد !تنبيه .قواعد ا ال أواني والمقالي الخ�سنة ت�سبب خدو�سا ب ا أقرا�ض الخزف الزجاجي ■ ■ تجنب ت�سخين ا ال أواني على الموقد حتى فراغ محتواها. فقد يت�سبب ذلك في ■ ■ .حدوث ا أ�سرار ال ت�سع ا أبدا المقالي وا ال أواني ال�ساخنة على نطاق اال�ستعمال ا أو نطاق وحدة ■ ■ .العر�ض ا أو ا إطار الموقد. فقد يت�سبب ذلك في حدوث ا أ�سرار .في حالة �سقوط ا أ�سياء �سلبة ا أو حادة على الموقد، فقد تحدث ا أ�سرار ■...
- Page 48 !خطر النقالب !خطر الحتراق قد ي�سبح الجهاز �ساخنا للغاية. ال تلم�ض ا أبدا ا ال أ�سطح ■ ■ الداخلية لحيز الطهي ا أو عنا�سر الت�سخين وهي �ساخنة. احر�ض دائم ً ا على ترك الجهاز يبرد. و ا أبعد .ا ال أطفال عن الجهاز .الكماليات و ا أواني الفرن قد ت�سبح �ساخنة للغاية ■ ■ ا�ستخدم دائما فوطة للفرن ال إخراج الكماليات ا أو ا أواني .الفرن من حيز الطهي :تحذير لتجنب خطر انقالب الجهاز، يجب تركيب و�سيلة ا أبخرة الكحول يمكن ا أن ت�ستعل في حيز الطهي وهو ■...
- Page 49 ا إر�سادات ا ل أمان المهمة !خطر الحريق اقر ا أ هذا الدليل بعناية. عندئذ فقط �سيمكنك ا�ستخدام الجهاز ب�سكل �سحيح و ا آمن. احتفظ بدليل اال�ستعمال المواد القابلة لال�ستعال التي يتم تخزينها في حيز ■ ■ .والتركيب ال�ستخدامه الحقا ا أو لت�سليمه للمالك الجديد الطهي يمكن ا أن ت�ستعل. ال تحتفظ ا أبدا بمواد قابلة افح�ض الجهاز بعد ا إخراجه من مواد التغليف. وال تقم لال�ستعال في حيز الطهي. ال تفتح باب الجهاز ا أ بد ً ا في بتو�سيل الجهاز في حالة وجود ا أ�سرار ناتجة عن حالة وجود ا أ دخنة بداخله. ا أ وقف الجهاز وانزع القاب�ض .عملية النقل...
- Page 50 .................ما العمل عند حدوث خلل؟ ......................بالغات الخط ا أ ......................تغيير لمبة الفرن ......................خدمة العمالء ................ن�سائح حول الطاقة والبيئة ................توفير الطاقة عند ا�ستخدام الفرن ................توفير الطاقة عند ا�ستخدام الموقد .............التخل�ض من المخلفات بطريقة ال ت�سر بالبيئة تجد المزيد من المعلومات حول المنتجات والكماليات وقطع الغيار والخدمات www.siemens-home.com وفي المتجر ا ال إلكتروني :على موقع ا ال إنترنت www.siemens-eshop.com :على موقع ا ال إنترنت خط ا�ستعالمات �سيمنز التابع لنا ا أن يقدم لك الم�سورة ومعلومات ي�سر رقم...
- Page 52 BSH Hausgeräte GmbH Carl-Wery-Straße 34, 81739 München, GERMANY siemens-home.com *9000999204* 9000892072 950623...