Motorola WN825G User Manual
Motorola wireless notebook adapter user guide wn825g
Hide thumbs
Also See for WN825G:
- Troubleshooting (2 pages) ,
- Getting started (1 page) ,
- Release note (1 page)
Table of Contents
Advertisement
Quick Links
Download this manual
See also:
Troubleshooting
Advertisement
Table of Contents

Related Manuals for Motorola WN825G


Summary of Contents for Motorola WN825G
- Page 1 User Guide Wireless Notebook Adapter WN825G...
- Page 2 Connect the equipment into an outlet on a circuit different from that to which the receiver is connected. • Consult the dealer or an experienced radio/TV technician for help. CAUTION: Changes or modifications not expressly approved by Motorola for compliance could void the user’s authority to operate the equipment.
-
Page 3: Wireless Lan And Your Health
Motorola, Inc., Broadband Communications Sector, 101 Tournament Drive, Horsham, PA 19044, 1-215-323-1000, declares under sole responsibility that the WR850G, WE800G, WA840G, WN825G, WPCI810G, and BR700 compile with 47 CFR Parts 2 and 15 of the FCC Rules as a Class B digital device. This device complies with Part 15 of FCC Rules. -
Page 4: Table Of Contents
Contents Section 1:Overview _______________________ 1-1 Features ... 1-1 Understanding your User Guide ... 1-2 Box Contents ... 1-2 Simple Home Network Diagram ... 1-3 Wireless Connections ... 1-3 Adapter Card Physical Description... 1-4 Top of Adapter Card...1-4 Bottom of Adapter Card...1-5 Section 2:Installation______________________ 2-1 Device Configuration Setup... -
Page 5: Section 1:Overview
Section 1:Overview Congratulations on purchasing the Motorola Wireless Notebook Adapter WN825G. The WN825G complies with the 802.11b and the new nearly 5-times-faster 802.11g wireless standard. With Wi-Fi Protected Access (WPA) included, your wireless connections are robust and secure, giving you the confidence to communicate without fear that the signal could be compromised. -
Page 6: Understanding Your User Guide
HI GH PERFORMANC E 54 Mbits/s DATA R A TE / D RAFT 802.11G COMPLIAN T WN825G CD-ROM SECTION 1, OVERVIEW OVERVIEW Motorola WN825G Wireless Notebook Adapter G et ting St art ed Check that your box contains W N 82 5G these i t ems. -
Page 7: Simple Home Network Diagram
OVERVIEW Simple Home Network Diagram Your wireless notebook adapter card, allows you to access files, printers, and an Internet connection on your network. A sample Local Area Network (LAN) is shown below: In the example above, the Internet communicates with the modem which in turn communicates with the router. -
Page 8: Adapter Card Physical Description
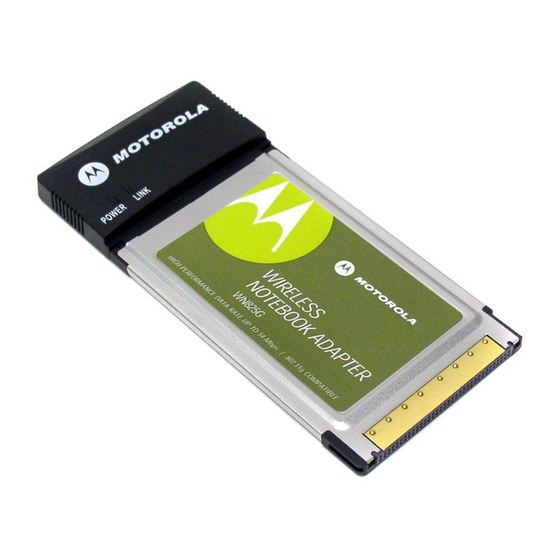
SECTION 1 Adapter Card Physical Description Top of Adapter Card The following illustration shows the top of the WN825G: The WN825G has the following features: Feature Power LED Link LED POWER LINK Description Indicates that the card is powered. Indicates the activity of the wireless network... -
Page 9: Bottom Of Adapter Card
OVERVIEW Bottom of Adapter Card The following illustration shows the bottom of the WN825G: The following describes the features on the bottom of the WN825G: Feature Label Address MODEL: WN825G PART NUMBER: 498518-001-00 S/N: PPPPMMYJJJSSSSSCAABBCCCC MAC address MAC: AB CD EF 01 23 45... -
Page 10: Section 2:Installation
Section 2:Installation To install the software and hardware: Insert the supplied CD-ROM into the CD-ROM drive. The software automatically starts the Installation Wizard program. Follow the prompts to setup your adapter card. If Windows 98SE prompts you for the original Windows CD-ROM, insert the CD-ROM, and direct Windows to its proper location (for example, D:\WIN98). -
Page 11: Section 3:Configuration
Section 3:Configuration You can use the information in this section to: Discover available wireless networks Setup operation modes Create connectivity profiles Setup security Monitor the wireless network / environment Diagnostic discovery Connecting to an Existing Wireless Network After the adapter card is installed, a red antenna icon is displayed on your computer in the system tray. - Page 12 SECTION 3 To connect to an existing wireless network: Double-click the antenna icon. The Connect to Wireless Network window is displayed: The window displays any available wireless networks detected. Highlight the network you want to access. If prompted, enter a Network key. Enter the network key you used to set up security on your access point.
-
Page 13: Configuring A New Wireless Network
CONFIGURATION Configuring a New Wireless Network To configure a new wireless network: Double-click the antenna icon in the system tray. The Connect to Wireless Network window is displayed: SECTION 3, CONFIGURATION SECTION 3... - Page 14 SECTION 3 Click Advanced. The Motorola Wireless Configuration Utility window is displayed: SECTION 3, CONFIGURATION CONFIGURATION...
- Page 15 CONFIGURATION Click Add. The Wireless Network Properties window is displayed: Enter information for the new wireless network. Field Network name (SSID) Data encryption (WEP enabled) Network Authentication (Shared mode) Network key Description Enter a Network Name (SSID) of no more than 32 alphanumeric characters.
-
Page 16: Configuration Section
(ad hoc) network After entering the information for this network, click OK. The Motorola Wireless Configuration Utility window is again displayed and the new network is listed in the Preferred networks area. Description Enter the format you used in the Network Key field –... -
Page 17: Configuring Properties For An Existing Wireless Network
CONFIGURATION Configuring Properties for an Existing Wireless Network To configure network properties for an existing wireless network: Double-click the antenna icon in the system tray. The Connect to Wireless Network window is displayed: SECTION 3, CONFIGURATION SECTION 3... - Page 18 SECTION 3 Click Advanced. The Motorola Wireless Configuration Utility window is displayed: In the Available networks list or the Preferred networks list, highlight the network you want to configure. In the Available networks area, click Configure or in the Preferred networks area, click Properties.
- Page 19 CONFIGURATION The Wireless Network Properties window is displayed: If the network you want to configure is open (no encryption, no authentication), click OK and this network is added to the list of preferred networks. If the network is not open and requires WEP data encryption, click Data encryption (WEP enabled).
-
Page 20: Preferred Networks - Setting Up The Connection Order
SECTION 3 Preferred Networks – Setting up the Connection Order There are two ways you can specify the order that the adapter will use to try to connect to an available network in your Preferred networks list: Using the Move up and Move down buttons Using Advanced selection rules 3-10 SECTION 3, CONFIGURATION... -
Page 21: Move Up And Move Down Buttons
Preferred networks. To select an advanced rule to display and choose a network: On the Motorola Wireless Configuration Utility window, on the Wireless Networks tab, click Advanced. The Advanced window is displayed: Choose one of the three ways to display and choose networks from the Preferred network list. -
Page 22: Removing A Network From Your Preferred Network List
SECTION 3 Removing a Network From Your Preferred Network List To remove a wireless network from your preferred network list: Double-click the antenna icon in the system tray. The Connect to Wireless Network window is displayed: 3-12 SECTION 3, CONFIGURATION CONFIGURATION... - Page 23 CONFIGURATION Click Advanced. The Motorola Wireless Configuration Utility window is displayed: In the Preferred networks list, highlight the network you want to remove. Click Remove. The network is removed from your preferred network list. SECTION 3, CONFIGURATION SECTION 3 3-13...
-
Page 24: Viewing Site Monitor Information
SECTION 3 Viewing Site Monitor Information To view site monitor information: Double-click the antenna icon in the system tray. On the Connect to Wireless Network window, click Advanced. Click the Site Monitor tab. The Visible Networks list provides information about all of the detected networks. - Page 25 CONFIGURATION To obtain more information about a selected network, click Advanced. The Advanced Site Monitor window is displayed: This window provides detailed information about the network you selected. To start a log of network activity, click Start Log. The Save log file as window is displayed: Select a drive and directory to store the networks.log file.
- Page 26 SECTION 3 The adapter saves a log of the information listed on the Advanced Site Monitor window to the networks.log file. The information is sent to the file approximately every six seconds. The log is a comma-delimited list that can be imported to a spreadsheet to enable you to view the activity on the network over an specific time period.
-
Page 27: Viewing Link Status
CONFIGURATION Viewing Link Status To view link status: Double-click the antenna icon in the system tray. Click Advanced. Click the Link Status tab. The Link Status tab provides information about the wireless network: SECTION 3, CONFIGURATION SECTION 3 3-17... -
Page 28: Viewing Network Statistics
Viewing Network Statistics To view statistics for the network you are connected to: Double-click the antenna icon in the system tray. Click Advanced. The Motorola Wireless Configuration Utility window is displayed. Click the Statistics tab. The Statistics tab provides information... - Page 29 CONFIGURATION Click Advanced. The Motorola Wireless Configuration Utility window is displayed. Click the LEAP tab. Click Enable LEAP to activate the function. To add a network, click Properties. The LEAP Network Properties window displays. Enter the required information and click OK.
-
Page 30: Diagnostics
This tab will help you, in conjunction with technical support, to isolate problems that might be occurring with your adapter. Double-click the antenna icon in the system tray. Click Advanced. The Motorola Wireless Configuration Utility window is displayed. Click the Diagnostics tab. -
Page 31: Viewing Adapter Product Information
Viewing Adapter Product Information To view product information for the adapter installed in your PC: Double-click the antenna icon in the system tray. Click Advanced. The Motorola Wireless Configuration Utility window is displayed. Click the Information tab. The Information tab provides the... -
Page 32: Removing The Wireless Adapter
SECTION 3 Removing the Wireless Adapter You can safely remove the Wireless Adapter while the PC is operating. To remove the adapter: Locate the Device Eject icon located in your system tray. In the illustration below, it is the third icon from the left; the picture of a card and a left-pointing arrow. - Page 33 CONFIGURATION Highlight the device you want to remove. Click STOP. The Stop a Hardware device window is displayed: Confirm that the device listed in the window is the device you want to stop. Click OK. After you receive a message telling you the device is stopped, you can safely remove the Wireless Adapter.
-
Page 34: Section 4:Troubleshooting
Section 4:Troubleshooting This section details possible solutions to common problems that might occur in using the WN825G. Contact Us If you are unable to locate a solution here, please access our website www.motorola.com/broadband/networking You can also reach us at 1-877-466-8646 7 days a week, 24 hours a day. -
Page 35: I Would Like To Test To See If My Internet Connection Is Alive
SECTION 4 I would like to test to see if my Internet connection is alive. For this, you will use the ping command to test the connection. Before attempting, determine the IP Address of your adapter. Open a command prompt by clicking Start and Run. For Windows 98 and ME, in the Open field, type command and press Enter or OK. - Page 36 Section 5:Glossary Access Point (AP) A device that provides wireless LAN connectivity to wireless clients (stations). Adapter A device or card that connects a computer, printer, or other peripheral device to the network or to some other device. A wireless adapter connects a computer to the wireless LAN. Address translation See NAT.
-
Page 37: Section 5:Glossary
Internet and your network. The Domain Name System is the Internet system for converting domain names (like www.motorola.com) to IP addresses. A DNS server contains a table matching domain names such as Internetname.com to IP addresses such as 192.169.9.1. When... - Page 38 The DNS lookup table is a distributed Internet database; no one DNS server lists all domain name to IP address matches. Domain Name A unique name, such as motorola.com, that maps to an IP address. Domain names are typically much easier to remember than are IP addresses. See DNS.
- Page 39 SECTION 5 Each Ethernet port has a physical address called the MAC address. Also see MAC address. Event A message generated by a device to inform an operator or the network management system that something has occurred. Firewall A security software system on the some devices that enforces an access control policy between the Internet and the LAN for protection.
- Page 40 GLOSSARY A company that provides this service In IBM environments, a mainframe computer ICMP Internet Control Message Protocol is a protocol used for error, problem, and informational messages sent between IP hosts and gateways. ICMP messages are processed by the IP software and are not usually apparent to the end-user.
- Page 41 SECTION 5 LEAP Lightweight Extensible Authentication Protocol (LEAP) is an authentication implementation of 802.1X by Cisco, which provides a challenge-response authentication mechanism and dynamic WEP key assignment. MAC Address The Media Access Control address is a unique, 48-bit value permanently saved in the ROM at the factory to identify each Ethernet network device.
- Page 42 GLOSSARY A Network Interface Card converts computer data to serial data in a packet format that it sends over the LAN. A NIC is installed in an expansion slot or can be built-in. Every Ethernet NIC has a MAC address permanently saved in its ROM. Packet The unit of data that is routed between the sender and destination on the Internet or other packet-switched network.
- Page 43 SECTION 5 Protocol A formal set of rules and conventions for exchanging data. Different computer types (for example PC, UNIX, or mainframe) can communicate if they support common protocols. Public IP Address The IP address assigned by the service provider. A public IP address is visible to devices on the Internet.
- Page 44 GLOSSARY Service Provider A company providing Internet connection services to subscribers. SMTP Simple Mail Transfer Protocol is a standard Internet protocol for transferring e-mail. Static IP Address An IP address that is permanently assigned to a host. Normally, a static IP address must be assigned manually. The opposite of Dynamic IP Address.
- Page 45 SECTION 5 Tunneling requires the following protocol types: A carrier protocol, such as TCP, used by the network that the data travels over An encapsulating protocol, such as IPSec, L2F, L2TP, or PPTP, that is wrapped around the original data A passenger protocol, such as IP, for the original data User Datagram Protocol.
- Page 46 GLOSSARY A wide-area network provides a connection over a large geographic area, such as a country or the whole world. The bandwidth depends on need and cost, but is usually much lower than for a LAN. Wireless Access Point or Wireless Access Protocol. See also Access Point.
- Page 47 Visit our website at: www.motorola.com/broadband 494075-001 07/03 MGBI...