Sign In
Upload
Manuals
Brands
sorin Manuals
Medical Equipment
XTRA
sorin XTRA Autotransfusion System Manuals
Manuals and User Guides for sorin XTRA Autotransfusion System. We have
2
sorin XTRA Autotransfusion System manuals available for free PDF download: Operator's Manual, Instructions For Use Manual
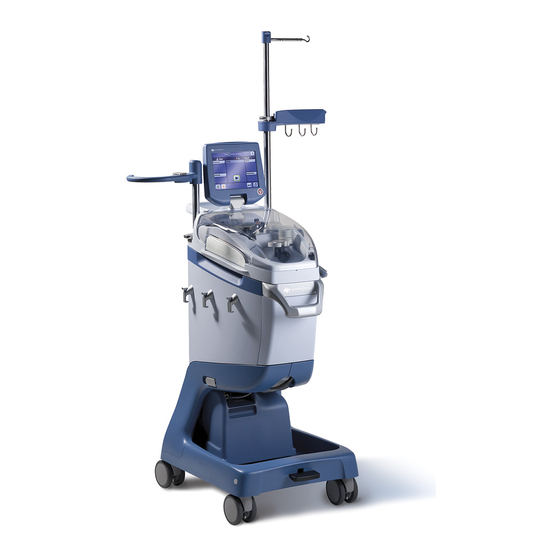
sorin XTRA Operator's Manual (304 pages)
Brand:
sorin
| Category:
Medical Equipment
| Size: 15.3 MB
Table of Contents
Table of Contents
3
Chapter 1: Introduction and Safety
15
About the Operating Instructions
15
Introducing the X
15
TRA System
15
Chapter 2: Overview
16
Chapter 3: System Description
16
Indications for Use
17
Contraindication for Use
17
General Warnings
17
Storage and Transporting Warnings
23
Electrical Warnings
23
General Precautions
24
Operating Conditions
28
Warning
28
Cautions
28
Adverse Effects
28
Installation of the Unit
28
Installation
28
Unpacking and Inspection
29
Storage and Transport Conditions
29
Electrical Requirements
29
Addresses
30
Service Information
31
Return of Used Product
31
For North American Customers
31
For International Customers
31
Disposal in Accordance with Environmental Regulations
32
Chapter 2: Overview
33
Advantages of Intra- and Postoperative Red Cell Recovery
33
Clinical Applications
33
Description of the X
33
TRA System
33
How the XTRA System Works
35
Collection and Anticoagulation
35
Processing
35
Figure 2-1 Position of Separated Whole Blood Components in Centrifuge Bowl
35
Reinfusion
36
The Basic XTRA
36
Options Available with XTRA
37
Programmability Option
37
Emergency Option
37
Vacuum System
37
Vac )
37
Preoperative Sequestration Option (PPP and PRP)
37
Data Management Options (USB, Printer, RS232)
37
Quality Control Options
37
Chapter 3: System Description
39
Machine Components
39
Figure 3-1 XTRA Front View
39
Figure
40
XTRA Rear View
40
Handles
41
Hooks and Tray Holders
41
Figure 3-3 Front Handle (Left), Rear Handle (Center), and Rear Transport Handle (Right)
41
Figure 3-4 Hooks on Left Side of
41
Cart
42
Figure 3-5 Left: Disposable Tray on Tray Holders; Right: Waste Bag on Right-Side Hooks
42
Figure 3-6 Cart
42
Figure 3-7 Spring Lever Releases Cart
43
Figure 3-8 Lifting Body from Cart
43
Figure
43
IV Pole and Reservoir Pole
44
Figure 3-9 XTRA Body and Cart
44
Figure 3-10 Reservoir and IV Pole
44
Reservoir Holder
45
Touch Screen Display Panel
45
Figure 3-11 Reservoir Holder
45
Centrifuge Assembly
47
Figure 3-13 Centrifuge Assembly
47
Figure 3-14 Centrifuge Well Fluid Container
48
Clamps
49
Left: Clamps with Clamp Lid Open | Right: Clamp Lid Closed and Latched
49
Figure
49
Processing Pump
50
Air Detector
50
Visible Parts of the X
50
TRA Processing Pump
50
Figure
50
Location of the Air Detector
50
Quality Control Indicators
51
Xvac
51
Figure 3-18 Location of the Hematocrit and Waste Line Color Indicators
51
Figure 3-19 Left: Vacuum Module | Right: Integrated Vacuum Module
51
Essential Performance
52
Order Guide
52
XVAC Release Screw
52
Figure
52
XVAC Control Panel
52
Xtra
52
Disposable Description
53
Figure
53
Figure
54
Collection Set
55
Figure 3-24 XTRA Collection Kit (CARDIO TOP)
55
Xtra
55
Figure
56
Collection Reservoir Lid Ports
56
Figure 3-27 Left: Reservoir with TOP Outlet | Right: Reservoir with BOTTOM Outlet
57
Aspiration Line
57
Figure
58
Vacuum Line
58
Bowl Set
59
Figure 3-30 Cardio Kit
59
Cross-Section of Latham Centrifuge Bowl
60
Figure 3-34 Red Blood Cells (RBC) Bag
62
Procedure Set
63
Figure 3-31 Bowl Set
63
Selecting the Disposable
64
Selecting the Bowl
64
Order Guide
65
Figure 3-35 Procedure Set
65
Anticoagulant Solution
67
Wash Solution
68
Accessories and Optional Devices
68
Cables
69
Figure 3-33 Waste Bag
69
Chapter 4: Installing the Disposables
71
Setup for Standby Collection
71
Supplies Required
71
Setup for Whole Blood Separation Program
71
Setup for Intraoperative Red Cell Recovery and Reinfusion
72
Power Requirements
72
Supplies Required
72
Step-By-Step Procedures for Installing Disposables
73
Step 1: Installing the Blood Collection Reservoir
73
Figure 4-1 Raising the Reservoir Holder
73
Figure
73
Step 2: Connecting the Suction Line
74
Figure 4-2 Positioning the Blood Collection Reservoir on the Reservoir Holder
74
Figure 4-3 Positioning the Blood Collection Reservoir on the Reservoir Holder
75
Step 3: Setup of the Vacuum Line
76
Figure 4-4 Positioning the Blood Collection Reservoir on the Reservoir Holder
76
Step 4: Installing the Bowl Set
77
Figure 4-5 Machine Top
77
Inserting the Centrifuge Bowl
78
Figure
78
Inserting the Bowl in Order to Avoid Wobbling
78
Figure 4-8 Seating the Pump Loop Cartridge (Left); Latching the Clamp Lid (Right)
79
Figure 4-9 Connecting the Bowl Set to the Top of the Blood Collection Reservoir
79
Figure 4-10 Connecting the Bowl Set to the Bottom of the Blood Collection Reservoir
79
Step 5: Connecting Wash Lines to the Saline Solution Containers
80
Step 6: Hanging the Waste Bag
80
Connecting the Wash Lines (Yellow) to the Washing Solution
80
Other Setups
81
Blood Collection
81
Figure 4-12 Connecting the Waste Bag
81
Procedure for Removing Disposables
82
Chapter 5: Processing
83
Operating the Touch Screen
83
Figure 5-1 Example of an Enabled Button
83
Figure
83
Example of in Inactive (Left) and Active (Right) Toggle Button
83
Figure 5-3 Example of a Disabled Button
83
Screen Structure
84
Typical Autotransfusion Processing Screen Structure
84
Figure
84
The Displets
85
Reservoir Displet (Open and Closed)
85
Figure
85
Vacuum Displet
85
Rbc's Displet
86
Figure
86
Waste Bag Displet
86
PPP/PRP Displet
86
Processing Displet
86
Modification of Parameters
87
Running a Case with the XTRA System
87
Before You Begin
87
Figure 5-11 a Text Box before and after Being Selected for Editing
87
Loading the Pump Segment for a New Case
88
Figure 5-12 Rear Panel of the
88
Figure
88
Processing a Cycle in Automatic or 1 Touch Mode
89
Setup Screen
89
Figure
89
Figure 5-14 Ready Screen
90
Fill Phase of the Processing Screen
91
Figure
91
Wash Phase of the Processing Screen
92
Figure
92
Pausing and Resuming the Cycle
93
Empty Phase of the Processing Screen
93
Figure
93
Figure 5-18 Fill Phase Paused
94
Figure 5-19 Wash Phase Paused
94
Figure 5-20 Wash Phase Paused with Pfat Protocol
95
Figure 5-21 Empty Phase Paused
95
Ending the Current Case
96
Unloading the Pump Loop
97
Figure 5-22 End of Case Screen
97
Emptying the RBC Line Without Ending the Case
98
Closing the End of Case Screen Without Ending the Case
98
Retaining Case Data between Power Cycles
98
Dealing with Expected Warnings During a Cycle
99
Reservoir Empty
99
Figure 5-23 Reservoir Empty Warning
100
Wash Bag Empty
101
Figure 5-24 Wash Bag Empty Warning
101
RBC Bag Full
102
Figure 5-25 RBC Bag Full Warning
102
Waste Bag Full
103
Figure 5-26 Waste Bag Full Warning
103
Factory Protocols
104
The Autotransfusion Protocols
105
Figure 5-27 Disposable Setup for ATS Protocols
105
Popt
106
Pstd
107
Pfat
108
Emergency
108
Figure 5-28 Emergency Activation Screen
109
Post-Op
111
Protocol Parameters (ATS)
112
The Operating Modes
113
Automatic
113
Touch
113
Manual
114
Figure 5-29 Ready Screen in Manual Mode
114
Figure 5-30 Fill Phase in Manual Mode
114
Figure 5-31 Wash Phase in Manual Mode
115
Figure 5-32 Empty Phase in Manual Mode
115
Selecting the Active Protocol and Operating Mode
116
Figure 5-33 Protocol/Mode Tab
116
Set the Active Protocol
117
Set the Active Operating Mode
117
Touch Screen User Interface
118
Alarms Disabled Confirmation Screen
118
Figure 5-34 Example Alarms Disabled Confirmation Screen
118
Setup Screen
119
Figure
119
Ready Screen
120
Figure
120
Processing Screen
121
Figure 5-37 Fill Phase of the Processing Screen
121
Figure 5-38 Wash Phase of the Processing Screen
122
Fat Removal Screens
123
Figure 5-39 Empty Phase of the Processing Screen
123
Fat Removal - Wash Processing Screen
124
Figure
124
Fat Removal - Empty Processing Screen
124
Fat Removal - Conc Processing Screen
125
Figure
125
Menu Screen
126
Tally Tab of the Menu Screen
126
Figure
126
Figure 5-44 ID Tab of the Menu Screen
128
Protocol/Mode Tab of the Menu Screen
129
Figure
129
Figure 5-46 Settings Tab of the Menu Screen
130
Figure 5-47 Reset Confirmation Screen
131
End of Case Screen
132
Figure
132
Help Screen
133
Figure
133
Past Cases Screen
134
Figure 5-50 Past Cases Screen
134
Automatic Reseparation Screen
137
Stop Button
137
Power Loss
137
Chapter 6: Special Cycles
139
Description
139
Enabling Purge and Prime IV Special Cycles
139
The Special Cycles Screen
139
Figure
139
Special Cycles Screen
139
Returning Fluid to the Reservoir: the Return Cycle
140
Figure 6-2 Return Screen
140
Adding Fluid to a Partially Filled Bowl: the Concentrate Cycle
141
Figure 6-3 Concentrate Screen
141
Priming the Reinfusion Line: Prime IV
142
Figure 6-4 Prime IV Screen (Paused)
143
Removing Air from the RBC Bag: the Purge Cycle
144
Figure
144
Purge Screen
144
Reinfusion
145
Description
145
Connecting the Blood Administration Set to the X
146
TRA RBC Bags
146
Figure
147
Top: "Y"-Type Blood Administration Set with Integral Filter Bottom: Filter with "Y"-Type Blood Administration Set
147
Chapter 7: Automated Functions
149
Description
149
Enabling Optional Automated Functions
149
Autostart Function
149
Figure 7-1 Autostart Activation Screen
150
Continue Function
151
Last Bowl
152
Figure 7-2 Last Bowl Activation Screen
152
Double Volume Wash Function
154
Better Quality Wash (BQW) Function
154
Better Empty
155
Chapter 8: Configuring X
157
Description
157
The Settings Tab of the Menu Screen
158
Configuration Mode
158
How to Enter the Configuration Mode
158
Figure
158
Settings Tab of the Menu Screen
158
Exit from the Configuration Mode
159
Predefined Feature Sets
159
Figure
159
Configuration Mode Password Screen
159
Configuration Mode Screen Tabs
160
Figure
160
Features Tab of the Configuration Mode
160
Figure 8-4 Protocol Set Tab of the Configuration Mode
162
Figure 8-5 Wakeup Tab of the Configuration Mode
163
Figure
163
Display Tab of the Configuration Mode
164
Figure
164
Warnings Tab of the Configuration Mode
164
Figure 8-8 ID Tab of the Configuration Mode Screen
166
Figure 8-9 Edit Field List Screen
167
Figure 8-10 Language Tab of the Configuration Mode
168
Chapter 9: Programmability Option
169
Description
169
Enabling Programmability Option
169
Creating Custom Protocols
169
Entering Values and Text
169
Figure 9-1 Keyboard Screen (Caps & Numbers ON)
170
Figure
170
Creating a New Protocol
171
Adjusting Parameters of a Protocol
171
Fill Phase Screen with Modifiable Parameter
172
Figure
172
Renaming a Protocol
174
Changing the Wakeup Protocol
174
Deleting a Protocol
174
The Protocol/Mode Tab
175
Mode Buttons
175
Protocol/Mode Tab of the Menu Screen
175
Protocol Area
176
Mode Area
177
Save Modifications and Close Buttons
177
Chapter 10: Preoperative Sequestration (PPP and PRP)
179
Description
179
Enabling the Preoperative Sequestration Protocols
180
Overview of Preoperative Sequestration
180
Sequestration Set
181
Figure
181
Order Guide
182
Before You Begin
182
Setup for Preoperative Sequestration
183
Supplies Required
183
Installing the Blood Collection Reservoir, Connecting the Aspiration Line, Setup of the Vacuum Line, Installing the Bowl Set
184
Connecting the 4-Way Adapter
184
Figure
184
Sequestration Set 4-Way Connection
184
Connecting and Hanging the Blood Transfer Bags
185
Figure 10-3 Blood Transfer Bag Setup: for PPP, PRP1, and PRP2 Procedures
185
Figure 10-4 Hang the Blood Transfer Bags, Keeping the Inlet Line Facing up
185
Connecting the Blood Bag Connection Line
186
Selecting the Active Protocol and Operating Mode
186
Figure
186
Running a Preoperative Sequestration Case
187
Processing Considerations
187
Loading the Pump Segment for a New Case
188
Processing a Cycle
188
Figure
188
Setup Screen
188
Figure 10-7 Ready Screen (PRP2)
189
Figure
189
Figure 10-8 Sequestration Fill Phase of the Processing Screen
190
Spill Phase (PPP) of the Processing Screen
191
The Concentrate Cycle (with the PPP/PRP Protocols)
194
Figure 10-11 Concentrate Screen (Preoperative Protocols)
194
Dealing with Expected Warnings During a Cycle
195
Whole Blood Bag Empty
195
PPP Bag Full
196
PRP Bag Full
196
RBC Bag Full
196
Finishing Preoperative Separation and Preparing for Blood Recovery
197
Tally Information
198
The Preoperative Sequestration Factory Protocols
199
Overview of the Preoperative Sequestration Protocols
199
Figure 10-13 Disposable Setup for Sequestration Protocols
199
Ppp
200
Prp1
201
Prp2
201
Protocol Parameters (PPP and PRP)
202
Preoperative Sequestration Operating Modes
203
Spill Screen
203
Figure 10-15 Spill PRP Phase of the Processing Screen
204
Chapter 11: Data Download Option
207
Description
207
Enabling Data Download Option
207
XTRA Output Devices
207
Printer
207
Figure
207
Data Ports Panel on Rear of Machine
207
USB Ports
208
Figure 11-2 Integrated Dot-Matrix Printer
208
RS232 Ports
209
Case Data Download
209
Entering and Modifying Optional Case Data Fields
209
Figure
209
Tally Tab of the Menu Screen
209
Selecting Past Cases
210
Figure 11-4 ID Tab of the Menu Screen
210
Selecting the Output Device for Data Download
211
Figure 11-5 Past Cases Screen
211
Sending Tallies to the Printer
212
Sending Tallies to the XTRA USB Memory Device
212
Figure 11-6 Destination Drop-Down Menu (Expanded)
212
Sending Tallies to the Stöckert Data Management System
213
Sending Tallies to a PC through the RS232 Port
213
XTRA Data Output
215
General Report Data
215
Additional Cycle Data
217
Chapter 12: Quality Management Option
219
Description
219
Figure
219
Location of the Hct and WLC Indicators
219
Enabling Quality Management Options
220
Hematocrit (Hct) Indicator
220
User Interface
220
Calibration
220
Supernatant Removal Indicator
221
User Interface
221
Waste Line Color Indicator
221
User Interface
222
Warnings Related to Waste Line Color Indicator
222
Chapter 13: Vacuum Module
223
Description
223
XVAC Vacuum Module
223
Operating Modes
224
Intraoperative Mode
224
Postoperative Mode
224
Setting Wakeup Values for Vacuum Module
224
Preliminary Setup
225
Performing a Blood Collection Procedure with the X
225
VAC Module
225
XVAC Used through the
225
TRA System Touch Screen Interface (Remote Control)
225
Figure 13-2 Vacuum Line Connecting Reservoir to Inlet Port
225
Figure 13-3 Cable Connections from the
226
Vac Xtra
226
Figure
226
XVAC Rear Panel
226
Vacuum Displet
226
Use of the X VAC System through the
228
VAC Control Panel (Local Control)
228
Xvac
228
Alarms
230
List of Fatal Alarms
230
Alarm Management in Local Control
230
Alarm Management in Remote Control
230
Chapter 14: Troubleshooting
233
General Precautions
233
Supervision and Checks
233
Alarms and Warnings
233
Visual Alert
234
Audible Alert
234
Figure 14-1 Example Warning Screen
234
Stop Button
235
Alarms and Warnings During Setup
235
During Processing
240
Equipment Malfunctions (Fatal Errors)
255
Therapy Concerns Unrelated to the Equipment
257
Quality of Salvaged Blood and Blood Product
259
Glossary
261
Routine Maintenance
261
General Maintenance Instructions
261
Chapter 15: Maintenance
261
Routine Visual Inspection
262
Cleaning and Disinfecting
262
Figure 15-1 Power Supply Cable (A); Serial Cable and Vacuum Pump Power Supply (B)
262
Figure 15-2 Clamps and Pump Loop Ejector
264
Figure 15-3 Centrifuge Well
264
Figure
264
Removal of the Overflow Trap from the Vacuum Pump
265
Figure
265
Composition of the Overflow Trap
265
List of Operator-Replaceable Parts
266
Pump Rotor
266
Figure 15-6 Sensors Located on Machine Top
266
Figure 15-7 Sensors Located on Machine Top
267
Centrifuge Well Fluid Container
268
Figure 15-8 Replacement of the Paper Roll
268
Figure 15-9 Removal of the Centrifuge Well Fluid Container
268
Preventive Maintenance
269
Regular Maintenance Checks by Authorized Service Technicians
269
Machine Repair
269
Chapter 16: Technical Data
271
Technical Features of the Equipment
271
Operating Features of the Equipment
272
Chapter 17: Warranty
273
Limited Warranty and Contractual Conditions for Livanova Medical Equipment
273
Warranty Expiry
273
Contents and Necessary Requirements of the Warranty
273
Appendix A: Safety Standards en 60601-1-2
277
Information on Electromagnetic Compatibility (EMC
277
Technical Description
281
Appendix B: Approvals and Test Certificate
283
EMC Standards
283
EMC Emission
283
EMC Immunity
283
Electrical and Mechanical Safety Standards
283
Certification
283
Appendix C: Quick Operating Instructions
285
Setting up the Disposables
287
Setting the Active Protocol and Mode
292
Running an ATS Case
293
Running a PRP Sequestration Case
294
Creating a Custom Protocol
295
Printing a Report for the Current Case
296
Appendix D: Recommended Fluid Bag Configurations
297
Appendix E: Symbols and Abbreviations
299
Symbols
299
Electrical Symbols on the Unit
299
Symbols on the Unit and on the Packaging
299
Abbreviations
301
Units Conversion Table and Measuring Units
301
Advertisement
sorin XTRA Instructions For Use Manual (88 pages)
XRES BLOOD COLLECTION RESERVOIR AND COLLECTION SET
Brand:
sorin
| Category:
Medical Equipment
| Size: 1.95 MB
Table of Contents
Table of Contents
1
Contraindications
3
Collection Set Cardio
3
Gb - English Xres Blood Collection Reservoir and Collection Set - Instructions for Use
3
Intended Use
3
Safety Information
4
Explanation of the Symbols Used on the Labels
4
Set up
4
Holder Set up
4
Set up of the VEL Vacuum Extension Line
5
Instructions for Use
5
Blood Collection and Anticoagulation
5
Using the XRES Blood Collection Reservoir Connected to a Bowl Set
5
Reinfusing Salvaged Blood
6
Return of Used Products
6
XRES B Blood Collection Reservoir
6
Recovery of Priming Residue from the ECC Circuit
6
It - Italiano Xres Blood Collection Reservoir E Collection Set - Istruzioni Per L'uso
8
Fr - Français Xres Blood Collection Reservoir Et Collection Set - Instructions D'utilisation
13
De - Deutsch Xres Blood Collection Reservoir und Collection Set- Gebrauchsanweisung
18
Es - Español Xres Blood Collection Reservoir y Collection Set - Instrucciones de Uso
23
Pt - Português Xres Blood Collection Reservoir E Collection Set - Instruções de Uso
28
Nl - Nederlands Xres Blood Collection Reservoir en Collection Set - Gebruiksinstructies
33
Se - Svenska Xres Blood Collection Reservoir Och Collection Set - Bruksanvisning
38
Dk - Dansk Xres Blood Collection Reservoir Og Collection Set - Brugsanvisning
43
No - Norge Xres Blood Collection Reservoir Og Collection Set - Bruksanvisning
48
Fi - Suomi Xres T Blood Collection Reservoir Ja Collection Set Tx - Käyttöohje
53
El - Ελληνικα Xres Blood Collection Reservoir Και Collection Set - Οδηγιεσ Χρησησ
58
Pl - Polski Xres Blood Collection Reservoir Ι Collection Set - Instrukcja Użytkowania
63
Cz - Česky Xres Blood Collection Reservoir a Collection Set - Pokyny K Použití
68
Xres Blood Collection Reservoir И Collection Set
73
Tr - Türkçe Xres Blood Collection Reservoir Ve Collection Set - Kullanim Kilavuzu
78
Zh - 简体中文
83
Advertisement
Related Products
sorin 04250
sorin 04251
sorin 04252
sorin 04253
sorin 04254
sorin 04255
sorin 04256
sorin 04257
sorin 04258
sorin 04261
sorin Categories
Medical Equipment
Heater
Oxygen Equipment
Freezer
More sorin Manuals
Login
Sign In
OR
Sign in with Facebook
Sign in with Google
Upload manual
Upload from disk
Upload from URL