Sign In
Upload
Manuals
Brands
SOMFY Manuals
Gate Opener
SGS 201
SOMFY SGS 201 Manuals
Manuals and User Guides for SOMFY SGS 201. We have
7
SOMFY SGS 201 manuals available for free PDF download: Operating And Installation Manual, Manual, Replacing, User Instructions
SOMFY SGS 201 Operating And Installation Manual (72 pages)
Brand:
SOMFY
| Category:
Gate Opener
| Size: 39.67 MB
Table of Contents
English
4
Table of Contents
4
Safety INSTRUCTIONS
6
Introduction
6
Preliminary Checks
6
Installation Environment
6
Condition of the Product to be Motorised
6
Specifications of the Gate to be Motorised
6
Dimensions and Maximum Weight of the Gate Leaves Which Can be Motorised, Based on the Wind Strength
6
Electrical Pre-Equipment
7
230V Power Supply Input (Not Required for a Solar Power Supply)
7
Cable Feed
7
Safety Instructions Relating to Installation
7
Safety Devices
7
Clothing Precautions
7
Safety Instructions Relating to Operation
8
About the Batteries
8
Safety Instructions Relating to Maintenance
8
Risk Prevention
9
Identification of Risk Zones
9
Measures to be Taken to Counter Risks
9
Regulations
10
Recycling and Disposal
10
Protection of the Environment
10
Recycling
10
Assistance
10
General Information
11
Welcome
11
Who Are Somfy
11
Product Description
11
Area of Application
11
Dimensions and Maximum Weight of the Gate Leaves
11
Space Requirements for the Motors and the Control Unit (in MM)
11
Technical Data
12
Overview of Your Installation
12
Tools and Hardware Required
13
Tools
13
Hardware
13
Pre-Installation Checks
13
Gate
13
Reinforcements
13
Closing End Stops
14
Mechanical Lock
14
Pillars
14
Electrical Pre-Equipment
14
230V Power Supply Input (Not Required for a Solar Power Supply)
14
Linking the Two Motors
14
Linking the Cells
14
Linking the Other Accessories
14
Installation and Commissioning
15
Drilling the Pillars
15
Taking Dimensions
15
Tracing the am and AH Axes
16
Drilling the Pillars
16
Securing the Motors to the Pillars
17
Securing the Pillar Mounting Bracket
17
Fitting the Cylinder on the Mounting Bracket
17
Securing the Motors to the Gate Leaves
18
Installing the Control Unit
20
Positioning the Control Unit on the Pillar
20
Fitting the Sealing Strip
20
Securing the Control Unit to the Pillar
20
Connecting the Motors
22
Connecting to the Mains Power Supply
22
Connecting the Control Unit to the Power Supply
22
Other Connections (Optional)
22
Commissioning
23
Presenting the Remote Controls
23
Attaching the Control Unit Label
23
Switching the Installation on
23
Adjusting the Opening Stop
23
Programming the Gate Leaf Travel
24
Finishing Mounting the Gate Leaf Bracket
25
Checking the Position of the Aerial
25
Closing the Control Unit
25
CUSTOMISING Your INSTALLATION
26
Default Operation
26
Operating Your Gate in Sequential Mode and Complete Opening Mode
26
Detecting Obstacles
26
Automatic Closing
26
Precautions for Use
26
Activating Automatic Closing Mode
26
Deactivating Automatic Closing Mode
27
Operating Your Gate in Automatic Closure Mode
27
Pedestrian Opening
27
Activating Pedestrian Opening
27
Deactivating Pedestrian Opening
27
Operating Your Gate in Pedestrian Opening Mode
27
Memorising Remote Controls
28
Selecting the Buttons of Your 2- or 4-Button Remote Control
28
Memorising a 2- or 4-Button Remote Control
28
3-Button Remote Controls
28
Wiring the Accessories
29
Accessories General Wiring Diagram
29
Cells
29
Orange Light
30
Area Lighting
30
Backup Battery
31
Key Lock
31
Video Entry Phone
32
Wired Code Keypad
32
Offset Aerial
32
Solar
33
Connection to the Solar Power Supply
33
Advice for Use
33
Troubleshooting Guide
34
Diagnostics
34
Assistance
34
Replacing the Remote Control Battery
34
Clearing the Settings
35
Clearing the Memorised Settings and Remote Controls
35
Unlocking/Locking the Motors
35
Deutsch
38
Sicherheitshinweise
40
Einleitung
40
Vorab Durchzuführende Kontrollen
40
Installationsumgebung
40
Zustand des mit dem Antrieb zu Bewegenden Trägerprodukts
40
Spezifikationen des mit dem Antrieb zu Bewegenden Tors
40
Höchstmaße und -Gewicht der mit dem Antrieb zu Bewegenden Torflügel in Abhängigkeit von der Windstärke
40
Elektrische Vorbereitung
41
Netzstromversorgung von 230 V (bei Solarstromversorgung nicht Erforderlich)
41
Kabelführung
41
Sicherheitshinweise bei der Installation
41
Sicherheitsvorrichtungen
41
Vorsichtshinweise zur Kleidung
41
Sicherheitshinweise bei der Benutzung
42
Batterien
42
Sicherheitshinweise bei der Wartung
42
Gefahrenvermeidung
43
Gefahrenbereiche (Zonen)
43
Maßnahmen zur Eliminierung von Gefahren
43
Normen
44
Support
44
Recycling und Entsorgung
44
Schutz der Umwelt
44
Recycling
44
ALLGEMEINE Informationen
45
Herzlich Willkommen
45
Wer ist Somfy
45
Produktbeschreibung
45
Anwendungsbereich
45
Höchstmaße und -Gewicht der Torflügel
45
Platzbedarf für Antriebe und Steuerkasten (in MM)
45
Technische Daten
46
Übersicht über die Anlage
46
Erforderliche Werkzeuge und Eisenwaren
47
Werkzeuge
47
Eisenwaren
47
Vor der Montage zu Prüfende Punkte
47
Tor
47
Verstärkungsschienen
47
Schließanschlag
48
Mechanisches Schloss
48
Pfeiler
48
Elektrische Vorbereitung
48
Netzstromversorgung von 230 V (bei Solarstromversorgung nicht Erforderlich)
48
Verbindung zwischen den Beiden Motoren
48
Anschluss der Fotozellen
48
Anschluss Weiteren Zubehörs
48
Installation und Inbetriebnahme
49
Herstellung der Bohrungen in den Pfeilern
49
Ermittlung der Maße
49
Anzeichnen der Achsen am und AH
50
Herstellen der Bohrungen an den Pfeilern
50
Befestigung der Antriebe an den Pfeilern
51
Anbringung des Befestigungswinkels am Pfeiler
51
Anbringung der Spindel am Befestigungswinkel
51
Befestigung der Antriebe an den Torflügeln
52
Installation des Steuerkastens
54
Position des Steuerkastens an Pfeiler/Mauer
54
Einlegen der Dichtungsschnur
54
Befestigung des Steuerkastens am Pfeiler
54
Anschluss der Antriebe
56
Anschluss an die Netzstromversorgung
56
Anschluss des Steuerkastens an die Netzstromversorgung
56
Zusätzliche Anschlüsse (Optional)
56
Inbetriebnahme
57
Beschreibung der Funkhandsender
57
Aufkleben des Schilds auf den Steuerkasten
57
Einschalten der Anlage
57
Einstellung des Öffnungsanschlags
57
Einlernen des Wegs der Torflügel
58
Abschließende Befestigung des Befestigungswinkels des Torflügels
59
Überprüfung der Position der Antenne
59
Schließen des Steuerkastens
59
Individuelle Anpassung der Anlage
60
Standardbetrieb
60
Betrieb des Tors IM Sequenziellen Modus und mit Vollständiger Öffnung
60
Erfassung eines Hindernisses
60
Automatischer Zulauf
60
Praktische Hinweise
60
Aktivieren des Automatischen Zulaufs
60
Deaktivieren des Automatischen Zulaufs
61
Funktionsweise IM Automatischen Zulauf
61
Fußgängeröffnung
61
Aktivierung der Fußgängeröffnung
61
Deaktivierung der Fußgängeröffnung
61
Funktion des Tores bei der Fußgängeröffnung
61
Einlernen von Funkhandsendern
62
Auswahl der Tasten an Ihrem Funkhandsender mit 2 oder 4 Tasten
62
Programmierung eines Funkhandsenders mit 2 oder 4 Tasten
62
Funkhandsender mit 3 Tasten
62
Verkabelung des Zubehörs
63
Allgemeiner Schaltplan für Zubehör
63
Fotozellen
63
Gelbe Signalleuchte
64
Umfeldbeleuchtung
64
Notstrombatterie
65
Schlüsselschalter
65
Video-Türsprechanlage
66
Kabelgebundene Codetastatur
66
Externe Zusatzantenne
66
Solarversorgung
67
Anschluss an die Solarstromversorgung
67
Hinweise zur Benutzung
67
Störungsbeseitigung
68
Diagnose
68
Support
68
Wechsel der Batterie des Funkhandsenders
68
Löschen von Einstellungen
69
Löschen von Einstellungen und Programmierten Funkhandsendern
69
Entriegeln/Verriegeln der Antriebe
69
Advertisement
SOMFY SGS 201 Operating And Installation Manual (68 pages)
Brand:
SOMFY
| Category:
Gate Opener
| Size: 10.05 MB
Table of Contents
English
3
Table of Contents
3
Important Information
4
Condition of the Gate to be Motorised
4
Electrical Installation
4
Safety Instructions
4
Cable Feed
5
Safety Instructions Relating to Installation of the Motorisation
5
Safety Instructions Relating to Operation
5
Regulations
6
Risk Prevention
6
About the Batteries
6
Recycling and Disposal
6
Safety Instructions Relating to Maintenance
6
Product Description
8
Contents of the Pack
8
Space Requirements
9
Field of Application
9
General View of the Installation
10
Pre-Installation Checks
11
Prerequisites for Installation
11
Presentation of the Control Electronics
11
Electrical Pre-Equipment
12
Cables Required
12
Tools Required for Installation (Not Provided)
13
Hardware Required for Installation (Not Provided)
13
Installation
14
Opening End Stop
14
Measuring the Dimensions
14
Secure the Bracket to the Pillar
15
Drilling the Pillars
15
Marking the am and AH Axes
15
Mounting the Pillar Brackets
15
Mounting the Motors
16
Installing the Control Unit
18
Position of the Control Unit
18
Installing the Sealing Strip
18
Checking the Position of the Antenna
18
Securing the Control Unit
19
Connecting the Motors
20
Connecting to the Power Supply
20
Closing the Control Unit
21
Switching the Installation on
21
Commissioning and Standard Use
21
Gate Travel Auto-Programming
21
Standby/Reactivating the Control Electronics
22
Obstacle Detection
22
User Training
22
Wiring the Accessories
23
Photoelectric Cells (Optional)
23
Flashing Light (Optional)
23
Battery (Optional)
23
Area Lighting (Optional)
24
Solar Power (Optional)
24
Video Entry Phone (Optional)
24
Key Lock (Optional)
24
Offset Antenna (Optional)
24
Advanced Parameter Settings
25
Pedestrian Opening
25
Pedestrian Opening Operation
25
Activating the Pedestrian Opening
25
Deactivating the Pedestrian Opening
25
Activating Automatic Closing
26
Automatic Closure Operation
26
Automatic Closing
26
Deactivating Automatic Closing
27
Programming the Remote Controls
28
Description of the Remote Controls
28
Possibilities for Programming the 2-Button Remote Control
28
Possibilities for Programming the 4-Button Remote Control
28
Using a 3-Button Remote Control
28
Deleting a Remote Control
29
3-Button Remote Control
29
2- or 4-Button Remote Control
29
Adding a Remote Control
29
Troubleshooting Guide
30
Assistance
30
Replacing the Remote Control Battery
30
Clearing the Settings
31
Unlocking/Locking the Motors
31
Diagnostics
32
Technical Data
34
Deutsch
35
Elektrische Installation
36
Sicherheitshinweise
36
Wichtige Informationen
36
Zustand des mit dem Antrieb zu Bewegenden Tors
36
Kabelführung
37
Sicherheitshinweise bei der Benutzung
37
Sicherheitshinweise bei der Installation des Antriebs
37
Gefahrenvermeidung
38
Normen
38
Recycling und Entsorgung
38
Sicherheitshinweise bei der Wartung
38
Sicherheitshinweise zu Batterien
38
Inhalt des Pakets
40
Produktvorstellung
40
Abmessungen
41
Bestimmungsgemäße Verwendung
41
Produktbeschreibung
41
Übersicht über die Anlage
42
Erläuterung der Steuerelektronik
43
Vor der Montage zu Prüfende Punkte
43
Voraussetzungen für die Installation
43
Bereitzustellende Kabel
44
Elektrische Vorbereitung
44
Für die Installation Benötigtes Werkzeug (nicht IM Lieferumfang)
45
Lieferumfang)
45
Ermittlung der Maße
46
Installation
46
Öffnungsanschlag
46
Anbringung des Befestigungswinkels an Pfeiler/Mauer
47
Anzeichnen der Achsen am und AH
47
Befestigung der Pfeilerbefestigungswinkel
47
Herstellen der Bohrungen an den Pfeilern
47
Anbringung der Befestigungsplatte der Spindel am Befestigungswinkel
48
Anbringung der Spindel am Befestigungswinkel
48
Befestigung der Antriebe
48
Einlegen der Dichtungsschnur
50
Installation des Steuerkastens
50
Position des Steuerkastens
50
Überprüfung der Position der Antenne
50
Befestigung des Steuerkastens
51
Anschluss an die Netzstromversorgung
52
Anschluss der Antriebe
52
Einlernen des Torwegs
53
Einschalten der Anlage
53
Inbetriebnahme und Übliche Verwendung
53
Schließen des Steuerkastens
53
Hinderniserkennung
54
Schulung der Benutzer
54
Vollöffnung und Schließung des Tors
54
Wechsel der Steuerelektronik in den Standby-/Betriebsmodus
54
Batterie (Option)
55
Fotozellen (Option)
55
Signalleuchte (Option)
55
Verkabelung des Zubehörs
55
Externe Zusatzantenne (Option)
56
Schlüsselschalter (Option)
56
Solarstromversorgung (Option)
56
Umfeldbeleuchtung (Option)
56
Video-Türsprechanlage (Option)
56
Aktivierung der Fußgängeröffnung
57
Deaktivierung der Fußgängeröffnung
57
Erweiterte Einstellungen
57
Funktion der Fußgängeröffnung
57
Fußgängeröffnung
57
Aktivierung des Automatischen Zulaufs
58
Automatischer Zulauf
58
Funktion des Automatischen Zulaufs
58
Deaktivierung des Automatischen Zulaufs
59
Beschreibung der Funksender
60
Einlernen von Funksendern
60
Programmiermöglichkeiten der Funksender mit 2 Tasten
60
Programmiermöglichkeiten der Funksender mit 4 Tasten
60
Verwendung eines Funksenders mit 3 Tasten
60
Funksender mit 2 oder 4 Tasten
61
Funksender mit 3 Tasten
61
Hinzufügen eines Funksenders
61
Löschen der Funksender
61
Austausch der Batterie des Funksenders
62
Störungsbeseitigung
62
Support
62
Einstellungen Löschen
63
Entriegeln/Verriegeln der Antriebe
63
Diagnose
64
Ergänzende Hinweise zur Ermittlung der Maße
65
Technische Daten
66
SOMFY SGS 201 Operating And Installation Manual (68 pages)
Brand:
SOMFY
| Category:
Gate Opener
| Size: 14.2 MB
Table of Contents
English
4
Table of Contents
4
Safety Instructions
6
General Information
10
Product Description
10
Dimensions and Weight of the Gate Leaves
10
Dimensions and Weight of the Gate Leaves Which Can be Motorised, Based on the Wind Strength
10
Space Requirements for the Motors and the Control Unit (in MM)
10
Technical Data
11
General View of the Installation
11
Tools and Hardware Required
12
Tools
12
Hardware
12
Pre-Installation Checks
12
Gate
12
Reinforcements
12
Closing End Stops
13
Opening Stop
13
Mechanical Lock
13
Pillars
13
Electrical Pre-Equipment
13
Cables Required
13
Cable Feed
13
Installation and Commissioning
14
Opening Stop
14
Drilling the Pillars
14
Measure the Dimensions
14
Tracing the am and AH Axes
15
Drilling the Pillars
15
Securing the Motors to the Pillars
16
Secure the Bracket to the Pillar
16
Fit the Cylinder Mounting Plate Onto the Bracket
16
Fit the Cylinder Onto the Mounting Plate
16
Securing the Motors to the Gate Leaves
17
Installing the Control Unit
19
Positioning the Control Unit
19
Installing the Sealing Bead
19
Securing the Control Unit
19
Connecting the Motors
20
Connecting to the Mains Power Supply
21
Connecting the Control Unit to the Mains Power
21
Commissioning
22
Switching the Installation on
22
Auto-Programming the Gate Leaves' Travel
22
Closing the Control Unit
23
Fully Opening and Closing the Gate
23
Detecting Obstacles
23
User Training
23
Wiring the Accessories
24
Accessories General Wiring Diagram
24
Cells
24
Orange Light
25
Area Lighting
25
Backup Battery
25
Key Lock
25
Video Entry Phone
26
Offset Aerial
26
Solar Power
26
Advanced Parameter Settings
27
Pedestrian Opening
27
Pedestrian Opening Operation
27
Activating the Pedestrian Opening
27
Deactivating the Pedestrian Opening
27
Automatic Closing
28
Automatic Closure Operation
28
Activating Automatic Closing
28
Deactivating Automatic Closing - Returning to Standard Operation
28
Programming the Remote Controls
29
Presenting the Remote Controls
29
Possibilities for Programming the 2-Button Remote Control
29
Possibilities for Programming the 4-Button Remote Control
29
Using a 3-Button Remote Control
29
Adding a 2 or 4-Button Remote Control
30
Adding a 3-Button Remote Control
30
Deleting a Remote Control
30
Troubleshooting Guide
31
Diagnostics
31
Assistance
31
Replacing the Remote Control Battery
31
Clear the Settings
32
Clear the Memorised Settings and Remote Controls
32
Unlock/Lock the Motors
32
Deutsch
36
Sicherheitshinweise
38
Allgemeine Informationen
42
Produktbeschreibung
42
Bestimmungsgemäße Verwendung
42
Maße und Gewicht der Torflügel
42
Maße und Gewicht der mit dem Antrieb zu Bewegenden Torflügel in Abhängigkeit von der Windstärke
42
Platzbedarf für Antriebe und Steuerkasten (in MM)
42
Technische Daten
43
Übersicht über die Anlage
43
Erforderliche Werkzeuge und Eisenwaren
44
Werkzeuge
44
Eisenwaren
44
Vor der Montage zu Prüfende Punkte
44
Tor
44
Verstärkungsschienen
44
Schließanschlag
45
Öffnungsanschlag
45
Mechanisches Schloss
45
Pfeiler
45
Elektrische Vorbereitung
45
Bereitzustellende Kabel
45
Kabelführung
45
Installation und Inbetriebnahme
46
Öffnungsanschlag
46
Herstellung der Bohrungen in den Pfeilern
46
Ermittlung der Maße
46
Anzeichnen der Achsen am und AH
47
Herstellen der Bohrungen an den Pfeilern
47
Befestigung der Antriebe an den Pfeilern
48
Anbringung des Befestigungswinkels an Pfeiler/Mauer
48
Anbringung der Befestigungsplatte der Spindel am Befestigungswinkel
48
Anbringung der Spindel an der Befestigungsplatte
48
Befestigung der Antriebe an den Torflügeln
49
Installation des Steuerkastens
51
Position des Steuerkastens
51
Einlegen der Dichtungsschnur
51
Befestigung des Steuerkastens
51
Anschluss der Antriebe
52
Anschluss an die Netzstromversorgung
53
Anschluss des Steuerkastens an die Netzstromversorgung
53
Inbetriebnahme
54
Einschalten der Anlage
54
Automatisches Einlernen der Flügelwege
54
Überprüfung der Position der Antenne
55
Schließen des Steuerkastens
55
Wechsel der Steuerelektronik in den Standby-/Betriebsmodus
55
Vollöffnung und Schließung des Tors
55
Erfassung eines Hindernisses
55
Schulung der Benutzer
55
Verkabelung des Zubehörs
56
Allgemeiner Schaltplan für Zubehör
56
Fotozellen
56
Gelbe Signalleuchte
57
Umfeldbeleuchtung
57
Notstrombatterie
57
Schlüsselschalter
57
Video-Türsprechanlage
58
Externe Zusatzantenne
58
Solarstromversorgung
58
Erweiterte Einstellungen
59
Fußgängeröffnung
59
Funktion der Fußgängeröffnung
59
Aktivierung der Fußgängeröffnung
59
Deaktivierung der Fußgängeröffnung
59
Automatischer Zulauf
60
Funktion des Automatischen Zulaufs
60
Aktivierung des Automatischen Zulaufs
60
Deaktivierung des Automatischen Zulaufs - Rückkehr in den Standardbetrieb
60
Einlernen von Funksendern
61
Beschreibung der Funksender
61
Programmiermöglichkeiten der Funksender mit 2 Tasten
61
Programmiermöglichkeiten der Funksender mit 4 Tasten
61
Verwendung eines Funksenders mit 3 Tasten
61
Einlernen eines Funksenders mit 2 oder 4 Tasten
62
Einlernen eines Funksenders mit 3 Tasten
62
Löschen der Funksender
62
Störungsbeseitigung
63
Diagnose
63
Support
63
Austausch der Batterie des Funksenders
63
Einstellungen Löschen
64
Einstellungen und Programmierte Funksender Löschen
64
Entriegeln/Verriegeln der Antriebe
64
Advertisement
SOMFY SGS 201 Replacing (52 pages)
Replacing the electronic unit
Brand:
SOMFY
| Category:
Garage Door Opener
| Size: 13.68 MB
Table of Contents
Français
3
Table of Contents
3
Présentation Générale
6
Caractéristiques Techniques
6
Remplacement du Boîtier de Commande
6
Mettre L'installation Hors Tension
6
Débrancher L'alimentation, Les Moteurs Et Les Périphériques
6
Installer Le Cordon D'étanchéité
6
Fixer Le Boîtier de Commande Au Pilier
7
Raccordement des Moteurs
7
Raccordement À L'alimentation Secteur
8
Mise en Service
8
Mettre L'installation Sous Tension
8
Mémoriser Les Télécommandes
8
Auto-Apprentissage de la Course des Vantaux
8
Vérifier la Position de L'antenne
9
Fermer Le Boîtier de Commande
9
Mise en Veille/Réveil de L'électronique de Commande
9
Fonctionnement Par Défaut
9
Détection Sur Obstacle
9
Câblage des Accessoires
10
Plan de Câblage Général des Accessoires
10
Cellules
10
Feu Orange
11
Eclairage de Zone
11
Batterie de Secours
11
Contact À Clé
11
Visiophone
12
Antenne Déportée
12
Alimentation Solaire
12
Ouverture Piétonne
13
Activer L'ouverture Piétonne
13
Désactiver L'ouverture Piétonne
13
Fermeture Automatique
14
Activer la Fermeture Automatique
14
Désactiver la Fermeture Automatique - Revenir Au Fonctionnement Standard
14
Programmation des Télécommandes
15
Présentation des Télécommandes
15
Ajouter Une Télécommande 2 Ou 4 Touches
15
Possibilités de Programmation de la Télécommande 2 Touches
15
Possibilités de Programmation de la Télécommande 4 Touches
15
Ajouter Une Télécommande 3 Touches
15
Supprimer Les Télécommandes
15
Aide Au Dépannage
16
Diagnostic
16
Assistance
16
Changer la Pile de la Télécommande
16
Effacer Les Réglages
17
Effacer Les Réglages Et Les Télécommandes Mémorisées
17
English
19
General Introduction
22
Technical Data
22
Replacing the Control Unit
22
Switching the Installation off
22
Disconnecting the Power Supply, Motors and Additional Devices
22
Installing the Sealing Bead
22
Securing the Control Unit to the Pillar
23
Connecting the Motors
23
Connecting to the Mains Power Supply
24
Commissioning
24
Switching the Installation on
24
Storing the Remote Controls
24
Auto-Programming the Gate Leaves' Travel
24
Closing the Control Unit
25
Default Operation
25
Detecting Obstacles
25
Wiring the Accessories
26
Accessories General Wiring Diagram
26
Cells
26
Orange Light
27
Area Lighting
27
Backup Battery
27
Key Lock
27
Video Entry Phone
28
Offset Aerial
28
Solar Power
28
Pedestrian Opening
29
Activating the Pedestrian Opening
29
Deactivating the Pedestrian Opening
29
Automatic Closing
30
Activating Automatic Closing
30
Deactivating Automatic Closing - Returning to Standard Operation
30
Programming the Remote Controls
31
Presenting the Remote Controls
31
Adding a 2 or 4-Button Remote Control
31
Possibilities for Programming the 2-Button Remote Control
31
Possibilities for Programming the 4-Button Remote Control
31
Adding a 3-Button Remote Control
31
Deleting a Remote Control
31
Troubleshooting Guide
32
Diagnostics
32
Assistance
32
Replacing the Remote Control Battery
32
Clear the Settings
33
Clear the Memorised Settings and Remote Controls
33
Polski
35
Ogólna Prezentacja
38
Dane Techniczne
38
Wymiana Modułu Sterującego
38
Wyłączenie Zasilania Instalacji
38
Odłączenie Zasilania, NapęDów I Urządzeń Dodatkowych
38
Montaż Sznura Uszczelniającego
38
Mocowanie Modułu Sterującego Do Słupka
39
Podłączenie NapęDów
39
Podłączenie Do Sieci Elektrycznej
40
Uruchomienie
40
Włączenie Zasilania Instalacji
40
Zaprogramowanie Pilotów Zdalnego Sterowania
40
Automatyczne Przyuczenie Toru Przesuwania Skrzydeł
40
Sprawdzenie Położenia Anteny
41
Zamykanie Modułu Sterującego
41
Ustawianie Trybu Czuwania / Wzbudzenia Układu Sterowania Elektronicznego
41
Działanie Domyślne
41
Wykrycie Przeszkody
41
Okablowanie Akcesoriów
42
Ogólny Schemat Okablowania Akcesoriów
42
Fotokomórki
42
Pomarańczowe Światło
43
Oświetlenie Strefowe
43
Zapasowy Akumulator
43
Przełącznik Kluczowy
43
Wideodomofon
44
Niezależna Antena
44
Zasilanie Energią Słoneczną
44
Otwarcie Umożliwiające Przejście Pieszego
45
Włączenie Trybu Otwarcia Umożliwiającego Przejście Pieszego
45
Automatyczne Zamykanie
46
Włączenie Trybu Automatycznego Zamykania
46
Wyłączenie Trybu Automatycznego Zamykania - Powrót Do Trybu Standardowego Działania
46
Programowanie Pilotów Zdalnego Sterowania
47
Prezentacja Pilotów Zdalnego Sterowania
47
Dodawanie Pilota Zdalnego Sterowania Z 2 Lub 4 Przyciskami
47
Sposoby Programowania Pilota Zdalnego Sterowania Z 2 Przyciskami
47
Sposoby Programowania Pilota Zdalnego Sterowania Z 4 Przyciskami
47
Dodawanie Pilota Zdalnego Sterowania Z 3 Przyciskami
47
Kasowanie Pilotów Zdalnego Sterowania
47
Pomoc W Usuwaniu Usterek
48
Diagnostyka
48
Pomoc Techniczna
48
Wymiana Baterii Pilota Zdalnego Sterowania
48
Kasowanie Ustawień
49
Usuwanie Zaprogramowanych Ustawień I Pilotów
49
SOMFY SGS 201 Manual (52 pages)
Replacing the electronic unit
Brand:
SOMFY
| Category:
Gate Opener
| Size: 7.51 MB
Table of Contents
Français
3
Table of Contents
3
1 Présentation Générale
6
Caractéristiques Techniques
6
2 Remplacement du Boîtier de Commande
6
Mettre L'installation Hors Tension
6
Débrancher L'alimentation, Les Moteurs Et Les Périphériques
6
Installer Le Cordon D'étanchéité
6
Fixer Le Boîtier de Commande Au Pilier
7
3 Raccordement des Moteurs 3
7
4 Raccordement À L'alimentation Secteur
8
5 Mise en Service
8
Mettre L'installation Sous Tension
8
Mémoriser Les Télécommandes
8
Auto-Apprentissage de la Course des Vantaux
8
Vérifier la Position de L'antenne
9
Fermer Le Boîtier de Commande
9
Mise en Veille/Réveil de L'électronique de Commande
9
Fonctionnement Par Défaut
9
Détection Sur Obstacle
9
6 Câblage des Accessoires
10
Plan de Câblage Général des Accessoires
10
Cellules
10
Feu Clignotant
11
Eclairage de Zone
11
Batterie de Secours
11
Contact À Clé
11
Visiophone
12
Antenne Déportée
12
Alimentation Solaire
12
Activer L'ouverture Piétonne
13
Désactiver L'ouverture Piétonne
13
8 Fermeture Automatique
14
Activer la Fermeture Automatique
14
Désactiver la Fermeture Automatique - Revenir Au Fonctionnement Standard
14
Présentation des Télécommandes
15
Possibilités de Programmation de la Télécommande 2 Touches
15
Possibilités de Programmation de la Télécommande 4 Touches
15
Ajouter Une Télécommande 2 Ou 4 Touches
15
Ajouter Une Télécommande 3 Touches
15
Supprimer Les Télécommandes
15
10 Aide Au Dépannage
16
Diagnostic
16
Assistance
16
Effacer Les Réglages
17
English
19
1 General Introduction
22
Technical Data
22
2 Replacing the Control Unit
22
Switching the Installation on
22
Disconnecting the Power Supply, Motors and Additional Devices
22
Installing the Sealing Strip
22
Securing the Control Unit to the Pillar
23
3 Connecting the Motors 3
23
4 Connecting to the Mains Power Supply
24
5 Commissioning
24
Switching the Installation on
24
Memorising the Remote Controls
24
Auto-Programming the Gate Leaves' Travel
24
Checking the Position of the Antenna
25
Closing the Control Unit
25
Standby / Reactivation of the Control Electronics
25
Default Operation
25
Detecting an Obstacle
25
6 Wiring the Accessories
26
General Wiring Diagram for the Accessories
26
Cells
26
Flashing Light
27
Area Lighting
27
Backup Battery
27
Key Contact
27
Videophone
28
Remote Antenna
28
Solar Power Supply
28
Activating the Pedestrian Opening
29
Deactivating the Pedestrian Opening
29
7 Pedestrain Opening
29
8 Automatic Closing
30
Activating Automatic Closing
30
Deactivating Automatic Closing - Returning to Standard Operation
30
Description of the Remote Controls
31
Possibilities for Programming the 2-Button Remote Control
31
Possibilities for Programming the 4-Button Remote Control
31
Adding a 2- or 4-Button Remote Control
31
Adding a 3-Button Remote Control
31
Deleting Remote Controls
31
9 Programming the Remote Controls 9
31
10 Troubleshooting Guide
32
Diagnostic
32
Assistance
32
Clearing the Settings
33
Polski
35
1 Ogólna Prezentacja
38
Dane Techniczne
38
2 Wymiana Modułu Sterującego
38
Wyłączenie Zasilania Instalacji
38
Odłączenie Zasilania, NapęDów I Urządzeń Dodatkowych
38
Montaż Sznura Uszczelniającego
38
Mocowanie Modułu Sterującego Do Słupka
39
3 Podłączenie NapęDów 3
39
4 Podłączenie Do Sieci Elektrycznej
40
5 Uruchamianie
40
Włączenie Zasilania Instalacji
40
Programowanie Pilotów Zdalnego Sterowania
40
Automatyczne Przyuczenie Toru Przesuwania Skrzydeł
40
Sprawdzenie Położenia Anteny
41
Zamykanie Modułu Sterującego
41
Ustawianie W Tryb Czuwania / Wzbudzenia Elektronicznego Układu Sterowania
41
Działanie Domyślne
41
Wykrycie Przeszkody
41
6 Okablowanie Akcesoriów
42
Ogólny Schemat Okablowania Akcesoriów
42
Fotokomórki
42
Migające Światło
43
Oświetlenie Strefowe
43
Zapasowy Akumulator
43
Przełącznik Kluczowy
43
Wideodomofon
44
Niezależna Antena
44
Zasilanie Energią Słoneczną
44
Włączanie Trybu Otwarcia Umożliwiającego Przejście Pieszego
45
Wyłączanie Trybu Otwarcia Umożliwiającego Przejście Pieszego
45
7 Otwarcie Umożliwiające Przejście Pieszego 7
45
8 Zamykanie Automatyczne
46
Włączenie Trybu Automatycznego Zamykania
46
Wyłączenie Trybu Automatycznego Zamykania - Powrót Do Trybu Standardowego Działania
46
Prezentacja Pilotów Zdalnego Sterowania
47
Sposoby Programowania Pilota Zdalnego Sterowania Z 2 Przyciskami
47
Sposoby Programowania Pilota Zdalnego Sterowania Z 4 Przyciskami
47
Dodawanie Pilota Zdalnego Sterowania Z 2 Lub 4 Przyciskami
47
Dodawanie Pilota Zdalnego Sterowania Z 3 Przyciskami
47
Usuwanie Pilotów Zdalnego Sterowania
47
9 Programowanie Pilotów Zdalnego Sterowania 9
47
10 Pomoc W Usuwaniu Usterek
48
Diagnostyka
48
Pomoc Techniczna
48
Kasowanie Ustawień
49
SOMFY SGS 201 Manual (36 pages)
Brand:
SOMFY
| Category:
Gate Opener
| Size: 3.52 MB
Table of Contents
Raccordements Électriques
2
Elektrische Verbindingen
8
Ustawianie Parametrów
15
Electric Connections
20
SOMFY SGS 201 User Instructions (20 pages)
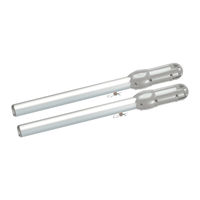
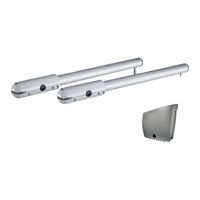
MOTOR DRIVES FOR SIDE-HUNG GATES
Brand:
SOMFY
| Category:
Gate Opener
| Size: 3.24 MB
Table of Contents
Table of Contents
2
Foreword
3
Safety Instructions
3
Product Description
4
Preliminary Operations
5
Preparing and Drilling Gateposts
7
Installing Arms
8
Electrical Connections
10
Settings
11
Usage
15
Troubleshooting
16
Accessories
16
Additional Dimensions to be Taken
19
Advertisement
Related Products
SOMFY SGS 601
SOMFY SGS 501
SOMFY SGS ESSENTIAL
SOMFY SGS 400
SOMFY SGS 200
SOMFY SGS 500
SOMFY SGS 600
SOMFY SGA 2000
SOMFY SGA 5000
SOMFY SGA 6000
SOMFY Categories
Engine
Gate Opener
Controller
DC Drives
Remote Control
More SOMFY Manuals
Login
Sign In
OR
Sign in with Facebook
Sign in with Google
Upload manual
Upload from disk
Upload from URL