Sign In
Upload
Manuals
Brands
SolarEdge Manuals
Inverter
SE7k
User Manuals: SolarEdge SE7k Solar Inverter
Manuals and User Guides for SolarEdge SE7k Solar Inverter. We have
6
SolarEdge SE7k Solar Inverter manuals available for free PDF download: Installation Manual
SolarEdge SE7k Installation Manual (114 pages)
Brand:
SolarEdge
| Category:
Inverter
| Size: 10.12 MB
Table of Contents
Disclaimers
2
Important Notice
2
Emission Compliance
3
Support and Contact Information
4
Revision History
5
Table of Contents
9
Handling and Safety Instructions
11
Safety Symbols Information
11
Important Safety Instructions
12
Chapter 1: Introducing the Solaredge Power Harvesting System
14
Power Optimizer
14
Inverter
15
Monitoring Platform
15
Installation Procedure
15
Installation Equipment List
15
Inverter Transport and Storage
16
Chapter 2: Installing the Power Optimizers
17
Safety
17
Installation Guidelines
18
Step 1: Mounting the Power Optimizers
21
Step 2: Connecting a PV Module to a Power Optimizer
21
Step 3: Connecting Power Optimizers in Strings
22
Step 4: Verifying Proper Power Optimizer Connection
23
Chapter 3: Installing the Inverter
24
Inverter Package Contents
24
Identifying the Inverter
24
Inverter Interfaces
24
Mounting the Inverter
27
Chapter 4: Connecting the AC and the Strings to the Inverter
32
Grid Connection Guidelines
32
Connecting the AC Grid to the Inverter
33
Connecting the Strings to the Inverter
35
Selecting a Residual Current Device (RCD)
35
Chapter 5: Commissioning the Installation
37
Step 1: Activating the System
37
Step 2: Pairing Power Optimizers to the Inverter
39
Step 3: Verifying Proper Activation
41
Step 4: Reporting and Monitoring Installation Data
41
Chapter 6: User Interface
45
LCD User Buttons
45
Inverter Configuration - Setup Mode
47
Configuration Menu Options
51
Status Screens - Operational Mode
58
Chapter 7: Setting up Communication
67
Communication Options
67
Communication Connectors
70
Removing the Inverter Cover
71
Creating an Ethernet (LAN) Connection
71
Creating an RS485 Bus Connection
75
Verifying the Connection
79
Appendix A: Errors and Troubleshooting
81
Troubleshooting Communication
81
Power Optimizer Troubleshooting
83
Appendix B: Mechanical Specifications
85
Appendix C: Connecting the AC and DC Strings to the DC Safety Unit
86
Connecting the AC Grid to the Inverter
87
Connecting the Strings to the DC Safety Unit
88
Appendix D: Safedc
91
Appendix E: External Fan Maintenance and Replacement
92
Fan Maintenance
92
External Fan Replacement
92
Appendix F: Replacing and Adding System Components
94
Replacing an Inverter
94
Replacing the DC Safety Unit
95
Adding, Removing, or Replacing Power Optimizers
98
Appendix G: Determining the Circuit Breaker Size
99
Revision History
99
Introduction
99
Using Transformers in Commercial Three Phase Inverter Installations
99
Determining the Size of an Inverter Circuit Breaker
101
Technical Specifications - Single Phase Inverters (Europe & APAC)
103
Technical Specifications - Three Phase Inverters (Europe & APAC)
106
Australia
114
Advertisement
SolarEdge SE7k Installation Manual (99 pages)
Brand:
SolarEdge
| Category:
Inverter
| Size: 3.28 MB
Table of Contents
Table of Contents
3
Exclusion of Liability
2
Important Notice
2
Handling and Safety Instructions
5
Support and Contact Information
6
Chapter 1, Introducing the Solaredge Power Harvesting System
9
What Is the Solaredge Power Harvesting Solution
9
Solaredge Power Optimizer
9
Solaredge Inverters
10
Installation Workflow
11
Solaredge Monitoring Portal
11
Equipment List
12
Transport and Storage
12
Inverter Storage
12
Inverter Transport
12
Chapter 2, Installing the Power Optimizers
13
Applicable Notes and Warnings
13
Note
13
Step 1, Mounting the Power Optimizers
14
Step 2, Connecting each PV Module to a Power Optimizer
15
Op250-Lv, Op300-MV, Op400-MV, Op400-Ev
15
Connecting Power Optimizers
17
Step 3, Connecting Power Optimizers in Strings
17
Verifying Proper Power Optimizer Connection
18
Step 4, Recording Installation Information
19
Chapter 3, Installing the Inverter
21
Identifying the Inverter
21
Selecting the Mounting Location
21
Chassis Clearance
21
Installing the Inverter and
21
Mounting the Inverter
23
Connecting the Inverter
25
Inverter Connection Overview
25
Connecting the Solaredge Inverter
26
Connecting the Inverter to the Solaredge Monitoring Server
27
Completing the Inverter Installation
29
Configuring the Inverter
29
Residual Current Device
31
Chapter 4, Commissioning the Installation
33
Commissioning - Workflow
33
Step 1, Activating the System
33
Step 2, Pairing Power Optimizers to the Inverter
35
Step 3, Verifying Proper Operation
37
Step 4, Reporting and Monitoring Installation Data
38
Providing Installation Information
39
Chapter 5, Replacing and Adding System Components
41
Modifying an Existing Installation
41
Three Phase Inverters - Replacing the Fans
43
Chapter 6, Setting up Communication
45
Communication Dataflow
45
Connector Panel
45
Communication Types
46
Creating an RS232 (UART) Connection
47
Creating an Ethernet (LAN) Connection
49
Creating an RS485 Bus Connection
54
Verifying the Connection
59
Troubleshooting Communication
59
Chapter 7, Inverter User Interface
61
Inverter LCD Panel and Leds
61
Inverter LCD Panel and User Buttons
62
Initial Inverter Status Window
63
Energy Meter Window
64
Main Inverter Status Window
64
Telemetry Window
64
Communication Status Window
65
ID Status Window
65
Fan Health Status Window - Three Phase Inverters
66
Configuring the Inverter Using the LCD Panel and User Buttons
67
Date and Time
70
Inverter Configuration Menu Options
72
LCD Button Menu Options
74
Configuring the Inverter Using the Solaredge Configuration Tool
75
IP Status Window
66
Appendix A, Errors and Troubleshooting
77
Appendix B, Technical Specifications
85
Single Phase Inverter
85
Three Phase Inverter
87
OP250-LV, OP300-MV, OP400-MV and OP400-EV
89
Appendix C, Power Optimizer Mechanical Specifications
91
OP250-LV, OP300-MV, OP400-MV, OP400-EV Power Optimizers
92
Appendix D Safe DC
93
Appendix E, Limited Product Warranty
95
SolarEdge SE7k Installation Manual (79 pages)
Brand:
SolarEdge
| Category:
Inverter
| Size: 4.75 MB
Table of Contents
Legal Notice
2
Important Notice
2
Compliance with Emission Standards
2
Support Information and Contact
3
Table of Contents
4
Handling Instructions and Safety
7
Safety Symbols
7
Safety Instructions
8
Chapter 1: System Overview Solaredge
9
System Overview
9
Solaredge Power Optimizer
9
Solaredge Inverter
9
Solaredge Monitoring Portal
9
Installation Procedure
10
List of the Installed Equipment
11
Transport and Storage of the Inverter
11
Chapter 2: Construction of
12
Security
12
Installation Instructions
13
Step 1, Mounting the Power Optimizers
13
Step 2, Connecting a Module to a Power Optimizer
14
Step 3 Connect the Power Optimizers Channels
14
Step 4, the Correct Connection Checking the Power Optimizer
15
Chapter 3: Installation of the Inverter
17
Package Contents of the UPS
17
Identifying the Inverter
17
The Interfaces between the Inverter
17
Mounting the Inverter
19
AC Connection to the Inverter
22
Instructions for Connecting to the Network
22
Connecting to AC
22
Connection Strings to the Inverter
24
Selecting a Residual Current Device
24
Chapter 4: Commissioning of the Facility
25
Step 1, Activating the System
25
Step 2, Pairing Power Optimizers to the Inverter
26
Step 3 Check the Health
27
Step 4, Reporting and Monitoring Installation Data
28
The Supervision System Solaredge
28
The Solaredge Monitoring System
28
Provide Information on Installing
29
Chapter 5: User Interface
30
LCD User Buttons
30
UPS Configuration - Setup Mode
31
UPS Configuration Using the User Buttons the Internal LCD
31
UPS Configuration with the Light Button on the External LCD
33
Options UPS Configuration Menu
35
Displays the Status of the UPS - Operating Mode
39
Initial UPS Status
39
Status of the Main UPS
39
Statute of the Energy Meter
40
Status Telemetry
40
Status ID
41
Server Communications Status
41
Status of the IP
41
Status Zigbee
41
Wi-Fi State
42
Status Communication Ports
42
Status Fan Status - Three-Phase UPS
43
Status of the Power Control
43
Chapter 6: Configuring Communications
44
Communication Connectors
44
Communication Types
45
Removing the Cover of the Inverter
45
Creating an Ethernet (LAN)
46
Creating an RS485 Bus Connection
48
Creating a Zigbee Connection
51
Creating a Wireless Connection
51
Connection Verification
52
Appendix A: Errors and Troubleshooting
53
Troubleshooting Communication Problems - S_OK Does Not Appear
53
Error Codes
55
Troubleshooting Power Optimizers
61
Appendix B: Specifications
62
Single Phase UPS
62
Three Phase Inverters
65
Appendix C: Mechanical Specifications
69
Dimensions of the Inverter and Mounting Bracket
69
Single Phase UPS and Type 1 Mount
69
Three-Phase UPS and Type 1 Mount
71
Single Phase Inverter and Mounting Bracket Type 2
73
Three-Phase Inverter and Mounting Bracket Type 2
74
Appendix D: Safety CC
75
Appendix E: Maintenance and Replacement of Fan
76
Fan Interview
76
Replacing the Fan 2
76
Appendix F: Replacing and Adding System Components
78
Replacing an Inverter
78
Adding, Removing, or Replacing Power Optimizers
78
Advertisement
SolarEdge SE7k Installation Manual (94 pages)
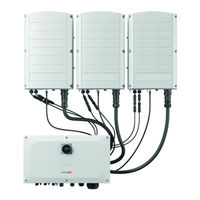
Three Phase System with SetApp Configuration For Europe and APAC
Brand:
SolarEdge
| Category:
Inverter
| Size: 2.68 MB
Table of Contents
Disclaimers
2
Important Notice
2
Emission Compliance
3
Support and Contact Information
4
Revision History
5
Table of Contents
6
Handling and Safety Instructions
8
Safety Symbols Information
8
Important Safety Instructions
9
Chapter 1: Introducing the Solaredge Power Harvesting System
11
Power Optimiser
11
Inverter
12
Monitoring Platform
12
Installation Procedure
12
Installation Equipment List
12
Inverter Transport and Storage
13
Chapter 2: Installing the Power Optimizers
14
Safety
14
Installation Guidelines
15
Step 1: Mounting the Power Optimizers
18
Step 2: Connecting a PV Module to a Power Optimiser
18
Step 3: Connecting Power Optimizers in Strings
19
Step 4: Verifying Proper Power Optimiser Connection
20
Chapter 3: Installing the Inverter
21
Inverter Package Contents
21
Identifying the Inverter
21
Inverter Interfaces
21
Mounting the Inverter
26
Chapter 4: Connecting the AC and the Strings to the Inverter
31
Grid Connection Guidelines
31
Connecting the AC Grid to the Inverter
32
Connecting the Strings to the Inverter
34
Selecting a Residual Current Device (RCD)
34
Chapter 5: Activating, Commissioning and Configuring the System Using the Inverter Setapp
36
Step 1: Activating the Installation
36
Step 2: Commissioning and Configuring the Installation
37
Step 3: Verifying Proper Activation and Commissioning
41
Viewing System Status
41
Reporting and Monitoring Installation Data
47
Chapter 6: Setting up Communication
50
Communication Options
50
Communication Connectors
52
Removing the Inverter Cover
53
Creating an Ethernet (LAN) Connection
53
Creating an RS485 Bus Connection
57
Verifying the Connection
61
Appendix A: Errors and Troubleshooting
63
Identifying Errors
63
Troubleshooting Communication
65
Power Optimizer Troubleshooting
66
Appendix B: Mechanical Specifications
68
Appendix C: Connecting the AC and DC Strings to the DC Safety Unit
69
Connecting the AC Grid to the Inverter
70
Connecting the Strings to the DC Safety Unit
71
Appendix D: Safedc
74
Appendix E: External Fan Maintenance and Replacement
75
Fan Maintenance
75
External Fan Replacement
75
Appendix F: Replacing and Adding System Components
78
Replacing an Inverter
78
Replacing the DC Safety Unit
79
Adding, Removing, or Replacing Power Optimizers
82
Appendix G: Determining the Circuit Breaker Size
83
Revision History
83
Introduction
83
Using Transformers in Commercial Three Phase Inverter Installations
83
Determining the Size of an Inverter Circuit Breaker
85
Technical Specifications - Three Phase Inverters (Europe & APAC)
87
Australia
94
SolarEdge SE7k Installation Manual (73 pages)
Brand:
SolarEdge
| Category:
Inverter
| Size: 2.36 MB
Table of Contents
Disclaimers
3
Important Notice
3
Emission Compliance
3
Support and Contact Information
4
Table of Contents
5
Handling and Safety Instructions
8
Safety Symbols
8
Safety Instructions
9
Chapter 1: Introducing the Solaredge System
10
System Overview
10
Solaredge Power Optimizer
10
Solaredge Inverter
10
Solaredge Monitoring Portal
10
Installation Procedure
11
Installation Equipment List
12
Inverter Transport and Storage
12
Chapter 2: Installing the Power Optimizers
13
Safety
13
Installation Guidelines
14
Step 1, Mounting the Power Optimizers
14
Step 2, Connecting a Module to a Power Optimizer
15
Step 3, Connecting Power Optimizers in Strings
16
Step 4, Verifying Proper Power Optimizer Connection
16
Chapter 3: Installing the Inverter
18
Inverter Package Contents
18
Identifying the Inverter
18
Inverter Interfaces
18
Inverter Front View
19
LCD Leds
19
Mounting the Inverter
20
Connecting the AC to the Inverter
22
Grid Connection Guidelines
22
Connecting to AC
22
Connecting the Strings to the Inverter
24
Selecting a Residual-Current Device
24
Chapter 4: Commissioning the Installation
25
Step 1, Activating the System
25
Step 2, Pairing Power Optimizers to the Inverter
26
Step 3, Verifying Proper Operation
27
Step 4, Reporting and Monitoring Installation Data
28
The Solaredge Monitoring System
28
Providing Installation Information
29
Chapter 5: User Interface
30
LCD User Buttons
30
Inverter Configuration - Setup Mode
31
Configuring the Inverter Using the Internal LCD User Buttons
31
Configuring the Inverter Using the External LCD Light Button
33
Inverter Configuration Menu Options
35
Power Control
37
Inverter Status Screens - Operational Mode
38
Initial Inverter Status
38
Main Inverter Status
39
Energy Meter Status
39
Telemetry Status
39
ID Status
39
Server Communication Status
40
IP Status
40
Zigbee Status
40
Communication Ports Status
41
Fan Health Status - Three Phase Inverters
41
Power Control Status
42
Chapter 6: Setting up Communication
43
Communication Connectors
43
Communication Types
44
Removing the Inverter Cover
44
Creating an Ethernet (LAN) Connection
44
Creating an RS485 Bus Connection
47
Creating an RS232 (UART) Connection
50
Creating a Zigbee Connection
51
Connecting a Laptop to the Inverter
51
Verifying the Connection
51
Appendix A: Errors and Troubleshooting
52
Troubleshooting Communication - S_OK Is Not Displayed
52
Error Codes
54
Power Optimizers Troubleshooting
59
Appendix B: Technical Specifications
60
Single Phase Inverters
60
Three Phase Inverters
62
Inverter and Mounting Bracket Dimensions
65
Single Phase Inverter and Mounting Bracket
65
Three Phase Inverter and Mounting Bracket
67
Appendix C: Safe DC
69
Appendix D: Fan Maintenance and Replacement
70
Fan Maintenance
70
Replacing an Inverter
72
SolarEdge SE7k Installation Manual (76 pages)
Three Phase Inverter with Synergy Technology
Brand:
SolarEdge
| Category:
Inverter
| Size: 11.29 MB
Table of Contents
Disclaimers
2
Important Notice
2
Emission Compliance
3
Revision History
4
Table of Contents
5
Handling and Safety Instructions
7
Safety Symbols Information
7
Chapter 1: Introducing the Solaredge Power Harvesting System
10
Power Optimizer
10
Three Phase Inverter with Synergy Technology
11
Monitoring Platform
12
Designer
12
Supported AC Grids
12
Installation Tools and Material List
12
Installation Procedure
13
Chapter 2: Installing the Power Optimizers Safety
15
Installation Guidelines
16
Step 1: Mounting the Power Optimizers
19
Step 2: Connecting a PV Module to a Power Optimizer
19
Step 3: Connecting Power Optimizers in Strings
20
Step 4: Verifying Proper Power Optimizer Connection
21
Chapter 3: Installing the Synergy Manager and Synergy Units
23
Synergy Manager Package Contents
23
Synergy Unit Package Contents
23
Identifying the Units
23
Front Interface of Synergy Manager
24
Inverter Interconnection Cable Interfaces
28
Synergy Manager External Cable Interface
29
Synergy Unit Interface Connectors
30
Mounting and Connecting the Synergy Manager and Synergy Units
31
Chapter 4: Connecting AC and PV Strings to the Synergy Manager
35
Grid Connection Guidelines
35
Connecting the AC Grid to the Synergy Manager
35
Connecting the PV Strings to the Synergy Manager
37
Connecting Ground and AC to the Synergy Manager
40
Chapter 5: Activating, Commissioning and Configuring the System
46
On-Grid Commissioning of the Inverter
47
Step 3: Verifying Proper Activation and Commissioning
49
Pre-Commissioning (Off-Grid)
49
Reporting and Monitoring Installation Data
51
Chapter 6: Setting up Communication with the Monitoring Platform
54
Communication Options
54
Communication Connectors
55
Creating an Local Area Network (LAN) Connection
58
Creating an RS485 Bus Connection
62
RS485 Bus Configuration
65
Verifying the Connection
65
Signaling Options
66
Appendix A: Errors and Troubleshooting
68
Identifying Errors
68
Power Optimizer Troubleshooting
69
Troubleshooting Communication
71
Appendix B: Adding Optional Components
73
AC Surge Protection Device (SPD)
73
DC Surge Protection Device (SPD)
73
Appendix C: Mechanical Specifications
74
Appendix D: Safedc
75
Advertisement
Related Products
SolarEdge SE7600A-US
SolarEdge SE7000US
SolarEdge SE7600H-US
SolarEdge StorEdge SE7K-RWS
SolarEdge SE75K
SolarEdge SE7K-N4
SolarEdge StorEdge SE7600A-US1
SolarEdge StorEdge SE7600A-USS
SolarEdge SE40K
SolarEdge SE110K
SolarEdge Categories
Inverter
Measuring Instruments
Recording Equipment
Battery Charger
UPS
More SolarEdge Manuals
Login
Sign In
OR
Sign in with Facebook
Sign in with Google
Upload manual
Upload from disk
Upload from URL