Sign In
Upload
Manuals
Brands
Ricoh Manuals
Printer
MP 2501SP
Ricoh MP 2501SP Manuals
Manuals and User Guides for Ricoh MP 2501SP. We have
3
Ricoh MP 2501SP manuals available for free PDF download: Service Manual, User Manual, Quick User Manual
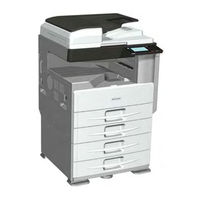
Ricoh MP 2501SP Service Manual (976 pages)
LANIER, RICOH, SAVIN
Brand:
Ricoh
| Category:
All in One Printer
| Size: 11.42 MB
Table of Contents
D158/D159/D160/D161/D170
5
Table of Contents
5
Important Safety Notices
15
Read this First
15
Safety Notices
15
Laser Safety
16
Symbols and Abbreviations
17
1 Product Information
19
Specifications
21
Machine Configuration
22
Component Layout
24
Product Overview
24
D158/D159: CCD Scanner Component Layout
26
D160/D161/D170: CIS Scanner Component Layout
26
Paper Path
27
Drive Layout
28
2 Installation
31
Installation Requirements
33
Environment
33
Machine Level
34
Minimum Space Requirements
34
Power Requirements
35
Installation Flow Chart
36
Copier Installation
37
Accessory Check
37
Installation Procedure
40
Selecting the Panel Display Language (for D158/D159)
44
Shutdown Function
45
Shutdown/Forced Shutdown Functions
45
Forced Shutdown Function
46
Instructions for the Customers
46
Platen Cover Installation
47
Accessory Check
47
Installation Procedure
48
Ardf Installation (for D158/D159)
50
Accessory Check
50
Installation Procedure
51
When Feeding Thin Paper
55
Ardf Installation (for D160/D161/D170)
56
Accessory Check
56
Installation Procedure
57
Two-Tray Paper Tray Unit Installation
61
Accessory Check
61
Installation Procedure
62
One-Tray Paper Tray Unit Installation
66
Component Check
66
Installation Procedure
66
One-Bin Tray Installation
70
Component Check
70
Installation Procedure
71
Anti-Condensation Heater Installation
76
Component Check
76
Installation Procedure
76
Tray Heaters
79
Component Check
79
Mainframe Upper Tray Heater
79
Installation Procedure
80
Component Check
83
Mainframe Lower Tray Heater (Two-Tray Model Only)
83
Installation Procedure
84
Component Check
86
Heater for the Optional One-Tray Paper Feed Unit2-54
86
Installation Procedure
87
Component Check
90
Heater for the Optional Two-Tray Paper Feed Unit2-58
90
Installation Procedure
90
Installing the Harness of the Heater
93
Counter Interface Unit
96
Component Check
96
Installation Procedure
96
Gdi Expansion (D160/D161 Only)
100
Component Check
100
Installing the Expansion Component
100
Hard Disk Drive Option (D158/D159 Only)
103
Component Check
103
Installation Procedure
104
Data Overwrite Security
107
Hdd Encryption
108
Controller Options
109
I/F Card Slot
109
Overview
109
SD Card Slots
109
Move Exec
110
Overview
110
Sd Card Appli Move
110
Undo Exec
111
Firmware Update Procedure
112
Installation Procedure
112
VM Card (D158/D159)
112
Component Check
114
Copy Data Security Unit (D158/D159)
114
Installation Procedure
115
File Format Converter (D158/D159)
117
Installation Procedure
117
User Tool Setting
117
Browser Unit (D158/D159)
118
Installation Procedure
118
Ricoh Javascript
121
EXJS Firmware Update
122
Updating the Extended Javascript
123
Fax Connection Unit (D158/D159)
124
Installation Procedure
124
Un-Installing EXJS Firmware
124
Installation Procedure
125
Sd Card for Netware Printing (D158/D159)
125
Bluetooth Interface Unit (D158/D159)
126
Installation Procedure
126
Component Check
127
Installation Procedure
127
Wireless Lan Interface Unit (D158/D159)
127
UP Mode Settings for Wireless LAN
129
SP Mode and up Mode Settings for IEEE 802.11 A/B/G, Wireless LAN
130
Ieee 1284 Interface Board (D158/D159)
131
Installation Procedure
131
Fax Unit (D158/D159)
132
Installation Procedure
133
Fax Settings
138
Installation Procedure
138
Memory Unit (D158/D159)
138
Component Check
139
Handset (D158/D159)
139
Installation Procedure
140
IC Card (D158/D159)
142
Installation Procedure
142
Check All Connections
144
3 Preventive Maintenance
145
Pm Tables
147
How to Reset the Pm Counter
148
D158/D159 Models
148
D160/D161/D170 Models
148
4 Replacement and Adjustment
149
General Cautions
151
Main Power Switch (Push Sw)
151
Pcu (Photoconductor Unit)
151
Transfer Roller
151
Fusing Unit
152
Laser Unit
152
Paper Feed
152
Scanner Unit
152
Special Tools and Lubricants
153
Exterior Covers & Operation Panel
154
Output Tray, Exit Cover, Exit Rear Cover
154
Rear Cover
154
Upper Covers (D158/D159)
156
Operation Panel (D158/D159)
158
Upper Covers (D160/D161/D170)
159
Operation Panel (D160/D161/D170)
160
Front Cover
161
Left Cover
161
Front Cover Switch (Interlock Switch)
162
Front Right Cover
162
Right Rear Cover
163
Duplex Unit (D158/D159/D160/D161) / Right Door (D170)4-14
164
By-Pass Tray
166
Right Lower Cover (Two-Tray Models Only)
167
Right Lower Cover Switch (Two-Tray Models Only)4-17
167
Platen Cover Sensor
168
Scanner Unit (D158/D159)
169
Exposure Glass/Df Exposure Glass (CCD)
170
Lens Block
172
Exposure Lamp
173
Sio Board
173
Aps Sensor (Length)
174
Scanner Motor
175
Scanner Home Position Sensor
176
Front Scanner Wire
177
Reassembling the Front Scanner Wire
179
Rear Scanner Wire
183
Reassembling the Rear Scanner Wire
185
Adjusting the Scanner Positions
187
Scanner Unit (D160/D161/D170)
189
Scanner Unit
191
Aps Sensors (Width/Length)
192
Cis Unit and Scanner Drive Belt
194
Exposure Glass/Df Exposure Glass (Cis)
196
Laser Unit
197
Location of Caution Decal
197
Laser Unit
198
Toner Shield Glass
198
Polygonal Mirror Motor
199
Pcu Section
200
Pcu
200
Pick-Off Pawls and Toner Density Sensor
201
Opc Drum
202
Charge Roller and Cleaning Brush
203
Cleaning Blade
204
Developer
205
After Replacement or Adjustment
206
Toner Supply Motor
207
Paper Feed Section
208
Paper Feed Roller
208
Friction Pad
209
Exit Sensor
210
Registration Roller
212
Registration Clutch
214
Registration Sensor
215
Upper Paper Feed Clutch
216
Relay Clutch
217
Relay Sensor
217
Lower Paper Feed Clutch (Two-Tray Models Only)4-68
218
Vertical Transport Sensor (Two-Tray Models Only)
218
Paper End Sensor
219
Paper End Sensor: T1
219
Paper Size Switch
219
Paper End Sensor: T2 (Two-Tray Models Only)
220
Tray Lift Motor
220
Tray Lift Sensor
222
By-Pass Paper Length Sensor
223
By-Pass Paper Width Sensor
224
When Replacing the By-Pass Paper Width Sensor
224
By-Pass Feed Roller and By-Pass Paper End Sensor
225
By-Pass Feed Clutch and By-Pass Tray Lift Clutch
226
By-Pass Tray Lift Sensor
227
Image Transfer
228
Image Transfer Roller
228
Image Density Sensor
229
Fusing
230
Fusing Unit
230
Thermistor
230
Fusing Lamps
231
Hot Roller
232
Hot Roller Stripper Pawls
232
Pressure Roller and Bushings
233
Thermostat
233
Nip Band Width Adjustment
234
Duplex Unit (Duplex Models Only)
235
Duplex Exit Sensor
235
Duplex Entrance Sensor
236
Duplex Inverter Sensor
236
Duplex Transport Motor
237
Duplex Inverter Motor
238
Electrical Components
239
Controller Board (Gw+/Gdi)
239
Replacement Procedure (GW+ Controller)
239
Types of Controller Board
239
After Installing the Controller Board (GW+ Controller)
242
When Replacing the New Controller Board (GW+ Controller)
242
Replacement Procedure (GDI Controller)
243
When Replacing the New Controller Board (GDI)
244
Hdd Unit (for D158/D159)
245
Replacement Procedure
245
Quenching Lamp
246
Bicu (Base-Engine Image Control Unit)
247
High-Voltage Power Supply Board
247
Replacing the NVRAM on the BICU
248
Main Motor
249
Rear Exhaust Fan (Duplex Models Only)
249
Left Exhaust Fan
250
Psu (Power Supply Unit)
251
Gearbox
252
Replacement Procedure
252
Gear Arrangement in the Gearbox
254
Copy Adjustments Printing/Scanning
255
Printing
255
Scanning
259
Ardf Image Adjustment
261
5 Troubleshooting
263
Troubleshooting Image Quality Problems
265
Marks (Vertical Streaks) on Prints and Copies Due to Scanning Problems
265
Converting the ARDF DF2020 (D684) to Contact Scanning
267
Service Call Conditions
270
Sc Code Descriptions
271
Sc1Xx: Scanning
271
Sc2Xx: Exposure (D158/D159)
274
Sc3Xx: Image Processing
276
Sc4Xx: Image Processing
280
Sc5Xx: Paper Feed and Fusing
281
Sc6Xx: Device Communication
289
Sc7Xx: Peripherals
297
Sc9Xx: Miscellaneous
362
Sensors
366
Electrical Component Defects
366
Switches
371
Blown Fuse Conditions
372
6 Service Tables
373
Service Program Mode
375
Sp Tables
375
Firmware Update
376
Before You Begin
376
Preparation
376
Updating Procedure
377
Firmware Update Error
378
Firmware Update Procedure (D160/D161/D)
379
Downloading an Sd Card to Nvram (D158/D)
385
Controller
386
Engine (BICU)
386
Nvram Data Upload/Download (D160/D161/D)
386
Using Sp Modes
387
Adjusting Registration and Magnification
387
Display Aps Data (Sp)
388
Memory Clear
390
Input Check
392
Input Check Table for Copier (D160/D161/D170)
392
Input Check Table for Copier (D158/D159)
397
Output Check
401
Serial Number Input (Sp 5811) (D158/D159)
405
D160/D161/D170 Models
406
Test Pattern Print
406
D158/D159 Models
407
Paper Jam Counters (Sp 7504)
409
Smc Print (Sp 5990)
411
Overview
412
Procedure
412
Smc Print to Sd Card (Sp 5992)
412
File Names of the Saved SMC Lists
414
Jam History Codes
415
Original Jam History Display (Sp 7508)
415
SC History Codes
416
Sc History Display (Sp 7403)
416
D158/D159/D160/D161/D170 Appendices
419
Specifications
421
1 Appendix: General Specifications
423
Specifications
423
General Specifications
423
Supported Paper Sizes
428
Original Size Detection
428
Mainframe, Bank (Optional Paper Trays), Bypass Tray
432
Paper Feed
432
Main: Mainframe / 1-Bin: 1-Bin Tray (D158/D159 Only)
435
Paper Exit
435
Software Accessories
437
D158/D159
437
Printer Drivers
437
D160/D160/D170
438
D158/D159
439
Scanner and Lan Fax Drivers
439
D160/D161/D170
440
Optional Equipment
441
Ardf (D724)
441
Ardf (D684)
442
One-Tray Paper Tray Unit
443
Two-Tray Paper Tray Unit
444
One-Bin Tray
445
2 Appendix: Pm Tables
447
Maintenance Tables
449
Mainframe (D158, D159)
449
Preventive Maintenance Items
449
Mainframe (D170, D160, D161)
453
Service Program Mode Tables
457
3 Appendix: Service Program Mode Tables
459
Main Sp Tables-1
459
Sp1-XXX (Feed)
459
Main Sp Tables-2
476
Sp2-XXX (Drum)
476
Main Sp Tables-3
496
Sp3-XXX (Process)
496
Main Sp Tables-4
497
Sp4-XXX (Scanner)
497
Main Sp Tables-5
537
Sp5-XXX (Mode)
537
Main Sp Tables-6
646
Sp6-XXX (Peripherals)
646
Main Sp Tables-7
654
Sp7-XXX (Data Log)
654
System Sp Tables-8
670
Sp8-XXX: Data Log 2
670
Input and Output Check
706
Input Chek
706
Output Check
715
Printer Sp Tables
722
D158/D159
722
Sp1-XXX (Service Mode)
722
Scanner Sp Tables
736
D158/159
736
Sp1-XXX (System and Others)
736
D158/D159
738
Sp2-XXX (Scanning-Image Quality)
738
Test Pattern Printing
739
D158/D159
739
D160/D161/D170
740
Ardf Df2020 (D684)
744
Ardf Df2020 (D684)
746
Covers and Tray
746
Rear Cover
746
Front Cover and Original Tray
747
Document Feed Components
748
Original Feed Unit
748
Pick-Up Roller
748
Feed Belt
749
Separation Roller
750
Electrical Components
751
Ardf Drive Board and Df Position Sensor
751
Original Length Sensors and Original Sensor
752
Original Set Sensor
753
Original Size Sensors and Skew Correction Sensor
755
Stamp Solenoid
757
Original Exit Sensor
759
Registration Sensor
760
Ardf Cover Switch
760
Original Feed Drive
761
Feed Motor
761
Pick-Up Solenoid
763
Inverter Solenoid
763
Feed Clutch
764
Transport Motor
765
Ardf Df2030 (D724)
768
Ardf Df2030 (D724)
770
Covers and Tray
770
Rear Cover
770
Front Cover and Original Tray
771
Document Feed Components
772
Original Feed Unit
772
Pick-Up Roller
772
Feed Belt
773
Separation Roller
774
Electrical Components
775
Ardf Drive Board and Df Position Sensor
775
Original Length Sensors and Original Sensor
776
Original Set Sensor
777
Original Size Sensors and Skew Correction Sensor
778
Stamp Solenoid and Original Exit Sensor
779
Registration Sensor
780
Original Feed Drive
781
Feed Motor
781
Pick-Up Solenoid
782
Inverter Solenoid
783
Feed Clutch
784
Transport Motor
785
1 Bin Tray Bn2010 (D697)
788
Symbols Used in this Manual
790
Replacement and Adjustments
792
Electrical Components
792
Led Lamp
792
Door Open Switch
793
Paper Sensor
794
Main Board
795
Transport Motor
796
One Tray Paper Feed Unit Pb2000 (D698)
799
Covers and Roller
803
Covers
803
Feed Roller
803
Replacement and Adjustments
803
Motors and Clutch
804
Tray Lift Motor
804
Transport Motor
806
Paper Feed Clutch
808
Main Board
808
Sensors and Board
809
Paper End Sensor
809
Paper Size Sensors
810
Tray Main Board
810
Two Tray Paper Feed Unit Pb2010 (D699)
813
1 Replacement and Adjustment
817
Covers and Roller
817
Covers
817
Rear Cover
817
Right Cover
817
Feed Roller
818
Drive Components
819
Lower Feed Clutch
819
Upper Feed Clutch
819
Paper Feed Motor
820
Relay Clutch
820
Lift Motors
821
Lower Lift Motor
821
Upper Lift Motor
821
Electrical Components
822
Paper End Sensor
822
Vertical Transport Sensor
822
Paper Size Sensors
823
Tray Main Board
824
2 Detailed Section Descriptions
825
Component Layout
825
Mechanical Component Layout
825
Electrical Component Layout
826
Electrical Component Description
828
Drive Layout
829
Paper Feed and Separation Mechanism
830
Paper Lift Mechanism
831
Paper End Detection
832
Paper Height Detection
833
Paper Size Detection
834
Side Fences
836
Side and End Fences
836
End Fence
836
Fax Option Type M1 (D702)
839
Conventions Used in this Manual
842
1 Installation
843
Fax Option Installation
843
Component Check
843
Fax Option Installation Procedure
844
Fax Settings
849
Fax Unit Options
850
Handset (D645)
850
2 Replacement and Adjustment
852
Fcu
852
Sram Data Transfer Procedure
852
3 Troubleshooting
860
Error Codes
860
Ifax Troubleshooting
882
Ip-Fax Troubleshooting
885
Cannot Send by IP Address/Host Name
885
Ip-Fax Transmission
885
Cannot Send Via Voip Gateway
886
Cannot Send by Alias Fax Number
887
Cannot Receive Via IP Address/Host Name
888
Ip-Fax Reception
888
Cannot Receive by Voip Gateway
889
Cannot Receive by Alias Fax Number
890
4 Service Tables
892
Cautions
892
Service Program Tables
893
Sp1-XXX (Bit Switches)
893
Sp2-XXX (Ram Data)
894
Sp3-XXX (Tel Line Settings)
895
Sp4-XXX (Rom Versions)
896
Sp5-XXX (Ram Clear)
896
Sp6-XXX (Reports)
897
Sp7-XXX (Tests)
898
Bit Switches
899
I-Fax Switches
913
Printer Switches
920
Communication Switches
926
G3 Switches
934
Ip Fax Switches
942
Ncu Parameters
950
Dedicated Transmission Parameters
963
Programming Procedure
963
Fax Parameters
964
E-Mail Parameters
968
General Specifications
972
Capabilities of Programmable Items
974
Ifax Specifications
975
Ip-Fax Specifications
976
Advertisement
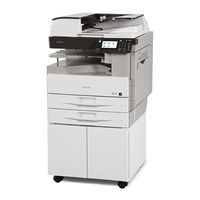
Ricoh MP 2501SP User Manual (228 pages)
Manuals
Brand:
Ricoh
| Category:
All in One Printer
| Size: 5.86 MB
Table of Contents
Table of Contents
3
How to Read the Manuals
8
Symbols Used in the Manuals
8
Model-Specific Information
9
Names of Major Features
10
1 What You Can Do with this Machine
11
Saving Paper
11
Converting Documents to Electronic Formats Easily
12
Registering Destinations
13
Operating the Machine more Effectively
14
Customizing the [Home] Screen
15
Making Copies Using Various Functions
16
Printing Data Using Various Functions
17
Utilizing Stored Documents
18
Sending and Receiving Faxes Without Paper
19
Sending and Receiving Faxes Via the Internet
21
Sending and Receiving Faxes by Using the Machine Without Fax Unit Installed
23
Using the Facsimile and the Scanner in a Network Environment
24
Preventing Information Leakage (Security Functions)
25
Monitoring and Setting the Machine Using a Computer
26
Preventing Unauthorized Copying
27
2 Getting Started
29
Guide to Names and Functions of Components
29
Guide to Components (Mainly Europe and Asia)
29
Guide to Components (Mainly North America)
31
Guide to Functions of the Machine's Options
34
Guide to Functions of the Machine's External Options (Mainly Europe and Asia)
34
Guide to Functions of the Machine's External Options (Mainly North America)
35
Guide to the Names and Functions of the Machine's Control Panel
36
Changing the Display Language
39
How to Use the [Home] Screen
40
Adding Icons to the [Home] Screen
41
Registering Functions in a Program
46
Example of Programs
48
Turning On/Off the Power
51
Turning on the Main Power
51
Turning off the Main Power
51
When the Authentication Screen Is Displayed
53
User Code Authentication Using the Control Panel
53
Logging in Using the Control Panel
53
Logging out Using the Control Panel
54
Placing Originals
55
Placing Originals on the Exposure Glass (Mainly Europe and Asia)
55
Placing Originals on the Exposure Glass (Mainly North America)
55
Placing Originals in the Auto Document Feeder
56
3 Copy
59
Basic Procedure
59
Reducing or Enlarging Originals
61
Preset Reduce/Enlarge
61
Zoom
62
Auto Reduce/Enlarge
63
Duplex Copying
65
Specifying the Original and Copy Orientation
66
Combined Copying
68
One-Sided Combine
69
Two-Sided Combine
70
Copying Onto Custom Size Paper from the Bypass Tray
73
Copying Onto Envelopes
74
Sort
76
Changing the Number of Sets
77
Storing Data in the Document Server
78
4 Fax
79
Basic Procedure for Transmissions (Memory Transmission)
79
Sending Originals Using the Exposure Glass (Memory Transmission)
80
Registering a Fax Destination
81
Deleting a Fax Destination
82
Transmitting While Checking Connection to Destination (Immediate Transmission)
84
Sending Originals Using the Exposure Glass (Immediate Transmission)
85
Canceling a Transmission
86
Canceling a Transmission before the Original Is Scanned
86
Canceling a Transmission While the Original Is Being Scanned
86
Canceling a Transmission after the Original Is Scanned (While a Transmission Is in Progress)
87
Canceling a Transmission after the Original Is Scanned (before a Transmission Is Started)
87
Sending at a Specific Time (Send Later)
89
Storing a Document
90
Sending Stored Documents
91
Printing the Journal Manually
93
5 Print
95
Quick Install
95
Displaying the Printer Driver Properties
96
Standard Printing
97
When Using the PCL 6 Printer Driver
97
Locked Print
98
Sending a Locked Print File
98
Printing a Locked Print File Using the Control Panel
98
Hold Print
100
Sending a Hold Print File
100
Printing a Hold Print File Using the Control Panel
100
Stored Print
102
Sending a Stored Print File
102
Printing a Stored Print File Using the Control Panel
103
6 Scan
105
Basic Procedure When Using Scan to Folder
105
Creating a Shared Folder on a Computer Running Windows/Confirming a Computer's Information
106
Registering an SMB Folder
108
Deleting an SMB Registered Folder
111
Entering the Path to the Destination Manually
112
Basic Procedure for Sending Scan Files by E-Mail
113
Registering an E-Mail Destination
114
Deleting an E-Mail Destination
115
Entering an E-Mail Address Manually
116
Basic Procedure for Storing Scan Files
117
Checking a Stored File Selected from the List
118
Specifying the File Type
119
Specifying Send Settings
120
7 Document Server
121
Storing Data
121
Printing Stored Documents
123
8 Web Image Monitor
125
Displaying Top Page
125
Viewing Received Fax Documents Using Web Image Monitor
127
9 Adding Paper and Toner
129
Loading Paper into Paper Trays
129
Loading Paper into the Bypass Tray
131
Printing from the Bypass Tray Using the Printer Function
132
Loading Orientation-Fixed Paper or Two-Sided Paper
137
Recommended Paper Sizes and Types
140
Thick Paper
146
Envelopes
147
Adding Toner
151
Sending Faxes or Scanned Documents When Toner Has Run out
153
Disposing of Used Toner
153
10 Troubleshooting
155
Indicators
155
When an Indicator for the [Check Status] Key Is Lit
156
Panel Tone
158
When You Have Problems Operating the Machine
159
When Messages Are Displayed on the Control Panel
166
Messages Displayed When Using the Copy/Document Server Function
166
Messages Displayed When Using the Facsimile Function
169
Messages Displayed When Using the Printer Function
185
Other Messages
190
Messages Displayed When Using the Scanner Function
198
When Messages Are Displayed on Your Computer Screen
213
Messages Displayed When Using the Scanner Function
213
11 Appendix
219
Trademarks
219
Index
221
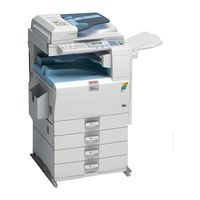
Ricoh MP 2501SP Quick User Manual (20 pages)
Copying, Printing E-mailing and Faxing
Brand:
Ricoh
| Category:
Printer
| Size: 3.89 MB
Table of Contents
Navigating Ricoh Operation Panel
3
Making Copy
4
Sending Fax
8
Chapter 4: Printing from Your Computer
10
Scan to E-Mail
16
Adding E-Mail Address
19
Advertisement
Advertisement
Related Products
Ricoh Aficio MP 2500SP
Ricoh MP 2555
Ricoh Aficio RPCS MP 2000
Ricoh Aficio MP 2012LD
Ricoh Aficio MP 2011LD
Ricoh Aficio MPC2000/SPF
Ricoh MP 4055
Ricoh MP C407
Ricoh Aficio MP 1610LD
Ricoh Aficio MP1810L
Ricoh Categories
All in One Printer
Printer
Digital Camera
Copier
Printer Accessories
More Ricoh Manuals
Login
Sign In
OR
Sign in with Facebook
Sign in with Google
Upload manual
Upload from disk
Upload from URL