Sign In
Upload
Manuals
Brands
Ricoh Manuals
All in One Printer
Aficio SP 5210SR
Ricoh Aficio SP 5210SR Manuals
Manuals and User Guides for Ricoh Aficio SP 5210SR. We have
13
Ricoh Aficio SP 5210SR manuals available for free PDF download: Service Manual, Operating Instructions Manual, Initial Manual, Best Practices Manual, Quick Manual
Ricoh Aficio SP 5210SR Service Manual (667 pages)
Brand:
Ricoh
| Category:
All in One Printer
| Size: 13.77 MB
Table of Contents
M052/M053/M054
5
Table of Contents
5
Important Safety Notices
16
Read this First
16
Safety Notices
16
Laser Safety
17
Symbols and Abbreviations
18
1 Product Information
20
Specifications
22
Overview
23
Mechanical Component Layout
23
Drive Layout
24
Paper Path
25
Standard Model (M052)/ Fax and 1 bin Tray Unit Model (M053)
25
Finisher Model (M054)
26
Machine Configuration
27
Controller Devices
29
Machine Configuration
29
2 Installation
30
Installation Requirements
32
Environment
32
Machine Level
32
Minimum Operational Space Requirements
33
Power Requirements
33
Optional Unit Combinations
34
Fax Options
34
Machine Options
34
Controller and Other Options
35
Controller Options
35
Other Options
35
Copier
36
Accessory Check
36
Copier Settings
37
Installation Procedure
37
Fax Settings Only for M053 Model
40
When Using an Smart Card Reader
40
Meter Click Charge
42
Paper Feed Unit Tk1090 (M375)
44
Installation Procedure
44
Paper Feed Unit Tk1100 (M376)
46
Installation Procedure
46
When Installing the Three Units (M375 and M376)
48
Fax Option Type Sp5200 (M381)
49
Component Check
49
Installation Procedure
50
Copy Data Security Unit Type F (B829)
54
Components Check
54
Installation
55
User Tool Setting
56
Controller Options
57
I/F Card Slot
57
Overview
57
SD Card Slots
57
USB Slots
57
Overview
58
Sd Card Appli Move
58
Move Exec
59
Undo Exec
60
File Format Converter (D377)
61
Installation Procedure
61
Ieee 802.11 A/G, G (D377: Wireless Lan)
62
Installation Procedure
62
UP Mode Settings for Wireless LAN
64
SP Mode and up Mode Settings for IEEE 802.11 A/G, G Wireless LAN
66
Bluetooth Interface Unit Type D (D566)
67
Installation Procedure
67
Browser Unit Type E (D430)
68
Installation Procedure
68
Update Procedure
69
Gigabit Ethernet Board Type a (G874)/ Type C (M397)
70
Installation Procedure
70
Installation Procedure
71
Ipds Unit Type 5210 (D571)
71
Check All Connections
72
Memory Unit Type B 32Mb (G578)
72
Optional Counter Unit Interface Type a
73
Data Overwrite Security Unit Type I (D362)
76
3 Preventive Maintenance
83
Maintenance Tables
85
Service Maintenance
85
User Maintenance
85
Pm Parts Settings
86
After Installing the New Pm Parts
86
Before Removing the Old Pm Parts
86
Operation Check
86
4 Replacement and Adjustment
87
Precautions
89
Aio
89
General
89
Scanner Unit
89
Transfer Roller
89
Fusing Unit
90
Halogen-Free Cable
90
Laser Unit
90
Lithium Batteries
90
Paper Feed
90
Special Tools and Lubricants
91
Adjusting Copy Image Area
92
Adjusting Registration
92
Printing
92
Adjusting Blank Margin
94
Adjusting Main-Scan Magnification
95
Adjusting Registration
95
Scanning
95
Adjusting Magnification
96
Df Image Adjustment
97
Exterior Covers
99
Left Cover
99
Right Cover
100
Rear Lower Cover
101
Front Door
102
Duplex Unit
103
Operation Panel Unit
104
Operation Panel Unit
105
Key Tops
106
Touch Panel Position Adjustment
108
Output Tray (M052/M053 Models Only)
109
Scanner Unit
110
Scanner
110
Scanner Left Cover
111
Scanner Right and Left Covers
111
Scanner Right Cover
111
Scanner Rear Cover
112
Exposure Glass
113
When Reassembling the ARDF Exposure Glass
113
Led Board
114
Scanner Motor
117
Sensor Board Unit (Sbu)
118
When Reassembling
118
Led Drive Board
119
Scanner Hp Sensor
120
Cover Sensor
121
Front Scanner Wire
122
Reinstalling the Front Scanner Wire
123
Rear Scanner Wire
126
Reinstalling the Rear Scanner Wire
127
Laser Optics
128
Caution Decal Locations
128
Laser Unit
129
Preparation before Removing the Laser Unit
129
Safety Switches for Laser Unit
129
Removing the Laser Unit for All Models
130
Polygon Motor
131
Laser Synchronization Detector
132
Paper Transfer
133
Transfer Roller
133
Drive Section
134
Gearbox
134
Main Motor
135
Duplex Motor
136
By-Pass Feed Clutch
137
Relay Clutch
137
Paper Feed Clutch
138
Registration Clutch
138
Paper Feed
139
Paper Feed Roller
139
Friction Pad
140
When Reassembling the Friction Pad
140
Paper End Sensor
141
Remaining Paper Sensors
141
By-Pass Paper Sensor
142
Registration Sensor
142
Duplex Relay Sensor
143
When Reassembling the Duplex Relay Sensor
143
Junction Gate 1 Solenoid
144
Junction Gate 2 Solenoid
145
Fusing Exit Sensor (M053 Model Only)
146
Paper Overflow Sensor (M052/M053 Models Only)
146
Fusing
147
Fusing Unit
147
Hot Roller and Pressure Roller Sections
148
Fusing Lamp
149
Hot Roller
150
Fusing Thermistor
151
Thermostats
151
Fusing Cleaning Roller
152
Pressure Roller
152
Duplex Unit
153
Duplex Inverter Motor
154
Duplex Exhaust Fan
155
Duplex Inverter Sensor
157
Duplex Entrance Sensor
158
Electrical Components
159
Controller Unit
159
Hdd Unit
160
Hdd Control Board
161
Nvram
161
When Reinstalling a New NVRAM
162
Eeproms
164
When Reinstalling a New EEPROM
164
DIMM Ram
165
Controller Board
166
When Installing a New Controller Board
167
Bicu
168
BICU Bracket
169
Hvps (High Voltage Power Supply)
171
Rfid Board
171
Paper Size Sensor Board
172
Toner End Sensor
172
Psu
173
Ardf
175
Ardf Rear Cover
176
When Installing the Platen Sheet
176
Ardf Front Cover and Original Tray
177
Original Feed Unit
178
Pick-Up Roller
179
Feed Roller
180
Ardf Friction Pad
181
Ardf Drive Board
182
Original Set Sensor and Ardf Top Cover Sensor
183
Ardf Feed Motor
185
Ardf Feed Clutch
186
Ardf Transport Motor
187
Ardf Registration Sensor
189
Ardf Inverter Sensor
190
Ardf Cooling Fan
191
When Installing the Cooling Fan
191
Internal Finisher
192
Internal Finisher
193
When Reinstalling the Internal Finisher
193
Finisher Output Tray Unit
194
Stapler Unit
195
Gathering Roller Motor
196
Finisher Paper Exit Motor
197
Shift Roller Motor
198
Finisher Transport Motor
199
Tray Lift Motor
200
Jogger Fence Hp Sensor
201
Jogger Motor
203
Exit Guide Plate Motor
204
Shift Roller Hp Sensor
205
Gathering Roller Hp Sensor
206
Finisher Entrance Sensor
207
Finisher Exit Sensor
208
Finisher Paper Sensor
210
Staple Tray Paper Sensor
211
Exit Guide Plate Hp Sensor
212
Tray Lower Limit Sensor
212
Finisher Main Board
213
When Reinstalling a New Finisher Main Board
213
Bin Tray Unit
214
Bin Tray Paper Exit Sensor
218
Bin Tray Paper Sensor and Led Board
219
5 System Maintenance Reference
221
Service Program
223
Types of Sp Modes
223
Using Sp and Ssp Modes
223
SP Mode Button Summary
224
Selecting the Program Number
225
Switching between SP Mode and Copy Mode for Test Printing
225
Exiting Service Mode
226
Service Mode Lock/Unlock
226
Display on the Control Panel Screen
227
Remarks
227
Others
228
System Sp1-XXX
229
Sp1-XXX (Feed)
229
System Sp2-XXX
235
Sp2-XXX (Drum)
235
System Sp3-XXX
237
Sp3-XXX (Process)
237
System Sp4-XXX
238
Sp4-XXX (Scanner)
238
System Sp5-XXX
256
System Sp6-XXX
324
System Sp7-XXX
327
System Sp8-XXX
338
Sp8-XXX: Data Log
338
Input and Output Check
386
Input Check Table
386
Output Check Table
392
Printer Service Mode
396
Sp1-XXX (Service Mode)
396
Scanner Service Mode
405
Sp1-XXX (System and Others)
405
Sp2-XXX (Scanning-Image Quality)
407
Fax Service Mode
408
Firmware Update
409
Type of Firmware
409
Before You Begin
411
Updating Firmware
412
Updating Procedure
412
Firmware Update Error
413
Recovery after Power Loss
414
Update Procedure for App2Me Provider
415
Browser Unit Update Procedure
416
Error Message Table
417
Handling Firmware Update Errors
417
Outline of Sd Card Appli Move
419
Move Exec
420
Undo Exec
421
Nvram Data Upload/Download
422
Uploading Content of Nvram to an Sd Card
422
Downloading an Sd Card to Nvram
423
Card Save Function
424
Error Messages
427
Using Sp Modes
428
Adjusting Registration and Magnification
428
Test Pattern Print (Sp)
428
Smc Print (Sp)
430
Troubleshooting
431
Service Call Conditions
433
Sc Code Descriptions
434
Sc1Xx: Scanning
435
Sc2Xx: Laser Exposure
438
Sc4Xx: Image Processing
440
Sc5Xx: Paper Feed and Fusing
441
Sc6Xx: Device Communication
444
Sc7Xx: Peripherals
449
Sc8Xx: Controller
452
Sc9Xx: Others
460
Electrical Component Defects
464
Blown Fuse Conditions
464
Jam Detection
465
Jam Codes and Display Codes
465
Paper Jam Display
465
Paper Jam Detection Sensor Location
471
7 Energy Saving
473
Energy Save
475
Energy Saver Modes
475
Timer Settings
475
Energy Save Effectiveness
476
Return to Stand-By Mode
476
Paper Save
478
Effectiveness of Duplex/Combine Function
478
How to Calculate the Paper Reduction Ratio
479
Advertisement
Ricoh Aficio SP 5210SR Service Manual (661 pages)
Brand:
Ricoh
| Category:
All in One Printer
| Size: 13.62 MB
Table of Contents
M052/M053/M054
5
Table of Contents
5
Important Safety Notices
16
Read this First
16
Safety Notices
16
Laser Safety
17
Symbols and Abbreviations
18
1 Product Information
20
Specifications
22
Overview
23
Mechanical Component Layout
23
Drive Layout
24
Paper Path
25
Standard Model (M052)/ Fax and 1 bin Tray Unit Model (M053)
25
Finisher Model (M054)
26
Machine Configuration
27
Controller Devices
29
Machine Configuration
29
2 Installation
30
Installation Requirements
32
Environment
32
Machine Level
32
Minimum Operational Space Requirements
33
Power Requirements
33
Optional Unit Combinations
34
Fax Options
34
Machine Options
34
Controller and Other Options
35
Controller Options
35
Other Options
35
Copier
36
Accessory Check
36
Copier Settings
37
Installation Procedure
37
Fax Settings Only for M053 Model
40
When Using an Smart Card Reader
40
Meter Click Charge
42
Paper Feed Unit Tk1090 (M375)
44
Installation Procedure
44
Paper Feed Unit Tk1100 (M376)
46
Installation Procedure
46
When Installing the Three Units (M375 and M376)
48
Fax Option Type Sp5200 (M381)
49
Component Check
49
Installation Procedure
50
Copy Data Security Unit Type F (B829)
54
Components Check
54
Installation
55
User Tool Setting
56
Controller Options
57
I/F Card Slot
57
Overview
57
SD Card Slots
57
USB Slots
57
Overview
58
Sd Card Appli Move
58
Move Exec
59
Undo Exec
60
File Format Converter (D377)
61
Installation Procedure
61
Ieee 802.11 A/G, G (D377: Wireless Lan)
62
Installation Procedure
62
UP Mode Settings for Wireless LAN
64
SP Mode and up Mode Settings for IEEE 802.11 A/G, G Wireless LAN
66
Bluetooth Interface Unit Type D (D566)
67
Installation Procedure
67
Browser Unit Type E (D430)
68
Installation Procedure
68
Update Procedure
69
Gigabit Ethernet Board Type a (G874)/ Type C (M397)
70
Installation Procedure
70
Installation Procedure
71
Ipds Unit Type 5210 (D571)
71
Check All Connections
72
Installation Procedure
72
Memory Unit Type B 32Mb (G578)
72
Optional Counter Unit Interface Type a
73
3 Preventive Maintenance
77
Maintenance Tables
79
Service Maintenance
79
User Maintenance
79
Pm Parts Settings
80
After Installing the New Pm Parts
80
Before Removing the Old Pm Parts
80
Operation Check
80
4 Replacement and Adjustment
81
Precautions
83
Aio
83
General
83
Scanner Unit
83
Transfer Roller
83
Fusing Unit
84
Halogen-Free Cable
84
Laser Unit
84
Lithium Batteries
84
Paper Feed
84
Special Tools and Lubricants
85
Adjusting Copy Image Area
86
Adjusting Registration
86
Printing
86
Adjusting Blank Margin
88
Adjusting Main-Scan Magnification
89
Adjusting Registration
89
Scanning
89
Adjusting Magnification
90
Df Image Adjustment
91
Exterior Covers
93
Left Cover
93
Right Cover
94
Rear Lower Cover
95
Front Door
96
Duplex Unit
97
Operation Panel Unit
98
Operation Panel Unit
99
Key Tops
100
Touch Panel Position Adjustment
102
Output Tray (M052/M053 Models Only)
103
Scanner Unit
104
Scanner
104
Scanner Left Cover
105
Scanner Right and Left Covers
105
Scanner Right Cover
105
Scanner Rear Cover
106
Exposure Glass
107
When Reassembling the ARDF Exposure Glass
107
Led Board
108
Scanner Motor
111
Sensor Board Unit (Sbu)
112
When Reassembling
112
Led Drive Board
113
Scanner Hp Sensor
114
Cover Sensor
115
Front Scanner Wire
116
Reinstalling the Front Scanner Wire
117
Rear Scanner Wire
120
Reinstalling the Rear Scanner Wire
121
Laser Optics
122
Caution Decal Locations
122
Laser Unit
123
Preparation before Removing the Laser Unit
123
Safety Switches for Laser Unit
123
Removing the Laser Unit for All Models
124
Polygon Motor
125
Laser Synchronization Detector
126
Paper Transfer
127
Transfer Roller
127
Drive Section
128
Gearbox
128
Main Motor
129
Duplex Motor
130
By-Pass Feed Clutch
131
Relay Clutch
131
Paper Feed Clutch
132
Registration Clutch
132
Paper Feed
133
Paper Feed Roller
133
Friction Pad
134
When Reassembling the Friction Pad
134
Paper End Sensor
135
Remaining Paper Sensors
135
By-Pass Paper Sensor
136
Registration Sensor
136
Duplex Relay Sensor
137
When Reassembling the Duplex Relay Sensor
137
Junction Gate 1 Solenoid
138
Junction Gate 2 Solenoid
139
Fusing Exit Sensor (M053 Model Only)
140
Paper Overflow Sensor (M052/M053 Models Only)
140
Fusing
141
Fusing Unit
141
Hot Roller and Pressure Roller Sections
142
Fusing Lamp
143
Hot Roller
144
Fusing Thermistor
145
Thermostats
145
Fusing Cleaning Roller
146
Pressure Roller
146
Duplex Unit
147
Duplex Inverter Motor
148
Duplex Exhaust Fan
149
Duplex Inverter Sensor
151
Duplex Entrance Sensor
152
Electrical Components
153
Controller Unit
153
Hdd Unit
154
Hdd Control Board
155
Nvram
155
When Reinstalling a New NVRAM
156
Eeproms
158
When Reinstalling a New EEPROM
158
DIMM Ram
159
Controller Board
160
When Installing a New Controller Board
161
Bicu
162
BICU Bracket
163
Hvps (High Voltage Power Supply)
165
Rfid Board
165
Paper Size Sensor Board
166
Toner End Sensor
166
Psu
167
Ardf
169
Ardf Rear Cover
170
When Installing the Platen Sheet
170
Ardf Front Cover and Original Tray
171
Original Feed Unit
172
Pick-Up Roller
173
Feed Roller
174
Ardf Friction Pad
175
Ardf Drive Board
176
Original Set Sensor and Ardf Top Cover Sensor
177
Ardf Feed Motor
179
Ardf Feed Clutch
180
Ardf Transport Motor
181
Ardf Registration Sensor
183
Ardf Inverter Sensor
184
Ardf Cooling Fan
185
When Installing the Cooling Fan
185
Internal Finisher
186
Internal Finisher
187
When Reinstalling the Internal Finisher
187
Finisher Output Tray Unit
188
Stapler Unit
189
Gathering Roller Motor
190
Finisher Paper Exit Motor
191
Shift Roller Motor
192
Finisher Transport Motor
193
Tray Lift Motor
194
Jogger Fence Hp Sensor
195
Jogger Motor
197
Exit Guide Plate Motor
198
Shift Roller Hp Sensor
199
Gathering Roller Hp Sensor
200
Finisher Entrance Sensor
201
Finisher Exit Sensor
202
Finisher Paper Sensor
204
Staple Tray Paper Sensor
205
Exit Guide Plate Hp Sensor
206
Tray Lower Limit Sensor
206
Finisher Main Board
207
When Reinstalling a New Finisher Main Board
207
Bin Tray Unit
208
Bin Tray Paper Exit Sensor
212
Bin Tray Paper Sensor and Led Board
213
5 System Maintenance Reference
215
Service Program
217
Types of Sp Modes
217
Using Sp and Ssp Modes
217
SP Mode Button Summary
218
Selecting the Program Number
219
Switching between SP Mode and Copy Mode for Test Printing
219
Exiting Service Mode
220
Service Mode Lock/Unlock
220
Display on the Control Panel Screen
221
Remarks
221
Others
222
System Sp1-XXX
223
Sp1-XXX (Feed)
223
System Sp2-XXX
229
Sp2-XXX (Drum)
229
System Sp3-XXX
231
Sp3-XXX (Process)
231
System Sp4-XXX
232
Sp4-XXX (Scanner)
232
System Sp5-XXX
250
System Sp6-XXX
318
System Sp7-XXX
321
System Sp8-XXX
332
Sp8-XXX: Data Log
332
Input and Output Check
380
Input Check Table
380
Output Check Table
386
Printer Service Mode
390
Sp1-XXX (Service Mode)
390
Scanner Service Mode
399
Sp1-XXX (System and Others)
399
Sp2-XXX (Scanning-Image Quality)
401
Fax Service Mode
402
Firmware Update
403
Type of Firmware
403
Before You Begin
405
Updating Firmware
406
Updating Procedure
406
Firmware Update Error
407
Recovery after Power Loss
408
Update Procedure for App2Me Provider
409
Browser Unit Update Procedure
410
Error Message Table
411
Handling Firmware Update Errors
411
Outline of Sd Card Appli Move
413
Move Exec
414
Undo Exec
415
Nvram Data Upload/Download
416
Uploading Content of Nvram to an Sd Card
416
Downloading an Sd Card to Nvram
417
Card Save Function
418
Error Messages
421
Using Sp Modes
422
Adjusting Registration and Magnification
422
Test Pattern Print (Sp)
422
Smc Print (Sp)
424
Troubleshooting
425
Service Call Conditions
427
Sc Code Descriptions
428
Sc1Xx: Scanning
429
Sc2Xx: Laser Exposure
432
Sc4Xx: Image Processing
434
Sc5Xx: Paper Feed and Fusing
435
Sc6Xx: Device Communication
438
Sc7Xx: Peripherals
443
Sc8Xx: Controller
446
Sc9Xx: Others
454
Electrical Component Defects
458
Blown Fuse Conditions
458
Jam Detection
459
Jam Codes and Display Codes
459
Paper Jam Display
459
Paper Jam Detection Sensor Location
465
7 Energy Saving
467
Energy Save
469
Energy Saver Modes
469
Timer Settings
469
Energy Save Effectiveness
470
Return to Stand-By Mode
470
Paper Save
472
Effectiveness of Duplex/Combine Function
472
How to Calculate the Paper Reduction Ratio
473
Ricoh Aficio SP 5210SR Service Manual (658 pages)
Mfps & printers M052; M053; M054
Brand:
Ricoh
| Category:
All in One Printer
| Size: 15.3 MB
Table of Contents
M052/M053/M054
5
Table of Contents
5
Important Safety Notices
16
Read this First
16
Safety Notices
16
Laser Safety
17
Symbols and Abbreviations
18
1 Product Information
20
Specifications
22
Overview
23
Mechanical Component Layout
23
Drive Layout
24
Paper Path
25
Standard Model (M052)/ Fax and 1 bin Tray Unit Model (M053)
25
Finisher Model (M054)
26
Machine Configuration
27
Controller Devices
29
Machine Configuration
29
2 Installation
30
Installation Requirements
32
Environment
32
Machine Level
32
Minimum Operational Space Requirements
33
Power Requirements
33
Optional Unit Combinations
34
Fax Options
34
Machine Options
34
Controller and Other Options
35
Controller Options
35
Other Options
35
Copier
36
Accessory Check
36
Copier Settings
37
Installation Procedure
37
Fax Settings Only for M053 Model
40
When Using an Smart Card Reader
40
Meter Click Charge
42
Paper Feed Unit Tk1090 (M375)
44
Installation Procedure
44
Paper Feed Unit Tk1100 (M376)
46
Installation Procedure
46
When Installing the Three Units (M375 and M376)
48
Fax Option Type Sp5200 (M381)
49
Component Check
49
Installation Procedure
50
Copy Data Security Unit Type F (B829)
54
Components Check
54
Installation
55
User Tool Setting
56
Controller Options
57
I/F Card Slot
57
Overview
57
SD Card Slots
57
USB Slots
57
Overview
58
Sd Card Appli Move
58
Move Exec
59
Undo Exec
60
File Format Converter (D377)
61
Installation Procedure
61
Ieee 802.11 A/G, G (D377: Wireless Lan)
62
Installation Procedure
62
UP Mode Settings for Wireless LAN
64
SP Mode and up Mode Settings for IEEE 802.11 A/G, G Wireless LAN
66
Bluetooth Interface Unit Type D (D566)
67
Installation Procedure
67
Browser Unit Type E (D430)
68
Installation Procedure
68
Update Procedure
69
Gigabit Ethernet Board Type a (G874)/ Type C (M397)
70
Installation Procedure
70
Installation Procedure
71
Ipds Unit Type 5210 (D571)
71
Check All Connections
72
Installation Procedure
72
Memory Unit Type B 32Mb (G578)
72
3 Preventive Maintenance
74
Maintenance Tables
76
Service Maintenance
76
User Maintenance
76
Pm Parts Settings
77
After Installing the New Pm Parts
77
Before Removing the Old Pm Parts
77
Operation Check
77
4 Replacement and Adjustment
78
Precautions
80
Aio
80
General
80
Scanner Unit
80
Transfer Roller
80
Fusing Unit
81
Halogen-Free Cable
81
Laser Unit
81
Lithium Batteries
81
Paper Feed
81
Special Tools and Lubricants
82
Adjusting Copy Image Area
83
Adjusting Registration
83
Printing
83
Adjusting Blank Margin
85
Adjusting Main-Scan Magnification
86
Adjusting Registration
86
Scanning
86
Adjusting Magnification
87
Df Image Adjustment
88
Exterior Covers
90
Left Cover
90
Right Cover
91
Rear Lower Cover
92
Front Door
93
Duplex Unit
94
Operation Panel Unit
95
Operation Panel Unit
96
Key Tops
97
Touch Panel Position Adjustment
99
Output Tray (M052/M053 Models Only)
100
Scanner Unit
101
Scanner
101
Scanner Left Cover
102
Scanner Right and Left Covers
102
Scanner Right Cover
102
Scanner Rear Cover
103
Exposure Glass
104
When Reassembling the ARDF Exposure Glass
104
Led Board
105
Scanner Motor
108
Sensor Board Unit (Sbu)
109
When Reassembling
109
Led Drive Board
110
Scanner Hp Sensor
111
Cover Sensor
112
Front Scanner Wire
113
Reinstalling the Front Scanner Wire
114
Rear Scanner Wire
117
Reinstalling the Rear Scanner Wire
118
Laser Optics
119
Caution Decal Locations
119
Laser Unit
120
Preparation before Removing the Laser Unit
120
Safety Switches for Laser Unit
120
Removing the Laser Unit for All Models
121
Polygon Motor
122
Laser Synchronization Detector
123
Paper Transfer
124
Transfer Roller
124
Drive Section
125
Gearbox
125
Main Motor
126
Duplex Motor
127
By-Pass Feed Clutch
128
Relay Clutch
128
Paper Feed Clutch
129
Registration Clutch
129
Paper Feed
130
Paper Feed Roller
130
Friction Pad
131
When Reassembling the Friction Pad
131
Paper End Sensor
132
Remaining Paper Sensors
132
By-Pass Paper Sensor
133
Registration Sensor
133
Duplex Relay Sensor
134
When Reassembling the Duplex Relay Sensor
134
Junction Gate 1 Solenoid
135
Junction Gate 2 Solenoid
136
Fusing Exit Sensor (M053 Model Only)
137
Paper Overflow Sensor (M052/M053 Models Only)
137
Fusing
138
Fusing Unit
138
Hot Roller and Pressure Roller Sections
139
Fusing Lamp
140
Hot Roller
141
Fusing Thermistor
142
Thermostats
142
Fusing Cleaning Roller
143
Pressure Roller
143
Duplex Unit
144
Duplex Inverter Motor
145
Duplex Exhaust Fan
146
Duplex Inverter Sensor
148
Duplex Entrance Sensor
149
Electrical Components
150
Controller Unit
150
Hdd Unit
151
Hdd Control Board
152
Nvram
152
When Reinstalling a New NVRAM
153
Eeproms
155
When Reinstalling a New EEPROM
155
DIMM Ram
156
Controller Board
157
When Installing a New Controller Board
158
Bicu
159
BICU Bracket
160
Hvps (High Voltage Power Supply)
162
Rfid Board
162
Paper Size Sensor Board
163
Toner End Sensor
163
Psu
164
Ardf
166
Ardf Rear Cover
167
When Installing the Platen Sheet
167
Ardf Front Cover and Original Tray
168
Original Feed Unit
169
Pick-Up Roller
170
Feed Roller
171
Ardf Friction Pad
172
Ardf Drive Board
173
Original Set Sensor and Ardf Top Cover Sensor
174
Ardf Feed Motor
176
Ardf Feed Clutch
177
Ardf Transport Motor
178
Ardf Registration Sensor
180
Ardf Inverter Sensor
181
Ardf Cooling Fan
182
When Installing the Cooling Fan
182
Internal Finisher
183
Internal Finisher
184
When Reinstalling the Internal Finisher
184
Finisher Output Tray Unit
185
Stapler Unit
186
Gathering Roller Motor
187
Finisher Paper Exit Motor
188
Shift Roller Motor
189
Finisher Transport Motor
190
Tray Lift Motor
191
Jogger Fence Hp Sensor
192
Jogger Motor
194
Exit Guide Plate Motor
195
Shift Roller Hp Sensor
196
Gathering Roller Hp Sensor
197
Finisher Entrance Sensor
198
Finisher Exit Sensor
199
Finisher Paper Sensor
201
Staple Tray Paper Sensor
202
Exit Guide Plate Hp Sensor
203
Tray Lower Limit Sensor
203
Finisher Main Board
204
When Reinstalling a New Finisher Main Board
204
Bin Tray Unit
205
Bin Tray Paper Exit Sensor
209
Bin Tray Paper Sensor and Led Board
210
5 System Maintenance Reference
212
Service Program
214
Types of Sp Modes
214
Using Sp and Ssp Modes
214
SP Mode Button Summary
215
Selecting the Program Number
216
Switching between SP Mode and Copy Mode for Test Printing
216
Exiting Service Mode
217
Service Mode Lock/Unlock
217
Display on the Control Panel Screen
218
Remarks
218
Others
219
System Sp1-XXX
220
Sp1-XXX (Feed)
220
System Sp2-XXX
226
Sp2-XXX (Drum)
226
System Sp3-XXX
228
Sp3-XXX (Process)
228
System Sp4-XXX
229
Sp4-XXX (Scanner)
229
System Sp5-XXX
247
System Sp6-XXX
315
System Sp7-XXX
318
System Sp8-XXX
329
Sp8-XXX: Data Log
329
Input and Output Check
377
Input Check Table
377
Output Check Table
383
Printer Service Mode
387
Sp1-XXX (Service Mode)
387
Scanner Service Mode
396
Sp1-XXX (System and Others)
396
Sp2-XXX (Scanning-Image Quality)
398
Fax Service Mode
399
Firmware Update
400
Type of Firmware
400
Before You Begin
402
Updating Firmware
403
Updating Procedure
403
Firmware Update Error
404
Recovery after Power Loss
405
Update Procedure for App2Me Provider
406
Browser Unit Update Procedure
407
Error Message Table
408
Handling Firmware Update Errors
408
Outline of Sd Card Appli Move
410
Move Exec
411
Undo Exec
412
Nvram Data Upload/Download
413
Uploading Content of Nvram to an Sd Card
413
Downloading an Sd Card to Nvram
414
Card Save Function
415
Error Messages
418
Using Sp Modes
419
Adjusting Registration and Magnification
419
Test Pattern Print (Sp)
419
Smc Print (Sp)
421
Troubleshooting
422
Service Call Conditions
424
Sc Code Descriptions
425
Sc1Xx: Scanning
426
Sc2Xx: Laser Exposure
429
Sc4Xx: Image Processing
431
Sc5Xx: Paper Feed and Fusing
432
Sc6Xx: Device Communication
435
Sc7Xx: Peripherals
440
Sc8Xx: Controller
443
Sc9Xx: Others
451
Electrical Component Defects
455
Blown Fuse Conditions
455
Jam Detection
456
Jam Codes and Display Codes
456
Paper Jam Display
456
Paper Jam Detection Sensor Location
462
7 Energy Saving
464
Energy Save
466
Energy Saver Modes
466
Energy Save Effectiveness
467
Paper Save
469
Advertisement
Ricoh Aficio SP 5210SR Operating Instructions Manual (444 pages)
Facsimile reference
Brand:
Ricoh
| Category:
All in One Printer
| Size: 12.6 MB
Table of Contents
Operating Instructions
1
Table of Contents
3
Manuals for this Machine
12
Notice
15
Important
15
How to Read this Manual
16
Symbols
16
Machine Types
16
Names of Major Functions
17
Notes
17
List of Options
17
Laws and Regulations
18
Legal Prohibition
18
Model-Specific Information
19
Reading the Display
20
Reading the Display Panel and Using Keys
20
Initial Display
21
Simplified Display
23
About Data Security for Copying
25
1 Transmission
27
Transmission Modes
27
Selecting Type of Transmission
28
Memory Transmission
30
Automatic Redial
34
Dual Access
34
Broadcasting Sequence
35
Immediate Transmission
36
Displaying Confirmation of Transmission
38
IP-Fax Functions
40
Terminology
42
Gatekeeper (Voip Gatekeeper)
42
Gateway (Voip Gateway)
42
Notes on Using IP-Fax
42
Functions Not Available for IP-Fax Transmission
43
E-Mail Functions and Folder Transmission
44
Internet Fax Transmission
45
Notes on Using Internet Fax
46
Functions Not Available by Internet Fax Transmission
47
Functions Not Available by Internet Fax Reception
48
T.37 Full Mode
48
E-Mail Encryption
49
E-Mail Transmission
51
Functions Not Available for E-Mail Transmission
52
E-Mail Encryption
52
Folder Transmission
55
Functions Not Available for Folder Transmission
55
Placing Originals
57
Setting the Original Orientation
59
Scanning Two-Sided Originals
60
Acceptable Original Sizes
63
Paper Size and Scanned Area
63
Checking the Content of a Scanned Original (Preview before Transmission)
65
Detecting Blank Sheet
67
Scan Settings
68
Original Type
68
Resolution
70
Jbig Transmission
70
Scan Size
72
Density (Contrast)
75
Manual Density
75
Mixing Scan Settings for a Multiple Page Original
77
Selecting the File Format
78
Specifying a Destination
80
Sending over a Fax Line (Fax Destinations)
80
Entering a Pause
81
Entering a Tone
82
Sending by IP-Fax (IP-Fax Destinations)
83
Sending by Internet Fax (Internet Fax Destinations)
88
Sending an E-Mail (E-Mail Destinations)
94
Sending to Folder Destinations (Folder Destinations)
100
Using the Address Book to Specify Destinations
103
Specifying Group Destinations
104
International TX Mode
106
Selecting Destinations from Recent Destinations
106
Preventing Transmission to the Wrong Destination
107
Re-Entering a Fax Number to Confirm Destination
107
Registering Destinations in the Address Book
111
Registering a Fax Destination
111
Changing a Fax Destination
114
Deleting a Fax Destination
116
Registering Destinations to the Address Book from [Prg. Dest.]
117
Registering Entered Destinations to the Address Book
118
Searching for a Destination in the Address Book
120
Search by Destination Name
120
Search by Fax Number/Ip-Fax Destination
123
Search by Internet Fax Destination
125
Search by E-Mail Destination
127
Search by Folder Destination
129
Search Using Advanced Search
132
Search by Registration Number
135
On Hook Dial
138
Manual Dial
140
Sender Settings
142
Advanced Features
145
Setting SUB Codes for Transmission
145
Setting SEP Codes for Reception
148
SEP Code RX Reserve Report
151
SEP Code RX Result Report
152
Canceling a Transmission
153
Before the Original Is Scanned
153
While the Original Is Being Scanned
153
While the Original Is Being Transmitted
154
Before the Transmission Is Started
156
Confirming a Transmission
160
Checking the Storage Result (Memory Storage Report)
162
Changing the Default Functions of the Fax's Initial Display
163
Ricoh Aficio SP 5210SR Operating Instructions Manual (372 pages)
Network and System Settings Reference
Brand:
Ricoh
| Category:
All in One Printer
| Size: 10.74 MB
Table of Contents
Operating Instructions
1
Table of Contents
3
Manuals for this Machine
12
Notice
15
Important
15
How to Read this Manual
16
Symbols
16
Machine Types
16
Notes
17
Names of Major Items
17
List of Options
17
About IP Address
18
Laws and Regulations
19
Legal Prohibition
19
Model-Specific Information
20
Display Panel
21
Accessing User Tools
22
Changing Default Settings
22
Quitting User Tools
23
1 System Settings
25
General Features
25
Output Tray Settings
27
Tray Paper Settings
29
Timer Settings
33
Setting the Date and Time (Mainly Europe and Asia)
35
Setting the Date and Time (Mainly North America)
36
Interface Settings
38
Network
38
Ddns Configuration
39
Wireless LAN
42
Communication Mode
42
Print List
44
File Transfer
46
Delivery Option
46
Administrator Tools
53
Capture Priority
61
Programming the LDAP Server
64
Changing the LDAP Server
68
Deleting the LDAP Server
68
Programming the Realm
70
Changing the Realm
71
Deleting the Realm
72
2 Connecting the Machine
73
Connecting to the Interface
73
Connecting to the Ethernet Interface (Mainly Europe and Asia)
74
Connecting to the Ethernet Interface (Mainly North America)
75
Connecting to the Gigabit Ethernet Interface (Mainly Europe and Asia)
76
Connecting to the Gigabit Ethernet Interface (Mainly North America)
78
Connecting to the USB (Type B) Interface
80
Connecting a Device to the Machine's USB Host Interface
81
Connecting to the Wireless LAN Interface
81
Network Settings Required to Use the Printer/Lan-Fax
84
Ethernet
84
Wireless LAN
85
Network Settings Required to Use Internet Fax
88
Ethernet
88
Wireless LAN
90
Network Settings Required to Use E-Mail Function
92
Ethernet
92
Wireless LAN
94
Network Settings Required to Use Scan to Folder Function
96
Ethernet
96
Wireless LAN
97
Network Settings Required to Use the Network Delivery Scanner
99
Ethernet
99
Wireless LAN
100
Network Settings Required to Use WSD Scanner
103
Ethernet
103
Wireless LAN
104
Network Settings Required to Use Network TWAIN Scanner
106
Ethernet
106
Wireless LAN
107
Network Settings Required to Use Document Server
109
Ethernet
109
Wireless LAN
110
Using Utilities to Make Network Settings
112
Interface Settings
112
File Transfer
117
Connecting the Machine to a Telephone Line and Telephone
120
3 Using a Printer Server
121
Preparing Printer Server
121
Using Netware
122
Setting up as a Print Server (Netware 3.X)
122
Setting up as a Print Server (Netware 4.X, 5/5.1, 6/6.5)
123
Using Pure IP in the Netware 5/5.1 or 6/6.5 Environment
124
Setting up as a Remote Printer (Netware 3.X)
126
Setting up as a Remote Printer (Netware 4.X, 5/5.1, 6/6.5)
129
4 Monitoring and Configuring the Machine
133
Using Web Image Monitor
133
Displaying Top Page
134
When User Authentication Is Set
136
About Menu and Mode
136
Access in the Administrator Mode
138
List of Setting Items
138
Displaying Web Image Monitor Help
146
Ricoh Aficio SP 5210SR Operating Instructions Manual (240 pages)
Scanner Reference
Brand:
Ricoh
| Category:
All in One Printer
| Size: 10.23 MB
Table of Contents
Operating Instructions
1
Table of Contents
3
Manuals for this Machine
9
Notice
12
Important
12
How to Read this Manual
13
Symbols
13
Notes
13
List of Options
13
Laws and Regulations
15
Legal Prohibition
15
Model-Specific Information
16
About the Scanner Functions
17
Display Panel
19
Simplified Display
19
Confirmation Displays
20
1 Sending Scan Files by E-Mail
27
Before Sending Scan Files by E-Mail
27
Overview of Sending Scan Files by E-Mail
27
Preparation for Sending by E-Mail
28
Registering E-Mail Addresses in the Address Book
30
E-Mail Screen
31
Basic Procedure for Sending Scan Files by E-Mail
33
Switching to the E-Mail Screen
36
Specifying E-Mail Destinations
37
Selecting the Destination from the Machine's Address Book
37
Entering an E-Mail Address Manually
40
Selecting the Destination from Recent Destinations
41
Selecting Destinations by Searching an LDAP Server
42
Registering a Directly-Entered Destination in the Address Book
45
Registering a Recent Destination in the Address Book
46
Specifying the E-Mail Sender
48
Selecting a Sender from the List
48
Using a Registration Number to Specify a Sender Name
49
Selecting the Sender by Searching the Machine's Address Book
49
Entering the E-Mail Subject
52
Entering the E-Mail Message
53
Selecting a Message from the List
53
Manual Entry of a Message
54
Simultaneous Storage and Sending by E-Mail
55
Security Settings to E-Mails
56
Sending Encrypted E-Mail
56
Sending E-Mail with a Signature
57
Sending the URL by E-Mail
58
2 Sending Scan Files to Folders
61
Before Sending Files by Scan to Folder
61
Overview of Sending Scan Files by Scan to Folder
61
Preparation for Sending by Scan to Folder
63
Registering Destination Folders in the Address Book
68
Scan to Folder Screen
69
Basic Procedure When Using Scan to Folder
71
Switching to the Scan to Folder Screen
74
Specifying Scan to Folder Destinations
75
Selecting the Destination from the Machine's Address Book
75
Sending Files to a Shared Network Folder
79
Sending Files to an FTP Server
82
Sending Files to Netware Server
83
Selecting the Destination from Recent Destinations
87
Registering the Path to the Selected Destination in the Address Book
88
Registering the Path to a Recent Destination in the Address Book
89
Simultaneous Storage and Sending by Scan to Folder
91
Ricoh Aficio SP 5210SR Operating Instructions Manual (204 pages)
Printer Reference
Brand:
Ricoh
| Category:
All in One Printer
| Size: 10.03 MB
Table of Contents
Operating Instructions
1
Table of Contents
3
Manuals for this Machine
9
Notice
12
Important
12
How to Read this Manual
13
Symbols
13
Machine Types
13
Notes
14
Names of Major Items
14
About IP Address
14
Laws and Regulations
15
Legal Prohibition
15
Model-Specific Information
16
Display Panel
17
Initial Display
17
Simplified Display
18
1 Preparing the Machine
21
Confirming the Connection Method
21
Network Connection
21
Local Connection
23
Installing the Printer Driver
24
Quick Install
25
Installing the Printer Driver for the Selected Port
26
Using the Standard TCP/IP Port
26
Using the IPP Port
28
Using the LPR Port
30
Using the WSD Port
32
Using the Smartdevicemonitor for Client Port
35
Using as a Windows Network Printer
42
Installing the PCL Printer Driver
42
Installing the Postscript 3 Printer Driver
43
Using as a Netware Print Server/Remote Printer
45
When Using the Postscript 3 Printer Driver
47
Form Feed
47
Banner Page
47
Printing after Resetting the Printer
47
Installing the Printer Driver Using USB
48
Windows XP, Windows Server 2003/2003 R2 - USB
48
Windows Vista, Windows Server 2008 - USB
49
Windows 7, Windows Server 2008 R2 - USB
50
Making Option Settings for the Printer
52
Conditions for Bidirectional Communication
52
If Bidirectional Communication Is Disabled
52
Installing Font Manager
55
Using Adobe Pagemaker Version 6.0, 6.5, or 7.0
56
2 Printing Documents
57
Displaying the Printer Driver Settings Screen
57
Making Printer Default Settings - the Printer Properties
57
Making Printer Default Settings - Printing Preferences
57
Making Printer Settings from an Application
58
Making Printer Settings - One Click Presets
59
Setting Paper on the Bypass Tray
60
Setting the Paper Size Using the Control Panel
61
Setting Custom Size Paper Using the Control Panel
63
Setting Thick Paper, Thin Paper or OHP Transparencies Using the Control Panel
64
Setting Envelopes Using the Control Panel
66
Printing on Orientation-Fixed or Two-Sided Paper
70
Print Area
72
Frequently Used Print Methods
74
Standard Printing
74
Printing on both Sides of Sheets
76
Combining Multiple Pages into Single Page
78
Advanced Printing
82
Menu Names and Brief Overview of each Function
82
Specifying Printer Driver or Print Command Priority
83
Collate
84
Staple (Type 3 Only)
85
Staple Position
86
Stapling Precautions
86
Cover Sheet
87
Chapter Page
91
Slip Sheets
92
User Defined Pages
93
Watermarks
94
If Error Occurs with the Specified Paper Size and Type
97
Printing from a Selected Tray
97
Canceling a Print Job
98
Spool Printing
99
Printing a PDF File Directly
101
Using Desktopbinder Lite
101
PDF Direct Printing Using Function Palette
102
PDF Direct Print Properties
103
Using UNIX Commands
104
Registering Classification Codes
106
Configuring Classification Codes
107
Specifying the Classification Code for a Print Job
107
Ricoh Aficio SP 5210SR Operating Instructions Manual (204 pages)
Brand:
Ricoh
| Category:
Copier
| Size: 1.84 MB
Table of Contents
Operating Instructions
1
Table of Contents
3
Manuals for this Machine
9
Notice
12
Important
12
How to Read this Manual
13
Symbols
13
Machine Types
13
Notes
14
Names of Major Items
14
About IP Address
14
Laws and Regulations
15
Legal Prohibition
15
Model-Specific Information
16
Display Panel
17
Initial Display
17
Simplified Display
18
1 Preparing the Machine
21
Confirming the Connection Method
21
Network Connection
21
Local Connection
23
Installing the Printer Driver
24
Quick Install
25
Installing the Printer Driver for the Selected Port
26
Using the Standard TCP/IP Port
26
Using the IPP Port
28
Using the LPR Port
30
Using the WSD Port
32
Using the Smartdevicemonitor for Client Port
35
Using as a Windows Network Printer
42
Installing the PCL Printer Driver
42
Installing the Postscript 3 Printer Driver
43
Using as a Netware Print Server/Remote Printer
45
When Using the Postscript 3 Printer Driver
47
Form Feed
47
Banner Page
47
Printing after Resetting the Printer
47
Installing the Printer Driver Using USB
48
Windows XP, Windows Server 2003/2003 R2 - USB
48
Windows Vista, Windows Server 2008 - USB
49
Windows 7, Windows Server 2008 R2 - USB
50
Making Option Settings for the Printer
52
Conditions for Bidirectional Communication
52
If Bidirectional Communication Is Disabled
52
Installing Font Manager
55
Using Adobe Pagemaker Version 6.0, 6.5, or 7.0
56
2 Printing Documents
57
Displaying the Printer Driver Settings Screen
57
Making Printer Default Settings - the Printer Properties
57
Making Printer Default Settings - Printing Preferences
57
Making Printer Settings from an Application
58
Making Printer Settings - One Click Presets
59
Setting Paper on the Bypass Tray
60
Setting the Paper Size Using the Control Panel
61
Setting Custom Size Paper Using the Control Panel
63
Setting Thick Paper, Thin Paper or OHP Transparencies Using the Control Panel
64
Setting Envelopes Using the Control Panel
66
Printing on Orientation-Fixed or Two-Sided Paper
70
Print Area
72
Frequently Used Print Methods
74
Standard Printing
74
Printing on both Sides of Sheets
76
Combining Multiple Pages into Single Page
78
Advanced Printing
82
Menu Names and Brief Overview of each Function
82
Specifying Printer Driver or Print Command Priority
83
Collate
84
Staple (Type 3 Only)
85
Staple Position
86
Cover Sheet
87
Chapter Page
91
Slip Sheets
92
User Defined Pages
93
Watermarks
94
If Error Occurs with the Specified Paper Size and Type
97
Printing from a Selected Tray
97
Canceling a Print Job
98
Spool Printing
99
Printing a PDF File Directly
101
Using Desktopbinder Lite
101
PDF Direct Printing Using Function Palette
102
PDF Direct Print Properties
103
Using UNIX Commands
104
Registering Classification Codes
106
Configuring Classification Codes
107
Specifying the Classification Code for a Print Job
107
Ricoh Aficio SP 5210SR Operating Instructions Manual (208 pages)
Copy and Document Server Reference
Brand:
Ricoh
| Category:
All in One Printer
| Size: 10.64 MB
Table of Contents
Operating Instructions
1
Table of Contents
3
Manuals for this Machine
8
Notice
11
Important
11
How to Read this Manual
12
Symbols
12
Machine Types
12
Notes
13
Names of Major Items
13
List of Options
13
Laws and Regulations
14
Legal Prohibition
14
Model-Specific Information
15
Display Panel
16
Simplified Display
17
1 Placing Originals
19
Originals
19
Sizes and Weights of Recommended Originals
19
Sizes Selectable as Regular Size Originals
20
Missing Image Area
21
Placing Originals
22
Original Orientation
22
Left Original Beeper
24
Placing Originals on the Exposure Glass
24
Placing Originals in the Auto Document Feeder
26
Batch Mode
27
SADF Mode
28
Specifying Original Sizes
29
2 Basic Copying
33
Basic Procedure
33
Interrupt Copy
35
Auto Start
36
Job Preset
36
Copying Onto Envelopes from Trays 1 - 4
37
Copying from the Bypass Tray
39
Copying Onto Regular Size Paper
41
Copying Onto Custom Size Paper
42
Copying Onto OHP Transparencies or Thin Paper
45
Copying Onto Thick Paper
46
Copying Onto Envelopes from the Bypass Tray
47
Reducing or Enlarging Originals
51
Preset Reduce/Enlarge
51
Zoom
53
Auto Reduce / Enlarge
56
Duplex Copying
58
Originals and Copy Orientation
61
Combined Copying
62
One-Sided Combine
62
Two-Sided Combine
66
Finishing
70
Sort
70
Sample Copy
72
Stack (Type 3 Only)
74
Staple (Type 3 Only)
75
Storing Data in the Document Server
78
Managing Jobs
80
Job List Screen
80
Checking Jobs in the Job List
81
Changing the Order of Jobs
82
Holding Jobs
82
Deleting Jobs
83
Checking the Job History
84
Registering Frequently Used Functions
85
Registering Functions in a Program
85
Changing a Stored Program
86
Recalling a Stored Program
87
Deleting a Stored Program
87
Changing the Default Functions of the Copy's Initial Display
89
Ricoh Aficio SP 5210SR Operating Instructions Manual (152 pages)
Troubleshooting
Brand:
Ricoh
| Category:
All in One Printer
| Size: 9.8 MB
Table of Contents
Operating Instructions
1
Troubleshooting
1
Table of Contents
3
Manuals for this Machine
6
Notice
9
Important
9
How to Read this Manual
10
Symbols
10
Machine Types
10
Notes
11
Names of Major Items
11
List of Options
11
Model-Specific Information
12
1 When the Machine Does Not Operate as Wanted
13
Indicators
13
Panel Tone
14
Checking Machine Status and Settings
15
When an Indicator to the Right of a Function Key Is Lit
18
When You Have Problems Operating the Machine
20
Messages Displayed When Changing the On-Screen Language
25
Adjusting the Image Density
28
Adjusting Printing Position
30
2 Troubleshooting When Using the Copy/Document Server Function
33
Messages Displayed When Using the Copy/Document Server Function
33
When You Cannot Make Clear Copies
36
When You Cannot Make Copies as Wanted
40
When Memory Is Full
47
3 Troubleshooting When Using the Facsimile Function
49
Adjusting the Volume
49
Messages Displayed When Using the Facsimile Function
51
When You Cannot Send or Receive Fax Messages as Wanted
62
When Memory Is Full
68
If an Error Report Is Printed
69
Turning off the Main Power / in the Event of Power Failure
70
When an Error Occurs Using Internet Fax
71
Error Mail Notification
71
Error Report (E-Mail)
71
Server-Generated Error E-Mail
71
4 Troubleshooting When Using the Printer Function
73
Messages Displayed When Installing the Printer Driver
73
Windows XP Professional or Windows Server 2003/2003 R2
73
Windows XP Home Edition
74
Windows Vista
74
Windows 7
75
Windows Server 2008
76
Windows Server 2008 R2
77
If USB Connection Fails
78
Messages Displayed When Using the Printer Function
79
Status Messages
79
Messages Displayed on the Control Panel When Using the Printer Function
80
Other Messages
83
When You Cannot Print
93
When the Data in Indicator Does Not Light up or Flash
95
Network Connection
97
Other Printing Problems
98
Ricoh Aficio SP 5210SR Initial Manual (48 pages)
Ricoh Initial Guide for Scanner and Fax
Brand:
Ricoh
| Category:
All in One Printer
| Size: 8.86 MB
Table of Contents
Table of Contents
3
How to Read this Manual
5
Symbols
5
Model-Specific Information
6
1 Using the Scanner Function
7
Guide to the Scanner Function
7
Sending Scanned Files Via E-Mail
7
Sending Scanned Files to a Computer's Shared Folder
8
Sending Scanned Files to an FTP Server
8
Sending Scanned Files to a Removable Memory Device
9
Scanning from a Computer Using a Network TWAIN Scanner
9
Preparation for Sending Scanned Files Via a Network
11
Configuring the Ipv4 Settings
12
Configuring the SMTP Settings
14
Configuring the DNS Settings
14
Configuring the Necessary Settings in [Scanner Features]
15
Creating a Shared Folder on the Computer
15
Registering a Destination in the Address Book
18
Basic Operation for Scanning Using the Control Panel
24
Basic Operation for Sending Scanned Files Via E-Mail
24
Basic Operation for Sending Scanned Files to a Computer's Shared Folder or FTP Server
25
2 Using the Fax Function
27
Guide to the Fax Function
27
Using the Machine as a Fax Machine
27
Using the Machine with an External Telephone
27
Sending Faxes over the Internet (Internet Fax)
28
Sending Faxes from a Computer (LAN-Fax)
28
Preparation for Faxing
30
Confirming the Required Information
31
Connecting the Machine to a Telephone Line and Telephone
32
Specifying the Country Code
33
Configuring the Telephone Line Type
33
Registering Fax Information
34
Setting the Date and Time (Mainly Europe and Asia)
35
Setting the Date and Time (Mainly North America)
36
Selecting the Reception Mode
37
Registering a Fax Destination in the Address Book
38
Basic Operation for Sending a Fax
40
Basic Operation for Receiving a Fax
41
Manual Reception
41
Auto Reception
41
3 Appendix
43
Preventing Transmission to the Wrong Destination
43
Changing Defaults
44
Trademarks
45
Ricoh Aficio SP 5210SR Best Practices Manual (25 pages)
Microsoft Print Server Environments
Brand:
Ricoh
| Category:
Software
| Size: 0.4 MB
Table of Contents
Table of Contents
2
Overview
3
Description
3
Support
3
Setup
4
Installing the Ricoh Pcl6/Ps Universal Print Driver
5
Windows 7, Server 2008 R2
6
Windows 2000, XP, 2003, Vista, 2008
6
Windows 7, Server 2008 R2 Using Group Policy
7
Driver Pre-Configuration with Pde
7
Upgrading the Ricoh Pcl6/Ps Universal Print Driver to a Newer Version
10
Uninstalling the Ricoh Pcl6/Ps Universal Print Driver
12
Citrix Support
13
Frequently Asked Questions
15
Known Issues
16
Fixes
18
Non-Supported Models
22
Supported Models
23
Ricoh Aficio SP 5210SR Quick Manual (6 pages)
Brand:
Ricoh
| Category:
All in One Printer
| Size: 3.69 MB
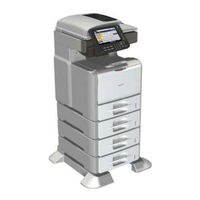
Table of Contents
Improve Productivity
3
Duplex Unit
5
System Specifications
6
Main Unit
6
Document Server
6
Advertisement
Related Products
Ricoh Aficio SP 5200S
Ricoh Aficio SP 5210SF
Ricoh Aficio SP 5210S
Ricoh Aficio SP 5200SR
Ricoh SP 5200SF
Ricoh SP 5200SR
Ricoh SP 5200S
Ricoh SP 5210SR
Ricoh SP 5210SF
Ricoh SP5 Series
Ricoh Categories
All in One Printer
Printer
Digital Camera
Copier
Printer Accessories
More Ricoh Manuals
Login
Sign In
OR
Sign in with Facebook
Sign in with Google
Upload manual
Upload from disk
Upload from URL