Sign In
Upload
Manuals
Brands
Quantum Manuals
Storage
Scalar i80
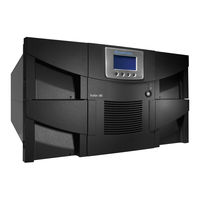
Quantum Scalar i80 Tape Library Manuals
Manuals and User Guides for Quantum Scalar i80 Tape Library. We have
12
Quantum Scalar i80 Tape Library manuals available for free PDF download: Maintenance Manual, User Manual, Quick Start Manual, Replacement Manual, Installation Manual
Quantum Scalar i80 Maintenance Manual (474 pages)
Brand:
Quantum
| Category:
Storage
| Size: 7.33 MB
Table of Contents
Table of Contents
3
Preface
19
Scalar I40 Supported Versions
25
Chapter 1 Common Service Procedures
27
Receiving Customer Library E-Mail
28
Connecting to the Service Port
29
Figure 1 Service Port
30
Logging in with Service Privileges
31
Service Menu Trees
32
Figure 2 Operator Panel Service Menu
33
Figure 3 Web Client Service Menu
34
Changing Operator Panel Home Screen View
35
Figure 4 Alternate Home Screen
36
Changing to Alternate Home Screen
37
Returning to Default Home Screen
37
Enabling Remote Service Login
37
Logging out
38
Resetting the Admin Password
39
Shutting Down, Restarting, Turning Off, and Removing Power
40
Shutting down the Library
41
Figure 5 Shutdown in Progress Message
42
Figure 6 Ready to Power down Message
42
Figure 7 Ready to Power down Message
42
Restarting the Library
43
Figure 8 Series of Restart Messages
44
Turning off the Library
45
Completely Removing Library Power
46
Emergency Power-Off Procedure
46
Taking the Library Offline
47
Taking a Partition Online or Offline
47
Taking a Tape Drive Online or Offline
49
Unlocking the I/E Station
51
Figure 9 I/E Station Unlocked Message
52
Figure 10 I/E Station Locked Message
53
Releasing Magazines
54
Releasing Magazines Via the User Interface
55
Figure 11 Magazine Unlocked Message
55
Figure 12 Magazine Locked Timer Message
55
Releasing Magazines Manually
56
Configuring the Service Port
57
Figure 13 Magazine Release Latch Access
57
Saving and Restoring the Library Configuration
58
Saving the Library Configuration
59
Restoring the Library Configuration
59
Removing the Y-Tray Restraint and Releasing the Y-Tray at Initial
61
Figure 14 Pushing down on Thumbscrews to Release Y-Tray
62
Libraries Only)
62
Install
63
Installing the Y-Tray Restraint
63
Figure 15 Removing the Y-Tray Restraint
63
Using Advanced Reporting Control Path Failover and Forced CPF
64
Prerequisites
64
Configuring CPF
65
Figure 16 Setup - Drive Settings Screen
65
Figure 17 Setup - Control Path Screen
66
Forcing CPF
67
Figure 18 Tools - Drive Operations Screen for CPF
67
Figure 19 Force CPF Screen
68
Chapter 2 Lodged Tape Removal Instructions
69
Notes for Service before Beginning
70
Pulling out the Tape Drive
70
Rotating the Picker Fingers
71
Figure 20 Picker Fingers Horizontal, Grasping Cartridge
72
Figure 21 Picker Fingers Vertical, Releasing Cartridge
73
Required Tools and Equipment
74
Taking ESD Precautions
74
Procedure
74
Recovering a Cartridge by Removing the Tape Drive
75
Figure 22 LTO Tape Cartridge Inspection
77
Recovering a Cartridge by Removing Top Cover of Library
78
Removing the Library from a Rack
79
Figure 23 "Plug" in Magazine Bezel to Allow Access to
80
Thumbscrews
80
Removing the Lid of the Desktop Kit
81
Removing the Top Cover of the Library
81
Figure 24 Top Cover Screw Locations
82
Dislodging Tape Using Drive Eject Button (Cartridge Completely Stuck in Drive)
83
Figure 25 HP LTO-4 Eject Button
84
Moving the Picker Carriage Along the Robot's Z-Axis
86
Figure 26 Picker Fingers Horizontal, Grasping Cartridge
86
Figure 27 Carriage Release Button in Normal Operating Position
87
(Flush with Top of Card)
87
Figure 28 Depressing the Carriage Release Button
88
Sliding the Picker Along the X-Axis
89
And Attached to Picker)
89
Figure 29 Acceptable Locations for Sliding the Picker Along the X-Axis
90
Swiveling the Picker (Theta Axis)
91
Figure 30 Normal Position of Theta Gear
92
Figure 31 Raising the Gear to Swivel the Picker
93
Manually Unloading the Tape Drive
94
Manually Unloading the HP LTO-4 or LTO-5 Half-Height Tape Drive
94
Manually Unloading the HP LTO-4 Full-Height Tape Drive
96
Figure 32 Manual Unload - HP LTO-4 and LTO-5
96
Figure 33 Manual Unload - HP LTO-4 Full-Height Tape Drive
98
Reinstalling the Top Cover and Final Steps
99
Chapter 3 Installing, Removing, and Replacing Crus
101
Taking ESD Precautions
102
Connecting Library Cables
103
Figure 34 Connection Locations
104
Installing the Rack Mount Kit (Rail Kit)
105
Supported Rack Types
105
Space Requirements
106
Tools Required
106
Rack Mount Kit Contents
106
Installing the Rack Mount Shelves
107
Figure 35 Rack Mount Shelf Depth Requirements
108
Figure 36 Assembling the Left and Right Rack Mount Shelves
109
Figure 37 Rail Adapter Types
110
Figure 38 Assembling the Left-Hand Rack Mount Shelf
111
Figure 39 Installing the Rack Mount Shelves
113
Figure 40 Tightening the Rack Mount Shelves
114
Installing the Library in a Rack
116
Figure 41 Location for Installing the Clip Nut or Cage Nut
116
Figure 42 Magazine Release Latch Access Holes
117
Removing the Library from a Rack
118
Figure 43 Securing the Scalar I40 and Scalar I80 in the Rack
118
Installing the Library in a Desktop Kit
119
Figure 44 Desktop Kit, Scalar I40 and Scalar I80
120
Kit Contents
121
Tools Required
121
Figure 45 Magazine Release Latch Access Holes
122
Procedure
122
Space Requirements
122
Figure 46 Location of Rubber Feet on Bottom of Library
124
Figure 47 Installing the Side Panels
126
Removing the Library from a Desktop Kit
127
Figure 48 Installing the Top Cover
127
Removing and Replacing the Front Bezel
128
Required Tools
128
Bezel Replacement Kit Contents
128
Bezel Replacement Procedure
128
Figure 49 Bezel Screw Locations on Bottom of Library
130
Figure 50 Bezel Screws
131
Figure 51 Scalar I80 Pull/Push Locations
132
Replacing the Chassis
133
Required Tools
133
Procedure
134
Figure 52 Components to Remove
136
Figure 53 Removing the Y-Tray Restraints
138
Figure 54 Restraining the Y-Tray
139
Figure 55 Reinstalled Components
143
Removing and Installing a Filler Plate
145
Removing and Installing a Tape Drive Filler Plate
145
Removing and Installing a Power Supply Filler Plate
145
Figure 56 Filler Plates Installed
146
Removing and Replacing a Magazine
147
Required Tools
147
Magazine Replacement Kit Contents
147
Creating a Backup Map of Cartridge Locations
147
Removing the Magazine from the Library
148
Installing the Magazine
149
Figure 57 Magazine Release Latch Access Holes
149
Figure 58 Proper Orientation (Right-Side Magazine)
150
Figure 59 Removing/Installing the Magazine Bezel
151
Removing and Installing a Power Supply
152
Figure 60 Single Power Supply System
152
Figure 61 Redundant Power Supply System
153
Replacing a Power Supply in a Single-Power-Supply System (Scalar I40 and Scalar I80)
153
Adding or Replacing a Redundant Power Supply on the Scalar I80
154
Removing and Replacing the System Control Board
155
Replacing the System Control Board
155
Installing Library Firmware
157
Figure 62 Ethernet Port Locations on the SCB
157
Restoring the Library Configuration
159
Manually Reconfiguring the Library
161
Removing and Replacing a Tape Drive
163
Preparing Partitions and Control Paths
163
Removing a Tape Drive from the Library
164
Installing a Tape Drive
165
Figure 63 Acceptable Installation Locations for Full-Height Tape
166
Drives
166
Figure 64 Installing a Tape Drive
167
Packaging the Library for Moving or Shipping
169
Packaging Kit Contents
169
Creating a Backup Map of Cartridge Locations
169
Procedure
170
Figure 65 Restraining the Y-Tray
172
Figure 66 Scalar I40 Packaging
173
Unpacking the Library in Its New Location
174
Figure 67 Scalar I80 Packaging
174
Chapter 4 Installing, Removing, and Replacing Frus
175
Replacing the Y-Tray with Robot
175
Tools Required
176
Y-Tray FRU Kit Contents
176
Taking ESD Precautions
176
Removing the Y-Tray
176
Figure 68 Top Cover Screw Locations
180
Figure 69 Y-Tray in Packaging
181
Figure 70 Bulkhead Inside Library, Y-Axis Flex Cable
183
Figure 71 Y-Axis Flex Cable Connection on Library Back Plane
184
Figure 72 Flex Cable on Robot
185
Figure 73 Y-Tray Lift Tabs
187
Installing the Y-Tray
188
Figure 74 Removing Thumbscrews and Plastic Strips from Bottom
188
Of Y-Tray
188
Figure 75 Y-Tray Adapter Board
190
Figure 76 Connecting the Flex Cable
190
Figure 77 Strain Relief on Y-Tray Adapter Board
191
Figure 78 Strain Relief on Y-Tray Adapter Board
192
Figure 79 Y-Climber Gear in Proper Position
193
Figure 80 Y-Climber Gear in Proper Position and Y-Axis Transmission
194
Gear
194
Figure 81 Y-Axis Flex Cable Connection on Library Back Plane
196
Figure 82 Y-Axis Flex Cable and Strain Relief Installed on Bulkhead
197
Figure 83 X-Axis Encoder on Robot - Front Inside of Library and Robot Directional Movement
199
Packing and Shipping the Removed Y-Tray
200
Moving the Picker into Proper Position for Shipping
200
Swiveling the Picker (Theta Axis)
201
Figure 84 Normal Position of Theta Gear
202
Figure 85 Raising the Gear to Swivel the Picker
203
Moving the Picker Along the Robot X-Axis
204
Figure 86 Acceptable Locations for Sliding the Picker Along the X-Axis
205
Chapter 5 Getting Information about the Library
207
Viewing Library Information
208
Viewing System Information
208
Viewing the Location of the Robot
209
Viewing the Library Configuration Report
212
Saving and E-Mailing the Library Configuration Record
214
Saving the Configuration Record
215
E-Mailing the Configuration Record
215
Viewing the Network Settings Report
216
Viewing the Logged in Users Report
217
Viewing the All Slots Report
218
Viewing, Saving, and E-Mailing Library Logs
219
Cleaning Log
219
Diagnostic Tickets Log
220
SKM Encryption Key Import Warning Log
220
Tape Drive Log
221
Viewing Library Information on the Operator Panel
223
Viewing Partition Information
223
Viewing Tape Drive Information
223
Viewing Network Settings
224
Viewing the Date, Time, and Time Zone
224
Viewing Licenses
224
Using Advanced Reporting
225
Advertisement
Quantum Scalar i80 User Manual (404 pages)
Brand:
Quantum
| Category:
Storage
| Size: 8.78 MB
Table of Contents
Table of Contents
3
Figures
15
Preface
21
Worldwide End-User Product Warranty
28
Chapter 1 Description
29
Overview
29
Library Components
30
Front Panel
30
Figure 1 Front Panel
30
Table 1 Front Panel Features
30
Robotic System and Barcode Scanner
31
Magazines
32
Figure 2 Scalar I40 Internal Layout and Magazine Slot Location
34
Figure 3 Scalar I80 Internal Layout and Magazine Slot Location
35
Power Supply
36
System Control Board
36
Tape Drives
37
Figure 4 Scalar I40 Back Panel Components
38
Figure 5 Scalar I80 Back Panel Components
39
Standard Features
40
User Interface
40
Partitions
40
Control Path Modification
40
Support for WORM
41
Licensable Features
41
Capacity on Demand (COD)
41
Advanced Reporting
42
Encryption Key Management
43
Chapter 2 Unpacking the Library
45
Figure 6 Packaging
46
Figure 7 Removing the Robot Restraint
48
Operator Panel
49
Operator Panel Layout and Functions
50
Figure 8 Operator Panel User Interface - Home Screen
50
Figure 9 Operator Panel User Interface - Alternate Home Screen
51
Scalar I80
51
Table 2 Operator Panel Functions
52
Navigating and Editing on the Operator Panel
55
Understanding the User Interface
49
Web Client
56
Tips
56
Figure 10 Using the Buttons to Set the Date and Time
56
Sorting Information in Tables
57
Web Client Layout and Functions
57
Figure 11 Web Client User Interface - Home Page
58
Web Client Home Page
59
System Summary
59
Table 3 Web Client Screen Elements
59
Subsystem Status
60
Menu Trees
61
Figure 12 Operator Panel Menus
62
Figure 13 Web Client Menus
63
Chapter 3 Understanding the User Interface
64
Chapter 4 Configuring the Library
65
Using the Setup Wizard
67
Configuring Network Settings
68
Library Host Name
69
Dhcp
70
IP Addresses
70
Default Gateway, Subnet Mask, Network Prefix, and DNS
71
Addresses
71
Default Configuration
68
Configuring SNMP Settings
72
Registering External Management Applications
72
Enabling SNMP Versions
74
Enabling SNMP Authentication Traps
74
Modifying the SNMP Community String
75
Downloading the SNMP MIB
75
Setting the Date, Time, and Time Zone
76
Setting the Date and Time Manually
77
Setting the Date and Time Using the Network Time Protocol
77
Setting the Time Zone
78
Setting Daylight Saving Time
79
Working with Partitions
79
Automatically Creating Partitions
81
Manually Creating Partitions
82
Modifying Partitions
84
Deleting Partitions
85
Viewing the Current Partitions
86
Changing Access to Partitions
87
Taking a Partition Online or Offline
87
Configuring Cleaning Slots
89
Configuring I/E Station Slots
91
Table 4 Scalar I80 I/E Slot Configuration
92
Configuring Tape Drive Parameters
93
Table 5 Fibre Channel Tape Drive Configurable Settings
94
Configuring Control Paths
95
Adding or Upgrading Licensable Features
97
About License Keys
97
Viewing Your License Keys
98
Viewing Installed Licenses
98
Obtaining a License Key
98
Applying a License Key
99
Working with E-Mail Notifications
100
Creating E-Mail Notifications
101
Modifying E-Mail Notifications
102
Deleting E-Mail Notifications
103
Configuring the Library E-Mail Account
104
Configuring the Service Port
106
Setting Customer Contact Information
106
Working with Local User Accounts and Passwords
108
Using the Web Client Default Administrator Account
108
Privilege Levels
109
Creating Local User Accounts on the Web Client
110
Modifying Local User Accounts on the Web Client
111
Deleting Local User Accounts on the Web Client
112
Enabling and Creating Passwords on the Operator Panel
112
Disabling Passwords on the Operator Panel
115
Modifying Passwords on the Operator Panel
115
Resetting Passwords on the Operator Panel
116
Working with LDAP User Accounts (Remote Authentication)
116
Local Authentication Vs. Remote Authentication
116
LDAP Server Guidelines
117
Configuring Secure LDAP on the Library
118
Configuring LDAP on the Library
118
Figure 14 LDAP Setup Example
121
Testing LDAP Settings
122
Configuring Kerberos
122
Generating the Kerberos Service Keytab File
124
Setting the Session Timeout
125
Configuring System Settings
126
Unload Assist
126
Logical Serial Number Addressing
127
Manual Cartridge Assignment
128
Snmp
129
Smi-S
129
Power Save
130
Configuring Security Settings
131
Network Interface
131
SSH Services
132
Internet Control Message Protocol (ICMP)
132
Remote Access Via Web Client
133
Remote Service Login
133
Snmp V1/V2
133
Ssl
134
Saving and Restoring the Library Configuration
135
Saving the Library Configuration
135
Restoring the Library Configuration
136
Changing Operator Panel Home Screen View
137
Changing to Alternate Home Screen
137
Returning to Default Home Screen
138
Registering the Library
137
Chapter 5 Advanced Reporting
139
Advanced Reporting Features
140
Required Firmware
141
Working with Control Path Failover (CPF)
141
Prerequisites
141
Configuring CPF
142
Figure 15 Setup - Drive Settings Screen
142
Figure 16 Setup - Control Path Screen
143
Forcing CPF
144
Figure 17 Tools - Drive Operations Screen for CPF
144
Figure 18 Force CPF Screen
145
Using Advanced Reporting Reports
146
Configuring the Drive Resource Utilization Report
147
Configuring the Media Integrity Analysis Report
149
Using Advanced Reporting Templates
151
Figure 19 Template and Report Data Functions
151
Loading and Reloading Advanced Reporting Data
152
Deleting Advanced Reporting Data
153
Saving and E-Mailing Advanced Reporting Data Files
153
Figure 20 Report Data Buttons
153
Figure 21 Saving and E-Mailing the Report Data
154
Configuring Media Security
155
Viewing, Saving, and E-Mailing Media Security Log
156
Working with the Media Security Log
154
Viewing the Media Usage Log
157
Automatically E-Mailing Advanced Reporting Reports and Logs
158
Creating a Recipient
159
Modifying a Recipient
162
Deleting a Recipient
162
Chapter 6 Performing Library Operations
163
Logging in
164
Simultaneous Logins
164
Logging in for the First Time
164
Logging in Using the Operator Panel
165
Logging in Via the Web Client
165
Logging in When LDAP or Kerberos Is Enabled
166
Logging out
166
Shutting Down, Restarting, Turning Off, and Removing Power
167
Shutting down the Library
168
Figure 22 Shutdown in Progress Message
168
Figure 23 Ready to Power down Message
169
Figure 24 Ready to Power down Message
169
Restarting the Library
170
Figure 25 Series of Restart Messages
170
Turning off the Library
171
Completely Removing Library Power
172
Emergency Power-Off Procedure
172
Taking the Library Offline
173
Unlocking and Opening the I/E Station
173
Figure 26 I/E Station Unlocked Message
174
Figure 27 I/E Station Locked Message
175
Releasing Magazines
176
Releasing Magazines Via the User Interface
177
Figure 28 Magazine Unlocked Message
177
Figure 29 Magazine Locked Timer Message
177
Releasing Magazines Manually
178
Figure 30 Magazine Release Latch Access
179
Importing Tape Cartridges
180
Bulk Loading Tape Cartridges
183
Moving Tape Cartridges
184
Exporting Tape Cartridges
186
Loading Tape Drives
188
Unloading Tape Drives
189
Performing Media Operations
179
Cleaning Tape Drives
191
Valid Cleaning Cartridges
192
About Autoclean
192
Enabling Autoclean
193
Importing Cleaning Cartridges
193
Exporting Cleaning Cartridges
195
Manually Cleaning Tape Drives
197
Taking a Tape Drive Online or Offline
200
Chapter 7 Encryption Key Management
203
About the EKM License
204
Configuring Scalar Key Manager (SKM) on the Library
204
Step 1: Upgrade Firmware
204
Step 2: Install the EKM License Key on the Library
204
Step 3: Install SKM on a Server or Servers
205
Step 4: Configure Encryption Settings and Key Server Addresses
205
Figure 31 Configuring Encryption Settings and Key Server Addresses
206
Step 5: Install TLS Communication Certificates on the Library
207
Step 6: Run EKM Path Diagnostics
207
Step 7: Configure SKM Partitions and Generate Data Encryption
207
Keys
207
Figure 32 Configuring Partition Encryption
208
Table 6 Encryption Methods
209
Step 8: Save the Library Configuration
210
EKM Path Diagnostics
210
Description
210
Failure Scenarios
211
Running Manual EKM Path Diagnostics
211
Enabling Automatic EKM Path Diagnostics
212
Figure 33 Enabling Automatic EKM Path Diagnostics
212
Scalar Key Manager Functions Available on the Library
213
Installing TLS Certificates on the Library
214
Figure 34 Checking and Installing TLS Certificates
215
Generating Data Encryption Keys
219
Figure 35 Accessing the Encryption Partition Configuration Screen
221
Figure 36 Changing Encryption Method to Allow Application Managed
222
Sharing Encrypted Tape Cartridges
223
Figure 37 Changing Encryption Method Back to Enable Library
223
Exporting Encryption Certificates
225
Figure 38 Exporting Encryption Certificates
225
Importing Encryption Certificates
226
Figure 39 Importing Encryption Certificates
226
Exporting Data Encryption Keys
227
Figure 40 Exporting Encryption Keys
227
Importing Data Encryption Keys
229
Figure 41 Importing Data Encryption Keys
229
Accessing the SKM Server Logs
230
Using the SKM Encryption Key Import Warning Log
230
Viewing Tape Drive Encryption Settings
213
Chapter 8 Getting Information about the Library
233
Viewing Library Information
234
Viewing System Information
234
Viewing the Location of the Robot
235
Viewing the Library Configuration Report
238
Saving and E-Mailing the Library Configuration Record
240
Saving the Configuration Record
241
E-Mailing the Configuration Record
241
Viewing the Network Settings Report
242
Viewing the All Slots Report
243
Viewing the Logged in Users Report
243
Viewing, Saving, and E-Mailing Library Logs
245
Cleaning Log
245
Diagnostic Tickets Log
246
Media Security Log (with Advanced Reporting License)
247
Media Usage Log (with Advanced Reporting License)
247
SKM Encryption Key Import Warning Log (with EKM License)
247
Tape Drive Log
248
Viewing Library Information on the Operator Panel
249
Viewing Partition Information
249
Viewing Tape Drive Information
250
Viewing Network Settings
250
Viewing the Date, Time, and Time Zone
251
Viewing Licenses
251
Using Advanced Reporting Features
251
Viewing the Open Source License Agreement
251
Viewing the Copyright Statement
252
Chapter 9 Installing, Removing, and Replacing Components
253
Taking ESD Precautions
254
Connecting Library Cables
255
Figure 42 Connection Locations
256
Installing the Rack Mount Kit (Rail Kit)
257
Supported Rack Types
257
Space Requirements
258
Tools Required
258
Rack Mount Kit Contents
258
Installing the Rack Mount Shelves
260
Figure 43 Rack Mount Shelf Depth Requirements
261
Figure 44 Assembling the Left and Right Rack Mount Shelves
262
Figure 45 Rail Adapter Types
263
Figure 46 Assembling the Left-Hand Rack Mount Shelf
264
Figure 47 Installing the Rack Mount Shelves
266
Figure 48 Tightening the Rack Mount Shelves
267
Figure 49 Location for Installing the Clip Nut or Cage Nut
269
Installing the Library in a Rack
269
Figure 50 Magazine Release Latch Access Holes
270
Figure 51 Securing the Scalar I40 and Scalar I80 in the Rack
271
Removing the Library from a Rack
271
Installing the Library in a Desktop Kit
272
Figure 52 Desktop Kit, Scalar I40 and Scalar I80
273
Kit Contents
274
Tools Required
274
Space Requirements
275
Procedure
275
Figure 53 Magazine Release Latch Access Holes
276
Figure 54 Location of Rubber Feet on Bottom of Library
277
Figure 55 Installing Side Panels
279
Figure 56 Installing Top Cover
280
Removing the Library from a Desktop Kit
280
Removing and Replacing the Front Bezel
281
Required Tools
281
Bezel Replacement Kit Contents
281
Bezel Replacement Procedure
281
Figure 57 Bezel Screw Locations on Bottom of Library
283
Figure 58 Bezel Screws
284
Figure 59 Scalar I80 Pull/Push Locations
285
Replacing the Chassis
286
Required Tools
286
Procedure
287
Figure 60 Components to Remove
289
Figure 61 Removing the Y-Tray Restraints
290
Figure 62 Restraining the Y-Tray
292
Figure 63 Reinstalled Components
295
Removing and Installing a Filler Plate
297
Removing and Installing a Tape Drive Filler Plate
297
Removing and Installing a Power Supply Filler Plate
297
Figure 64 Filler Plates Installed
298
Removing and Replacing a Magazine
299
Required Tools
299
Magazine Replacement Kit Contents
299
Creating a Backup Map of Cartridge Locations
299
Removing the Magazine from the Library
300
Installing the Magazine
301
Figure 65 Magazine Release Latch Access Holes
301
Figure 66 Proper Orientation (Right-Side Magazine)
302
Figure 67 Removing/Installing the Magazine Bezel
303
Figure 68 Single Power Supply System
304
Replacing a Power Supply in a Single-Power-Supply System (Scalar I40 and Scalar I80)
305
Figure 69 Redundant Power Supply System
305
Adding or Replacing a Redundant Power Supply on the Scalar I80
306
Removing and Installing a Power Supply
304
Removing and Replacing the System Control Board
307
Replacing the System Control Board
307
Installing Library Firmware
309
Figure 70 Ethernet Port Locations on the SCB
309
Restoring the Library Configuration
311
Manually Reconfiguring the Library
312
Removing and Replacing a Tape Drive
314
Preparing Partitions and Control Paths
315
Removing a Tape Drive from the Library
316
Installing a Tape Drive
316
Figure 71 Acceptable Installation Locations for Full-Height Tape Drives
317
Installation Procedure
317
Figure 72 Installing a Tape Drive
318
Packaging the Library for Moving or Shipping
320
Packaging Kit Contents
320
Creating a Backup Map of Cartridge Locations
320
Procedure
321
Figure 73 Restraining the Y-Tray
323
Figure 74 Scalar I40 Packaging
324
Figure 75 Scalar I80 Packaging
325
Replacing the Y-Tray with Robot
326
Updating Firmware
327
Chapter 10 Updating Firmware
327
Updating Library Firmware
327
Figure 76 Tools - Update Library Firmware Screen
329
Updating and Autoleveling Tape Drive Firmware
332
About Tape Drive Firmware Autoleveling
333
Uploading Tape Drive Firmware Used in Autoleveling
334
Deleting Tape Drive Firmware Used in Autoleveling
336
Initiating Tape Drive Firmware Autoleveling
338
Troubleshooting
339
Chapter 11 Troubleshooting
339
About Diagnostic Tickets
340
Viewing, Closing, and Resolving Diagnostic Tickets
341
Closing Diagnostic Tickets Automatically
344
Capturing Snapshots of Library Information
345
Not Ready" Messages on the Operator Panel
346
Not Ready" Messages on the Web Client
346
Troubleshooting Library "Not Ready" Messages
346
Interpreting Leds
348
Front Panel Leds
349
Figure 77 Front Panel Leds
349
System Control Board Leds
350
Figure 78 System Control Board Leds
350
Tape Drive/Sled Leds
351
Power Supply LED
352
Figure 79 Fibre Channel Tape Drive Leds
352
Retrieving Tape Drive Logs
348
Figure 80 Power Supply LED
353
Running the Installation and Verification Test (IVT)
353
Running the IVT Diagnostic Subtests Individually - Robotics, Tape Drive, and Magazine Tests
355
Running the Random Move Test
357
Performing Library Diagnostics
358
Resetting a Tape Drive
359
Robotics Get/Put Test
360
Resetting Factory Defaults
361
Chapter 12 Working with Cartridges and Barcodes
363
Handling Tape Cartridges Properly
364
Barcode Label Requirements
365
Write-Protecting Tape Cartridges
365
Supported Barcode Formats
366
Installing Barcode Labels
367
Figure 81 Barcode Label Orientation
368
Appendix A Specifications
369
Physical Specifications
369
Table 7 Base Library
369
Capacity
370
Table 8 Library Installed in a Desktop Kit
370
Air Clearance Requirements
371
Environmental Specifications
371
Library Power Specifications
372
Power Consumption and Heat Output
373
Communication Interfaces
374
Supported Tape Drives
374
Supported Media
375
Supported Internet Browsers
375
Supported Operating Systems
376
Table 9 Tape Alert Flag Severity Codes
377
Table 10 Tape Drive Tape Alert Flag Descriptions
378
Disposal of Electrical and Electronic Equipment
387
Quantum Scalar i80 User Manual (341 pages)
Brand:
Quantum
| Category:
Storage
| Size: 8.01 MB
Table of Contents
Table of Contents
3
Document Organization
19
Preface
19
Notational Conventions
21
Getting more Information or Help
25
Scalar I40 Supported Versions
26
Worldwide End-User Product Warranty
26
Chapter 1 Description
27
Description
27
Overview
27
LTO-7 Drive Restrictions
27
Library Components
28
Front Panel
28
Figure 1 Front Panel
28
Robotic System and Barcode Scanner
29
Magazines
30
Figure 2 Scalar I40 Internal Layout and Magazine Slot Location
31
Figure 3 Scalar I80 Internal Layout and Magazine Slot Location
32
Power Supply
33
System Control Board
34
Tape Drives
34
Figure 4 Scalar I40 Back Panel Components
36
Standard Features
37
User Interface
37
Figure 5 Scalar I80 Back Panel Components
37
Partitions
38
Control Path Modification
38
Support for WORM
38
Licensable Features
39
Capacity on Demand (COD)
39
Advanced Reporting
39
Encryption Key Management
40
Unpacking the Library
41
Figure 6 Library Packaging (Overpack Box with Drives Not Shown)
42
Chapter 2 Unpacking the Library
43
Figure 7 Removing the Robot Restraint
44
Figure 8 Operator Panel User Interface - Home Screen
46
Chapter 3 Understanding the User Interface
47
Operator Panel Layout and Functions
48
Navigating and Editing on the Operator Panel
51
Tips
52
Figure 10 Using the Buttons to Set the Date and Time
52
Sorting Information in Tables
53
Figure 9 Operator Panel User Interface - Alternate Home Screen
47
Operator Panel
47
Understanding the User Interface
47
Web Client
54
Figure 11 Web Client User Interface - Home Page
54
Web Client Home
55
Web Client Layout and Functions
55
Subsystem Status
56
System Summary
56
Web Client Home Page
57
Figure 12 Operator Panel Menus
58
Figure 13 Web Client Menus
59
Menu Trees
59
Chapter 4 Configuring the Library
61
Using the Setup Wizard
63
Configuring Network Settings
64
Library Host Name
65
Dhcp
66
IP Addresses
66
Default Gateway, Subnet Mask, Network Prefix, and DNS
67
Addresses
67
Default Configuration
64
Configuring SNMP Settings
68
Registering External Management Applications
68
Enabling SNMP Versions
70
Enabling SNMP Authentication Traps
70
Modifying the SNMP Community String
71
Downloading the SNMP MIB
71
Setting the Date, Time, and Time Zone
72
Setting the Date and Time Manually
73
Setting the Date and Time Using the Network Time Protocol
73
Screen
73
Setting the Time Zone
74
Setting Daylight Saving Time
75
Working with Partitions
75
Automatically Creating Partitions
77
Manually Creating Partitions
78
Modifying Partitions
81
Deleting Partitions
81
Viewing the Current Partitions
83
Changing Access to Partitions
83
Taking a Partition Online or Offline
83
Configuring Cleaning Slots
85
Configuring I/E Station Slots
88
Configuring Tape Drive Parameters
90
Configuring Control Paths
92
Adding or Upgrading Licensable Features
94
About License Keys
94
Viewing Your License Keys
95
Viewing Installed Licenses
95
Obtaining a License Key
95
Applying a License Key
96
Working with E-Mail Notifications
97
Creating E-Mail Notifications
98
Modifying E-Mail Notifications
99
Deleting E-Mail Notifications
100
Configuring the Library E-Mail Account
101
Setting Customer Contact Information
103
Configuring the Service Port
104
Working with Local User Accounts and Passwords
105
Using the Web Client Default Administrator Account
105
Privilege Levels
106
Creating Local User Accounts on the Web Client
107
Modifying Local User Accounts on the Web Client
108
Deleting Local User Accounts on the Web Client
109
Enabling and Creating Passwords on the Operator Panel
109
Disabling Passwords on the Operator Panel
112
Modifying Passwords on the Operator Panel
112
Resetting Passwords on the Operator Panel
113
Working with LDAP User Accounts (Remote Authentication)
113
Local Authentication Vs. Remote Authentication
113
LDAP Server Guidelines
114
Configuring Secure LDAP on the Library
115
Configuring LDAP on the Library
115
Figure 14 LDAP Setup Example
118
Testing LDAP Settings
119
Configuring Kerberos
119
Generating the Kerberos Service Keytab File
121
Setting the Session Timeout
122
Configuring System Settings
123
Unload Assist
123
Logical Serial Number Addressing
124
Manual Cartridge Assignment
125
Snmp
126
Smi-S
126
Power Save
127
Configuring Security Settings
128
Network Interface
128
SSH Services
129
Internet Control Message Protocol (ICMP)
129
Remote Access Via Web Client
130
Remote Service Login
130
Snmp V1/V2
130
Ssl
131
Saving and Restoring the Library Configuration
132
Saving the Library Configuration
132
Restoring the Library Configuration
133
Changing Operator Panel Home Screen View
134
Changing to Alternate Home Screen
134
Returning to Default Home Screen
135
Registering the Library
134
Advanced Reporting
137
Chapter 5 Advanced Reporting
137
Advanced Reporting Features
138
Required Firmware
139
Working with Control Path Failover (CPF)
139
Prerequisites
139
Configuring CPF
140
Figure 15 Setup - Drive Settings Screen
140
Forcing CPF
141
Figure 16 Setup - Control Path Screen
141
Figure 17 Tools - Drive Operations Screen for CPF
142
Using Advanced Reporting Reports
143
Figure 18 Force CPF Screen
143
Configuring the Drive Resource Utilization Report
144
Configuring the Media Integrity Analysis Report
146
Figure 19 Template and Report Data Functions
149
Using Advanced Reporting Templates
149
Loading and Reloading Advanced Reporting Data
150
Deleting Advanced Reporting Data
151
Figure 20 Report Data Buttons
151
Saving and E-Mailing Advanced Reporting Data Files
151
Working with the Media Security Log
152
Figure 21 Saving and E-Mailing the Report Data
152
Configuring Media Security
153
Viewing, Saving, and E-Mailing Media Security Log
154
Viewing the Media Usage Log
155
Automatically E-Mailing Advanced Reporting Reports and Logs
156
Creating a Recipient
157
Modifying a Recipient
160
Deleting a Recipient
160
Advertisement
Quantum Scalar i80 User Manual (328 pages)
Brand:
Quantum
| Category:
Storage
| Size: 6.03 MB
Table of Contents
Table of Contents
3
Chapter 1 Description
27
Overview
27
Library Components
28
Front Panel
28
Figure 1 Front Panel
28
Table 1 Front Panel Features
28
Robotic System and Barcode Scanner
29
Magazines
30
Figure 2 Scalar I40 Internal Layout and Magazine Slot
31
Location Coordinates
31
Figure 3 Scalar I80 Internal Layout and Magazine Slot
32
Location Coordinates
32
Power Supply
33
System Control Board
33
Tape Drives
34
Figure 4 Scalar I80 Back Panel Components
35
Figure 5 Scalar I80 Back Panel Components
35
Standard Features
36
User Interface
36
Partitions
36
Control Path Modification
36
Support for WORM
37
Licensable Features
37
Capacity on Demand (COD)
37
Advanced Reporting
37
Chapter 2 Initial Installation and Setup
39
Required Tools and Equipment
39
Before You Begin
40
Unpacking the Library
40
Figure 6 Packaging
41
Figure 7 Pushing down on Thumbscrews to Release Robot
42
Figure 8 Removing the Robot Restraint
43
Accessory Kit Items
44
Installing the Library in a Rack or Desktop Kit
44
Installing Tape Drives
44
Connecting the Cables
45
Turning the Library on and Configuring Network Settings
45
Figure 9 Turning on the Library
46
Figure 10 Setup Wizard - Initial Screen
46
Figure 11 Setup Wizard - Date/Time Screen
47
Figure 12 Changing the Date and Time
48
Figure 13 Setup Wizard - Setup Network Screen
48
Figure 14 Setup Wizard - Licenses Screen
49
Figure 15 Setup Wizard - Current Configuration Screen
50
Accessing the Library Via the Web Client
51
Figure 16 Setup Wizard Complete
51
Configuring Partitions
52
Importing Tape Cartridges
52
Saving the Library Configuration
52
Configuring the Host Software
52
Chapter 3 Understanding the User Interface
53
Operator Panel
53
Operator Panel Layout and Functions
54
Figure 17 Operator Panel User Interface - Home Page
54
Table 2 Operator Panel Functions
54
Navigating and Editing on the Operator Panel
56
Web Client
57
Tips
57
Figure 18 Changing the Date and Time
57
Sorting Information in Tables
58
Web Client Layout and Functions
58
Figure 19 Web Client User Interface - Home Page
59
Web Client Home Page
60
System Summary
60
Table 3 Web Client Screen Elements
60
Subsystem Status
61
Menu Trees
62
Figure 20 Operator Panel Menus
63
Figure 21 Web Client Menus
64
Chapter 4 Configuring the Library
65
Using the Setup Wizard
67
Default Configuration
68
Configuring Network Settings
68
Library Host Name
69
Dhcp
69
IP Addresses
70
Default Gateway, Subnet Mask, Network Prefix, and DNS Addresses
71
Configuring SNMP Settings
71
Registering External Management Applications
72
Enabling SNMP Versions
73
Enabling SNMP Authentication Traps
73
Modifying the SNMP Community String
74
Downloading the SNMP MIB
74
Setting the Date, Time, and Time Zone
75
Setting the Date and Time Manually
76
Setting the Date and Time Using the Network Time Protocol
76
Setting the Time Zone
77
Setting Daylight Saving Time
77
Working with Partitions
78
Automatically Creating Partitions
79
Manually Creating Partitions
81
Modifying Partitions
83
Deleting Partitions
83
Viewing the Current Partitions
84
Changing Access to Partitions
85
Taking a Partition Online or Offline
85
Configuring Cleaning Slots
87
Configuring I/E Station Slots
89
Configuring Tape Drive Parameters
91
Table 4 Fibre Channel Tape Drive Configurable Settings
91
Configuring Control Paths
93
Adding or Upgrading Licensable Features
94
Viewing Your License Keys
94
Viewing Installed Licenses
94
About License Keys
95
Obtaining a License Key
95
Applying a License Key
96
Working with E-Mail Notifications
97
Creating E-Mail Notifications
98
Modifying E-Mail Notifications
99
Deleting E-Mail Notifications
100
Configuring the Library E-Mail Account
100
Setting Customer Contact Information
103
Configuring the Service Port
103
Working with Local User Accounts
104
Using the Web Client Default Administrative User Account
105
Privilege Levels
106
Creating Local User Accounts on the Web Client
107
Modifying Local User Accounts on the Web Client
108
Deleting Local User Accounts on the Web Client
108
Enabling and Creating Passwords on the Operator Panel
109
Disabling Passwords on the Operator Panel
111
Modifying Passwords on the Operator Panel
111
Resetting Passwords on the Operator Panel
112
Working with LDAP User Accounts (Remote Authentication)
112
Local Authentication Vs. Remote Authentication
112
Using Microsoft Active Directory
113
LDAP Server Guidelines
113
Enabling and Configuring LDAP on the Library
114
Configuring Kerberos
116
Generating the Kerberos Service Keytab File
117
Setting the Session Timeout
119
Configuring System Settings
119
Unload Assist
120
Logical Serial Number Addressing
120
Manual Cartridge Assignment
121
Snmp
122
Smi-S
122
Configuring Security Settings
123
Network Interface
123
SSH Services
123
Internet Control Message Protocol (ICMP)
124
Remote Access Via Web Client
124
Remote Service Login
125
Ssl
125
Saving and Restoring the Library Configuration
126
Saving the Library Configuration
127
Restoring the Library Configuration
127
Registering the Library
128
Chapter 5 Performing Library Operations
129
Logging in
130
Simultaneous Logins
130
Logging in for the First Time
130
Logging in Using the Operator Panel
130
Logging in Via the Web Client
131
Logging in When LDAP or Kerberos Is Enabled
131
Logging out
132
Shutting Down, Restarting, Turning Off, and Removing Power
133
Shutting down the Library
133
Figure 22 Shutdown in Progress Message
134
Figure 23 Ready to Power down Message
134
Restarting the Library
135
Figure 24 Ready to Power down Message
135
Figure 25 Series of Restart Messages
136
Turning off the Library
137
Completely Removing Library Power
137
Emergency Power-Off Procedure
138
Taking the Library Offline
139
Unlocking the I/E Station
139
Releasing Magazines
140
Figure 26 Magazine Unlocked Message
140
Figure 27 Magazine Unlocked Message
141
Releasing Magazines Via the User Interface
141
Releasing Magazines Manually
142
Performing Media Operations
143
Importing Tape Cartridges
143
Figure 28 Magazine Release Latch Access
143
Bulk Loading Tape Cartridges
147
Moving Tape Cartridge
147
Exporting Tape Cartridges
149
Loading Tape Drives
151
Unloading Tape Drives
153
Cleaning Tape Drives
154
Valid Cleaning Cartridges
156
About Autoclean
156
Enabling Autoclean
156
Importing Cleaning Cartridges
157
Exporting Cleaning Cartridges
159
Manually Cleaning Tape Drives
160
Taking a Tape Drive Online or Offline
163
Quantum Scalar i80 Quick Start Manual (44 pages)
Scalar Key Manager
Brand:
Quantum
| Category:
Storage
| Size: 1.73 MB
Table of Contents
Table of Contents
1
Quick Start Guide
1
Installing and Configuring the SKM Appliance Servers
2
Items Required for Setup
2
Installing the SKM Appliance Servers
3
Configuring the SKM Appliance Servers
5
Installing and Configuring the SKM Vmware Servers
9
Equipment and Software Needed for Vmware
9
Deploying the .Ova Image on Vmware
11
Configuring the SKM VM Servers on Vmware
11
Installing and Configuring the SKM KVM Servers
17
Equipment and Software Needed for KVM
17
Deploying the .Raw Image on KVM
18
Configuring the SKM VM Servers on KVM
21
Installing TLS Certificates on the SKM Server for Pre-SKM 2.4 (240Q)
25
Installation Process
25
Requirements for Installing User-Provided TLS Certificates
27
Installing TLS Certificates on the SKM
28
Server for SKM 2.4 (240Q) or Later
28
Begin the Installation
28
Executing the Script Using the -D Option
28
Executing the Script Without Using the -D Option
31
Generating Quantum Bundles for Certificates
36
Configuring Your Library for SKM
38
Configuring the Scalar I40/I80 and Scalar I500 Tape Libraries
38
Configuring the Scalar I2000/I6000 Tape Library
40
Configuring the Scalar I3/I6 Tape Library
41
Configuring Multiple Libraries
42
Backing up the Servers
43
Quantum Scalar i80 Quick Start Manual (18 pages)
Brand:
Quantum
| Category:
Storage
| Size: 2.67 MB
Table of Contents
Table of Contents
1
Required Tools and Equipment
2
Environmental Requirements
2
Taking ESD Precautions
2
Unpacking the Library
3
Accessory Kit Contents
5
Installing the Library in a Rack or Desktop Kit
5
Installing the Tape Drives
5
Installation Instructions
6
Connecting the Cables
7
Turning the Library on and Configuring Network Settings
8
Accessing the Library Via the Web Client
13
Configuring Partitions
14
Running the Installation and Verification Test
14
Importing Tape Cartridges
15
Saving the Library Configuration
17
Configuring the Host Software
17
Registering the Library
17
Quantum Scalar i80 Replacement Manual (8 pages)
System Control Board Replacement
Brand:
Quantum
| Category:
Storage
| Size: 0.3 MB
Table of Contents
Taking ESD Precautions
1
Removing the System Control Board
2
Replacing the System Control Board
4
Installing Library Firmware
4
Configuring the Library
5
Restoring the Library Configuration
5
Manually Reconfiguring the Library
5
Quantum Scalar i80 Replacement Manual (8 pages)
Tape Drive Replacement
Brand:
Quantum
| Category:
Storage
| Size: 0.22 MB
Table of Contents
Taking ESD Precautions
2
Preparing Partitions and Control Paths
2
Removing a Tape Drive from the Library
4
Installing a Tape Drive
5
Replacing a Tape Drive with a Filler Plate
7
Quantum Scalar i80 Installation Manual (6 pages)
Tape Drive
Brand:
Quantum
| Category:
Storage
| Size: 0.3 MB
Table of Contents
Tape Drive Installation
1
Taking Esd Precautions
1
Installing a Tape Drive
2
Tape Drive Slot Location Considerations
2
Replacing a Tape Drive with a Filler Plate
4
Quantum Scalar i80 Replacement Manual (6 pages)
Bezel Replacement
Brand:
Quantum
| Category:
Storage
| Size: 0.27 MB
Table of Contents
Bezel Replacement Kit Contents
1
Creating a Backup Map of Cartridge Locations
2
Removing the Bezel
2
Replacing the Bezel
6
Quantum Scalar i80 Replacement Manual (4 pages)
Power Supply Replacement
Brand:
Quantum
| Category:
Storage
| Size: 0.4 MB
Quantum Scalar i80 Replacement Manual (2 pages)
Power Supply Filler Plate Replacement
Brand:
Quantum
| Category:
Storage
| Size: 0.1 MB
Advertisement
Related Products
Quantum Scalar i2000
Quantum Quantum Atlas 10K II 9.2/18.4/36.7/73.4 GB
Quantum Scalar i40
Quantum Scalar i6000
Quantum Scalar i500 i4
Quantum Scalar i3
Quantum Scalar i6
Quantum Scalar 100
Quantum Scalar 1000
Quantum Scalar 10K
Quantum Categories
Storage
Wheelchair
Network Hardware
Server
Wireless Access Point
More Quantum Manuals
Login
Sign In
OR
Sign in with Facebook
Sign in with Google
Upload manual
Upload from disk
Upload from URL