Sign In
Upload
Manuals
Brands
PerkinElmer Manuals
Laboratory Equipment
AVIO 200
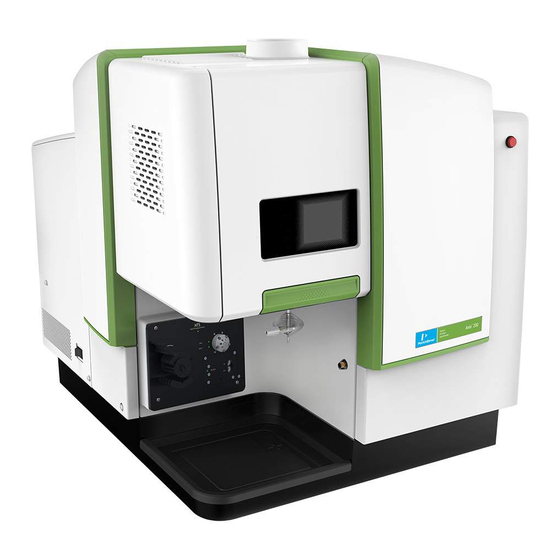
PerkinElmer AVIO 200 ICP-OES Spectrometer Manuals
Manuals and User Guides for PerkinElmer AVIO 200 ICP-OES Spectrometer. We have
1
PerkinElmer AVIO 200 ICP-OES Spectrometer manual available for free PDF download: Hardware Manual
PerkinElmer AVIO 200 Hardware Manual (309 pages)
Spectrometer
Brand:
PerkinElmer
| Category:
Laboratory Equipment
| Size: 8.79 MB
Table of Contents
Table of Contents
5
Customer Service
13
Safety and Regulatory Information
14
Safety Information in the Manual
14
Regulatory Information
15
Safety Compliance
15
Electrical Protection
15
Electromagnetic Compatibility (EMC)
15
European Union (EMC Directives)
15
United States (FCC)
15
Environment
16
Symbols Used on the Instrument
17
Warning Labels on the Instrument
19
Labels on the Front of the Instrument in the Sample Compartment
19
Caution Label on the Back of the Instrument
20
Warning Labels on the Left Side of the Instrument
21
Warning Labels on the Right Side of the Instrument
23
Warning Labels in the Torch Compartment
25
Neon Box Label
26
Using this Guide
27
Documents to Help You
27
How this Guide Is Organized
28
Using the Index
29
A Word on Troubleshooting
29
Chapter 1: Safety Practices
31
Introduction
33
Laboratory Guidelines
33
General
33
Environmental Conditions
34
Handling of the Instrument
34
Laboratory Ventilation
35
Instrument Safety Practices
35
Safety Interlocks
36
Radio Frequency Radiation
36
Ultraviolet Radiation
36
Electrical Safety
37
High Temperatures
40
Hot Exhaust Gases
40
Safe Use of Drain Systems
40
Waste Disposal Procedures
41
WEEE Instructions for Perkinelmer Products
42
Safe Handling of Gas Cylinders
43
Identification of Gas Cylinders
44
Hazardous Chemicals Warnings
45
Safe Use of Chemical Reagents
46
Sample Preparation
48
Dissolving Solid Samples in Organics
48
Dissolving Solid Samples Using Acids
49
Acid Digestions
50
Fusion Mixtures
53
Decontamination and Cleaning
53
Decontamination
53
Procedure
54
Cleaning the Instrument
54
References
55
Chapter 2: Preparing Your Laboratory
57
Environmental Conditions
59
Exhaust Vent Requirements
60
Cooling Water Requirements
65
Avio 200
66
Argon
68
Purge Gas
68
Shear Gas
69
Regulator
69
Chapter 3: System Description
71
Introduction
73
Introduction
75
Transfer Optics
75
Monochromator
75
Detector
77
Wavelength Correction
80
ICP Source
80
RF Generator
80
RF Control Electronics
82
Sample Introduction System
82
Sample and Torch Compartments
82
Quick-Change Adjustable Torch Module
82
Nebulizers
83
Peristaltic Pump
86
Autosampler
86
Switches and Controls
87
Main On/Off Switch
87
Interlocks
87
Connections to Electrical, Gas, and Cooling Water Supplies
90
System Initialization
92
Technical Data
93
General
93
ICP Plasma Generator System
93
Gas Flow Controls
94
Sample Introduction System
95
Optical System
96
Chapter 4: Installation
97
Installation Summary
99
Setting up the Computer and Printer
100
Moving the Instrument
100
Connecting the Gases and Cooling Water
101
Connecting the Gases
101
Connecting the Polyscience Chiller
106
Connecting the Chiller to the Instrument
107
Remote Chiller Connections
107
Starting up the Polyscience Chiller
113
Connecting the System Components
114
Connecting the USB Cable for the Plasmacamtm
117
Installing the Quick-Change Adjustable Torch Module
118
Connecting the Scott Spray Chamber
134
Connecting the Nebulizer (NEB) Tubing
138
Connecting the Cyclonic Spray Chamber
140
Setting the Torch Position
142
Installing the Autosampler
144
Fitting and Connecting the Autosampler Sampling Probe
148
Adjusting the Sampling Probe Height
151
Setting the Torch Viewing Position
153
Switching on the System
154
Setting Instrument Parameters
155
General Parameter Settings
155
Instrument Settings for Aqueous Solutions
156
Hardware Settings and Options
158
Shipping List
159
Chapter 5: Maintenance
165
Introduction
167
Daily Checks
167
Daily Cleaning
167
Argon Supply
168
Purge Gas Supply
168
Shear Gas Supply
168
Chiller
168
Vent
168
Torch and Plasma Induction Plates
169
Nebulizer
169
Peristaltic Pump and Drain
169
Periodic Checks
171
Torch Assembly and Plasma Induction Plates
171
Purge Viewing Window/Tubes
171
Nebulizer
172
Spray Chamber
172
Peristaltic Pump
172
Drains
172
General System Maintenance
172
Torch Viewing Position Alignment
173
Performance Checks
173
Cleaning the Sample Introduction System
173
Quick-Change Adjustable Torch Module
175
Plasma Torch
175
Plasma Induction Plates
176
Removing the Injector
177
Removing and Disassembling the Torch
178
Cleaning the Torch
186
Replacing the Torch
187
Replacing the Torch on the Mount
189
Scott Spray Chamber
191
Removing the Scott Spray Chamber
191
Removing the End Cap from the Spray Chamber
193
Cleaning the Scott-Type Spray Chamber
194
Replacing the Scott-Type Spray Chamber
195
Cyclonic Spray Chamber
195
Removing the Cyclonic Spray Chamber
195
Etching the Cyclonic Spray Chamber
197
Cleaning the Cyclonic Spray Chamber
198
Installing the Cyclonic Spray Chamber
198
Replacing the Plasma Induction Plates
199
Windows
201
Removing and Cleaning the Windows
201
Removing and Replacing the Windows
202
Removing and Returning the Axial Purge Window
202
Removing and Returning the Radial Purge Window
205
Cleaning the Windows
208
Replacing and Adjusting the Shear Gas Nozzle
209
Removing the Shear Gas Nozzle
209
Returning the Shear Gas Nozzle
211
Adjusting the Position of the Shear Gas Nozzle
212
Remove and Replacing the Axial Heat Sink Cooling Tube
212
Removing and Replacing the Axial Flat Optic
214
Nebulizers
218
Gemtip Cross-Flow Nebulizer
220
Removing the Nebulizer/End Cap
221
Checking the Spray Pattern
222
Disassembling the Cross-Flow Nebulizer
223
Removing the Sample Tip from the End Cap, N0780546
225
Removing the Argon Tip from the End Cap, N0780546
228
Connecting the Nebulizer Argon Tubing (Cross-Flow End Cap, N0780546)
231
Replacing the Nebulizer Argon Tubing (Cross-Flow End Cap, N0780546)
231
Replacing the Nebulizer/End Cap
233
Gemcone Nebulizer
234
Daily Cleaning of the Low-Flow Gemcone Nebulizer
234
Daily Cleaning of the High Solids Gemcone Nebulizer
234
Installing the Gemcone Nebulizer on the Scott-Type Spray Chamber
235
Installing the Gemcone Nebulizer on the Cyclonic Spray Chamber
237
Cleaning the Gemcone Nebulizer
238
Gemcone Liquid Fitting Maintenance
238
Concentric Glass Nebulizer
239
Installing the Concentric Nebulizer on the Cyclonic Spray Chamber
239
Installing the Concentric Nebulizer on the Scott's Spray Chamber
240
Cleaning the Concentric Glass Nebulizer
242
Mira Mist Nebulizer
243
Sample Capillary Tubing
244
Gas Line
245
Sample Introduction / Maximizing Stability
245
Cleaning the Nebulizer
246
Peristaltic Pump
246
Replacement Pump Tubing
246
Installing the Sample and Drain Tubing
248
Installing the Sample Tubing
249
Connecting the Drain Tubing Assembly
251
Installing the Drain Tubing
253
Adjusting the Pump Tubing
254
Cleaning the Pump
255
Removing the Pump Head on the Peristaltic Pump
255
Drain
256
General System Maintenance
258
Cleaning the Instrument
258
Air Filters
258
Changing the Air Filters
258
Changing the Neon Lamp Assembly
260
Chiller and Filters
260
Fuses
261
Replacement Parts: General
262
Consumables and Supplies
271
Order Online
271
Chapter 6: Troubleshooting
273
Performance Problems
278
Checking the Sample Introduction System
278
Plasma Ignition and Stability Problems
285
Plasma Ignition Problems
285
Plasma Stability Problems
286
Printing Problems
287
Troubleshooting Form
290
General
290
Sample Introduction Configuration
290
Instrument Environment
291
Advertisement
Advertisement
Related Products
PerkinElmer AVIO 500
PerkinElmer ASX-260
PerkinElmer ASX-280
PerkinElmer ASX-520
PerkinElmer ASX-560
PerkinElmer 200A Series
PerkinElmer 2081-0010
PerkinElmer aanalyst 200
PerkinElmer Caliper IVIS Spectrum
PerkinElmer chemagic 360-D
PerkinElmer Categories
Laboratory Equipment
Measuring Instruments
Dispenser
Amplifier
All in One Printer
More PerkinElmer Manuals
Login
Sign In
OR
Sign in with Facebook
Sign in with Google
Upload manual
Upload from disk
Upload from URL