Sign In
Upload
Manuals
Brands
Oce Manuals
Printer
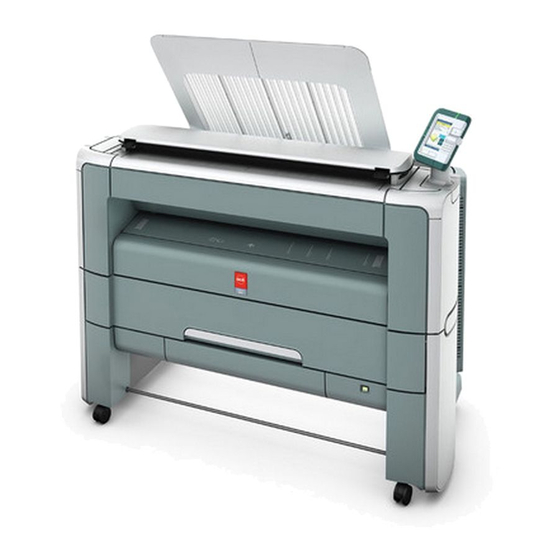
PlotWave 300
User Manuals: Oce PlotWave 300 Wide Format Printer
Manuals and User Guides for Oce PlotWave 300 Wide Format Printer. We have
1
Oce PlotWave 300 Wide Format Printer manual available for free PDF download: User Manual
Oce PlotWave 300 User Manual (340 pages)
Brand:
Oce
| Category:
Printer
| Size: 13.18 MB
Table of Contents
Table of Contents
4
Chapter 1 Introduction
9
Notes for the Reader
10
Available Documentation
12
How to Use this Manual
14
The Océ Plotwave 300 Key Concepts
16
Job Recovery
17
User Interaction
18
Chapter 2 Get to Know the Printing System
19
The Main Components
20
Working Area [Footprint]
21
Approved Abbreviations
22
The Océ Plotwave 300 Hardware
23
The Components of the Printer (Front)
23
The Components of the Printer (Left Side)
25
The Components of the Printer (Back)
26
The Media Drawer
27
The User Panel
28
The Output Delivery
31
The Components of the Scanner (Optional)
32
The Front Original Tray (Optional)
33
The Folder (Optional)
35
The Printing System Consumables
36
Chapter 3 Quick Start
37
Connect the Mains Supply Cable and the Network Cable
38
Switch on the Printing System
39
Unpack the Media Roll
41
Load a Media Roll (Position 1)
43
Load a Media Roll (Position 2)
48
The Océ Express Webtools
54
The Smart Inbox
55
Easy Printing, Copying and Scanning
57
Print from a USB Mass Storage Device or Flash Drive
57
Use Océ Publisher Express to Send a Print Job
58
Print a Job from the Smart Inbox
60
Use the Océ Windows
61
Printer Driver to Send a Print Job
61
Use the Océ Postscript
63
Driver to Send a Print Job
63
Make a 01:01 am Copy of a CAD Drawing
65
Make a 01:01 am Copy of a Color Drawing
67
Make a Half Size Copy (50%) of a CAD Drawing
69
Scan a CAD Drawing to TIFF Format
71
Scan a CAD Drawing to Color PDF
73
Scan a CAD Drawing to a USB Mass Storage Device
75
Switch off the Printing System
77
Chapter 4 Define Your Workflow with the Océ Express Webtools
79
Introduction
80
The Océ Express Webtools
80
The 'Jobs' Tab
81
The 'Preferences
82
The System
82
The 'Preferences' Tab
83
The System
83
The 'Configuration' Tab
85
The System
85
The 'Support' Tab
87
The 'System ' Tab
89
Set Another Language for the Océ Express Webtools
90
How to Edit a Setting
92
The 'Preferences
95
The 'Configuration
95
The 'Preferences
96
The 'Configuration
96
Save the Settings in a File
96
Load the Settings from a File
97
The 'Preferences
97
The 'Configuration
97
The System
97
The 'Preferences
98
The 'Configuration
98
Restore the Factory Defaults
98
The System
98
The System Monitor
99
The System
100
The 'Support
101
Shut down or Restart the System
101
Security
102
Access and Passwords
102
User Roles and Authorizations
102
User Roles and
103
Log in as an Authorized User
104
Log out after Your Session
105
Change the Password for Authorized Users
106
Secure Protocols
107
Enable Ipsec
107
Enable Ipv6
108
E-Shredding
109
Enable or Disable the E-Shredding Function
109
Select the E-Shredding Algorithm
110
Specify the Number of Overwrite Passes
111
Configure Your Printing System
112
Change the Regional Settings
112
Configure the Sleep Mode Timer
113
Configure the Network Settings in the Océ Express Webtools
114
Configure and Manage Scan Destinations
115
Configure Scan Destinations
115
Configure a Local Scan Destination
117
Configure a Remote Scan Destination
118
Create Web Destination with FTP
118
Configure the Pen Settings
121
Define Your Printing System Preferences
122
What You Need to Know about Default Settings
122
Define the System Preferences
123
Define the Print Job Preferences
125
Define the Default Output Quality for Print Jobs
127
Define the Copy Job Preferences and Copy Templates
128
Define the Default Output Quality for Copy Jobs
131
Define the Scan Job Preferences and Scan Templates
133
Define the Default Output Quality for Scan Jobs
136
Manage Jobs on Your Printing System
139
The Smart Inbox and Jobs Queue Concept
139
Use Smart Inboxes in a Multiple-User Environment
142
Use Smart Inboxes in a Repro Environment
143
Use Smart Inboxes in a Multiple-User and Repro Environment
144
Open or Create a Smart Inbox
145
Delete a Smart Inbox
146
Chapter 5 Use the Printing System
147
Pause, Resume or Stop an Active Job
148
The Job States
151
Clear the System
153
Send Print Jobs
154
What You Need to Know before You Send Your Print Jobs
154
Use Océ Publisher Express to Send a Print Job
155
Use the Océ Windows
157
Printer Driver to Send a Print Job
157
Use the Océ Postscript
159
Driver to Send a Print Job
159
Use FTP to Send a Print Job
161
Use LPR to Send a Print Job
162
Print a Job from the Smart Inbox
163
Print from a USB Mass Storage Device or Flash Drive
164
Basic Copy Jobs
165
Introduction to Copy Jobs
165
Feed the Original
167
Auto-Feed the Original
169
Use the Carrier Sheet
171
Do a Basic Copy Job
173
Extended Copy Jobs
175
Introduction to Copy Jobs
175
Do an Extended Copy Job
177
Available Settings for Copy Jobs
180
Make Multiple Sets of Copies
189
Make a Copy with a Stamp
191
Scale to Another Media Size
192
Make a Copy on a Cut Sheet
194
Make a Copy and Add a Strip
196
Make a Copy and Erase a Margin
198
Make a Copy of a Specific Area of an Original
200
Make a Copy and Delete a Specific Area of an Original
202
Basic Scan Jobs
204
Introduction to Scan Jobs
204
Feed the Original
206
Auto-Feed the Original
208
Use the Carrier Sheet
210
Do a Basic Scan Job
212
Extended Scan Jobs
214
Introduction to Scan Jobs
214
Do an Extended Scan Job
216
Available Settings for Scan Jobs
219
File Type
225
Make a Scan and Erase a Margin
227
Chapter 6 Maintain the Printing System
229
Move the Printing System
230
Switch off the Printing System
230
Disconnect the Network Cable and the Mains Supply Cable
232
Move and Re-Adjust the Printing System
233
Connect the Mains Supply Cable and the Network Cable
240
Switch on the Printing System
241
Replace the Media
243
The Media Drawer
243
Remove a Media Roll
244
Unpack the Media Roll
248
Load a Media Roll (Position 1)
250
Load a Media Roll (Position 2)
255
Change the Media Type and Media Size
261
Refill the Toner
262
Replace the Residual Toner Container
264
Maintain the Scanner
266
Clean the Scanner
266
Calibrate the Scanner
270
Chapter 7 Solve Problems
271
How to Solve Problems with Jobs
272
Clear an Original Jam on the Scanner
273
Clear a Media Jam in the Fuser Section
274
Clear a Media Jam in the Media Bypass Section
277
Clear a Media Jam in the Roll Feed Section
280
Print a Demo Print
281
Print a Test Print
282
Adjust the Print Density
283
Chapter 8 License Management
285
Introduction to Managing Licenses
286
The 'Licenses' Tab in the Océ Express Webtools
287
The Basic Workflow of 'Support' - 'Licenses' Activation
288
Océ License Logic
289
The Structure of License Files and Licenses
290
Check Your Licenses
292
Save the Currently Active Licenses
294
Install a New License
295
Chapter 9 Account Management
297
An Overview of Océ Account Center
298
Océ Account Console
300
Introduction to Océ Account Console
300
Summary of Océ Account Console
301
Enable Account Management in the Océ Express Webtools
304
Specifications of the Océ Plotwave 300
307
Appendix A Specifications of the Océ Plotwave 300
307
Specifications Océ Powerm Controller
308
Specifications Océ Plotwave 300 Printer
310
Specifications Océ Scanner Express
312
Specifications Drivers and Job Submission Software
314
Preferred Océ Media Types and Sizes
316
Appendix B Reader's Comment Sheet
321
Reader's Comment Sheet
322
Appendix C Addresses of Local Océ Organizations
325
Addresses of Local Océ Organisations
326
Advertisement
Advertisement
Related Products
Oce Arizona 300 GT
Oce Arizona 350 GT
Oce PlotWave 360
Oce PlotWave 340
Oce Arizona 360 GT
Oce plotwave 365
Oce Arizona 318 GL
Oce Arizona 350 XT
Oce 3121
Oce PlotWave 350
Oce Categories
All in One Printer
Printer
Copier
Printer Accessories
Scanner
More Oce Manuals
Login
Sign In
OR
Sign in with Facebook
Sign in with Google
Upload manual
Upload from disk
Upload from URL