Sign In
Upload
Manuals
Brands
Jands Manuals
DJ Equipment
Vista T2
Jands Vista T2 Manuals
Manuals and User Guides for Jands Vista T2. We have
1
Jands Vista T2 manual available for free PDF download: User Manual
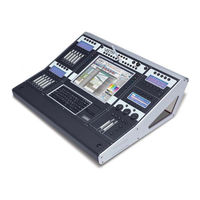
Jands Vista T2 User Manual (309 pages)
lighting console
Brand:
Jands
| Category:
DJ Equipment
| Size: 4.78 MB
Table of Contents
Table of Contents
3
1 Welcome to the Vista
9
What Things Are the same as on Other Consoles?
9
What’s Different about the Vista?
9
About the Generic Fixture Model
10
Need more Information
10
External Displays
11
2 Getting Started
11
Power
11
Setting up the Console
11
Switching on
12
Creating a Show
14
Creating and Loading Shows
14
Loading Existing Shows
14
Saving Shows
14
Exporting Show Archives (Backing Up)
15
Importing Show Archives
15
Saving Copies of Shows
15
To Export a Show Archive Onto an External Storage Device
15
Deleting Shows
16
Password‐Protecting Your Console or Show
16
Main Toolbar
19
Menu Bar
19
3 Using the Interface
19
Window Navigation
19
The Soft Buttons
20
V1 Classic Style Window Navigation
20
Standard Buttons
21
Modified Soft Buttons
22
Shift Set (Red Modifier)
22
Alt Set (Green Modifier)
23
Ctrl Set (Yellow Modifier)
25
Ctrl + Alt Set (Blue Modifier)
26
Configuring the Sidebar
27
Configuring the Soft Buttons
27
Soft Key Toolbar
27
The Sidebar
27
Fixture Macro Toolbar
28
Patch Window Toolbars
28
Toolbars
28
View Toolbar
28
Chooser & Timeline Window Toolbars
29
Connections Toolbar
29
Update Toolbar
29
Edit Toolbar
30
Undo Toolbar
30
Fixture Selection Toolbar
31
Command Line Toolbar
32
Fan Toolbar
32
Components Toolbar
33
Adding Fixtures to the Patch
35
4 Patching Your Rig
35
Adding the Fixture to the Patch Panel
36
Choosing a Fixture from the Factory List
36
Dragging and Dropping Individual Fixtures
36
Patching Multiple Fixtures with the Patch Box
37
Changing Universes
38
Moving Fixtures Around the Patch Panel
38
Re‐Arranging Fixtures on the Patch Panel
38
Deleting Fixtures
39
Renaming Fixtures
39
Renumbering Fixtures
39
Setting Fixture Properties
39
Properties Tab
40
Transforms Tab
40
Advanced Transforms
41
Channels Tab
42
Viewing the Patch in Different Ways
42
DMX View
43
List View
43
Table View
43
Cloning Fixtures
44
Controlling the Fixtures
44
Exporting and Importing Patch Information
45
Exporting the Patch
45
Importing the Patch
45
Configuring the DMX & Ethernet Outputs
47
Connecting Universes to the Console DMX & Ethernet
48
Disconnecting an Output
48
To Connect a Console or Control Surface DMX Output
48
To Connect an External Interface Box
48
The Chooser Screen
51
5 The Chooser Window
51
Vista Displays the Fixtures Screen
51
Arranging Fixtures in a Layout
52
Using Different Layout Views
52
Zooming in and out
52
Layouts
53
Managing Layout Views
53
Layout Properties
54
Hiding and ‘Un‐Hiding’ Fixtures and Groups
55
To Hide Fixture or Group Icon or Notes
55
Activating Layout Views
56
Duplicating a Layout
56
Layout Options
56
Layout Organisation
57
Adding Notes to the Layout Window
60
Arranging Fixtures in a Grid
60
Placing Fixtures in a Matrix
61
To Create a Matrix Container and Place Fixtures in It
61
Selecting Fixtures
62
Selection Tools
62
Displaying the Selection Order
63
Sorting Fixtures
63
Creating Custom Sort Orders
64
Custom Ganging Examples
65
Selecting Odd and Even Numbered Fixtures
65
Custom Fan Shapes
66
Fan Shapes
66
Deleting a Sort
67
Duplicating a Sort
67
Managing Your Saved Sorts
67
Renaming a Sort
67
Summary or Detailed View
68
The Palette Tab
68
Using the Programmer Sidebar
68
Common Features of the Palettes
69
To Adjust a Slider Setting
69
Checking that Everything Is Working
70
Highlight and Lowlight
70
Intensity
71
Position
71
Using the All Panel
71
Fine Mode
72
Hue and Saturation Values
72
Setting Colour
72
Colour Wheel
73
Swatch
73
Rotation
74
Setting Gobo
74
Focus
75
Iris
75
Setting Beam Size and Focus
75
Custom Values
76
Using the Detailed Panels
76
Colour
77
Flip
77
Lee Swatch
80
Wheel
80
Gobo
81
Custom DMX
82
Beam
83
Zoom
83
Framing
84
About Custom Values
85
Custom Panels
85
Custom Feature Window
86
The Components Tab
87
Components Window Tools
88
The Parameter Filter
88
Quicker Picker Panels
89
The Multi Quickpick
90
Quickpicker Popup Menu
91
Arranging the Quicker Picker Panels
92
Presets Labels
93
Creating Groups
94
Groups
94
Creating Presets
95
Presets
95
To Create a Group
95
The Highlight and Lowlight Presets
97
Updating Presets
97
Live Time
98
Live Time Presets
98
To Set the Live Time
98
Applying a Built in Effect
99
Smartfx
99
To Apply an Effect
99
Applying Extracts
100
Creating Extract
100
Effects that Modulate or Swing
100
Extracts
100
Hardware Keypad
101
Using a Keypad in the Programmer Window
101
Using the CLI
101
Programmer Intensity
103
Programmer Mode
103
Storing with the CLI
103
The Programmer Hardware Controls
103
Index
104
Store All
107
Vista Is a Tracking Console
107
6 Working with Cuelists
107
Storing a Look in 3 Clicks
108
Storing a Look with Options
109
Store Part
112
Selecting the Cuelist to Store to
113
Selecting the Cue and Store Options
114
Opening a Cuelist in the Editor
115
The Timeline Window
116
Cuelist Tabs
117
Playing and Moving Around a Cuelist
117
Cuelist Navigator
118
Tiles View
118
Adding and Deleting Cues
121
Deleting Cues
121
Merging Cues
121
Moving and Copying Cues
122
Paste Options
122
Alias Cues
123
Making Changes to a Cue Without Affecting the Next Cue
123
To Create an Alias Cue
123
Blocking a Cue
124
Creating a Move in Black Cue
124
Cue Properties
127
Blocking
129
Tracking
129
Free Effects Mode
130
Cue Defaults
131
Cuelist Properties
131
Chase Properties
134
Cuelist Audio Playback
134
Cuelist Timecode
134
Cuelist Notes
135
Cuelist Property Defaults
135
Timeline Panel
135
Default Times
136
Expanded Default Time View
136
Saving and Re‐Applying Timing Configurations
138
Saving Timing Sets
138
To Save a Default Timing Set
138
About the Timeline
139
Applying Saved Timing Configurations
139
Modifying the Cue Number, Name and Duration
139
To Apply a Timing Set to a Cue
139
Using the Summary Views
140
Summary by Feature
141
Summary by Fixtures
141
Filtering the All Events View
142
Deleting a Filter
144
Duplicating a Filter
144
Managing Your Saved Filters
144
Renaming a Filter
144
The Editor Status Bar
145
The Progress Indicator
146
Timeline Events
146
About the Event Bars
147
Adding Events to the Timeline
147
Feature Detail Event
147
Feature Summary Event
147
Changed Events
148
Moving Events Around
148
Snap Events
148
Making Precise Timing Adjustments
149
Using the Set Timing Window
149
Working with Selection Handles
149
Aligning Start and End Points
150
Resetting Events to Follow the Default Times
150
Setting the Event Fade Curve
151
Creating Release Events
152
Muting Events
152
Un-Tracking Events
152
Creating and Applying Extracts
153
Creating Extracts
153
Stopping Effects Overriding an Event
153
Using Commands Within Cuelists
154
Existing Information
156
Updating Presets and Cuelists During Playback
156
Effect Types
159
7 Smartfx
159
Using Effects
159
Using the Smartfx Window to Modify an Effect
160
Effect Controls
162
Rate Control
162
The Sequence Tab
166
Advanced Tab
168
Creating an Effect from Scratch
170
Making Your Effect Swing
170
To Create Your Own Effect
170
Saving Your Effect
171
Stopping a Particular Effect(S)
171
Stopping All Effects
171
Stopping an Effect
171
Stopping Effect Running on a Feature
172
8 Assigning Audio to a Cuelist
173
To Assign an Audio File to a Specific Cue
173
Adjusting Cues to Timecode
174
Using Learn Timing
174
Using Learn Timing to Adjust Cue Timing
174
Adjusting Cues Based on Audio or Video
175
9 Automating Playback
176
To Set up the Timecode
176
Using Timecode to Control Cuelists
176
Disabling All Timecode
177
Managing Date and Time Events
177
Playback Lag Compensation
177
Timecode Dropouts
177
Using Date and Time to Control Cuelists
177
Creating a New Event
179
Controlling and Monitoring Playback
181
Cuelist Pane
181
10 The Playback Control Window
181
Cue Pane
182
Auto Scroll
184
Dragable Playhead
184
Filtering the Cuelists
184
Editing in the Playback Control Window
185
Search
185
To Edit a Field Directly
185
11 Using the Console Hardware
187
Console Layout
187
T4 Console
187
L5 Console
188
S1 Control Surface
188
S3 Control Surface
188
T2 Console
188
Function Keys
189
Grand Master and DBO
189
M1 Control Surface
189
To Assign a Function to One of the Buttons
189
Sfx
190
The Modifier Keys
190
The Super Playback / Programmer Controls
190
Editor (Aka Programmer) Mode
191
Fixture Selection Butto
192
Super Fine Mode
192
Editor Intensity
193
Editor Live Time
193
Play Controls
193
Super Playback Mode
193
Cuelist Control (Normal) Mode
194
Super Playback Mode Extended Controls
194
Cuelist Chase Mode
195
Cuelist FX (Effects) Mode
196
Using the Jump Window
196
Playbacks with Faders
197
Page Controls
198
Playbacks Without Faders
198
Configuring the Console for Playback
199
Expanding Playbacks
200
Splitting Playback Controls
200
Cuelist Faders
203
Playback Status Indication
203
Playback Popup Menu
204
Group Masters
205
Setting Cuelist Properties
205
To Assign an Action
206
Group Fader
207
Pages
207
Locking a Playback to Prevent Changing
208
Page Holdover
208
Snapshots
208
To Record a Snapshot
208
12 The Output Window
211
Configuring the Output Window
212
13 The Console Control Panel
215
Calibrating the Pen Tablet
215
System Settings (T & I Series Only)
215
Display and Input Devices
216
Using the Screensaver
217
Etwork Preferences
218
Date and Time
219
14 Appendix 1 - Menu & Toolbar Reference
220
File Menu
220
Edit Menu
221
Components Menu
222
Tools Menu
222
Atch Menu
225
15 Appendix 2 - Installing New Software
232
Installation (T2, T4, I3 & L5 Consoles)
232
To Install a Vista V2 Console Update Package
233
Connecting to the Console Via FTP
234
Hardware Setup
234
Installation (Windows XP, Vista & 7)
234
Computer Software Setup
235
Using FTP
235
Vista Software Setup
235
16 Appendix 3 - Creating a Bootable USB Device
236
Troubleshooting
238
17 Appendix 4 - Tracking Backup
239
Configuring the Network Settings
239
Necting the Backup
239
Setting up
239
Computer Network Settings
241
Starting Tracking Backup
241
What Happens if the Master Fails
242
Backup Status
243
Private IP Addresses
244
Troubleshooting
244
18 Appendix 5 - Using VNC on T & I- Series Consoles
245
Connecting to Vista Using a Windows PC
245
Starting VNC
245
VNC Password
245
Connecting to Vista Using a Mac
246
19 Appendix 6, Using MIDI Show Control (MSC) to Control Cues
248
Configuring the MIDI Port
248
Advanced MIDI Options
250
MSC Lighting Messages
250
20 Appendix 7, Using Serial Communication to Control Cuelists
252
Connecting to the Serial Port
252
Enabling the Serial Port
252
Playback Commands
253
Setting Fixture Levels
253
Serial Command Acknowledgements
254
21 Appendix 8 - the Fixture Editor
255
The Fixture Type Library Editor
255
Creating a Fixture Profile
256
Main Tab
257
DMX Chart Tab
259
Add DMX Channel Window
260
Gobo Wheel
271
Select the Anti-Clockwise Range
271
Channels with Custom Ranges
280
Saving the Fixture
280
22 Appendix 9 - Crash Logs
282
Retrieving Software Crash Files from a Console
282
Retrieving Software Crash Files from a Windows PC
283
Up Procedure for Windows XP
283
23 Appendix 10 - the Touchpad and the Pen Tablet
287
Click
287
Drag
287
Right Click
287
Using the Touchpad
287
Tip Switch / Pen Tip
288
Working with the Grip Pen
288
Double‐Clicking
289
Dragging
289
Duoswitch
289
Using a Pen
289
Selection Buttons
290
Working with on Screen Display Settings
290
Caring for the Cintiq Pen Tablet
291
Cleaning the Pen‐Tablet
291
Replacing the Pen Tip
291
To Remove the Old Tip
291
Removing and Installing the Duo Switch
292
To Insert a New Tip
292
To Remove the Duoswitch
292
To Install the Duoswitch
293
Handling
294
Precautions on Using and Handling the Pen-Tablet
294
Temperature and Humidity
294
24 Appendix 11 - Technical Details
296
Battery Replacement
296
Power
296
Service & Maintenance
296
General Specifications
297
Inputs & Outputs
297
Installation
297
T4 / T2 / I3 / L5 Shut down
297
Index
301
Advertisement
Advertisement
Related Products
Jands Vista T4
Jands Vista I3
Jands Vista L5
Jands Vista S1
Jands Vista S3
Jands Vista M1
Jands Categories
Lighting Equipment
Music Mixer
Controller
Dimmer
DJ Equipment
More Jands Manuals
Login
Sign In
OR
Sign in with Facebook
Sign in with Google
Upload manual
Upload from disk
Upload from URL