Sign In
Upload
Manuals
Brands
Hunter Manuals
Wheel Balancers
GSP9700 Series
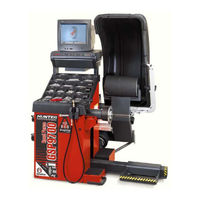
Hunter GSP9700 Series Tire Wheel Balancer Manuals
Manuals and User Guides for Hunter GSP9700 Series Tire Wheel Balancer. We have
2
Hunter GSP9700 Series Tire Wheel Balancer manuals available for free PDF download: Operation Instructions Manual
Hunter GSP9700 Series Operation Instructions Manual (150 pages)
Road Force Measurement System with SmartWeight Balancing Technology
Brand:
Hunter
| Category:
Wheel Balancers
| Size: 4.51 MB
Table of Contents
Table of Contents
5
1 Getting Started
9
Introduction
9
For Your Safety
9
Hazard Definitions
9
Important Safety Instructions
10
Electrical
11
Decal Information and Placement
12
Right Side View
12
Left Side View
13
Back View
14
Specific Precautions/Power Source
15
Turning Power ON/OFF
15
Equipment Installation and Service
16
Equipment Specifications
16
Electrical
16
Air
16
Atmospherics
16
Sound Pressure Level
16
Safety Summary
16
Explanation of Symbols
16
Equipment Components
17
Standard Balancer Accessories
18
Operating the Console
19
Using Softkeys
19
Primary Balancing Display
20
Using the Control Knob (GSP9712)
20
Using Control Knobs (GSP9702)
21
Resetting the Program
21
Using the Screen Saver/Merchandising Display
21
2 Balancing Overview
23
Balancing Modes
23
Smartweight™ Balancing Technology
23
Balancing Theory
23
Static Imbalance
23
Couple Imbalance
24
Static and Dynamic Imbalance Sensitivity
25
Identifying the Static Balance Weight Plane
26
Identifying the Dynamic Balance Weight Planes
27
Smartweight™ Dynamic Weight Planes
28
3 Mounting Wheels on the Balancer
29
Mounting the Wheel Using Wheel Lift (Optional)
29
Raising the Tire/Wheel Assembly
29
Lowering the Tire/Wheel Assembly
31
Mounting the Wheel (Without Wheel Lift)
31
Mounting Error Detection Features
32
Front/Back Cone Mounting
32
Using Plastic Wheel Mounting Washer
34
Cone/Flange Plate Mounting
35
Expandable Collet Mounting
36
Using the Pressure Ring and Spacers
36
Pressure Ring
36
Spacers
37
Centeringcheck
38
On-Vehicle Wheel Mounting Methods
41
Hub Centric
41
Lug Centric
41
4 Balancing a Wheel
43
Balancing Procedures
43
Smartweight™ Balancing Technology
43
Using Smartweight
43
Switching from Smartweight™ to Traditional Dynamic Balancing Modes
45
Dynamic Balancing Selection
45
Static Balancing Selection
45
Static Balance Mode Reminder for "Dynamic Balance Importance" (Except Patch Balance)
46
Selecting Weight Types and Placement Modes
47
STANDARD Balancing Procedure (Using Clip-On Weights)
47
MIXED WEIGHTS Balancing Procedure (Combination of Clip-On & Adhesive Weights)
49
ADHESIVE WEIGHTS Balancing Procedure (Adhesive Weights Only)
51
PATCH BALANCE Procedure
53
Using the Auto Dataset Arms
56
Automatic Weight Position Measurement
56
Manual Weight Position Measurement
56
Measuring Dimensions for Standard Clip-On Weight Balancing
57
Measuring Dimensions for Mixed Weights (Clip-On/Tape-On) Balance
57
Measuring Dimensions for Adhesive Weights Balancing (Tape-On/Tape-On)
58
Measuring 20 Inch or Larger Rims
59
Adjustable Length Inner Dataset® Arm
59
Servo-Aided Adhesive Weight Placement
59
Manual Adhesive Weight Placement
61
Rim Runout Measurements
62
Single Arm Rim Runout External Measurement (Tire and Wheel Assembly)54
62
Dual Arm Rim Runout External Measurement (Tire and Wheel Assembly)
62
Rim Runout Measurement (Bare Rim)
64
Primary and Popup Screens
65
Primary Screen Selection
65
Balance Primary Screen
66
Load Roller
68
Load Roller Operation
68
Forcematching
69
Forcematching™ Procedures
70
Forcematching™ Using Previous Bare Rim Measurement
71
Forcematching™ Using Previous Road Force™ Measurement
71
Using Forcematch Codes Feature
72
Dial Indicator Gauges Feature
72
Lateral/Radial Rim High Spot Indicators Feature
73
Details/Diagnosis Explanation Key
73
Encountering Forcematching™ Prediction Errors
73
Do's and Don'ts of Road Force™ Measurement
74
Quickmatch™ Tire and Wheel Mounting
74
Quickmatch™ Procedures
75
Quickmatch™ Using Previous Bare Rim Measurement
76
Quickmatch™ Using Previous Loaded Runout Measurement
76
Dial Indicator Gauges Feature
76
Lateral/Radial Rim High Spot Indicators Feature
77
Encountering Forcematching™ or Quickmatching™ Prediction Errors
77
Do's and Don'ts of Loaded Runout Measurement
78
Straighttrak LFM (Lateral Force Measurement)
78
Disabling Straighttrak
81
Vehicle Plan View
82
Net Tire Pull Arrow
82
Road Force™ Arrows
82
Changing Tag Numbers
83
Show Least Pull
84
Show Least Vibration
84
Show Alternate Placements
84
Show Details
85
Determining Tire Conicity Outliers
85
Printout
85
Inflation Pressure
86
Quick-Thread™ Feature
86
Motor Drive/Servo-Stop
87
Spindle-Lok Feature
87
Hood Autostart Feature
87
Loose Hub Detect Feature
87
Blinding and Rounding
88
Inflation Station
89
5 Balancing Features and Options
91
Smartweight™ Balancing Technology
91
Weightsaver™ Wheel Balancing Feature
92
Quick-Thread™ Feature
92
Motor Drive/Servo-Stop
93
Spindle-Lok Feature
93
Hood Autostart Feature
94
Loose Hub Detect Feature
94
Inflation Station
94
Split Weight Feature
95
Split Weight Operation
95
Correcting Large Imbalances
96
Split Spoke ® Feature
96
Hiding Adhesive Weight Behind Spoke
96
Re-Entering Similar Wheel after Split Spoke Is Enabled
98
Placing Hidden Weight Inside of Hollow Spokes
99
Matchmaker™ Tire and Wheel Mounting Procedure
101
Tires Mounted on Rims
101
Tires Not Mounted to Rims
102
Diagnosis Explanation Screen (Limits Disabled)
103
Diagnosis Explanation Screen (Limits Enabled)
103
Details Screen
104
Print Summary
105
Harmonics & T.I.R. Data/Plots
106
Assembly Data Plots Screen
106
Tire Data Plots Screen
107
Statistics
108
Show Statistics
108
Weight Savings
109
Rim Data Plots Screen
110
6 Equipment Information
111
Software Identification
111
Program Cartridge Removal and Installation
111
Balancer Set up
112
Setting up the Display Language
113
Setting up the Printout Language
113
Setting up the Quickmatch Feature
113
Setting up the Use Limits Feature
114
Setting up the Screen Saver Time-Out
114
Setting up the Hood Autostart Feature
115
Setting up the Servo-Stop/Servo-Push
115
Setting up the Quick-Thread™ Feature
116
Setting up the Balance Check Spin
116
Setting up the Weight Units
116
Setting up the Inflation Station Units
117
Setting up the Runout Units
117
Setting up the Road Force Units
117
Setting up the Prompted Inflation Station
118
Setting up the Prompted Centering Checks
118
Service Mode Setup and Features
119
Setting up the Runout & Road Force™ Limits
119
Setting the "P" Limits
119
Setting the "P/SUV" Limits
119
Setting the "LT" Limits
120
Setting the Limits to "Factory Default
120
Programmed Road Force™ Limits
120
Setting up the Balance Limits
121
Main Selections
121
Setting up the Weight Units
121
Setting up the Ounce Round Amount
121
Setting up the Gram Round Amount
121
Setting the Limits Displayed
121
Non-Smartweight Options
121
Setting up the Ounce Blind Amount
121
Setting up the Gram Blind Amount
121
Smartweight™ Options - Setting up the Force Limits
122
Weightsaver™ Residual Goal
122
Setting up the Inner Dataset Arm Type
122
Setting up the Console Type
123
Setting up the Load Roller Type
123
7 Calibration and Maintenance
124
Calibration Procedures
124
Balancer (3 Spin Procedure)
125
Inner Dataset ® Arm (Calibration Tool, 221-672-1, Required)
126
Outer Dataset ® Arm (Calibration Tool, 221-672-1, Required)
129
Load Roller (Calibration Tool, 221-672-1, Required)
131
Servo-Stop
133
Quick Calibration Check Procedure
134
Diagnostic Procedures
134
Force Sensors
135
Rotary Encoders
135
Keys and Switches
135
Data Acquisition Circuits
135
Dataset ® Arm Sensors
135
Loaded Runout Sensor
135
Printing
135
Changing Ribbon Cartridge (P/N 162-42-2)
136
Bottom Feed Paper Loading
136
Cleaning the Console
136
Spindle Hub Face and Shaft Maintenance
137
Mounting Cone Maintenance
137
8 Theory of Operation
139
Harmonic Vibrations
139
Road Force™ Measurement
141
Force Variation
141
Tire Radial Force Variation (Uniformity)
142
Radial Force Variation (RFV)
142
Radial Force Variation Vs. Unloaded Run out
143
Road Force™ Vibration Placed into Perspective
143
Straighttrak Lateral Force Measurement System
144
Straighttrak Lateral Force Measurement
144
Tire Pull Measurement and Correction
144
Theory
145
Conicity
146
Plysteer
146
Net Tire Pull
146
9 Glossary
147
Balancing Terms
147
Advertisement
Hunter GSP9700 Series Operation Instructions Manual (157 pages)
Road Force Measurement System, With SmartWeight Balancing Technology Software Version 3.0
Brand:
Hunter
| Category:
Wheel Balancers
| Size: 5.49 MB
Table of Contents
Table of Contents
5
1 Getting Started
9
Introduction
9
For Your Safety
9
Hazard Definitions
9
Important Safety Instructions
10
Electrical
11
Decal Information and Placement
11
Specific Precautions/Power Source
13
Specific Precautions/Bdc Laser Indicator
13
Specific Precautions/Hammerhead™ TDC Laser Indicator (Optional)
14
Turning Power ON/OFF
14
Equipment Installation and Service
15
Equipment Specifications
15
Safety Summary
16
GSP9720JLR Components
16
Standard Accessories
17
JLR Wheel Mounting Kit
17
Operating the Console
18
Using Softkeys
18
Using Control Knob
19
Primary Balancing Display
20
Resetting the Program
20
2 Introduction to Balancing
21
Balance Forces
21
Balancing Theory - Static Imbalance
21
Balancing Theory - Couple Imbalance
22
Smartweight Balancing Technology
23
Static and Dynamic Imbalance Sensitivity
23
Smartweight Balancing Technology Dynamic Weight Planes
24
Using Smartweight Balancing Technology
24
Smartweight Forces and Limits Feature
26
Weightsaver® Wheel Balancing Feature
26
Smartweight Odometer
27
Show Savings Summary
28
3 Balancing Procedures
31
Mounting the Wheel Using Wheel Lift (Optional)
31
Raising the Wheel Assembly
31
Lowering the Wheel Assembly
32
Mounting the Wheel on the Balancer Spindle
33
Installing the Wheel
33
Installing the Wheel Using Quick-Thread® Wheel Clamping
33
Quick-Thread® Wheel Clamping
34
Centeringcheck® Wheel Centering Feature
35
Mounting Error Detection Features
38
Front/Back Cone Mounting
38
Using Plastic Wheel Mounting Washer
39
Cone/Flange Plate Mounting
41
Expandable Collet Mounting
42
Using the Pressure Ring and Spacers
42
Hood Autostart Feature
43
Loose Hub Detect Feature
43
The Logo Screen
44
Recall Specifications Screen
44
TSB Screen
45
Vehicle Specifications Screen
46
Updating Specifications
46
Motor Drive/Servo-Stop
51
Spindle-Lok® Feature
51
Balance Primary Screen
51
Spin Tracker Feature
52
Methods of Saving Spin Data
52
Storing Measurements
53
Print Summary
54
Balance Modes
54
Smartweight® Balancing Technology
55
Dynamic Balancing - Traditional Balancing Mode
55
Static Balancing - Traditional Balancing Mode
56
Balancing Procedures for Specific Weight Types and Placement
57
AUTO MODE Balancing Procedure
58
STANDARD Balancing Procedure Using Clip-On Weights
58
MIXED WEIGHTS Balancing Procedure Using a Combination of Clip-On & Adhesive Weights
60
ADHESIVE WEIGHTS Balancing Procedure Using Adhesive Weights
63
PATCH BALANCE® Procedure
65
Automatic Dataset® Arms Operation
67
Automatic Weight Position Measurement
67
Manual Weight Position Measurement
67
Measuring Dimensions for Standard Clip-On Weight Balancing
68
Measuring Dimensions for Mixed Weights (Clip-On/Adhesive) Balance
68
Measuring Dimensions for Adhesive Weights Balancing
69
Rim Runout Measurements
71
Blinding and Rounding
74
Split Weight® Feature
74
Split Weight® Operation
74
Correcting Large Imbalances
75
Split Spoke® Feature
75
Hiding Adhesive Weight Behind Spoke
76
Re-Entering Similar Wheel after Split Spoke® Is Enabled
77
Placing Hidden Weight Inside of Hollow Spokes
78
Rimscan™ Wheel Profile Scanner
80
Setting Dimensions with Rimscan
80
Real-Time Predictions with Rimscan and Smartweight
83
BDC Laser Adhesive Weight Locator
83
Optional Hammerhead
84
TDC Laser Adhesive Weight Locator
84
Specific Precautions / Hammerhead™ TDC Laser System
86
Tpmspecs
86
TM Feature
86
4 Road Force ® Measurement Procedures
89
Load Roller Operation
89
Inflation Station
90
Forcematching
91
Road Force and Runout Limits Enabled Diagnosis Mode
91
Forcematch® Procedures
92
Forcematching Using Previous Bare Rim Measurement
93
Forcematching Using Previous Road Force® Measurement
94
Using Forcematch Codes Feature
94
Dial Indicator Gauges Feature
95
Lateral/Radial Rim High Spot Indicators Feature
95
Details/Diagnosis Explanation Key
95
Encountering Forcematch® Prediction Errors
96
Do's and Don'ts of Road Force® Measurement
96
Quickmatch® Tire and Wheel Mounting
97
Road Force Audit Mode
97
Quickmatch® Procedures
98
Quickmatch® Using Previous Bare Rim Measurement
98
Quickmatch® Using Previous Loaded Runout Measurement
99
Dial Indicator Gauges Feature
99
Lateral/Radial Rim High Spot Indicators Feature
100
Encountering Forcematching® or Quickmatching® Prediction Errors
101
Do's and Don'ts of Loaded Runout Measurement
101
Tranzsaver
102
Straighttrak® LFM (Lateral Force Measurement)
103
Disabling Straighttrak
106
Vehicle Plan View
106
Net Tire Pull Arrow
106
Road Force® Arrows
107
Changing Tag Numbers
107
Show Least Pull
108
Show Least Vibration
108
Show Alternate Placements
108
Show Details
109
Printout
109
Inflation Pressure
110
Diagnosis Explanation Screen (Limits Disabled)
110
Diagnosis Explanation Screen (Limits Enabled)
110
Details Screen
111
Tire and Rim Road Force® and Runout
111
Printouts
113
Harmonics & T.I.R. Data/Plots
114
Assembly Data Plots Screen
114
Tire Data Plots Screen
115
Rim Data Plots Screen
116
Statistics
116
Show Statistics
116
5 Equipment Information
119
Software Identification
119
Program Cartridge and Security Key Removal and Installation
119
Balancer Set up
120
Display Language
121
Print Language
121
Printer
121
Printout Paper Size Selection
121
Quickmatch
121
Use Runout & Road Force Limits
121
Hood Autostart Feature
121
Servo-Stop
121
Balance Checkspin
121
Weight Units
121
Service Mode Setup and Features
122
Set Date and Time
122
Prompted Inflation Station
122
Prompted Centering Checks
122
Runout & Road Force® Limits
122
Balance Limits
124
Main Selections
124
Non-Smartweight Options
125
Smartweight® Options - Setting up the Force Limits
125
Prompt for Wheel Assembly ID
125
Spindle Type
126
Load Roller Type
126
Hammerhead
126
Road Force Audit Mode
126
6 Calibration and Maintenance
127
Calibration Procedures
127
Quick Calibration Check Procedure
127
Calibration Menu
128
Calibration Menu (Service Mode Enabled)
135
Diagnostic Procedures
137
Force Sensors
137
Spindle Encoder
138
Keys and Switches
138
Data Acquisition Circuits
138
Dataset Arm Sensors
138
Loaded Runout Sensor
138
Lateral Force Sensor
138
Diagnostic Procedures (Service Mode Enabled)
138
Loaded Runout Air Components (Service Mode Only)
138
Motor Drive (Service Mode Only)
138
Cleaning the Console
138
Maintenance
139
Spindle Hub Face and Shaft
139
BDC Laser Adhesive Weight Locator Maintenance or Service
139
Optional Hammerhead™ TDC Laser Clip-On Weight Locator Maintenance or Service
139
Mounting Cone Maintenance
140
7 Theory of Operation
141
Harmonic Vibrations
141
Road Force® and Runout Measurement
143
Force Variation
143
Radial Force Variation (RFV)
144
What Is Road Force Measurement
145
Radial Force Variation Vs. Unloaded Run out
147
Road Force® Vibration Placed into Perspective
147
Straighttrak® Lateral Force Measurement System
148
Straighttrak® Lateral Force Measurement
148
Theory
149
8 Glossary
153
Advertisement
Related Products
Hunter GSP9712
Hunter GSP9720JLR
Hunter Lite GSP9220
Hunter GSP9200 Touch
Hunter GSP9200 Series
Hunter type g series
Hunter G835
Hunter G800E
Hunter G880
Hunter G875
Hunter Categories
Fan
Air Cleaner
Thermostat
Controller
Humidifier
More Hunter Manuals
Login
Sign In
OR
Sign in with Facebook
Sign in with Google
Upload manual
Upload from disk
Upload from URL