Sign In
Upload
Manuals
Brands
Fuji Xerox Manuals
All in One Printer
DocuCentre-IV 3065
Fuji Xerox DocuCentre-IV 3065 Printer Manuals
Manuals and User Guides for Fuji Xerox DocuCentre-IV 3065 Printer. We have
2
Fuji Xerox DocuCentre-IV 3065 Printer manuals available for free PDF download: Administrator's Manual, User Manual
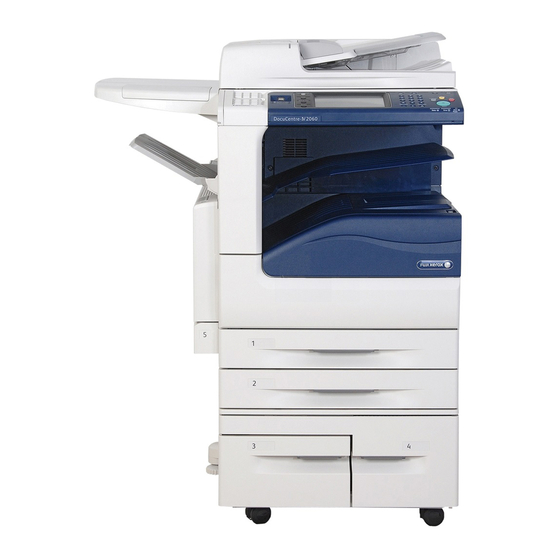
Fuji Xerox DocuCentre-IV 3065 Administrator's Manual (633 pages)
Brand:
Fuji Xerox
| Category:
All in One Printer
| Size: 32.73 MB
Table of Contents
Table of Contents
3
1 Before Using the Machine
15
Preface
16
This Guide
16
Types of Manuals
17
Using this Guide
18
Organization of this Guide
18
Conventions
19
Interface Cables
21
Using the USB Interface
21
Using the Ethernet Interface
21
Energy Saver Mode
23
Changing the Interval for Entering Energy Saver Mode
23
Customizing the Control Panel
26
Changing the Screen Default
26
Setting the Screen after Auto Clear
27
Customizing the Button Layout
28
Assigning Services to the <Custom> Buttons
32
Adjusting Screen Brightness
33
Entering Text
34
2 Paper and Other Media
35
Paper Types
36
Paper Type Classification
36
Loadable Paper Quantity and Weight
37
Supported Paper
38
Usable Paper
39
Loading Paper
41
Loading Paper in Trays 1 to 4
41
Loading Paper in Tray 3 (When Tandem Tray Module Is Installed)
43
Loading Paper in Tray 4 (When Tandem Tray Module Is Installed)
44
Loading Paper in Tray 5
45
Loading Paper in Tray 6 (HCF A4 1)
46
Changing the Paper Size
47
Changing the Paper Size for Trays 1 to 4
47
Changing the Paper Size for Tray 3 (When Tandem Tray Module Is Installed)
49
Changing the Paper Size for Tray 4 (When Tandem Tray Module Is Installed)
50
Changing the Paper Size for Tray 6 (HCF A4 1)
51
Changing the Paper Settings
53
3 Maintenance
55
Replacing Consumables
56
Replacing Toner Cartridges
57
Replacing the Drum Cartridge (for Customers Having a Spot Maintenance Contract)
60
Replacing Staple Cartridge (for Finisher-A1)
62
Replacing Staple Cartridge (for Finisher-B1)
64
Replacing Staple Cartridge (for Booklet Maker Unit for Finisher-B1)
65
Emptying Punch Waste Container (for Finisher-B1)
66
Replacing Stamp
67
Replacing Fusing Unit
68
Cleaning the Machine
71
Cleaning the Exterior
71
Cleaning the Touch Screen
71
Cleaning the Document Cover and Document Glass
72
Cleaning the Film and Constant Velocity Transport Glass
72
Cleaning the Document Feeder Rollers
73
Printing a Report/List
74
Deleting a Private Charge Print Job with an Invalid User ID
75
Setting Restore Tool
76
4 Machine Status
77
Overview of Machine Status
78
Machine Information
79
General Information
79
Paper Tray Status
81
Print Reports
82
Printer Reports
83
Fax Reports
86
Automatically Printed Reports/Lists
89
Transmission Report
90
Broadcast Report
90
Job Flow Error Report
90
Overwrite Hard Disk
91
Print Mode
91
Fax Receiving Mode
93
Faults
94
Press the <Machine Status> Button
94
Supplies
95
Billing Information
96
On the [Machine Information] Screen
96
User Account Billing Information
97
5 Tools
99
System Settings Procedure
100
Step 1 Entering System Administration Mode
100
Step 2 Entering the System Administrator User ID and Passcode
100
Step 3 Selecting [Tools]
101
Step 4 Selecting a Setting Item on the [Tools] Screen
101
Step 5 Setting a Feature
102
Step 6 Exiting System Administration Mode
102
Tools Menu List
103
Common Service Settings
115
Machine Clock/Timers
115
Connection Interval
116
Auto Print
116
Daylight Savings
117
Audio Tones
118
Screen/Button Settings
119
Default Language
120
Paper Tray Settings
121
Image Quality
123
Reports
124
Maintenance
125
Software Options
126
Finisher Adjustment
126
Software Upgrade
126
Watermark
127
Background Pattern
128
Force Annotation
129
Print Universal Unique ID
130
Notify Job Completion by E-Mail
131
Other Settings
131
Auto Job Promotion
132
Keyboard Input Restriction
135
Data Encryption
136
Data Restoration
136
Software Download
138
Data Indicator
138
Copy Service Settings
139
Copy Tab - Features Allocation
139
Preset Buttons
140
Copy Defaults
140
Background Suppression
141
Copy Control
144
Original Size Defaults
145
Reduce/Enlarge Presets
146
Annotations - Create Comments
146
Connectivity & Network Setup
147
Port Settings
147
Upnp Discovery
150
Protocol Settings
151
Machine's E-Mail Address/Host Name
154
Proxy Server Settings
155
EP Proxy Server Setup
156
SIP Settings
158
T.38 Settings
160
Outgoing/Incoming E-Mail Settings
161
Remote Authentication/Directory Service
162
Security Settings
166
Certificate Revocation Retrieval Settings
169
Other Settings
170
Print Service Settings
171
Allocate Memory
171
Delete Form
173
Other Settings
173
Scan Service Settings
177
First Tab
177
Scan Defaults
178
Scan to PC Defaults
180
Original Size Defaults
180
Output Size Defaults
181
Reduce/Enlarge Presets
181
Other Settings
181
Background Suppression Level
182
Shadow Suppression Level
182
Fax Service Settings
184
Screen Defaults
184
Fax Defaults
185
Fax Control
186
Fax Received Options
191
Reduce/Enlarge Presets
191
Original Size Defaults
192
Local Terminal Information
192
Internet Fax Control
193
E-Mail/Internet Fax Service Settings
196
E-Mail Control
196
Folder Service Settings
199
Job Flow Service Settings
200
Media Print Service Settings
201
Stored File Settings
202
Setup
204
Create Folder
204
Stored Programming
206
Create Job Flow Sheet
206
Create Job Flow Sheet Keyword
213
Add Address Book Entry
214
Address Type
216
Transfer Protocol
217
Relay Broadcast
220
Create Fax Group Recipients
221
Add Fax Comment
222
Paper Tray Attributes
222
Accounting
223
Create/View User Accounts
223
Account Limit
224
View Accounts
225
Reset User Accounts
226
System Administrator's Meter (Copy Jobs)
227
Accounting Type
227
Accounting Login Screen Settings
228
Fax Billing Data
229
Accounting/Billing Device Settings
229
Interrupt Mode
230
Authentication/Security Settings
231
System Administrator Settings
231
Authentication
232
Create Authorization Groups
234
User Details Setup
235
Maximum Login Attempts
236
Passcode Policy
236
Allow User to Disable Active Settings
238
Job Status Default
239
Overwrite Hard Disk
239
6 Centreware Internet Services Settings
241
Installation of Centreware Internet Services
242
Preparations
242
Configuration on the Machine
242
Starting Centreware Internet Services
244
Configuring Machine Settings Using Centreware Internet Services
245
7 Printer Environment Settings
249
Print Overview
250
Supported Operating Systems
252
Installation When Using USB Port
253
Step 1 Preparations
253
Step 2 Configuration on the Machine
253
Step 3 Configuration on the Computer
254
Centreware Internet Services Setting Items
254
Installation When Using TCP/IP (Lpd/Port 9100)
255
Step 1 Preparations
255
Step 2 Configuration on the Machine
255
Step 3 Configuration on the Computer
256
Centreware Internet Services Setting Items
257
Installation When Using Netware
258
Step 1 Preparations
258
Step 2 Configuration on the Machine
258
Step 3 Configuration on the Computer
260
Centreware Internet Services Setting Items
260
Installation When Using Microsoft Network (SMB)
261
Step 1 Preparations
261
Step 2 Configuration on the Machine
261
Step 3 Configuration on the Computer
262
Centreware Internet Services Setting Items
262
Installation When Using Internet Printing Protocol (IPP)
263
Step 1 Preparations
263
Step 2 Configuration on the Machine
263
Step 3 Configuration on the Computer
264
Centreware Internet Services Setting Items
264
Installation When Using Ethertalk
265
Step 1 Preparations
265
Step 2 Configuration on the Machine
265
Step 3 Configuration on the Computer
266
Centreware Internet Services Setting Items
266
8 E-Mail Environment Settings
267
E-Mail Overview
268
Preparations
270
Installation Procedures
272
Step 1 Enabling Port and Setting up TCP/IP
272
Step 2 Configuring E-Mail Environment
273
Centreware Internet Services Setting Items
274
9 Scanner Environment Settings
275
Scan Service Overview
276
Configuration of Store to Folder
278
Step 1 Enabling Port and Setting up TCP/IP
278
Step 2 Registering a Folder
279
Step 3 Configuring a Computer
279
Configuration of Scan to PC
280
Step 1 Preparations
280
Step 2 Enabling Port and Setting up TCP/IP
281
Configuration of Store to USB
282
Step 1 Available USB Memory Devices
282
Centreware Internet Services Setting Items
282
Configuration of Network Scanning (Job Template Scanning)
283
Step 1 Preparations
283
Step 2 Enabling Ports and Setting up TCP/IP
283
Step 3 Configuring the SNMP Port
284
Step 4 Configuration on the Computer
284
Configuration of Scan to Home
285
Step 1 Preparations
285
Step 2 Enabling SMB Port and Setting up TCP/IP
285
Step 3 Configuring Remote Authentication
286
Step 4 Configuring Scan to Home
287
Step 5 Configuration on the Computer
288
Configuration of Job Flow Sheets
289
Step 1 Enabling Ports and Setting up TCP/IP
289
Step 2 Configuring the SNMP Port
290
Step 3 Configuration on the Computer
290
Configuration of Store & Send Link
291
Step 1 Configuring E-Mail
291
Step 2 Enabling Authentication
291
Step 3 Other Settings
291
Centreware Internet Services Setting Items
292
Configuration of Store to WSD
293
Step 1 Preparations
293
Step 2 Enabling Port
293
Step 3 Confirmation on the Computer
294
10 Using IP Fax (SIP)
295
IP Fax (SIP) Overview
296
Preparations
296
System Requirements for the Machine
296
Settings by System Configuration
296
Installation Procedures
297
Step 1 Enabling Port and Setting up TCP/IP
297
Step 2 Configuring the SIP User Name
298
Step 3 Configuring Fax Environment
298
Step 4 Configuring the SIP Server
299
Step 5 Registering the Voip Gateway
300
11 Using the Internet Fax Service
303
Internet Fax Overview
304
Preparations
304
System Requirements for the Machine
304
E-Mail Environment
305
Installation Procedures
306
Step 1 Enabling Port and Setting up TCP/IP
306
Step 2 Configuring E-Mail Environment
307
Step 3 Testing the Internet Fax
308
12 Using the Server Fax Service
309
Server Fax Overview
310
Preparations
311
System Requirements for the Machine
311
Installation Procedure
312
Installation Overview
312
Step 1 Fax Settings
312
Step 2 Setting the Server Fax Feature
313
13 Encryption and Digital Signature Settings
315
Encryption and Digital Signature Overview
316
Types of Certificate
316
Encryption Features for Communication
316
Encryption and Digital-Signature Features for Scan Files
317
Configuration of HTTP Communications Encryption
318
Installation Overview
318
Step1 Configuration on the Machine
318
Step2 Configuration on the Computer
319
Configuration of Encryption Using Ipsec
320
Installation Overview
320
Step1 Import and Configuration of a Certificate
320
Step2 Configuration on the Machine (Configuration of Ipsec)
321
Step3 Configuration on the Computer
322
Configuration of E-Mail Encryption/Digital Signature
323
Installation Overview
323
Step1 Configuration on the Machine
323
Step2 Configuration on Sender and Recipient
325
Configuration of Pdf/Docuworks/Xps Signature
327
Installation Overview
327
Step1 Configuration on the Machine
327
Step2 Configuration on the Computer
328
14 Authentication and Accounting Features
329
Overview of Authentication and Accounting Feature
330
Overview of Authentication Feature
330
Overview of Accounting Feature
331
Authentication
332
User Types Managed by Authentication Feature
332
User Roles and Authorization Groups
333
Types of Authentication
334
Types of Account Administration
335
Authentication and Accounting Relationship
336
Services Controlled by Authentication
337
Overview
337
Services Restricted by User ID Authentication
337
Services Restricted by the Combined Use of Smart Card Authentication and User ID Authentication
340
Authentication for Job Flow Sheets and Folders
343
Overview
343
When the Authentication Feature Is Disabled
345
When the Authentication Feature Is Enabled
348
Jobs Manageable by Account Administration
351
Configuration for Authentication
354
Installation Overview
354
Enabling Authentication
354
Changing the Default Authorization Group Settings
357
Creating an Authorization Group
357
Configuration for IC Card Reader (Optional)
359
Step 1 Preparations
359
Step 2 Logout Method Using the Smart Card
359
Step 3 Registering Smart Card Information
360
Configuration for Account Administration
361
Step 1 Selecting an Accounting Type
361
Step 2 Registering User Information
361
User Authentication Operations
363
Authenticating Login Users
363
Changing Passcode
364
15 Problem Solving
365
Troubleshooting
366
Machine Trouble
367
Image Quality Trouble
372
Trouble During Copying
377
Unable to Copy
377
The Copy Result Is Not What was Expected
378
Trouble During Printing
380
Unable to Print
380
The Print Result Is Not What was Expected
381
Trouble During Faxing
383
Sending Problems
383
Receiving Problems
388
Trouble During Scanning
392
Unable to Scan with the Machine
392
Unable to Import Scanned Documents to the Computer
393
Unable to Send a Scanned Document over the Network (FTP/SMB)
394
Unable to Send E-Mail
395
The Image Is Not What was Expected
395
Network-Related Problems
397
When Using SMB
397
When You Cannot Print
398
When Using Netware
399
When Using TCP/IP
403
When Using Ethertalk
404
Centreware Internet Services Problems
405
E-Mail Features Problems
406
Internet/Intranet Connection Problems
407
Ipv4 and Ipv6 Connection Problems
408
Media Print - Text Trouble
411
Error Code
412
Other Errors
490
Paper Jams
491
Paper Jams in Top Left Cover a
492
Paper Jams in Bottom Left Cover B
494
Paper Jams in Bottom Left Cover C
494
Paper Jams in Top Left Cover E
495
Paper Jams in Trays 1 to 4
496
Paper Jams in Tray 3 (When Tandem Tray Module Is Installed)
496
Paper Jams in Tray 4 (When Tandem Tray Module Is Installed)
497
Paper Jams in Tray 5
498
Paper Jams in Tray 6 (HCF A4 1)
499
Paper Jams in Duplex Module D
501
Paper Jams in Finisher-A1
501
Paper Jams in Finisher-B1
502
Document Jams
504
Stapler Faults
506
Staple Jams in Staple Cartridge (for Finisher-A1)
507
Staple Jams in Staple Cartridge (for Finisher-B1)
508
16 Appendix
511
Specifications
512
Print Function
515
Scan Function
517
Fax Function
519
Printable Area
524
Internal Fonts
525
Optional Components
527
ESC/P-K Emulation
530
Fonts
531
ESC/P-K Emulation Settings
532
Magnification Table
539
Paper Size and Number of Printable Characters
543
PDF Direct Print
545
Docuworks Direct Print
547
PCL Emulation
549
Output Feature
551
Pcl Settings List
552
HP-GL2 Emulation
556
Output Feature
557
HP-GL/2 Emulation Settings
558
Hard Clip Area
565
Printable Area
566
Auto Layout
567
Notes and Restrictions
574
Notes and Restrictions on the Use of the Copy Feature
576
Notes and Restrictions on the Use of the Print Feature
577
Notes and Restrictions on the Use of the Scan Features
579
Notes and Restrictions on the Use of the Fax Feature
583
Notes and Restrictions on the Use of the E-Mail/Internet Fax Feature
584
Notes and Restrictions for IP Fax (SIP)
589
Notes and Restrictions When Connecting with Internet Service Provider
590
Notes and Restrictions on the Interrupt Mode
592
Notes and Restrictions on Folders
594
Notes and Restrictions on Job Flows
596
Notes and Restrictions on the Authentication and Accounting Features
597
Notes and Restrictions for Using TCP/IP
599
Notes and Restrictions for Using Ethertalk
600
Notes and Restrictions for Using Bonjour
601
Notes and Restrictions for USB Cable Distribution
603
Using the Telephone
604
Activity Report
606
Installing the HDD Extension Kit (Optional)
609
Installing the Extension System Memory (2 GB) (Optional)
612
EP System
615
Installing the TC/SC Font Kit (Optional)
616
Glossary
619
Index
621
Advertisement
Fuji Xerox DocuCentre-IV 3065 User Manual (399 pages)
Brand:
Fuji Xerox
| Category:
All in One Printer
| Size: 20.75 MB
Table of Contents
Table of Contents
3
Before Using the Machine
13
Preface
14
Types of Manuals
15
Using this Guide
16
Organization of this Guide
16
Conventions
17
Safety Notes
18
Electrical Safety
19
Machine Installation
20
Operational Safety
23
Consumable
26
Location of Warning and Caution Labels
28
Regulation
29
Radio Frequency Emissions (Class B)
29
Product Safety Certification (UL, CB)
29
Environment
30
About License
31
Rsa Bsafe
31
Heimdal
31
JPEG Code
31
Libcurl
32
Freebsd
32
Openldap
33
Des
35
Aes
35
TIFF (Libtiff)
35
ICC Profile (Little Cms)
35
XPS (XML Paper Specification)
35
EDICT and COMPDIC
35
Cyrus SASL
36
Legal Notice
37
Product Overview
39
Machine Components
40
Power Source
49
Switching the Main Power on
49
Switching the Power on
50
Switching the Power off
51
Switching the Main Power off
52
Ground Fault Interrupter
53
Energy Saver Mode
55
Exiting the Energy Saver Mode
56
Control Panel
57
Screens and Buttons Displayed
60
About the [Services Home] Screen
61
Activity Report
64
Entering Text
65
Installing the Tray Attachment on the Finisher-B1
66
Copy
67
Copying Procedure
68
Step 1 Loading Documents
68
Step 2 Selecting Features
70
Step 3 Entering a Quantity
71
Step 4 Starting the Copy Job
72
Step 5 Confirming the Copy Job in Job Status
73
Operations During Copying
74
Stopping the Copy Job
74
Changing the Number of Copies
75
Interrupting the Copy Job
76
Simple Copy
77
Paper Tray (Selecting the Paper Tray for Copying)
77
Reduce/Enlarge (Making Enlarged/Reduced Copies)
78
Sided Copying (Making 2 Sided Copies)
79
Lighten/Darken (Adjusting the Copy Density)
79
Pages Per Side (Copying Two Pages Onto One Sheet)
79
Staple
80
Copy
81
Reduce/Enlarge (Making Enlarged/Reduced Copies)
81
Paper Supply (Selecting the Paper for Copying)
84
Sided Copying (Making 2 Sided Copies)
87
Copy Output (Specifying Finishing Options)
87
Pages Per Side (Copying Multiple Pages Onto One Sheet)
87
Lighten/Darken (Adjusting the Copy Density)
88
Image Quality
89
Original Type (Selecting the Document Type)
89
Image Options (Adjusting Copy Density/Sharpness of Images)
90
Background Suppression (Erasing the Background Color of Documents)
91
Layout Adjustment
92
Sided Copying (Making 2 Sided Copies)
92
Book Copying (Copying Facing Pages Onto Separate Sheets)
94
Sided Book Copying (Making 2 Sided Copies of Facing
95
Original Size (Specifying the Scan Size for the Document)
97
Mixed Size Originals (Scanning Different Size Documents Simultaneously)
98
Edge Erase (Erasing Edges and Margin Shadows of the Document)
99
Image Shift (Adjusting the Image Position)
100
Invert Image (Making Reversed Copies of Images)
103
Original Orientation (Specifying the Orientation of Loaded Documents)
103
Image Rotation (Changing the Orientation of Images)
104
Output Format
106
Sided Copying (Making 2 Sided Copies)
106
Select [Copy] on the [Services Home]
106
Screen
106
Booklet Creation (Creating a Booklet)
107
Covers (Attaching Covers to Copies)
110
Pages Per Side (Copying Multiple Pages Onto One Sheet)
112
Poster (Making Enlarged Copies Spread over Multiple Sheets)
113
Repeat Image (Making Multiple Copies on One Sheet)
114
Annotations (Adding a Comment/A Date/Page Numbers to Copies)
115
Watermark (Printing Control Numbers on the Background of Copies)
121
Folding (Outputting Bi-Folded)
124
Preset Repeat Image (Making Multiple Copies on a Single Sheet)
125
Transparency Options (Inserting Blank Sheets between Transparencies)
126
Copy Output (Specifying Finishing Options)
127
ID Card Copy (Copying both Sides of an ID Card)
131
Job Assembly
133
Build Job
133
(Processing Documents Scanned with Different Settings as One Job)
133
Select [Copy] on the [Services Home] Screen
133
Booklet Creation
134
Sample Job (Checking the Finished Output of the Copy)
137
Combine Original Sets (Adding Originals)
138
Form Overlay (Making Copies to Overlay Documents)
140
Delete Outside/Delete Inside (Deleting Outside or Inside of the Selected Area)
141
Stored Programming (Calling a Stored Program for Build Job)
142
Fax
143
Fax Procedure
144
Step 1 Loading Documents
144
Step 2 Selecting Features
146
Step 3 Specifying Destinations
147
Step 4 Starting the Fax Job
149
Step 5 Confirming the Fax Job in Job Status
150
Operations During Faxing
151
Stopping the Fax Job
151
Changing the Scan Settings
152
About Internet Fax
154
Internet Fax Features
154
Sending Internet Fax
156
Receiving Internet Fax
157
Useful Features
158
About IP Fax (SIP)
162
IP Fax (SIP) Features
163
Feature Comparison with Regular Fax
165
Sending IP Fax (SIP)
165
Receiving IP Fax (SIP)
166
About Server Fax
167
Sending Server Fax
167
Simple Fax
169
Specifying a Destination Using the Numeric Keypad
169
Speed Dialing (Specifying a Destination Using an Address Number)
170
Specifying a Destination Using a One Touch Button
171
Resolution (Specifying the Scanning Resolution)
172
Original Type (Selecting the Document Type)
172
Sided Scanning (Transmitting 2-Sided Originals)
173
Fax/Internet Fax
174
Internet Fax/Fax/Ip Fax (SIP) (Selecting Internet Fax/Fax)
174
Add (Sending Faxes to Multiple Recipients)
175
Specifying a Destination Using the Address Book
176
Speed Dialing (Specifying a Destination Using an Address Number)
177
Specifying a Destination Using a One Touch Button
178
Specifying a Destination Using the Keyboard Screen
179
Specifying a Destination Using the Redial Feature
180
Specifying a Line (Port)
180
Entering Specific Symbols
181
Removing/Confirming a Recipient
182
Lighten/Darken (Adjusting Fax Density)
182
Sided Scanning (Transmitting 2-Sided Originals)
183
Original Type (Selecting the Document Type)
184
Resolution (Specifying the Scanning Resolution)
185
Layout Adjustment
186
Sided Scanning (Transmitting 2-Sided Originals)
186
Original Size (Specifying the Scan Size for the Original)
186
Select [Fax/Internet Fax] on the [Services Home] Screen
186
Mixed Sized Originals (Scanning Different Size Documents Simultaneously)
187
Book Faxing (Scanning Facing Pages Onto Separate Sheets)
188
Reduce/Enlarge (Specifying a Scan Ratio)
189
Stamp (Adding a Stamp When Scanning a Document)
190
Fax/Internet Fax Options
191
Acknowledgement Report (Confirming Transmission Results)
191
Starting Rate (Selecting a Communication Mode)
193
Priority Send/Delay Start (Specifying Send Priority/Send Time)
194
Transmission Header Text (Adding Sender Name and Phone Number to Faxes)
196
Cover Page (Transmitting Documents with a Cover Page)
196
Internet Fax Subject (Specifying the Internet Fax Subject)
198
Internet Fax Message (Editing the Internet Fax Mail Contents)
199
Recipient Print Sets (Printing Multiple Sets at the Remote Machine)
200
Pages Per Side (Combining Multiple Pages into One Sheet)
200
Remote Folder (Using Remote Folder)
201
F Code (Using F Code Transmission)
204
Internet Fax Profile (Specifying Internet Fax Profiles)
207
Encryption (Sending Internet Fax Encrypted by S/MIME)
209
Digital Signature (Sending Internet Fax with a Digital Signature by S/MIME)
209
More Options
210
Remote Polling (Retrieving Files from Remote Machines)
210
Select [Fax/Internet Fax] on the [Services Home] Screen
210
Store for Polling
212
(Storing Files on the Machine that a Remote Machine Can Retrieve)
212
On-Hook (Confirming Remote Machine Response Prior to Transmission)
214
Broadcast
215
Broadcast Send (Transmitting to Multiple Recipients)
215
Relay Broadcast (Transmitting Documents through a Relay Station)
215
Fax Signal Method
216
Remote Relay Broadcast (Performing Relay Broadcast to Remote Locations)
219
F Code Method
221
Receiving Faxes
223
Switching between Auto Receive and Manual Receive
223
Using Auto Receive
224
Using Manual Receive
224
Using Folder Receive
225
Facsimile Information Services
226
Using the Receiver
226
When Not Using a Receiver
226
Scan
229
Scanning Procedure
230
Step 1 Loading Documents
230
Step 2 Selecting the Features
232
Step 3 Starting the Scan Job
235
Step 4 Confirming the Scan Job in Job Status
236
Step 5 Saving the Scanned Data
237
Operations During Scanning
238
Stopping the Scan Job
238
Previewing the Scanned Images During a Scan Job
239
Changing Scan Settings
240
E-Mail
241
Address Book (Specifying an E-Mail Address)
241
New Recipient (Entering an Address)
244
Add Me (Adding the Sender's Address)
245
Recipient(S) (Editing a Recipient)
245
From (Setting the Sender's Address)
246
Subject (Setting the Subject)
247
Message (Entering the E-Mail Body)
247
Preview (Previewing the Scanned Images During a Scan Job)
248
Color Scanning (Selecting an Output Color)
248
Sided Scanning (Scanning both Sides of a Document)
249
Original Type (Selecting the Document Type)
250
File Format (Selecting a File Format for Output Data)
250
Network Scanning
259
Preview (Previewing the Scanned Images During a Scan Job)
260
Color Scanning (Selecting an Output Color)
260
Sided Scanning (Scanning both Sides of a Document)
260
Original Type (Selecting the Document Type)
260
File Format (Selecting a File Format for Output Data)
260
Scan to PC
261
Transfer Protocol (Selecting a Transfer Protocol)
261
Address Book (Specifying a Destination PC Using the Address Book)
262
Browse (Specifying a Destination PC by Browsing Your Network)
263
Specifying a Destination (Specifying a Destination PC Using the Screen Keyboard)
264
Preview (Previewing the Scanned Images During a Scan Job)
266
Color Scanning (Selecting an Output Color)
266
Sided Scanning (Scanning both Sides of a Document)
266
Original Type (Selecting the Document Type)
266
File Format (Selecting a File Format for Output Data)
266
Store to Folder
267
Color Scanning (Selecting an Output Color)
268
Sided Scanning (Scanning both Sides of a Document)
268
Original Type (Selecting the Document Type)
268
Preview (Previewing the Scanned Images During a Scan Job)
268
Store to USB
269
Save in
273
(Specifying a Storage Location in the USB Memory Device)
273
(Displaying the Details of a Storage Location in the USB Memory Device)
274
Preview (Previewing the Scanned Images During a Scan Job)
274
Color Scanning (Selecting an Output Color)
274
Sided Scanning (Scanning both Sides of a Document)
274
Original Type (Selecting the Document Type)
275
File Format (Selecting a File Format for Output Data)
275
Store & Send Link
276
Scan to (Displaying the E-Mail Address of the Authenticated User)
277
From (Displaying the E-Mail Address of the Authenticated User)
277
Subject (Setting the Subject)
277
Message (Entering the E-Mail Body)
277
Color Scanning (Selecting an Output Color)
277
Sided Scanning (Scanning both Sides of a Document)
277
Original Type (Selecting the Document Type)
277
Preview (Previewing the Scanned Images During a Scan Job)
278
File Format (Selecting a File Format for Output Data)
278
Store to WSD
279
Computer (Starting a Scan Job Via Computer Operation)
279
This Device (Storing Data Scanned by the Machine on a Network Computer)
281
Advanced Settings
282
Photographs (Scanning a Color Photograph)
282
Image Options (Adjusting Scan Density and Image Sharpness)
283
Image Enhancement
284
(Erasing the Background Color of Documents/Adjusting Contrast)
284
Shadow Suppression (Suppressing the Document Background)
284
Color Space (Specifying the Color Space)
285
Layout Adjustment
286
Resolution (Specifying a Scanning Resolution)
287
Sided Scanning (Scanning both Sides of a Document)
287
Book Scanning (Scanning Facing Pages on Separate Sheets)
287
Original Size (Specifying a Scan Size)
289
Mixed Sized Originals (Scanning Different Size Documents Simultaneously)
290
Edge Erase (Erasing Edges and Margin Shadows in the Document)
291
Reduce/Enlarge (Specifying a Scanning Ratio)
292
Original Orientation (Specifying the Orientation of the Loaded Documents)
293
E-Mail Options/Filing Options
294
Mail], [Store to Folder], [Network Scanning]
294
On the [Services Home] Screen, Select
294
Scan to PC], [Store & Send Link], or
294
To USB]
294
Quality/File Size (Specifying an Image Compression Ratio When Scanning)
295
Read Receipts (Specifying Read Receipts)
295
Split Send (Sending in Sections)
296
File Name (Specifying a Name for the File to be Sent)
297
Reply to (Specifying a Reply Address)
297
File Name (Specifying a Name for the File to be Saved)
298
File Name Conflict (Setting the Action to be Taken for File Name Conflict)
298
Digital Signature (Sending E-Mail with a Digital Signature by S/MIME)
299
Encryption (Sending E-Mail Encrypted by S/MIME)
299
Login Name
299
Meta Data
299
Password
299
Send from Folder
301
Folder Operating Procedure
302
Step 1 Opening the [Send from Folder] Screen
302
Step 2 Selecting a Folder
302
Step 3 Checking/Selecting Files in a Folder
303
Step 4 Operating Files in a Folder
303
Selecting a Folder
304
Checking/Operating Files in a Folder
305
Checking File Details
307
Printing Files in a Folder
308
Configuring/Starting Job Flow
311
[Link Job Flow Sheet to Folder] Screen
313
Job Flow Restrictions
315
Job Flow Sheets
317
Job Flow Procedure
318
Step 1 Opening the [Job Flow Sheets] Screen
318
Step 2 Selecting a Job Flow Sheet
319
Step 3 Confirming/Changing the Job Flow Sheet
319
Step 4 Starting the Job Flow Sheet
319
Selecting/Changing a Job Flow Sheet
320
Stored Programming
323
Stored Programming Overview
324
Registering/Deleting/Renaming Stored Programs
325
Registering Stored Programs
326
Notes and Restrictions on Registering Stored Programs
327
Registering Stored Programs for Build Job
328
Deleting Stored Programs
328
Entering/Changing a Stored Program Name
329
Assigning/Changing Icons for Stored Programs
329
Calling a Stored Program
331
Calling a Stored Program for Build Job
332
Media Print-Text
333
Media Print Overview
334
Supported File Formats
334
Notes and Restrictions on Media Print
335
Inserting USB Memory Device
336
Selecting Files
339
[Select from List] Screen
340
Selecting the Printing Options
341
Media Print - Text
341
Index Print
342
10 Job Status
343
Job Status Overview
344
Checking Current/Pending Jobs
345
Checking Completed Jobs
346
Printing and Deleting Stored Jobs
347
Secure Print
347
Sample Set
349
Delayed Print
351
Charge Print
352
Private Charge Print
355
Public Folder
358
Undelivered Faxes
359
Printing Pending Jobs
361
Handling Error Terminations
362
Computer Operations
363
Features Overview
364
Print
365
Print Features
365
Setup
366
Printing
367
E-Mail Printing
368
Setup
368
Sending E-Mail
368
Sending Fax
370
Registering Destinations
370
Importing Scanned Data
372
Importing to a TWAIN Compatible Application
372
Importing Using Stored File Manager 3
374
Importing Using Centreware Internet Services
376
Importing Using Easyoperator
378
Centreware Internet Services
380
Browser Settings
382
Starting Centreware Internet Services
383
12 Appendix
385
Glossary
386
Index
393
Advertisement
Related Products
Fuji Xerox ApeosPort-IV 3370
Fuji Xerox DocuCentre-III 3007
Fuji Xerox Document Centre 336 series
Fuji Xerox DocuCentre-IV 3060
Fuji Xerox DocuCentre-II 3005
Fuji Xerox DocuCentre-IV C5570
Fuji Xerox DocuCentre-IV 4470
Fuji Xerox DocuCentre-IV 3370
Fuji Xerox DocuCentre-IV 2270
Fuji Xerox DocuCentre-IV C4475
Fuji Xerox Categories
All in One Printer
Printer
Copier
Scanner
Office Equipment
More Fuji Xerox Manuals
Login
Sign In
OR
Sign in with Facebook
Sign in with Google
Upload manual
Upload from disk
Upload from URL