Sign In
Upload
Manuals
Brands
Fuji Xerox Manuals
All in One Printer
ApeosPort-VI C3371
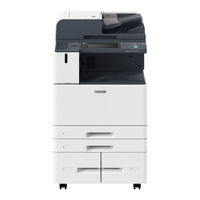
Fuji Xerox ApeosPort-VI C3371 Manuals
Manuals and User Guides for Fuji Xerox ApeosPort-VI C3371. We have
4
Fuji Xerox ApeosPort-VI C3371 manuals available for free PDF download: Administrator's Manual, User Manualline, Quick Reference, User Manual
Fuji Xerox ApeosPort-VI C3371 Administrator's Manual (889 pages)
Brand:
Fuji Xerox
| Category:
All in One Printer
| Size: 31.72 MB
Table of Contents
Table of Contents
3
1 Before Using the Machine
15
Preface
16
Types of Manuals
17
Using this Guide
18
Organization of this Guide
18
Conventions
19
Interface Cables
21
Using the USB Interface
21
Using the Ethernet Interface
22
Power Saver Mode
25
Changing the Interval for Entering Power Saver Mode
25
Deactivating Smart Welcomeyes
27
Warmer Mode
29
Setting the Warmer Mode
29
Customizing the Control Panel
32
Changing the Screen Default
32
Setting the Screen after Auto Clear
33
Customizing the Button Layout
35
Assigning Services to the Custom Buttons
40
Adjusting Screen Brightness
42
Touch Screen
43
Important Security Instructions
45
Entering Text
46
2 Paper and Other Media
47
Paper Types
48
Loadable Quantity and Weight for Supported Paper
48
Supported Paper Type
50
Special Media
53
Loading Paper
56
Loading Paper in Trays 1 to 4
57
Loading Paper in Tray 3 (When Tandem Tray Module Is Installed)
58
Loading Paper in Tray 4 (When Tandem Tray Module Is Installed)
60
Loading Paper in Tray 5 (Bypass)
61
Loading Paper in Tray 6 (HCF (A4 1 Tray))
63
Changing the Paper Size
66
Changing the Paper Size for Trays 1 to 4
66
Changing the Paper Size for Tray 3 (When Tandem Tray Module Is Installed)
67
Changing the Paper Size for Tray 4 (When Tandem Tray Module Is Installed)
68
Changing the Paper Size for Tray 6 (HCF (A4 1 Tray))
70
Changing the Paper Settings
73
3 Maintenance
77
Replacing Consumables
78
Replacing Toner Cartridge
80
Replacing Waste Toner Container R5
82
Replacing Drum Cartridges R1, R2, R3, or R4 (for Customers Having a Spot Maintenance Contract)
85
Replacing Staple Cartridge (for Finisher A2)
90
Replacing Staple Cartridge (for Finisher B1)
92
Replacing Staple Cartridge (for C3 Finisher or C3 Finisher with Booklet Maker)
94
Replacing Staple Cartridge (for Booklet Maker Unit for Finisher B1)
96
Replacing Booklet Staple Cartridge (for C3 Finisher with Booklet Maker)
98
Emptying the Hole Punch Waste Container (for Finisher B1)
101
Emptying the Hole Punch Waste Container (for C3 Finisher or C3 Finisher with Booklet Maker)
103
Replacing Stamp (for Duplex Automatic Document Feeder B1-PC)
104
Replacing Stamp (for Duplex Automatic Document Feeder C1-PC)
105
Cleaning the Machine
107
Cleaning the Exterior
107
Cleaning the Interior (LED Printheads)
107
Cleaning the Touch Screen
110
Cleaning Document Cover and Document Glass
111
Cleaning White Chute and Constant Velocity Transport Glass
113
Cleaning the Document Feeder Rollers
115
Executing Calibration
117
Executing 2 Sided Color Scanning Calibration
121
Printing a Report/List
124
Deleting a Private Charge Print Job with an Invalid User ID
125
Setting Restore Tool
126
4 Machine Status
127
Overview of Machine Status
128
Machine Information
129
General Information
129
Paper Tray Status
130
Print Reports
131
Automatically Printed Reports/Lists
142
Overwrite Hard Disk
143
Print Mode
143
Fax Receiving Mode
147
Faults
148
Supplies
149
Billing Information
150
User Account Billing Information
151
5 Tools
155
System Settings Procedure
156
Step1 Entering System Administration Mode
156
Step2 Entering the System Administrator User ID and Passcode
156
Step3 Selecting [Tools]
157
Step4 Selecting a Setting Item on the [Tools] Screen
157
Step5 Setting a Feature
159
Step 6 Exiting System Administration Mode
160
Tools Menu List
161
System Settings
161
Setup
163
Accounting
163
Authentication/Security Settings
163
Common Service Settings
164
Machine Clock/Timers
164
Power Saver Settings
167
Audio Tones
169
Screen/Button Settings
170
Paper Tray Settings
175
Image Quality Adjustment
180
Reports
183
Maintenance
185
Watermark
189
Secure Watermark
191
Force Annotation
194
Print Universal Unique ID
196
Image Log Control
196
Notify Job Completion by E-Mail
199
Plug-In Settings
200
Other Settings
200
Copy Service Settings
222
Copy Tab - Features Allocation
222
Preset Buttons
223
Copy Defaults
223
Copy Control
228
Original Size Defaults
231
Reduce/Enlarge Presets
231
Custom Colors
231
Annotations - Create Comments
232
Connectivity & Network Setup
233
Port Settings
233
Wireless LAN Settings
238
Protocol Settings
239
Machine's E-Mail Address/Host Name
243
Proxy Server Settings
244
EP Proxy Server Setup
245
SIP Settings
246
T.38 Settings
249
Outgoing/Incoming E-Mail Settings
250
Remote Authentication/Directory Service
252
Security Settings
258
Other Settings
263
Print Service Settings
265
Allocate Memory
265
Delete Form
266
Register Google Cloud Print
267
Other Settings
267
Scan Service Settings
272
Screen Defaults
272
Scan Defaults
273
Scan to PC Defaults
276
Original Size Defaults
277
Output Size Defaults
277
Reduce/Enlarge Presets
277
Other Settings
278
Fax Service Settings
281
Screen Defaults
281
Fax Defaults
282
Fax Control
284
Fax Received Options
289
Reduce/Enlarge Presets
292
Original Size Defaults
292
Local Terminal Information
293
Internet Fax Control
294
E-Mail/Internet Fax Service Settings
297
E-Mail Control
297
Address Book Settings
300
Folder Service Settings
301
Job Flow Service Settings
303
Media Print Service Settings
304
Stored File Settings
305
Web Applications Service Setup
308
Server Certificate Verification Settings
308
Server Setup
310
Other Settings
312
Web Browser Setup
313
Setup
315
Create Folder
315
Stored Programming
318
Create Job Flow Sheet
318
Create Job Flow Sheet Keyword
328
Add Address Book Entry
328
Create Fax Group Recipients
337
Add Fax Comment
338
Paper Tray Attributes
339
Accounting
340
Create/View User Accounts
340
View Accounts
343
Reset User Accounts
344
System Administrator's Meter (Copy Jobs)
345
Accounting Type
345
Accounting Login Screen Settings
346
Fax Billing Data
348
Accounting/Billing Device Settings
348
Authentication/Security Settings
351
System Administrator Settings
351
Authentication
352
Allow User to Disable Active Settings
362
Job Status Default
362
Overwrite Hard Disk
363
6 Centreware Internet Services Settings
365
Installation of Centreware Internet Services
366
Preparations
366
Configuration on the Machine
366
Starting Centreware Internet Services
368
Configuring Machine Settings Using Centreware Internet Services
369
7 Printer Environment Settings
373
Print Overview
374
Installation When Using USB Port
377
Step 1 Preparations
377
Step 2 Configuration on the Machine
377
Step 3 Configuration on the Computer
378
Centreware Internet Services Setting Items
378
Installation When Using TCP/IP (Lpd/Port 9100)
379
Step 1 Preparations
379
Step 2 Configuration on the Machine
379
Step 3 Configuration on the Computer
380
Centreware Internet Services Setting Items
381
Installation When Using Internet Printing Protocol (IPP)
383
Step 1 Preparations
383
Step 2 Configuration on the Machine
383
Step 3 Configuration on the Computer
384
Centreware Internet Services Setting Items
384
8 E-Mail Environment Settings
387
E-Mail Overview
388
Preparations
390
Installation Procedures
393
Step 1 Enabling Port and Setting up TCP/IP
393
Step 2 Configuring E-Mail Environment
394
Centreware Internet Services Setting Items
396
9 Scanner Environment Settings
397
Scan Service Overview
398
Configuration of Store to Folder
400
Step 1 Enabling Port and Setting up TCP/IP
400
Step 2 Registering a Folder
401
Step 3 Configuring a Computer
401
Configuration of Scan to PC
402
Step 1 Preparations
402
Step 2 Enabling Port and Setting up TCP/IP
403
Step 3 Configuration on the Computer
404
Configuration of Scan to My Folder
405
Step1 Preparations
405
Step 2 Enabling SMB Port and Setting up TCP/IP
405
Step 3 Configuring Remote Authentication
406
Step 4 Configuring Scan to My Folder
408
Step 5 Configuration on the Computer
410
Configuration of Store to USB
411
Available USB Memory Devices
411
Centreware Internet Services Setting Items
411
Configuration of Network Scanning (Job Template Scanning)
412
Step 1 Preparations
412
Step 2 Enabling Ports and Setting up TCP/IP
412
Step 3 Configuring the SNMP Port
413
Step 4 Configuration on the Computer
414
Configuration of Job Flow Sheets
415
Step 1 Enabling Ports and Setting up TCP/IP
415
Step 2 Configuring the SNMP Port
416
Step 3 Configuration on the Computer
416
Configuration of Store & Send Link
417
Step 1 Configuring E-Mail
417
Step 2 Enabling Authentication
417
Step 3 Other Settings
417
Step 4 Centreware Internet Services Setting Items
417
Device Information
418
Configuration of Store to WSD
419
Step 1 Preparations
419
Step 2 Enabling Port
419
Step 3 Confirmation on the Computer
420
10 Using IP Fax (SIP)
421
IP Fax (SIP) Overview
422
Preparations
423
System Requirements for the Machine
423
Settings by System Configuration
423
Installation Procedures
424
Step 1 Enabling Port and Setting up TCP/IP
424
Step 2 Configuring the SIP User Name
425
Step 3 Configuring Fax Environment
426
Step 4 Configuring the SIP Server
427
Step 5 Registering the Voip Gateway
428
11 Using the Internet Fax Service
431
Internet Fax Overview
432
Preparations
433
System Requirements for the Machine
433
E-Mail Environment
433
Installation Procedures
434
Step 1 Enabling Port and Setting up TCP/IP
434
Step 2 Configuring E-Mail Environment
435
Step 3 Testing the Internet Fax
437
12 Using the Server Fax Service
439
Server Fax Overview
440
Preparations
441
System Requirements for the Machine
441
Installation Procedure
442
Installation Overview
442
Step 1 Fax Settings
442
Step 2 Setting the Server Fax Feature
443
13 Encryption and Digital Signature Settings
445
Encryption and Digital Signature Overview
446
Types of Certificate
446
Certificate Conditions
448
Encryption Features for Communication
448
Encryption and Digital-Signature Features for Scan Files
450
Configuration of HTTP Communications Encryption
451
Installation Overview
451
Step1 Configuration on the Machine
451
Step2 Configuration on the Computer
453
Configuration of Encryption Using Ipsec
454
Installation Overview
454
Step1 Import and Configuration of a Certificate
454
Step2 Configuration on the Machine (Configuration of Ipsec)
455
Step3 Configuration on the Computer
456
Configuration of E-Mail Encryption/Digital Signature
457
Installation Overview
457
Step1 Configuration on the Machine
458
Step2 Configuration on Sender and Recipient
460
Configuration of Pdf/Docuworks/Xps Signature (Apeosport Series Models Only)
462
Installation Overview
462
Step1 Configuration on the Machine
462
Step2 Configuration on the Computer
464
14 Authentication and Accounting Features
465
Overview of Authentication and Accounting Feature
466
Types of User
466
User Roles and Authorization Groups
466
Access Control
468
Types of Authentication
468
Account Administration
470
Services Controlled by Authentication
475
Overview
475
Combination of Authentication and Account Administration Types
475
Authentication for Job Flow Sheets and Folders
478
Creating / Using Job Flow Sheet
478
Creating / Using Folder
480
Configuration for Authentication
481
Installation Overview
481
Enabling Authentication
481
Changing the Default Authorization Group Settings
484
Creating an Authorization Group
485
Configuration for IC Card Reader (Optional)
487
Step 1 Preparations
487
Step 2 Logout Method Using the Smart Card
488
Step 3 Registering Smart Card Information
488
Configuration for Account Administration
489
Step 1 Selecting an Accounting Type
489
Step 2 Registering User Information
489
User Authentication Operations
491
Authenticating Login Users
491
Changing Passcode
492
15 Problem Solving
495
Troubleshooting
496
Machine Trouble
497
Image Quality Trouble
503
Trouble During Copying
509
Unable to Copy
509
The Copy Result Is Not What was Expected
510
Trouble During Printing
513
Unable to Print
513
The Print Result Is Not What was Expected
514
Trouble During Faxing
516
Sending Problems
516
Receiving Problems
520
Trouble During Scanning
524
Unable to Scan with the Machine
524
Unable to Import Scanned Documents to the Computer
525
Unable to Send a Scanned Document over the Network (FTP/SMB)
525
Unable to Send E-Mail
526
The Image Is Not What was Expected
527
Network-Related Problems
529
When Using SMB
529
When Using TCP/IP
529
Centreware Internet Services Problems
531
E-Mail Features Problems
532
Internet/Intranet Connection Problems
532
Ipv4 and Ipv6 Connection Problems
534
Help Connection Problems
536
Media Print - Text Trouble
537
Media Print - Photos Trouble
538
Error Code
539
Other Errors
665
Paper Jams
666
Paper Jams in Side Tray
666
Paper Jams in Top Left Cover a
667
Paper Jams in Bottom Left Cover B
672
Paper Jams in Trays 1 to 4
673
Paper Jams in Tandem Tray Module
673
Paper Jams in Tray 5
675
Paper Jams in Tray 6 (HCF B1)
676
Paper Jams in Finisher A2
679
Paper Jams in Finisher B1
680
Paper Jams in C3 Finisher / C3 Finisher with Booklet Maker
682
Paper Jams in the Folder Unit CD1
690
Document Jams
695
Duplex Automatic Document Feeder B1-PC
695
Duplex Automatic Document Feeder C1-PC
697
Stapler Faults
700
Staple Jams in Staple Cartridge (for Finisher A2)
701
Staple Jams in Staple Cartridge (for Finisher B1)
702
Booklet Maker
704
Booklet Staple Jams in Booklet Staple Cartridge (for C3 Finisher with Booklet Maker
706
Advertisement
Fuji Xerox ApeosPort-VI C3371 User Manualline (555 pages)
Brand:
Fuji Xerox
| Category:
All in One Printer
| Size: 19.42 MB
Table of Contents
Table of Contents
3
Before Using the Machine
13
Preface
14
Types of Manuals
15
Using this Guide
16
Organization of this Guide
16
Conventions
17
Safety Notes
19
Electrical Safety
20
Machine Installation
22
Operational Safety
27
Consumable
31
Location of Warning and Caution Labels
32
Regulation
33
Radio Frequency Emissions (Class B)
33
Regulatory Information for RFID
33
Product Safety Certification (CB)
33
Other
33
Environment
34
Legal Notice
35
Product Overview
37
Machine Components
38
Power Source
49
Switching the Main Power on
49
Switching the Power on
50
Switching the Power off
51
Switching the Main Power off
52
Switching the Power off from Remote Location
53
Circuit Breaker
55
Power Saver Mode
56
Entering the Power Saver Mode
56
Exiting the Power Saver Mode
56
Smart Welcomeyes
57
Control Panel
59
Large Size Color UI
63
Screens and Buttons Displayed
65
About the Services Home Screen
67
Activity Report
72
Fax Receiving Mode
73
Print Mode
73
Touch Screen
74
Entering Text
77
Installing the Tray Attachment on the Finisher B1
78
Copy
79
Copying Procedure
80
Step 1 Loading Documents
80
Step 2 Selecting Features
84
Step 3 Entering a Quantity
85
Step 4 Starting the Copy Job
85
Step 5 Confirming the Copy Job in Job Status
86
Operations During Copying
87
Stopping the Copy Job
87
Changing the Number of Copies
88
Interrupting the Copy Job
89
Simple Copy
90
Paper Supply (Selecting the Paper for Copying)
90
Reduce/Enlarge (Making Enlarged/Reduced Copies)
91
Sided Copying (Making 2 Sided Copies)
92
Auto/Color/Black & White (Selecting the Color for Copying)
93
Lighten/Darken (Adjusting the Copy Density)
93
Pages Per Side (Copying Two Pages Onto One Sheet)
94
Staple
94
Copy
96
Reduce/Enlarge (Making Enlarged/Reduced Copies)
96
Paper Supply (Selecting the Paper for Copying)
100
Adjust Paper Curl
102
Alignment Adjustment
103
Paper Type
103
Output Color (Selecting the Color for Copying)
104
Auto Detect
105
Sided Copying (Making 2 Sided Copies)
110
Copy Output (Specifying Finishing Options)
110
Pages Per Side (Copying Multiple Pages Onto One Sheet)
110
Lighten/Darken (Adjusting the Copy Density)
111
Image Quality
112
Original Type (Selecting the Document Type)
112
Image Options (Adjusting Copy Density/Sharpness/Saturation of Images)
114
Image Enhancement (Erasing the Background Color of Documents/Adjusting Contrast)
115
Color Effects (Selecting an Image Quality)
116
Color Balance (Adjusting Color Balance)
117
Color Shift (Adjusting the Color Tone)
119
Layout Adjustment
120
Sided Copying (Making 2 Sided Copies)
120
Book Copying (Copying Facing Pages Onto Separate Sheets)
122
Sided Book Copying (Making 2 Sided Copies of Facing
124
Original Size (Specifying the Scan Size for the Document)
127
Mixed Size Originals (Scanning Different Size Documents Simultaneously)
128
Edge Erase (Erasing Edges and Margin Shadows of the Document)
129
Image Shift (Adjusting the Image Position)
131
Invert Image (Making Reversed Copies of Images)
134
Original Orientation (Specifying the Orientation of Loaded Documents)
135
Image Rotation (Changing the Orientation of Images)
135
Output Format
138
Sided Copying (Making 2 Sided Copies)
138
Booklet Creation (Creating a Bound Booklet)
139
Covers (Attaching Covers to Copies)
143
Pages Per Side (Copying Multiple Pages Onto One Sheet)
145
Poster (Making Enlarged Copies Spread over Multiple Sheets)
146
Repeat Image (Making Multiple Copies on One Sheet)
148
Annotations (Adding a Comment/A Date/Page Numbers to Copies)
149
Watermark (Printing Control Numbers on the Background of Copies)
156
Secure Watermark (Managing Document Security)
160
Folding (Outputting Bi-Folded/Tri-Folded Paper)
162
Preset Repeat Image (Making Multiple Copies on a Single Sheet)
164
Copy Output (Specifying Finishing Options)
165
ID Card Copy (Copying both Sides of an ID Card)
171
Job Assembly
173
Build Job (Processing Documents Scanned with Different Settings as One Job)
173
Booklet Creation
174
Sample Job (Checking the Finished Output of the Copy)
178
Combine Original Sets (Adding Originals)
180
Delete Outside/Delete Inside (Deleting Outside or Inside of the Selected Area)
181
Stored Programming (Calling a Stored Program for Build Job)
184
Fax
185
Fax Procedure
186
Step 1 Loading Documents
186
Step 2 Selecting Features
190
Step 3 Specifying Destinations
191
Step 4 Starting the Fax Job
193
Step 5 Confirming the Fax Job in Job Status
194
Operations During Faxing
196
Stopping the Fax Job
196
Previewing the Read Images During a Fax Job
197
Thumbnail View
198
Changing the Scan Settings
200
About Internet Fax
202
Internet Fax Features
202
Sending Internet Fax
204
Receiving Internet Fax
206
Useful Features
207
About IP Fax (SIP)
211
IP Fax (SIP) Features
212
Feature Comparison with Regular Fax
214
Sending IP Fax (SIP)
214
Receiving IP Fax (SIP)
216
About Server Fax
217
Sending Server Fax
217
Simple Fax
219
Specifying a Destination Using the Numeric Keypad
219
Speed Dialing (Specifying a Destination Using an Address Number)
220
Specifying a Destination Using a One-Touch Button
220
Previewing the Read Images During a Simple Fax Job
221
Resolution (Specifying the Scanning Resolution)
221
Original Type (Selecting the Document Type)
222
Sided Scanning (Transmitting 2-Sided Originals)
223
Fax/Internet Fax
224
Internet Fax/Fax/Ip Fax (SIP) (Selecting Internet Fax/Fax/Ip Fax (SIP))
224
Add (Sending Faxes to Multiple Recipients)
225
Specifying a Destination Using the Address Book
225
Address Book (Specifying a Destination Using the Address Book [Type 1])
226
Address Book (Specifying a Destination Using the Address Book [Type 2])
230
Speed Dialing (Specifying a Destination Using an Address Number)
232
Add New Address (Registering a Destination on the Address Book)
233
Specifying a Destination Using a One-Touch Button
236
Specifying a Destination Using the Keyboard Screen
236
Specifying a Destination Using the Redial Feature
237
Specifying a Line (Port)
238
Entering Specific Symbols
240
Removing/Confirming a Recipient
240
Previewing the Read Images During a Fax/Internet Fax Job
241
Lighten/Darken (Adjusting Fax Density)
242
Sided Scanning (Transmitting 2-Sided Originals)
242
Original Type (Selecting the Document Type)
244
Resolution (Specifying the Scanning Resolution)
245
Layout Adjustment
246
Sided Scanning (Transmitting 2-Sided Originals)
246
Original Type (Selecting the Document Type)
246
Resolution (Specifying the Scanning Resolution)
246
Original Size (Specifying the Scan Size for the Original)
247
Mixed Size Originals (Scanning Different Size Documents Simultaneously)
248
Book Faxing (Scanning Facing Pages Onto Separate Sheets)
249
Reduce/Enlarge (Specifying a Scan Ratio)
250
Stamp (Adding a Stamp When Scanning a Document)
252
Lighten / Darken (Adjusting Fax Density)
253
Fax/Internet Fax Options
254
Acknowledgement Report (Confirming Transmission Results)
254
Starting Rate (Selecting a Communication Mode)
256
Priority Send/Delay Start (Specifying Send Priority/Send Time)
258
Delay Start
259
Transmission Header Text (Adding Sender Name and Phone Number to Faxes)
260
Cover Page (Transmitting Documents with a Cover Page)
261
Internet Fax Subject (Specifying the Internet Fax Subject)
263
Internet Fax Message (Editing the Internet Fax Mail Contents)
263
Recipient Print Sets (Printing Multiple Sets at the Remote Machine)
265
Pages Per Side (Combining Multiple Pages into One Sheet)
266
Remote Folder (Using Remote Folder)
267
F Code (Using F Code Transmission)
270
Internet Fax Profile (Specifying Internet Fax Profiles)
275
Encryption (Sending Internet Fax Encrypted by S/MIME)
276
Digital Signature (Sending Internet Fax with a Digital Signature by S/MIME)
277
More Options
278
Remote Polling (Retrieving Files from Remote Machines)
278
Store for Polling (Storing Files on the Machine that a Remote Machine Can Retrieve)
281
On-Hook (Confirming Remote Machine Response Prior to Transmission)
283
Broadcast
285
Broadcast Send (Transmitting to Multiple Recipients)
285
Relay Broadcast (Transmitting Documents through a Relay Station)
286
Remote Relay Broadcast (Performing Relay Broadcast to Remote Locations)
290
Receiving Faxes
295
Switching between Auto Receive and Manual Receive
295
Using Auto Receive
296
Using Manual Receive
296
Using Folder Receive
297
Facsimile Information Services
298
Using the Receiver
298
When Not Using a Receiver
299
Scan
301
Scanning Procedure
302
Step 1 Loading Documents
302
Step 2 Selecting the Features
306
Step 3 Starting the Scan Job
309
Step 4 Confirming the Scan Job in Job Status
311
Step 5 Saving the Scanned Data
311
Operations During Scanning
313
Stopping the Scan Job
313
Previewing the Scanned Images During a Scan Job
314
Changing Scan Settings
318
E-Mail
320
Address Book
321
Address Book (Specifying a Destination Using the Address Book [Type 1])
322
Address Book (Specifying a Destination Using the Address Book [Type 2])
325
Add New Address (Registering a Recipient on the Address Book)
329
Specifying a Destination Using a One-Touch Button
331
New Recipient (Specifying an E-Mail Address)
332
Add Me (Adding the Sender's Address)
334
Recipient(S) (Editing a Recipient)
334
From (Setting the Sender's Address)
336
Subject (Setting the Subject)
337
Message (Entering the E-Mail Body)
337
Preview (Previewing the Scanned Images During a Scan Job)
338
Color Scanning (Selecting an Output Color)
338
Sided Scanning (Scanning both Sides of a Document)
339
Original Type (Selecting the Document Type)
341
File Format (Selecting a File Format for Output Data)
341
Searchable Text
344
Setting Item
344
Network Scanning
356
Preview (Previewing the Scanned Images During a Scan Job)
357
Color Scanning (Selecting an Output Color)
357
Sided Scanning (Scanning both Sides of a Document)
357
Original Type (Selecting the Document Type)
357
File Format (Selecting a File Format for Output Data)
358
Scan to PC
359
Transfer Protocol (Selecting a Transfer Protocol)
359
Address Book
360
Address Book (Specifying a Destination Using the Address Book [Type 1])
361
Address Book (Specifying a Destination Using the Address Book [Type 2])
363
Add New Address (Registering a Destination PC on the Address Book)
364
Specifying a Destination PC Using a One-Touch Button
368
Browse (Specifying a Destination PC by Browsing Your Network)
368
Specifying a Destination (Specifying a Destination PC Using the Screen Keyboard)
370
Preview (Previewing the Scanned Images During a Scan Job)
373
Color Scanning (Selecting an Output Color)
373
Sided Scanning (Scanning both Sides of a Document)
373
Original Type (Selecting the Document Type)
373
File Format (Selecting a File Format for Output Data)
373
Store to Folder
374
Color Scanning (Selecting an Output Color)
375
Sided Scanning (Scanning both Sides of a Document)
375
Original Type (Selecting the Document Type)
375
Preview (Previewing the Scanned Images During a Scan Job)
375
Store to USB
376
Save in (Specifying a Storage Location in the USB Memory Device)
380
Details (Displaying the Details of a Storage Location in the USB Memory Device)
382
Preview (Previewing the Scanned Images During a Scan Job)
382
Color Scanning (Selecting an Output Color)
382
Sided Scanning (Scanning both Sides of a Document)
383
Original Type (Selecting the Document Type)
383
File Format (Selecting a File Format for Output Data)
383
Store & Send Link
384
Scan to (Displaying the E-Mail Address of the Authenticated User)
385
From (Displaying the E-Mail Address of the Authenticated User)
385
Subject (Setting the Subject)
385
Message (Entering the E-Mail Body)
385
Color Scanning (Selecting an Output Color)
385
Sided Scanning (Scanning both Sides of a Document)
386
Original Type (Selecting the Document Type)
386
Preview (Previewing the Scanned Images During a Scan Job)
386
File Format (Selecting a File Format for Output Data)
386
Store to WSD
387
Computer (Starting a Scan Job Via Computer Operation)
388
This Device (Storing Data Scanned by the Machine on a Network Computer)
389
Advanced Settings
391
Color Scanning (Selecting an Output Color)
391
Original Type (Selecting the Document Type)
392
Photographs (Scanning a Color Photograph)
392
Image Options (Adjusting Scan Density and Image Sharpness)
392
Image Enhancement (Erasing the Background Color of Documents/Adjusting Contrast)
393
Shadow Suppression (Suppressing the Document Background)
394
Color Space (Specifying the Color Space)
395
Layout Adjustment
396
Resolution (Specifying a Scanning Resolution)
396
Sided Scanning (Scanning both Sides of a Document)
397
Book Scanning (Scanning Facing Pages on Separate Sheets)
397
Original Size (Specifying a Scan Size)
399
Mixed Size Originals (Scanning Different Size Documents Simultaneously)
400
Edge Erase (Erasing Edges and Margin Shadows in the Document)
401
Reduce/Enlarge (Specifying a Scanning Ratio)
403
Original Orientation (Specifying the Orientation of the Loaded Documents)
404
E-Mail Options/Filing Options
405
Quality/File Size (Specifying an Image Compression Ratio When Scanning)
405
File Format (Selecting a File Format for Output Data)
406
Read Receipts (Specifying Read Receipts)
406
Split Send (Sending in Sections)
407
File Name (Specifying a Name for the File to be Sent)
408
Reply to (Specifying a Reply Address)
409
File Name Conflict (Setting the Action to be Taken for File Name Conflict)
410
File Name (Specifying a Name for the File to be Saved)
410
Encryption (Sending E-Mail Encrypted by S/MIME)
411
Digital Signature (Sending E-Mail with a Digital Signature by S/MIME)
411
Login Name
412
Password
412
Meta Data
412
Send from Folder
413
Folder Operating Procedure
414
Step 1 Opening the [Send from Folder] Screen
414
Step 2 Selecting a Folder
414
Step 3 Checking/Selecting Files in a Folder
415
Step 4 Operating Files in a Folder
415
Selecting a Folder
416
Checking/Operating Files in a Folder
417
Checking File Details
420
Printing Files in a Folder
423
Configuring/Starting Job Flow
427
[Link Job Flow Sheet to Folder] Screen
429
Job Flow Restrictions
433
Job Flow Sheets
435
Job Flow Procedure
436
Step 1 Opening the [Job Flow Sheets] Screen
436
Step 2 Selecting a Job Flow Sheet
436
Step 3 Confirming/Changing the Job Flow Sheet
437
Step 4 Starting the Job Flow Sheet
437
Selecting/Changing a Job Flow Sheet
438
Stored Programming
443
Stored Programming Overview
444
Registering/Deleting/Renaming Stored Programs
445
Registering Stored Programs
446
Notes and Restrictions on Registering Stored Programs
447
Registering Stored Programs for Build Job
448
Deleting Stored Programs
449
Entering/Changing a Stored Program Name
450
Assigning/Changing Icons for Stored Programs
451
Calling a Stored Program
452
Calling a Stored Program for Build Job
452
Web Applications
455
Web Applications Overview
456
Accessing Web Applications
457
Accessing Using Buttons Registered on the Services Home Screen
459
Media Print (Text and Photos)
461
Overview of Media Print
462
Supported Media and File Formats
463
Notes and Restrictions on Media Print
463
Inserting USB Memory Device
465
Media Print - Text
469
Selecting Files
469
[Select from List] Screen
470
Media Print - Photos
472
Selecting Files
472
[Select from List] Screen
473
Selecting the Printing Options
474
Media Print Photos
475
Media Print - Text
476
Index Print
476
Fuji Xerox ApeosPort-VI C3371 Quick Reference (155 pages)
Brand:
Fuji Xerox
| Category:
Printer
| Size: 14.23 MB
Table of Contents
Table of Contents
3
Before Using the Machine
7
Preface
8
Using this Guide
9
Prerequisite Knowledge
9
Organization
9
Conventions
10
Safety Notes
12
Electrical Safety
13
Machine Installation
15
Operational Safety
19
Consumable
22
Location of Warning and Caution Labels
23
Regulation
24
Radio Frequency Emissions (Class B)
24
Radio Interference
25
Harmonics Current Emissions
25
Radio Act
26
Safety Data Sheet (SDS) - an Index for Characteristics and Handling of the Specific Chemical Substances Defined
27
Environment
31
Illegal Copies and Printouts
32
Product Overview
35
Machine Components
36
Control Panel
47
Large Size Color UI
50
Power On/Off
52
Switching the Main Power on
52
Switching the Power on
53
Switching the Power off
54
Switching the Main Power off
54
Power Saver Modes
56
Smart Welcomeyes
57
Changing the Interval for Entering Power Saver Mode
57
Adjusting Screen Brightness
59
Basic Operation
61
Copying Procedure
62
Step 1 Loading Documents
62
Step 2 Selecting Features
64
Step 3 Entering a Quantity
65
Step 4 Starting the Copy Job
65
Step 5 Confirming the Copy Job in Job Status
66
Stopping the Copy Job
66
Fax/Internet Fax Procedure
68
Step 1 Loading Documents
68
Step 2 Selecting Features
68
Step 3 Specifying the Destination
69
Step 4 Starting the Fax/Internet Fax Job
69
Step 5 Confirming the Fax/Internet Fax Job in the Job Status
70
Stopping the Fax/Internet Fax Job
70
Print Procedure
71
Scanning Procedure
72
Step 1 Loading the Documents
72
Step 2 Selecting the Features
72
Step 3 Starting the Scan Job
74
Step 4 Confirming the Scan Job in the Job Status
74
Step 5 Saving the Scanned Data
75
Stopping the Scan Job
76
Other Scanning Features
77
Creating Folders
79
Changing the Default Settings
80
Paper and Other Media
81
Usable Paper
82
Weights of Usable Paper
82
Supported Paper Types
82
Unusable Paper
83
Loading Paper
84
Loading Paper in Trays 1 to 4
84
Loading Paper in Tray 3 (When Tandem Tray Module Is Installed)
85
Loading Paper in Tray 4 (When Tandem Tray Module Is Installed)
86
Loading Paper in Tray 5 (Bypass Tray)
87
Loading Paper in Tray 6 (HCF B1) (Optional)
88
Changing Paper Settings
89
Maintenance
91
Replacing the Toner Cartridge
92
Replacing the Staple Cartridge
94
Replacing Staple Cartridge (for Finisher A2)
94
Replacing Staple Cartridge (for Finisher B1)
95
Replacing Staple Cartridge (for C3 Finisher or C3 Finisher with Booklet Maker)
97
Replacing Booklet Staple Cartridge (for Booklet Maker Unit for Finisher B1)
99
Replacing Booklet Staple Cartridge (for C3 Finisher with Booklet Maker)
100
Emptying the Punch Waste Container
103
Emptying the Hole Punch Waste Container (for Finisher B1)
103
Emptying the Hole Punch Waste Container (for C3 Finisher or C3 Finisher with Booklet Maker)
104
Executing Calibration
106
Troubleshooting
107
Fault Clearance Procedure
108
Paper Jams
109
Paper Jams in Side Tray
110
Paper Jams in Top Left Cover a
110
Paper Jams in Bottom Left Cover B
113
Paper Jams in Trays 1 to 4
114
Paper Jams in Tray 3 (When Tandem Tray Module Is Installed)
114
Paper Jams in Tray 4 (When Tandem Tray Module Is Installed)
115
Paper Jams in Tray 5 (Bypass Tray)
116
Paper Jams in Tray 6 (HCF B1)
116
Paper Jams in Finisher A2
118
Paper Jams in Finisher B1
120
Paper Jams in C3 Finisher / C3 Finisher with Booklet Maker
121
Paper Jams in the Folder Unit CD1
128
Advertisement
Fuji Xerox ApeosPort-VI C3371 User Manual (22 pages)
Brand:
Fuji Xerox
| Category:
All in One Printer
| Size: 0.78 MB
Table of Contents
Table of Contents
2
About Google Cloud Print
3
Overview of Google Cloud Print
3
Operating Environment
3
Environment Settings
5
Configuration on the Machine
5
Registering Devices to Google Cloud Print
6
Checking the Device Registration Status
11
Sharing a Device between Multiple Users
11
Cancelling the Registration of the Device from Google Cloud Print
12
Printing
14
Problem Solving
15
Problems on Registering
15
Problems on Printing
16
Error Code
17
Notes and Restrictions
19
Index
21
Advertisement
Related Products
Fuji Xerox ApeosPort-V C7775
Fuji Xerox ApeosPort-V C3376
Fuji Xerox ApeosPort-V 7080
Fuji Xerox ApeosPort-V 6080
Fuji Xerox ApeosPort-V C7780
Fuji Xerox ApeosPort-V C6680
Fuji Xerox ApeosPort-V C5580
Fuji Xerox apeosport-v c5585
Fuji Xerox ApeosPort-V 3060
Fuji Xerox ApeosPort-V 2060
Fuji Xerox Categories
All in One Printer
Printer
Copier
Scanner
Office Equipment
More Fuji Xerox Manuals
Login
Sign In
OR
Sign in with Facebook
Sign in with Google
Upload manual
Upload from disk
Upload from URL