Sign In
Upload
Manuals
Brands
Applied Biosystems Manuals
Laboratory Equipment
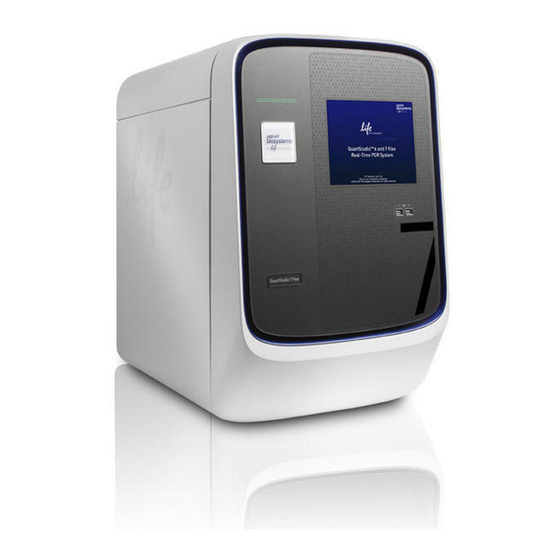
QuantStudio 6 Flex
Applied Biosystems QuantStudio 6 Flex Manuals
Manuals and User Guides for Applied Biosystems QuantStudio 6 Flex. We have
1
Applied Biosystems QuantStudio 6 Flex manual available for free PDF download: User Manual
Applied Biosystems QuantStudio 6 Flex User Manual (194 pages)
Brand:
Applied Biosystems
| Category:
Laboratory Equipment
| Size: 3.62 MB
Table of Contents
Table of Contents
3
About this Guide
10
Assumptions
10
Audience
10
Purpose
10
Contents of this Manual
11
Symbols on this Instrument
11
User Attention Words
11
CHAPTER 1 Getting Started
13
Differences between the Quantstudio ™ 6 and 7 Flex Real-Time PCR Systems
13
About the Quantstudio ™ 6 and 7 Flex Real-Time PCR Systems
13
Data Collection
14
Instrument Filters and Supported Dyes
15
Instrument Hardware
16
Front
16
Rear
17
Barcode Scanner
18
Twister ™ Robot Components
19
Electrical Protective Devices
22
Instrument Software
22
Computer Requirements
22
Software Installation
23
Third-Party Software
23
Instrument Consumables
24
Interchangeable Sample Blocks, Heated Covers, and Plate Retainers
25
CHAPTER 2 Calibrate the Instrument
26
Calibration Overview
27
Calibration and Maintenance Schedule
27
Calibration with Quantstudio ™ Real-Time PCR Software V1.6
28
Planned Maintenance
28
About Maintenance Reminders
28
Calibration Workflow
29
View the Calibration Status of an Instrument
29
Enable or Change the Calibration Reminders
32
Requirements to Email Calibration Reminders
32
Define the Mail Server Settings
32
Modify the Notification Settings for a Monitored Instrument
34
Guidelines for Preparing Calibration Plates and Array Cards
36
Preparing Array Cards for Instrument Calibration
37
Required Materials
37
Fill the Calibration Taqman ® Array Cards
37
ROI Calibration
41
When to Perform the Calibration
41
About the Calibration Data
42
Preparing the Calibration Plate or Array Card
42
Prepare the ROI Calibration Plate
42
Perform the ROI Calibration
43
Background Calibration
45
When to Perform the Calibration
46
About the Calibration Data
46
Preparing the Calibration Plate or Array Card
46
Prepare the Background Calibration Plate
46
Perform the Background Calibration
47
Uniformity Calibration
49
When to Perform the Calibration
49
Preparing the Calibration Plate or Array Card
50
Prepare the ROI Calibration Plate
50
Perform the Uniformity Calibration
51
Dye Calibration
53
When to Perform the Calibration
53
About the Dye Calibration Data
53
Preparing the Calibration Plate or Array Card
54
Prepare the Dye Calibration Plates
54
Perform the Dye Calibration
56
Normalization Calibration (Taqman ® Array Card Only)
59
When to Perform the Calibration
59
About the Calibration Data
59
Preparing the Calibration Array Card
59
Perform the Normalization Calibration
59
Verify the Instrument Performance
62
When to Perform the Test
62
About the Rnase P Kits
62
Analytical Performance
63
Installation Specification
64
Prepare the Rnase P Plate
64
Preparing an Array Card for Instrument Verification
65
Run the Rnase P Plate or Array Card
67
Troubleshooting
72
How to Identify Contamination
81
Remove a Plate Stuck Within the Instrument
81
APPENDIX A Manual Instrument Operation
82
Overview of Instrument Touchscreen Functions
82
Operate the Instrument from the Touchscreen
83
Create an Experiment from a Template
83
Run an Experiment
84
Transfer Experiments, Templates, and Results Data
85
Maintain the Instrument from the Touchscreen
87
Back up and Restore the Instrument Settings
87
Perform an Instrument Self Test
89
Update the Instrument Firmware
89
Administrate the Instrument from the Touchscreen
90
Define the Date and Time
91
Define the Instrument Settings
91
Define the Maintenance Reminders
93
Define the Network Settings
93
Define the System Shortcuts
94
Review the Instrument Statistics
94
Review the Instrument Version Information
95
Enable or Disable Instrument Security
95
View the Instrument Log
96
APPENDIX B Maintenance
97
Decontaminate the Sample Block
97
Materials Required
98
How to Handle the Sample Block
98
Clean the Sample Block
98
Replace the Halogen Lamp
100
Materials Required
101
Halogen Lamp Warnings
101
View the Lamp Status
101
Replace the Lamp
101
Replace the Instrument Fuses
103
Materials Required
103
Replace the Fuses
104
Install the Quantstudio ™ Real-Time PCR Software
104
Computer Requirements
104
Install the Software
104
Install the Quantstudio
104
Real-Time PCR Software
104
Software Licenses
105
Activate a License
105
Install a License File
105
Update the Quantstudio
106
Real-Time PCR Software
106
Update the Software
106
Update the Microsoft
107
Change the Sample Block
107
When to Change the Sample Block
107
Materials Required
107
How to Handle the Sample Block
107
Operating System
107
Windows ™ Operating System
107
Change the Sample Block
108
Change the Heated Cover
109
When to Change the Heated Cover
109
Materials Required
109
How to Handle the Heated Cover
109
Change the Heated Cover
110
Change the Plate Adapter
111
When to Change the Plate Adapter
111
Materials Required
112
Change the Plate Adapter
112
APPENDIX C Networking
113
Networking Overview
113
And 7 Flex Systems
113
About the Ethernet Port
114
Example Network Layouts
114
Networking Guidelines and Best Practices
115
Network Setup Workflow
116
Collect the Required Network Information
116
Connect the Quantstudio
117
Or 7 Flex System to the Network
117
Materials Required
117
Define the Instrument Internet Protocol Settings
117
Connect the Computer to the Network
118
Materials Required
118
Computer Requirement
118
Collect Required Information
118
Set up the Computer
118
Install the Quantstudio ™ Real-Time PCR Software
119
Or 7 Flex Real-Time PCR System
119
About Remote Monitoring
120
Download Experiment Files
120
Real-Time PCR Software
120
Enable or Change the Calibration Reminders
121
APPENDIX D Power on or Off, Store, and Move
123
Place the Quantstudio
123
Power on the Quantstudio ™ 6 or 7 Flex Real-Time PCR System
123
Store the Quantstudio ™ 6 or 7 Flex System
125
Materials Required
125
Prepare the Quantstudio
126
Move the Quantstudio ™ 6 or 7 Flex System
126
How to Handle the Sample Block and Heated Cover
127
Prepare the Quantstudio ™ 6 or 7 Flex System Components
127
Move the Quantstudio ™ 6 or 7 Flex System
128
Reinstall the Quantstudio ™ 6 or 7 Flex System
128
APPENDIX E Security, Audit, and Electronic Signature
130
Administrator Overview
130
Example Applications
131
Configure the Security System
131
Access the Security Screen and Enable or Disable Security
131
Set Account Setup and Security Policies
132
Set up Messaging Notifications
132
User Account Management
134
Create or Edit User Accounts
134
Determine the Name of the Logged-In User
135
Create or Edit a User Role
135
View or Print a User Report
137
Audit Trail Management
138
Access the Audit Screen and Enable or Disable Auditing
138
Modify the Auditing Settings
139
Audit Report Generation
139
Viewing Audit Histories from the Security Settings Dialog Box
139
Viewing Audit Histories from an Experiment, Template, or Study
142
Manage Electronic Signature
143
Access the E-Signature Settings Screen, and Enable or Disable the E-Signature
143
Configure the Meanings of the Electronic Signatures
144
Configure the E-Signature Rights for User Roles
144
Select the Actions that Require Signature
145
How the Software Prompts Electronic Signature
146
Generate E-Signature Reports
146
Export and Import User, Security, Audit, and E-Signature Settings
148
User Overview
148
User Account Permissions
148
Account Suspension
149
Session Time-Out
149
User Security Tasks
149
APPENDIX F Calibration Consumable Preparation
151
Create a Background Plate or Array Card
151
Required Materials
151
Create a Background Plate
152
Create a Background Array Card (Quantstudio ™ 7 Flex System Only)
152
Create a Custom Dye Plate for Calibration
153
Before You Use Custom Dyes
153
Required Materials
153
Determine Optimum Dye Concentration
153
Create a Custom Dye Plate
155
Add the Custom Dye to the Software
155
APPENDIX G Parts and Materials
158
How to Order
158
How to Order from the System Software
158
Kits, Consumables, and Accessories
159
Standard 96-Well Consumables
160
Fast 96-Well Consumables
160
384-Well Consumables
161
Array Card Consumables
161
Quantstudio ™ 6 and 7 Flex Systems Accessories
162
Quantstudio ™ 6 and 7 Flex Systems Empty Plates and Array Cards
162
General-Use Materials and Consumables
163
APPENDIX H Instrument Specification and Layout
164
Quantstudio ™ 6 and 7 Flex Systems Specifications
164
Required Clearances
165
Electrical Requirements
165
Environmental Requirements
166
Network Requirements
167
Quantstudio ™ 6 and 7 Flex Systems Layout and Connections
167
APPENDIX I Safety
169
Symbols on this Instrument
169
Standard Safety Symbols
170
Additional Safety Symbols
171
Location of Safety Labels
172
Control and Connection Symbols
172
Conformity Symbols
173
Safety Information for Instruments Not Manufactured by Thermo Fisher Scientific
174
Instrument Safety
174
General
174
Physical Injury
174
Safety Information for Instruments Not Manufactured by Thermo
174
Fisher Scientific
174
Electrical Safety
175
Cleaning and Decontamination
176
Instrument Component and Accessory Disposal
176
Laser Safety-Barcode Scanner
176
Workstation Safety
177
Safety and Electromagnetic Compatibility (EMC) Standards
177
Safety Standards
178
EMC Standards
178
Environmental Design Standards
178
Chemical Safety
179
Biological Hazard Safety
181
APPENDIX J Documentation and Support
182
Related Documentation
182
Customer and Technical Support
182
Limited Product Warranty
183
Glossary
184
Advertisement
Advertisement
Related Products
Applied Biosystems QuantStudio 3D
Applied Biosystems QuantStudio 3
Applied Biosystems QuantStudio 5
Applied Biosystems QuantStudio 7 Flex
Applied Biosystems 2720
Applied Biosystems 7300
Applied Biosystems 7500
Applied Biosystems 7500 Fast
Applied Biosystems 7900HT
Applied Biosystems A30207
Applied Biosystems Categories
Laboratory Equipment
Measuring Instruments
Bicycle Accessories
Software
Control Unit
More Applied Biosystems Manuals
Login
Sign In
OR
Sign in with Facebook
Sign in with Google
Upload manual
Upload from disk
Upload from URL