Table of Contents
Advertisement
Quick Links
Advertisement
Table of Contents

Subscribe to Our Youtube Channel
Related Manuals for Insportline IN 162 Denver


Summary of Contents for Insportline IN 162 Denver
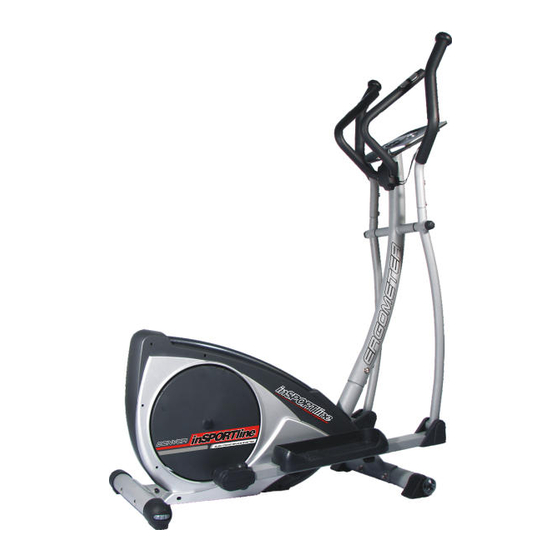
- Page 1 USER MANUAL – EN IN 162 Elliptical inSPORTline Denver...
-
Page 2: Table Of Contents
CONTENTS SAFETY INSTRUCTIONS ............................ 3 IMPORTANT NOTES ............................3 PARTS LIST ................................4 EXPLODED DRAWING ............................6 CHECK LIST ................................7 ASSEMBLY INSTRUCTIONS ..........................8 SM3720 INSTRUCTION MANUAL ........................14 TERMS AND CONDITIONS OF WARRANTY, WARRANTY CLAIMS ............17... -
Page 3: Safety Instructions
SAFETY INSTRUCTIONS • To ensure the best safety of the exerciser, regularly check it on damages and worn parts. • If you pass on this exerciser to another person or if you allow another person to use it, make sure that that person is familiar with the content and instructions in these instructions. -
Page 4: Parts List
• The general rule is that exercisers and training devices are no toys. Therefore, they must only be used by properly informed or instructed persons. • Stop your work-out immediately in case of dizziness, nausea, chest pain or any other physical symptoms. - Page 5 Rear stabilizer Computer SM-3720-71 Square neck screw M6X45L Handle plus 21L/21R Pedal Flat washer D25*D8.5*2T Upper cover for universal axle Waved washer Ladder bolt M10*58L C-shape ring D21.5*D17.5*1.2T Flat washer D24*D13.5*2.5T Front pedal axle Screw ST4.2*1.4*15L Fixing plate for idle wheel C-shape ring S-17(1T) Swing Axle D19*374.5 Electric cable...
-
Page 6: Exploded Drawing
EXPLODED DRAWING... -
Page 7: Check List
CHECK LIST 22&59 52L&R 21L&R D22*D8.5*1.5T D15.4*D8.2*2T M8*1.25*75L M8*1.25*20L M8*1.25*15L M6*1*45L D25*D8.5*2T D14*D6.5*0.8T M8*1.25*25L D14*D8*4T ST4*20L... -
Page 8: Assembly Instructions
ASSEMBLY INSTRUCTIONS STEP 1: Assemble the front stabilizer (2) and rear stabilizer (19) onto the main frame (1) by using the two square neck bolts (3), the two curved washers (6), then two spring washers (7) and two domed nuts (8) separately. - Page 9 STEP 2: First connect the upper computer cable (29) with the lower computer cable (30).
- Page 10 STEP 3: Insert the swing axle (71) through the movable handlebar support (12), assemble one waved washer (67) every side, and the movable handlebar support (12), then assemble one flat washer (66), one spring washer (7) every side, then tighten with the bolt (40), last cover the screw cap (38).
- Page 11 STEP 4: Assemble the fixed handlebar (72) on the handlebar post (10) by using the two bolts (9), then the two spring washers (7), the two curved washers (6). Then assemble the cover for handlebar (17) to the fixed well handlebar (72). Assemble the left &...
- Page 12 STEP 5: Assemble the left and right pedal (21L&21R) on the pedal supporting tube (11) by using the two square neck screws (20), the two flat washers (73), then tighten it with knob (77). Using the four bolts (9), the four spring washer (7), the two curved washer (6), the two taper washers (48) to tighten the handlebar post (10) on the main frame.
- Page 13 STEP 6: Connect the upper computer cable (29) and handle pulse cable (46) with the computer (64). Fix the upper cover for universal axle (22) and the lower cover for universal axle (59) by using the Screw (75). Before excising, please remember to insert the adapter (78) into the equipment.
-
Page 14: Sm3720 Instruction Manual
SM3720 INSTRUCTION MANUAL DISPLAY FUNCTIONS: ITEM DESCRIPTION TIME Workout time displayed during exercise. Range 0:00 ~ 99:59 SPEED Workout speed displayed during exercise. Range 0.0 ~ 99.9 DISTANCE Workout distance displayed during exercise. Range 0.0 ~ 99.9 CALORIES Burned calories during workout display. Range 0 ~ 999 PULSE Pulse bpm displayed during exercise. - Page 15 Plug in power supply, computer will power on and display all segments on LCD for 2 seconds. Enter into user data setting mode (Age, Gender, Height, Weight). After 4 minutes without pedaling or pulse input, console will enter into power saving mode. Press any key may wake the console up.
- Page 16 USER PROGRAM MODE 1. Press UP or DOWN to select workout program, choose User and press MODE to enter. 2. Press UP or DOWN to set load level of each column, and press MODE to next one. (Total column =20) 3.
-
Page 17: Terms And Conditions Of Warranty, Warranty Claims
BODY FAT MODE 1. When workout stop, press BODY FAT key. 2. Hold on handgrip, after 8 seconds, computer will show BMI, FAT% and fat symbol. 3. Press BODY FAT key again reverse to main menu. B.M.I. (Body mass index): B.M.I LOW/MED MEDIUM... -
Page 18: Crank
According to valid legal regulations it depends whether the Buyer is the End Customer or not. “The Buyer who is the End Costumer” or simply the “End Costumer” is the legal entity that does not conclude and execute the Contract in order to run or promote his own trade or business activities. “The Buyer who is not the End Customer”... - Page 19 +420 556 770 190, Mobile: +420 604 853 019, servis@insportline.cz Fax: +420 556 770 192, (Service +420 556 770 191) Web: www.insportline.cz, www.worker.cz, www.worker-moto.cz INSPORTLINE, s.r.o. Bratislavska 36, 911 05 Trencin, Slovakia CRN: 36311723, VAT ID: SK2020177082 Orders: +421(0)326 526 701, +421(0)917 649 192, objednavky@insportline.sk...
Need help?
Do you have a question about the IN 162 Denver and is the answer not in the manual?
Questions and answers