Table of Contents
Advertisement
Operation
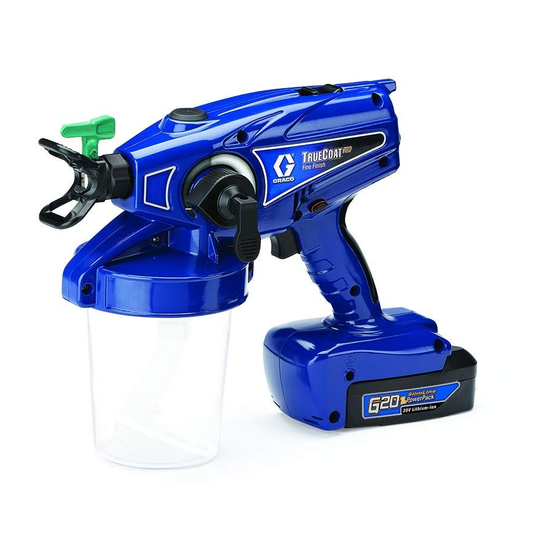
Fine Finish Hand-Held Paint Sprayer
- For portable spray applications of architectural paints and coatings only -
- Not approved for use in explosive atmospheres or hazardous locations -
IMPORTANT SAFETY INSTRUCTIONS
Read all warnings and instructions in this manual and related manuals.
Be familiar with the controls and the proper usage of the equipment.
Save these instructions.
All Models:
Maximum Working Pressure 1700 psi (117 bar, 11.7 MPa)
Model
16F887
16H240
16H241
16H242
16H243
262612
16H245
16H829
- Service only at Graco approved service centers -
- For professional use only -
3A1698G
EN
ti16695a
Advertisement
Table of Contents

Related Manuals for Graco 16F887


Summary of Contents for Graco 16F887
- Page 1 - For portable spray applications of architectural paints and coatings only - - Not approved for use in explosive atmospheres or hazardous locations - - Service only at Graco approved service centers - - For professional use only - IMPORTANT SAFETY INSTRUCTIONS Read all warnings and instructions in this manual and related manuals.
-
Page 2: Table Of Contents
Sprayer Setup ......13 Graco Standard Warranty ....32 Starting a New Job (or Refilling the Cup) . -
Page 3: Warnings
Warnings Warnings The following warnings are for the setup, use, maintenance, and repair of this equipment. The exclamation point symbol alerts you to a general warning and the hazard symbols refer to procedure-specific risks. When these sym- bols appear in the body of this manual or on warning labels, refer back to these Warnings. Product-specific hazard symbols and warnings not covered in this section may appear throughout the body of this manual where applicable. - Page 4 • Always use the nozzle tip guard. Do not spray without nozzle tip guard in place. Use Graco nozzle tips. • Use caution when cleaning and changing nozzle tips. In the case where the nozzle tip clogs while spraying, remove battery and follow the Pressure Relief Procedure for relieving the pressure before removing the nozzle tip to clean.
- Page 5 Do not leave battery unattended while charging. • Immediately unplug charger and remove battery when charging is complete. • Charge only Graco approved batteries listed in this manual; other batteries may burst. • Use only in dry locations. Do not expose to water or rain. •...
- Page 6 Warnings WARNING WARNING WARNING WARNING PERSONAL PROTECTIVE EQUIPMENT You must wear appropriate protective equipment when operating, servicing, or when in the operating area of the equipment to help protect you from serious injury, including eye injury, hearing loss, inhalation of toxic fumes, and burns.
-
Page 7: Component Identification
Component Identification Component Identification ti16696b Trigger Lock Fine Finish Tip/Guard Assembly Static Wick *B Tip Filter (Reverse Threaded) Hi/Lo Switch (Motor Speed) Flexible Suction Tube Outlet Valve Access Plug Pressure Control Knob Startup/Storage Kit Prime/Pressure Relief Valve Lithium Ion Battery Charger Grounding Plug Cup Liner Replacement (10 Pack) SlimLine Battery... -
Page 8: Battery And Charger
Battery and Charger Battery and Charger • Lithium Battery Packs: Batteries are low mainte- • Cold Weather Battery Operation: Batteries may nance. They can be used at any charge level with- be used in cold temperatures. However, if sprayer out creating a memory effect. light indicates battery is too cold, you may warm the battery by operating the sprayer in prime mode with •... -
Page 9: Charger Status Indicator Lights
Battery and Charger Plug charger into an electrical outlet and slide battery When battery becomes fully charged, immediately into charger as shown (light will turn on in 5 seconds). unplug the charger from the power supply and remove the battery from the charger. ti14990a ti16706a Charger Status Indicator Lights... -
Page 10: Common Procedures
Common Procedures Common Procedures Trigger Lock Pressure Relief Procedure Always engage the trigger lock when you stop spraying Do not operate or spray near children. Do not aim the to prevent the sprayer from being triggered accidentally sprayer at, or spray any person or animal. Keep hands by hand, or if dropped or bumped. -
Page 11: Setting Hi/Lo Switch
Common Procedures Setting Hi/Lo Switch Adjusting Pressure (Motor Speed) Low Speed High Speed ti16705a ti16704a Minimum Pressure Setting Maximum Pressure Setting 1. To reduce overspray, always spray at lowest pres- sure that results in an acceptable spray pattern. Speed Control Switch ti16731a 2. -
Page 12: Setup
Setup Setup Spraying Floors and Base Boards When spraying floors, rotate the suction tube collar to the back of the material cup. Flammable fumes (such as solvent and paint fumes) in work area can ignite or explode. See Grounding Instructions, page 3. Do not spray flammable or combustible liquids in a con- fined area. -
Page 13: Sprayer Setup
Setup Sprayer Setup This sprayer arrives from the factory with a small 5. Engage trigger lock and put prime/pressure relief valve UP to release pressure. amount of test material in the system. It is important that you flush this material from the sprayer before using it for the first time: 1. -
Page 14: Starting A New Job (Or Refilling The Cup)
Starting a New Job (or Refilling the Cup) Starting a New Job 4. Reverse spray tip to UNCLOG position and spray into waste area for five seconds. (or Refilling the Cup) ti15491a ti14985a ti14991a ti14991a When spraying flammable or combustible materials: ti16713a •... -
Page 15: Install Tip/Guard Assembly
Techniques (if not installed) Use a piece of scrap cardboard to practice these basic NOTE: Only use Graco Fine Finish Tip/Guard assemblies. spraying techniques before you begin spraying the surface. • Hold sprayer 10 in. (25 cm) from surface and aim straight at surface. -
Page 16: Unclogging Spray Tip/Guard Assembly
Unclogging Spray Tip/Guard Assembly 5. Disengage trigger lock, put prime/pressure relief Unclogging Spray Tip/Guard valve DOWN to spray position, and resume spray- ing. Assembly ti16701a ti16698a ti14995a Do not operate or spray near children. Do not aim the ti15425a sprayer at, or spray any person or animal. Keep hands and other body parts away from the discharge. -
Page 17: Shutdown And Cleaning
Failure to properly clean sprayer after each use will result in hardened materials, damage to the sprayer, and the warranty will no longer be valid. Do not store solvents other than mineral spirits in sprayer. Always flush with Graco pump armor prior to storage. ti15002a ti16725a Flushing Sprayer 4. - Page 18 Shutdown and Cleaning 8. Disengage trigger lock, reverse tip to UNCLOG 11. Engage trigger lock and put prime/pressure relief position, and pull trigger for 5 seconds to prime valve UP to release pressure. sprayer. ti16700a ti16699a ti14994a ti14991a ti14995a ti16698a ti14999a 12.
-
Page 19: Cleaning Sprayer Exterior
Storage Cleaning Sprayer Exterior 1. Dilute 4 oz. bottle of Pump Armor Concentrate with an additional 4 oz. of water in material cup. • Wipe paint off outside of sprayer using a soft cloth moistened with water or flushing fluid. Do NOT submerge the sprayer. -
Page 20: Replacement Parts And Kits
Replacement Parts and Kits Replacement Parts and Kits ti20355a 3A1698G... -
Page 21: Parts List
Bare Sprayer (no tip, battery, suction tube, or material cup) Models 16H241, 16H242 24J581 Bare Sprayer (no tip, battery, suction tube, or material cup) All Models 243103 Pump Armor (32oz) Non-Euro Models 16F887, 16H240, 16H242 16M816 Startup/Storage Kit Euro Models 16H241, 16H829, 16H243, 262612, 16P358 Startup/Storage Kit 16H245... - Page 22 Kit, repair, motor, control board (includes 29, 34, 38 (qty 10) 44, 62, 63, 65-70) Table continues on the following page. Models 16F887, 16H241, 16H242, 16H829 16U240 Enclosure replacement kit (includes 20, 34-37, 38 (qty 10), 39, 44, 56, 62-66, 68-70)
- Page 23 (model number is the same as the part number, Number: which is below the handle) All Models 16D562 Cup Liner Replacement (10 pack) Models 16F887, 16H241, 16H242, 16H829 16U240 Enclosure replacement kit (includes 20, 34-37, 38 (qty 10), 39, 44, 56, 62-66, 68-70) Model 16H240 16U241...
-
Page 24: Alternate Priming Method
Alternate Priming Method Alternate Priming Method 5. Leaving the sprayer upside-down, disengage trigger lock and quickly trigger sprayer until material comes out of drain port. Move sprayer to a non-hazardous area before servicing. ti16997a If sprayer fails to prime, the inlet valve may be stuck due ti16698a to paint residue. -
Page 25: Inlet Valve Removal/Service
Inlet Valve Removal/Service Inlet Valve Removal/Service Installation NOTE: Before installing, make sure o-ring (c) is installed on inlet valve (b). 1. Place inlet valve (b) with spring (a) on top of inlet fit- ting (d). Push inlet fitting up into pump cavity. Move sprayer to a non-hazardous area before servicing. -
Page 26: Outlet Valve Repair
Outlet Valve Repair Outlet Valve Repair 4. Use tool (supplied) to loosen and remove outlet valve fitting. Make sure old o-ring, seat, outlet valve, and spring are out of pump outlet cavity. Move sprayer to a non-hazardous area before servicing. NOTE: Before doing any repair to pump, perform Flushing Sprayer procedure, page 17. -
Page 27: Troubleshooting
Troubleshooting Troubleshooting Check everything in this Troubleshooting Table before you bring the sprayer to an authorized service center. Problem Cause Solution Sprayer makes no sound when Trigger is locked. Disengage trigger lock. See page 10. trigger is pulled Status Indicator Light is solid RED when Replace with charged battery and place triggering, indicating that the battery old battery in charger, or allow battery to... - Page 28 Troubleshooting Problem Cause Solution Sprayer sprays with poor results Tip is partially clogged See Unclogging Tip/Guard Assembly, page 16. Tip is not in correct position Rotate tip to SPRAY position. Incorrect tip for application of See Reversible Tip Selection Chart, material.
- Page 29 Troubleshooting Problem Cause Solution Sprayer is moving too slow for material. Move sprayer faster while spraying. Spray pattern has dripping: Sprayer is too close to target surface. Move sprayer away from surface 10 in. (25 Holding trigger while changing spray Release trigger when changing directions.
-
Page 30: Technical Data
Technical Data Technical Data Sprayer: U.S. Metric Adjustable Pressure Range 500 to 1500 psi 34 to 103 bar, 0.34 to 10.3 MPa Maximum working pressure 1700 psi 117 bar, 11.7 MPa Weight 5.06 lb 2.51 kg Dimensions: Length 13.75 in. 34.9 cm Width 5.5 in. -
Page 31: Preferred Material Settings Log
Preferred Material Settings Log Preferred Material Settings Log Motor Speed Item Material Spray Pressure Setting Date (Circle One) Sprayed Sprayed (Mark Dial) 03/24/201 Crown molding Urethane varnish FF308 3A1698G... -
Page 32: Graco Standard Warranty
With the exception of any special, extended, or limited warranty published by Graco, Graco will, for a period of twelve months from the date of sale, repair or replace any part of the equipment determined by Graco to be defective.
Need help?
Do you have a question about the 16F887 and is the answer not in the manual?
Questions and answers