Table of Contents
Advertisement
OWNER'S MANUAL & OPERATING INSTRUCTIONS
4010077
Certified to
CAN/CSA Standard
C22.2 No. 100
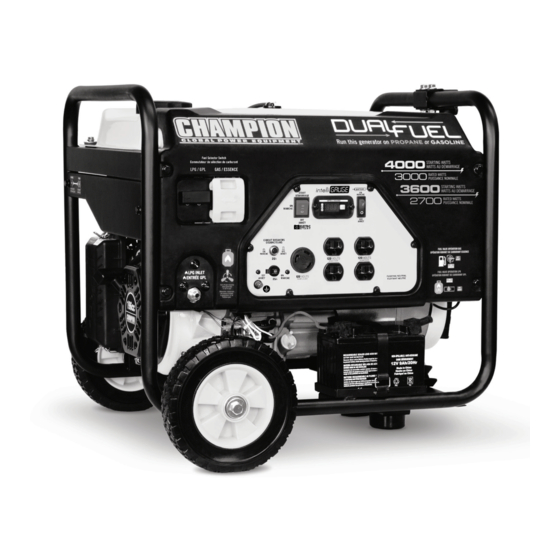
4000 Starting Watts/3000 Running Watts (Gas)
3600 Starting Watts/2700 Running Watts (LPG)
Electric Start
DUAL FUEL GENERATOR
MODEL NUMBER
76555
12039 Smith Ave.
SAVE THESE INSTRUCTIONS
Santa Fe Springs CA 90670
Important Safety Instructions
USA / 1-877-338-0999
MADE IN CHINA
are included in this manual.
REV 76555-20140718
www.championpowerequipment.com
Advertisement
Table of Contents

Related Manuals for Champion 76555


Summary of Contents for Champion 76555
-
Page 1: Electric Start
3600 Starting Watts/2700 Running Watts (LPG) Electric Start DUAL FUEL GENERATOR MODEL NUMBER 76555 12039 Smith Ave. SAVE THESE INSTRUCTIONS Santa Fe Springs CA 90670 Important Safety Instructions USA / 1-877-338-0999 MADE IN CHINA are included in this manual. REV 76555-20140718 www.championpowerequipment.com... - Page 2 AN IMPORTANT MESSAGE ABOUT TEMPERATURE: Your Champion Power Equipment product is designed and rated for continuous operation at ambient temperatures up to 40°C (104°F). When your product is needed your product may be operated at temperatures ranging from -15°C (5°F) to 50°C (122°F) for short periods.
-
Page 3: Table Of Contents
76555 4000 Starting Watts/3000 Running Watts (Gas) 3600 Starting Watts/2700 Running Watts (LPG) Electric Start DUAL FUEL GENERATOR TABLE OF CONTENTS Introduction ...... -
Page 4: Introduction
ENGLISH INTRODUCTION Introduction Accessories Congratulations on your purchase of a Champion Champion Power Equipment manufactures and sells Power Equipment generator. CPE designs and builds accessories designed to help you get the most from your generators to strict specifications. With proper use and purchase. -
Page 5: Manual Conventions
Please call our help line at 1-877-338-0999 situation which, if not avoided, could result in death or serious injury. CAUTION CAUTION indicates a potentially hazardous situation which, if not avoided, may result in minor or moderate injury. REV 76555-20140718... -
Page 6: Safety Rules
Traumatic amputation or severe laceration can result. Keep hands and feet away from rotating parts. Tie up long hair and remove jewelry. Operate equipment with guards in place. DO NOT wear loose-fitting clothing, dangling drawstrings or items that could become caught. REV 76555-20140718... - Page 7 Inform your electricity provider immediately if you or anyone in your household depends on electrical equipment to live. Inform your electrical provider immediately if a loss of power would cause you or anyone in your household to experience a medical emergency. REV 76555-20140718...
-
Page 8: Fuel Safety
– Always keep the LPG cylinder in an upright position. – LPG will burn skin if it comes in contact with it. Keep any and all LPG away from skin at all times. REV 76555-20140718... -
Page 9: Controls And Features
Air Cleaner – Protects the engine by filtering dust Power Panel – See “Power Panel” section. and debris from the intake air. Fuel Selector Switch – Used to select fuel source. Recoil Starter – Used to manually start the engine. LPG Hose Connector REV 76555-20140718... -
Page 10: Generator Panel
120 Volt AC, 20 Amp Duplex (2) (NEMA 5-20R) – May be used to supply electrical LPG Hose Connector – Used to connect LPG hose power for the operation of 120 Volt AC, 20 Amp, to generator. single phase 60 Hz electrical loads. REV 76555-20140718... -
Page 11: Parts Included
76555 ENGLISH CONTROLS AND FEATURES Parts Included Your 76555 Dual Fuel Generator ships with the following parts: Wheel Kit – 8 in. (20.3 cm) Wheel .... -
Page 12: Assembly
1. Remove the protective cover from the red (+) lead on the battery. 2. Attach the red (+)lead to the red (+) terminal on the battery with the cap screw and secure with the nut. 3. Repeat steps 1-2 for the black (–) battery lead. REV 76555-20140718... -
Page 13: Add Engine Oil
2. Remove oil fill cap/dipstick to add oil. 3. Add 0.6 qt. (0.6 L) of oil and replace oil fill cap/ dipstick. DO NOT OVERFILL. 4. Check engine oil level daily and add as needed. REV 76555-20140718... -
Page 14: Add Fuel (Gas)
DO NOT fill fuel tank indoors. DO NOT fill fuel tank when the engine is running or hot. DO NOT overfill the fuel tank. DO NOT light cigarettes or smoke when filling the fuel tank. REV 76555-20140718... -
Page 15: Connecting Liquid Petroleum Gas (Lpg) Cylinder
We strongly recommend that you consult with a qualified CAUTION electrician to ensure compliance with local electrical codes. Do not allow children to tamper or play with the cylinder or hose connections. REV 76555-20140718... -
Page 16: Operation
During operation the muffler and exhaust fumes produced will become hot. If adequate cooling and breathing space are not supplied, or if the generator is blocked or contained, temperatures can become extremely heated and may lead to fire. REV 76555-20140718... -
Page 17: Fuel Selector Switch
Only when the fuel valves are in the “OFF” position can the cover slide side to side. NOTE The fuel selector is locked into place once a “CLICK” sound is made. Only then can a fuel valve be turned to the vertical position. REV 76555-20140718... -
Page 18: Connecting Electrical Loads
If the generator will be connected to a building electrical system, consult your local utility company or a qualified electrician. Connections must isolate generator power from utility power and must comply with all applicable laws and codes. REV 76555-20140718... -
Page 19: Do Not Overload Generator
5. Plug in and turn on the next item. and fuel storage. 6. Allow the engine to stabilize. 7. Repeat steps 5-6 for each additional item. NOTE Never exceed the specified capacity when adding loads to the generator. REV 76555-20140718... -
Page 20: Maintenance And Storage
6. Dispose of used oil at an approved waste 4. Saturate in clean engine oil. management facility. 5. Squeeze in a clean, absorbent cloth to remove all excess oil. 6. Place the filter in the assembly. REV 76555-20140718 7. Reattach the air filter cover and snap in place. -
Page 21: Spark Arrester
Contact our helpline at 1-877-338-0999 to locate the 3. Remove the spark arrester screen. nearest Champion Power Equipment certified service 4. Carefully remove the carbon deposits from the spark arrester screen with a wire brush. dealer for your generator or engine maintenance needs. -
Page 22: Storage
Ignition Switch, the Fuel Valve and the Battery Switch are set in the A Float Charger will maintain the battery condition the the OFF position and the battery leads have over long storage periods. been disconnected from the battery. REV 76555-20140718... -
Page 23: Specifications
......Single Your Champion Power Equipment product is designed – Frequency ...... -
Page 24: Parts Diagram
76555 ENGLISH SPECIFICATIONS Parts Diagram REV 76555-20140718... -
Page 25: Parts List
Lock Nut M10 2.06.032 Clip (Ø17) 122.201701.05.48 8 in. Wheel, Yellow 122.074000.02 Cut-off Valve 122.200016.01 Bushing (Ø16×Ø10.5×59) 122.070012.05 Pipe (380 mm) 1.96.10 Washer Ø10 152.070031.00 Jacket, LPG Hose 1.5782.10105 Bolt M10×105 26.130021.05 LPG Hose With Regulator 3.3 ft. (1 m) REV 76555-20140718... -
Page 26: Engine Parts Diagram
76555 ENGLISH SPECIFICATIONS Engine Parts Diagram REV 76555-20140718... -
Page 27: Engine Parts List
Governor Arm 104 1.16674.0516 Flange Bolt M5×16 1.6177.06 Flange Nut M6 105 45.030032.00 Sheath, Wire 21.110001.00 Shaft, Governor Arm 106 1.5789.0629 Flange Bolt M6×29 22.123000.02 Ignition Coil (Shield EPA) 107 2.04.005 Dowel Pin (Ø8×10) 1.5789.0625 Flange Bolt M6×25 REV 76555-20140718... -
Page 28: Wiring Diagram
76555 ENGLISH SPECIFICATIONS Wiring Diagram REV 76555-20140718... -
Page 29: Troubleshooting
Review load and adjust. See “Power Management” Faulty cords or device Check for damaged, bare or frayed wires. Replace defective device For further technical support: Technical Service Mon – Fri 8:30 AM – 5:00 PM (PST/PDT) Toll Free: 1-877-338-0999 tech@championpowerequipment.com REV 76555-20140718... -
Page 30: Warranty
Warranty Qualifications Other Exclusions Champion Power Equipment (CPE) will register this This warranty excludes: warranty upon receipt of your Warranty Registration Card – Cosmetic defects such as paint, decals, etc.
Need help?
Do you have a question about the 76555 and is the answer not in the manual?
Questions and answers