Table of Contents
Advertisement
Quick Links
Advertisement
Table of Contents

Related Manuals for Marantz PMD670


Summary of Contents for Marantz PMD670
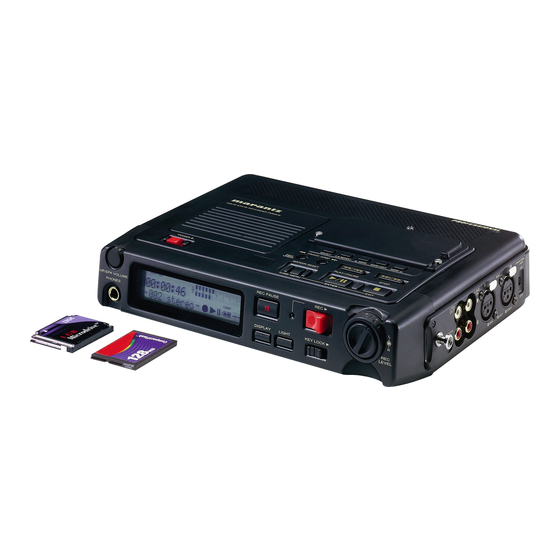
- Page 1 Model PMD670 User Guide Portable Solid State Recorder ®...
-
Page 2: Precautions Warnings And Cautions
Warnings and Cautions CAUTION: TO REDUCE THE RISK OF ELECTRIC SHOCK, REFER SERVICING TO QUALIFIED SERVICE PERSONNEL WARNING TO REDUCE THE RISK OF FIRE OR ELECTRIC SHOCK, DO NOT EXPOSE THIS APPLIANCE TO RAIN OR MOISTURE. CAUTION: CAUTION RISK OF ELECTRIC SHOCK DO NOT OPEN DO NOT REMOVE COVER (OR BACK) NO USER-SERVICEABLE PARTS INSIDE... -
Page 3: Important Safety Instructions
Important Safety Instructions This product was designed and manufactured to meet strict quality and safety standards. There are, however, some installation and operation precautions which you should be particularly aware of. Read Instructions – All the safety and operating instructions should be read before the product is operated. -
Page 4: Note To Catv System Installer
GROUND CLAMP ELECTRIC SERVICE EQUIPMENT GROUND CLAMPS FIGURE 1 EXAMPLE OF ANTENNA GROUNDING AS PER NATIONAL ELECTRICAL CODE, ANSI/NFPA 70 NEC - NATIONAL ELECTRICAL CODE NOTE TO CATV SYSTEM INSTALLER: This reminder is provided to call the CATV (Cable-TV) system installer's attention to Article 820-40 of the NEC, which provides guidelines for proper grounding and, in particular, specifies that the cable ground shall be connected to the grounding system of the building,... - Page 5 "Este aparato lleva elementos antiparasitarios necesarios para cumplir con ls limites que se estableren en el Anexo V del Reglamento sobre Pertubaciones Radioelectricas e Interferencias aprobado en el Real Decreto 138/1989. (B.O.E. de 9 Febrero 1989)." MARANTZ EUROPE B.V. 5600 EINDHOVEN THE NETHERLANDS - 5 -...
-
Page 6: Quick Start
1. Unpack the AC adapter and the PMD670. a. Plug AC adapter into household power. DC IN 13V b. Plug the adaptor jack into the PMD670 at DC IN 13V. 2. Slide the POWER switch to the right and release. On first power up, wait for the PMD670 to initialize. -
Page 7: Table Of Contents
Table of Contents Precautions Warnings and Cautions ... 2 Important Safety Instructions ... 3 Regulatory Compliance ... 4 Quick Start ... 6 Table of Contents ... 7 US/Europe models ... 8 Package Contents ... 8 Control and Connection Diagrams Top ... 9 Front ... -
Page 8: Us/Europe Models
Optional accessories ... 51 Menu defaults... 51 Warranty ... 52 US/Europe models The US model, PMD670/UIB distributed in the USA, and European model, PMD670/W1B distributed elsewhere, differ slightly in supplied accessories and default settings. Those differ- ences are noted in this User Guide. -
Page 9: Control And Connection Diagrams
Control and Connection Diagrams STEREO AUTO MARK ANALOG OUT SOLID STATE RECORDER PMD670 SINGLE PRE REC EDL PLAY INPUT LOCK INPUT A-B REPEAT TRACK JUMP UNDO MARGIN RESET PLAY / PAUSE POWER I / O MENU/STORE ENTER EDIT INPUT A-B REPEAT... -
Page 10: Front
REC PAUSE HP/SPK VOLUME PHONES DISPLAY CHARGE DIGITAL DC IN 13V 14 15 16 17 LINE LINE REMOTE COLD Control Front HP/SPK VOLUME control ... 39 Display (see next page) ... 39 REC PAUSE button ... 39 REC indicator..39 LIGHT KEY LOCK LEVEL... -
Page 11: Display
TOTAL TRACKTIME REC REMAIN kbps TRACK MARK Control Display 1 REC label ... 47 2 TOTAL label ... 47 3 REMAIN label ... 47 4 TRACK label ... 47 5 TIME label ... 47 6 kbps label ... 47 7 A-B label ... 47 8 Upper alphanumeric display ... -
Page 12: Introduction
Recordings can be transferred to your desktop or laptop computer by removing the CF card from the PMD670 or by using the supplied cable to connect the PMD670 to your computer via the I/O port. Audio recorded in the popular MP3 com- pression format is directly available for intranet or internet file sharing. -
Page 13: Features
• Portions of multiple recordings can be played back in sequence using EDL marks. • There are four ways to power the PMD670: • Included AC adapter • AA Alkaline batteries (~ 6 hours) •... -
Page 14: Input A-B Repeat Mark
Reading is dis- played while the CF card is read. setup controls relatively unavailable. The setup controls allow you to setup the PMD670 for your unique application. You can then have someone EDIT MARK FWD / +... -
Page 15: Pre Rec Switch
PRE REC desired. When power is on the PMD670 is constantly saving 2 seconds of audio input. This is called pre record cache. When recording is started by sliding the REC switch, or resumed from REC PAUSE by sliding the REC switch the pre-re- corded 2 seconds is recorded. -
Page 16: Repeat Switch
OFF: When the EDL PLAY switch is at OFF PMD670 playback does not respond to EDL mark instructions. ON: When EDL PLAY is ON PMD670 playback follows EDL mark instructions regarding play- back order, skipping sections of recording on the memory card, or repeating a section of recording on the memory card. -
Page 17: Input Button
Note: The PMD670 'listens' only to the selected -20dB input. For example if the input selected is MIC ATTEN FLAT LRmono with LINE input, and no input source is connected to the LINE IN jacks the PMD670 will LIMITER MANUAL record silence. LEVEL CONT. EDIT MARK US default: mono with INT MIC input. -
Page 18: Input Device(S) And Channels
Input device(s) and channels: mono with INT MIC input Mono audio input from the internal microphone is recorded as a mono file. stereo with LINE input Audio input from the L LINE IN jack is recorded on the Left channel. Audio input from the R LINE IN jack is recorded on the Right channel. -
Page 19: Mark/ Edit Buttons
STEREO -20dB AUTO MARK ANALOG OUT MIC ATTEN SINGLE FLAT PRE REC LIMITER MANUAL INPUT LOCK EDL PLAY LEVEL CONT. EDIT INPUT A-B REPEAT MARK 16 17 EDIT 16, 17, 18. MARK/ MARK This button group controls EDL Marks and Editing functions. EDL Marks Mark functions: manually adding Marks, and locating Marks. -
Page 20: Edl A-B Looping
STOP button EXECUTING will be displayed and the percent- age executing will increase to 100%. 100% done will be displayed momentarily. Then the PMD670 and the display will return to stop over mode. How to erase tracks From stop press and hold the MARK/ EDIT button for about 2 seconds to enter Edit mode. -
Page 21: How To Erase All Edl Marks
Done will be dis- played momen- TRACK tarily. The PMD670 and the display will return to stop mode. The recording time (file space on the CF card) used by the erased track is available for record ing. How to erase all EDL marks within one track From stop press and hold the MARK/ EDIT button for about 2 seconds to enter Edit mode. -
Page 22: How To Format A Cf Card
CF cards with 2 - 8 GB capacity are automatically formatted FAT32. The maximum CF card that can be formatted in the PMD670 is 8 GB. If larger cards are used please format in your computer. - 22 - to confirm. (Or to cancel.) -
Page 23: Controls And Connections Top
20. TRACK JUMP forward button During playback press and release to jump to the next track. If pressed while playing the last track jumps to the first track on the CF card. SOLID STATE RECORDER PMD670 EDIT iNPUT A-B REPEAT... -
Page 24: Margin Reset Play / Pause Stop
POWER switch on the PMD670 to the right to power on. This display appears. The CF card in the PMD670 appears as an external drive on a connected computer. Power off to disconnect. See page 43, How to connect via the I/O port. -
Page 25: The Menu Choices Are
Then either: 8a. Press and release the FWD/+ button the -/REW button to tab to another menu choice, or 8b. Press and release the button to write the menu changes and return to stop mode, or 8c. Press and release the CANCEL button cancel any menu changes and return to stop mode. - Page 26 The day will be flashing. Example display. 5. With the day flashing press and release the FWD/+ button or the -/REW button tab through days. When the day is correct, press and release the ENTER button The year will be flashing. Example Display 6.
-
Page 27: Date Format
How to set or change the Date Form The date form is the date order month/day/year or day/month/year. The US default is M/D/Y (month/day/year). The Europe default is D/M/Y (day/month/year). 1. From stop, press and hold the STORE button for about 2 seconds. MENU will appear (flashing) in the display. -
Page 28: Algor/File
Algor/File The PMD670 can record in a variety of compres- sion algorithm, associated bit rate, file format, and recording type (channels recorded) parameters. See explanations below and chart in right column. First select your input device (internal micro- phone, microphone(s), Line in, or digital input). -
Page 29: How To Set Or Change The Algor/File Parameters
Algor/File default 44.1 - - - - - - - - - 22.05 384,256,192,128,96,64 44.1 Stereo 320,256,160,128,80,64 44.1 160,128,80,64,40,32 22.05 44.1 - - - - - - - - - 22.05 192,128,96,64,48,32 44.1 Mono 44.1 160,128,80,64,40,32 22.05 - - - - - - - - - Dig-In 384,256,192,128,96,64 320,256,160,128,80,64... - Page 30 How to set or change the Algor/File param- eters continued Algor/File default 44.1 - - - - - - - - - 22.05 384,256,192,128,96,64 44.1 Stereo 320,256,160,128,80,64 44.1 160,128,80,64,40,32 22.05 44.1 - - - - - - - - - 22.05 192,128,96,64,48,32 44.1...
-
Page 31: Other Menu Choices
Other menu choices: Manual track incrementing. When Manual track incrementing is on, during recording slide and release the REC switch increment the track. A new track is created at that point. There is no break in recording. When Manual track incrementing is off, sliding and releasing REC switch during recording does nothing. -
Page 32: Silent Skip
Silent Skip looks for sound below a preset level for a preset period of time. When that occurs the PMD670 switches to record pause. When a signal of about -30 dB is input recording resumes. -
Page 33: Auto Cue
Auto Cue Auto Cue skips the silence at the beginning of an audio track and pauses playback at the point where the sound is loud enough for long enough. You can adjust how loud (how many dB) and how long (milliseconds) the audio has to be before playback is cued. -
Page 34: Single Play
(See A.PowOFF next page.) If A.PowOFF is set to Y, and Beep is set to ON, the PMD670 will beep to alert you that the power is shutting off. Default is Beep On. -
Page 35: Automatic Power Off
Automatic Power Off If the PMD670 is not operated for 30 minutes during stop or play pause, power can be auto- matically shut off to conserve battery life. Default is A.PowOFF Y (on). -
Page 36: Remote Mode
Remote Mode Use a wired remote, not supplied, to control the PMD670. There are four remote modes: • StartStop – during recording or playback switch the remote off to pause, on to resume. -
Page 37: Menu Default
3. Press and release the ENTER button accept the ID# choice and switch to the highest number position. 4. Press and release the FWD/+ button the -/REW button to tab through the digits 0 through 9. 5. When correct Press and release the ENTER button to switch to the next digit. -
Page 38: Play/Pause
When you resume playback starts at the beginning of the first track. During menu operations press and release to cancel all entries made and return to stop mode. SOLID STATE RECORDER PMD670 EDIT iNPUT A-B REPEAT MARK... -
Page 39: Front
Front REC PAUSE HP/SPK VOLUME PHONES DISPLAY 1. HP/SPK VOLUME control Turn to adjust the volume of headphones plugged into the HP/SPK VOLUME PHONE jack or the built-in speaker. Audio on the built-in speaker is automatically interrupted when recording with the internal microphone. -
Page 40: Phones Jack
Front continued REC PAUSE HP/SPK VOLUME PHONES DISPLAY PHONES 7. PHONES jack Plug stereo head- phones in here. Adjust headphone volume with the HP/SPK volume control. Headphones are active during recording and playback. During playback plugging in headphones mutes the internal speaker. DISPLAY 8. -
Page 41: Key Lock Switch
DISPLAY KEY LOCK 10. KEY LOCK switch The KEY LOCK switch secures the PMD670 in the state it is in during Record, Playback or Stop. Slide the switch to the right to turn KEY LOCK on. Only these controls will work: Display LIGHT button. -
Page 42: Digital In/Out Jacks
The connection makes it easy to copy audio files to your computer's hard drive or a CD. The I/O connection can only be made active when the PMD670 is off (neither recording or during play- back). - 42 - 14. DC IN 13V jack Plug the supplied AC adapter in here. -
Page 43: How To Connect Via I/O Port
POWER switch on the PMD670 to the right and release to power on. This display appears: The CF card in the PMD670 appears as a re- movable device on your computer. The audio files are in a MPGLANG1 folder. -
Page 44: Right Side
Right side LINE LINE REMOTE REMOTE 16. Remote jack Plug a wired remote (not supplied) in here. Wiring diagram 2.5 mm jack A switch connected to the 2.5mm mini jack off (open) and on (closed) does the following de- pending on the RemoteMode setting: RemoteMode: Start Stop During record or playback switch remote off to... -
Page 45: Phantom +48V Switch
OFF: No microphone power is supplied. Microphone recommendations Professional condenser microphone(s) (which require additional power either phantom power from the PMD670 or from another source) are recommended because they provide greater sensitivity, and higher quality audio recording. Dynamic microphone(s) can be used but do not yield optimum audio quality recordings. -
Page 46: Battery Compartment
Battery power The PMD670 can operate on several types of battery power. Hint: Keep fully charged batteries in the PMD670 when recording using AC power. Otherwise if AC power is interrupted, as much as 30 minutes of your recording could be lost. -
Page 47: Display
Display 4 5 6 7 8 9 10 11 TOTAL TRACKTIME REC REMAIN kbps TRACK MARK 1. REC label The REC label appears with other labels in this area to indicate TOTAL REC TIME or REC TIME REMAINING displayed on the upper alphanumeric display. -
Page 48: Record
The LINE label appears when input(s) se- lected for recording is (are) the LINE IN jacks. 20. Record The Record symbol appears when the PMD670 is in record mode. Appears with the Play symbol when recording. Appears flashing when in record pause. 21. Play... -
Page 49: Recording Time Chart
Recording time chart The recording time available on a CF card depends on the size of the card in MB, the recording type (.mp3, .mp2 or PCM), the bitrate of the recording and if recording in mono or stereo. This Recording time chart lists approximate recording times based on those factors. bitrate 32 kbps 64 kbps... -
Page 50: Troubleshooting
• check AC adaptor connections The PMD670 turns on then turns itself off • install fresh batteries The PMD670 seems to record but there is no sound on playback • check input settings (For example, if LINE input is selected and no input is connected to the LINE IN jacks the PMD670 will record silence.) -
Page 51: Specifications
SPECIFICATIONS* Digital audio system System ... Solid State Recorder Usable Media ... CF memory cards Recording and media methods .mp2 ... MPEG1 Layer II compression .mp3 ... MPEG1 Layer III compression .mp3 ... MPEG2 Layer III compression* *for all half sample rates. PCM ... -
Page 52: Warranty
Manufacturer shall not be liable for damage to other products caused by any defects in Marantz products, damages based on inconvenience or loss of use of the product, or any other damages, whether incidental, conse- quential, or otherwise. - Page 53 ® Marantz is a registered trademark. 2003/6...
Need help?
Do you have a question about the PMD670 and is the answer not in the manual?
Questions and answers