Advertisement
Quick Links
Advertisement

Related Manuals for Mamiya 6MF


Summary of Contents for Mamiya 6MF
- Page 1 Mamiya 0 AAF...
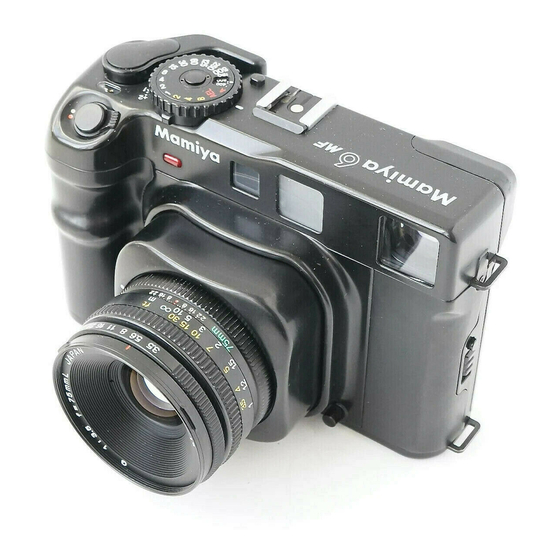
- Page 2 Congratulations on your purchase of the Mamiya 6 MF, Succeeding the New Mamiya 6, the Mamiya 6 MF is the latest addition to the Mamiya 6 x 6cm format series which has become the world’s standard in the medium format field thanks to Mamiya’s stress on “originality and reliability qualities that have become synonymous with the very name Mamiya.
- Page 3 Special Features of the Mamiya 6 MF Nomenclature and Functional Parts ... Preparatory Steps for Usee ... Mounting/Removing Lenses ... to Retract the Lens Mount ... 11 Inserting Batteries ... Opening/Closing g Light Shield Curtain ... 13 Releasing g the Shutter r ...
- Page 4 Compact and Light Weight 6 x 6 Format / Versatile and Q u i c k Although the Mamiya 6 MF is a 6 x 6cm format camera, its versatility is comparable to that of a 35mm camera and allows for fast operation, thus serving particularly well for covering wedding, parties, sports as well as a host of other photographic venues.
- Page 5 [Retracted - locked] The retractable lens mount greatly reduces the profile of the Mamiya 6 MF. making it more convenient to store and carry. When not in use the lens mount, retracts into the body for storage and reduces the overall size of the camera.
- Page 6 Exposure compensation scale - Film speed window (ISO) Retractable lens mount Internal bellows - Rangefinder coupling pin - Retraction/extension button Press this button to retract the lens for storage. or pull it out for operation.
- Page 7 AEL release button Film selector Exposure compensation lock release button Film holder roller Film type (120 or Pressure plate...
- Page 8 Self-timer lever ( c) Synchro-socket ( f Viewfinder eyepiece Rubber eyecup - carrying strap lug Film spool stud...
- Page 9 Body cap...
- Page 10 In order to attach the lens, first pull out the lens mount and remove the camera body cap. To do this, while pressing the retraction/ extension button (A) in, pull the lens mount out by gripping the cross bar of the lens cap. Then, while pressing the lens release button (B) in, rotate the cap counterclockwise, and align the groove (C) on the cap’s side with...
- Page 11 [Mounting lens] Remove the front and rear lens caps. a The front lens cap can be removed by pressing in the tabs on the right and left with your fingers and pulling the cap towards you. * The rear lens cap can be removed by rotating it counterclockwise.
- Page 12 Insert the two bat- teries, being sure to properly place each battery with the “+” side up, facing the cover. [Batteries] The Mamiya 6 MF uses either two SR44 silver oxide batteries or two LR44 alkaline manganese batteries.
- Page 13 [Battery check] 1. Power can be turned on/off with the small lever beside the shutter release button. (ON) Align the white dot on the lever with the white dot on the camera body. (OFF) Align the white dot on the lever with the red dot on the camera body.
- Page 14 Before opening/closing the light shield curtain, be sure to cock the shutter, otherwise, it will not open/close. CAUTION: Never touch the light shield curtain or the bellows. If touched, light leakage or a mal- function may result. To open the light shield curtain, slide the light shield curtain release lever along lo fol- low the arrow "...
- Page 15 Before using the camera, it is advisable to understand how it works ~2 Power on/off lever ....Set to ON. (See page 12) T Film advance lever .._ Wind the lever to cock the shutter.
- Page 16 [Setting the film speed] [Opening/closing the back cover] While depressing the back cover lock but- ton, simultaneously push down the lock lever in the direction of the arrow and the back will open. When closing the back cover, securely press both corners until it clicks. [Setting the film type] This camera can use either 120 or 220/135 film, To set the type of film used, simply...
- Page 17 [Memo clip] The memo clip on the back cover is used to hold the film box to serve as a convenient reminder of the type of film in the camera or for recording the date. Push the spool release lever of right side to the right, and install the take-up spool in the take-up spool chamber, then push the lower spool stud up.
- Page 18 3. When the new roll has been inserted, be sure to reset the lower spool stud by pres- sing it in. (Also, be sure to reset the take-up spool stud in a similar manner.) 4. Pull out the backing paper, and insert the tip into the slot on the take-up spool as pic- tured.
- Page 19 The Mamiya 6 MF has an aperture-prior- ity, AE lens shutter. Once the aperture and film speed are set, the AE meter selects a proper shutter speed in relation to the set aperture. Under the manual photographic mode, proper shutter speed is indicated by a red LED within the viewfinder.
-
Page 20: Viewfinder Display
The shutter release button i s designed so that pressure can be applied in two stages. When it is lightly touched, correct metering data is displayed on the left side of the view finder. When it is depressed all the way, the shutter is released and an exposure *The LED's are located at the very left margin of the finder in order not to interfere... - Page 21 AE photography AEL photography Manual mode...
- Page 22 When the lens has been focused, the doubleimage superimposing rangefinder produces two superimposed images with in the square 0 of the viewfinder. 1. Position the subject within the central square 0 of the viewfinder. As on the top left the subject will appear as a double images.
- Page 23 1. Press the shutter release button when you have focused and determined compos- ition. 2. Advance the film by winding the film advance lever until it stops. (The shutter is then cocked.) 3. After completing the last exposure, wind the advance lever several times, until the film with its backing paper is completely wound onto the take-up spool.
- Page 24 1. Align “A” on the shutter speed dial with the white line index mark on the camera body. 2. Be sure to set the exposure compensa- tion scale to 0. 3. Set the aperture to the desided “f” number according to conditions 4.
- Page 25 You may over-ride the AE mode and select the aperture and shutter speed manually. Simply set the shutter speed against the white line index mark and also set the lens aperture to the desired “f" stop. As noted previously when the shutter re- lease button is touched slightly, the proper shutter speed will be indicated by a blinking LED.
- Page 26 The depth-of-field varies according to the aperture. The smaller the aperture (f/8, f/11, f/16...) the greater the depth-of-field; the larger the aperture (f/8, f/5...) the smaller the depth-of-field. To take pictures which are sharp from foreground to infinity or when taking snap shots, the focusing range is extended or depth increased by using a smaller aperture.
- Page 27 The exposure compensator functions in a number of important ways. It can be used to correct exposure values (EVs) or the differ- ences in brightness between a primary sub- ject and its background -especially when over or under-exposures occur. It can also be used when filters are employed or when engaged in available light photography - or under high contrast conditions (i.e.
- Page 28 The Mamiya 6 MF features an X synchro flash terminal and its lens shutter system permits flash synchronization at all shutter speeds. Shoe-mounted flash units can be attached directly to the hot-shoe, while flash brackets can be attached to the tripod socket for larger flash guns.
- Page 29 The emergency winding-stop release button should not be used for any other purposes. Since the Mamiya 6 MF has a 6 x 6 for- mat, it is not necessary to adjust for vertical and horizontal composition. Because most...
- Page 30 Photography with the 6X4.5cm Format Before taking photos, Insert the 6X4.5 frame under the film guide rails. making sure to open the light shield curtain first. If it is inserted when the curtain is closed, your fingers may come in contact with the curtain and light may leak in or other malfunctions may result.
- Page 31 Lenses Lens construction: 8 elements in 5 groups Angle of view: 75° Minimum aperture: 22 35mm equivalent: 28mm Minimum focusing distance: 1m MInimum magnification: 0.059 Area covered: 945 x 945mm Filter size: 58mm Hood: Bayonet type Dimensions: 55 (length) x 64mm (diameter) Weight: 335g Lens construction 6 elements in groups...
- Page 32 [Lens hood] For 50mm f/4: Bayonet type (58mm in diameter) For 75mm f/3.5: Bayonet type (58mm in diameter) For 150mm f/4.5 Screw-in type (67mm in diameter) All are supplied with the lenses. [Diopter correcting lens] Focusing accuracy diminishes when the eye diopter is incorrect.
- Page 33 135 Film 12EXP..... .5 The picture area (24 x 54mm) provided by the Mamiya 6 MF panoramic photography is about three (exactly 2.78) times as wide as that provided by 35mm panoramic format (13 x36mm).
- Page 34 Uniquely designed to prevent mistakes, the New Mamiya 6 incorporates numerous safety features. If the shutter will not function, it is very likely due to user error rather than camera malfunction. Should something appear to go wrong, be sure to review the following points.
- Page 35 For a general overhaul, cleaning, or repairs, take the camera to your nearest authorized Mamiya Service Center or ask your camera shop for advice. This product employs a protective circuit for prevention of electrostatic electrification.
Need help?
Do you have a question about the 6MF and is the answer not in the manual?
Questions and answers