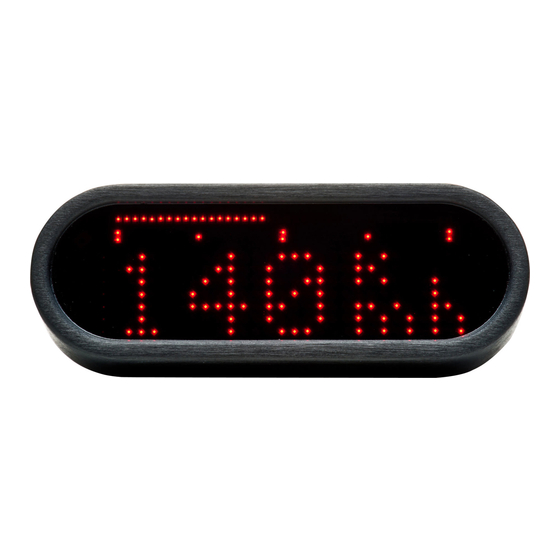
Summary of Contents for motogadget motoscope mini
- Page 1 Operating manual for multifunctional instrument – motoscope mini – Suchen Sie die deutsche Bedienungsanleitung? Besuchen Sie: www.motogadget.de/de/msm_files.html KBA 91177...
- Page 2 Thank you very much for purchasing a high quality product from motogadget. Please read the following information and recommendations carefully and follow these instructions for installation and usage of the instrument. No liability is assumed by motogadget for damage or defects resulting from negligence or failure due to following the operating manual.
- Page 3 ROADS IS UNDERTAKEN AT USER'S OWN RISK. 2.1 Duty of registration The motoscope mini has a General Operating Permit (ABE) and therefore does not have to be entered into the vehicle documents. The device is identifiable as having a General Operating Permit by a special label with the code "KBA 91177"...
- Page 4 Because the motoscope mini can be installed on a wide range of vehicles with different specifications and equipment it is not possible to cover all cases in this manual. In case of doubt please consult our web site (Support and FAQ). Motoscope mini might also be installed by a garage.
- Page 5 5 Quick start This section provides a guide to quick installation and connection of the motoscope mini Have all the required equipment like mounting brackets, push buttons, fitting screws and nuts, screw adhesive (medium-strength), cables, cable ties, plug connectors, shrink tubing and soldering tin ready before you start. Tools required are screwdrivers, wrenches, an Allen key for M3 metric Allen screws, a side cutter, small pliers, soldering iron, a voltmeter and a crimping tool.
- Page 6 • Make sure that your vehicle is equipped with interference suppressing spark plugs and connector cables! Use of the motoscope mini with non-suppressed ignition systems can lead to serious damage of the device. 7 Installation of the motoscope mini To ensure correct fastening two metric fastening screws must be used (M3).
- Page 7 The motoscope mini requires “switched plus” for the power supply that means electricity will only flow if the ignition is switched on. The motoscope mini can operate within a voltage range of 7 V to 18 V DC. Using the instrument without a vehicle battery is not intended or recommended! Please ensure that the polarity of the power supply is correct.
- Page 8 If the electrical connections are correct, the “motogadget” logo will appear which will then switch to the speedometer. If this doesn't happen turn off the ignition and double-check all connections and wires.
- Page 9 5 Hz and with maximum brightness. 12 The Setup menu (adjusting the instrument) All adjustments and calibrations of the motoscope mini are carried out with a single push button. For this reason the setup is divided in “levels.” Selection and access of these levels as well as sub-levels is achieved by pressing the push button for different lengths of time which is displayed by an LED bar.
- Page 10 12.1.1 Teach The function Teach offers an automatic calibration of the speedometer, for example if wheel scope or impulse per wheel rotation are not known. To use this function the vehicle must be driven at 50 km/h (31 mph). Start the Teach function with the menu button. The calibration takes 5 seconds.
- Page 11 12,000, 14,000 or 16,000 (rev./min). In order to exit this menu option press push button for duration 2 (two bars). 12.2.3 Day The motoscope mini features an integrated light sensor that distinguishes between daytime (light) and nighttime (dark). In menu option Day brightness of LED display can be adjusted for daytime. The function Day offers the functions low, med, high or high+.
- Page 12 Press push button for duration 3: Exits menu without deleting anything. 13 Cleaning of instrument Use only gentle, non-corrosive detergents and a soft cloth for cleaning the motoscope mini. Avoid anything that might scratch the aluminium casing and the display surface. Should any scratching occur, we recommend special polishing pastes in order to remove them from the display.
-
Page 13: Trouble Shooting
The motoscope mini provides a lot of information at one time. Users consequently require a certain “training” period in order to recognise all the given information quickly and correctly. Please take this into account, particularly during your first rides with the motoscope mini and do not distract yourself by watching the instrument in public traffic. - Page 14 16 Appendix 16.1 Connection Scheme a) connection diagram for motogadget speed sensor b) connection diagram for OEM sensor 16.2 General ov erview of operation Standard display Setup display 1 2 3 Speed PARAM Teach Start next number Trip 2 0 1. 2 3...
- Page 15 16.3 Table of tire circumferences Zoll Reifendimension Abrollumfang für Zoll Reifendimension Abrollumfang für Inch Tyre Size ABE / Gutachten Inch Tyre Size ABE / Gutachten 100/90 16 1770 90/90 - 18 51 H TL 1869 110/90 16 1824 100/90 - 18 56 H 1924 120/80 16 1806...


Need help?
Do you have a question about the motoscope mini and is the answer not in the manual?
Questions and answers