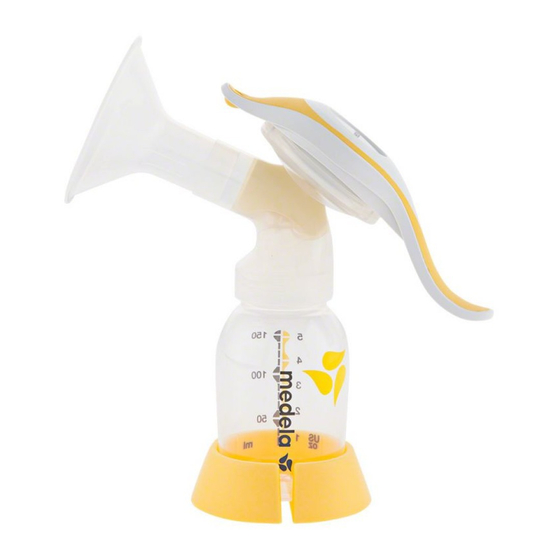
Medela Harmony Instructions & Assembly
Hide thumbs
Also See for Harmony:
- Instructions for use manual (172 pages) ,
- Manual (88 pages) ,
- Instructions & assembly (48 pages)
Summary of Contents for Medela Harmony
- Page 1 Harmony ™ Manual breastpump Sacaleches manual Tire-lait manuel Instructions & assembly. Instrucciones. Instructions et assemblage.
- Page 2 ® Harmony Disassembly ........5-6 Harmony Assembly.
-
Page 3: Ordering Parts
Harmony Breastpump Parts Breastpump Parts ™ & Assembly A. Handle ......#8007170 A1. Let-down symbol B. Diaphragm, Stem, O-Ring assembly . . #8207234 C. PersonalFit... -
Page 4: Before You Begin
Do not use with Quick Clean Micro-Steam bags. Wash only ™ ™ according to the instructions above. Hygiene: Wash hands thoroughly before pumping. If your physician recommends it, clean breast and surrounding area with a damp cloth. Do not use soap or alcohol, which can dry the 4. P ull yellow valve (F) skin and cause cracked nipples. from pump body (D) by twisting gently. Using a breastpump should never be uncomfortable. If you experience any pain, contact your healthcare provider or lactation specialist immediately. Single User Caution: The Harmony breastpump is a personal care item that should not be shared between users. -
Page 5: Harmony Assembly
Harmony Disassembly ™ 4. If the handle components (continued) (A & B) have been disassembled: place the 5. Remove white membrane oval shaped base of the (E) from yellow valve (F). stem into the diaphragm (B). Hint: Make sure the oval shape is lined up correctly in the diaphragm. Harmony Assembly Correct Incorrect 1. Snap white membrane (E) 5. Place silicone diaphragm/ button into small opening stem (B) into pump handle on yellow valve (F) until (A) and press down firmly membrane lies completely around entire edge to ensure flat on valve. (Both parts proper seal. The lines on the should be completely dry diaphragm should line up before assembly.) with the yellow dots on the handle. 2. Push yellow valve (F) 6. Insert stem of handle... - Page 6 Using Your Harmony Breastpump When to Use the Harmony Breastpump ™ ™ 1. C enter breastshield over The Harmony Breastpump… nipple. Caution: pushing • allows you to pump manually on an occasional shield too firmly into breast basis. That is, you are available to nurse your may actually reduce milk flow. baby for most feedings each day, except for a few occasions during the week. 2. T he adjustable handle can be positioned for your maximum • is ideal to collect breastmilk for a feeding pumping comfort. The level of that will be missed due to an evening out. vacuum is controlled by the • is also ideal to relieve occasional breast compression and the speed engorgement or sore nipples. of the handle stroke. You decide the pumping rhythm When long-term pumping is required, e.g. when the baby...
-
Page 7: Upgrading To Electric Pumping
Upgrading to Electric Pumping with the Symphony Breastpump Setup (cont.) Medela Symphony Breastpump. Requires membrane cap #8100769, membrane #8200094 ® and tubing #8007213. Sold separately. Symphony Breastpump Setup Requires membrane cap #8100769, membrane #8200094 and tubing #8007213. Sold separately. 3. Assemble protective membrane and membrane cap. -
Page 8: Tips For Success & Trouble Shooting
5. Freeze milk in small portions, 2 to 4 ounces per pump handle is seated bottle. Smaller amounts thaw more quickly. all the way into the pump body (D) until it will go 6. When freezing milk, do not fill bottles more than 3/4 full no farther. Make sure the to allow room for liquid to expand. Cool milk white o-ring is in place in prior to freezing. Never refreeze breastmilk that has the stem handle (B). been frozen. c. M ake sure the pump body (D) is firmly screwed 7. Use solid lids and seal bottles tightly if you intend to onto the bottle (G) and that the breastshield (C) is firmly seated into the pump body (D). refrigerate breastmilk for several days or freeze it. d. M ake sure the oval base of the stem (B) is properly 8. Refer to the following chart for maximum storage seated in the oval base of the periods under varying conditions. diaphragm (B). e. F inally, make sure the diaphragm (B) is pushed all the way onto the circular rim on the underside of the handle (A). f. I f assistance is still needed after reviewing this booklet, please contact Medela Customer Service at (800) 435-8316 or (815) 363-1166 Monday-Friday, 7:30 am to 8:00 pm Central Time. -
Page 9: Breastmilk Storage Guidelines
WHICH VARY FROM STATE TO STATE. Before you make a claim can also change the composition of breastmilk.) under this warranty, it may save time and expense to call Medela • P rior to each use, all feeding components must be washed. Customer Service (toll-free) at 1-800-435-8316. You may also call Follow the instructions in the prior to each use section.


Need help?
Do you have a question about the Harmony and is the answer not in the manual?
Questions and answers