Table of Contents
Advertisement
Quick Links
Advertisement
Table of Contents

Related Manuals for M-Audio KEYSTUDIO KeyStudio 49i


Summary of Contents for M-Audio KEYSTUDIO KeyStudio 49i
-
Page 1: User Guide
KeyStudio 49i Keyboard-based Music Production System English User Guide... -
Page 2: Table Of Contents
MIDI Connections Other Connections Connecting KeyStudio 49i to a Computer KeyStudio 49i Windows Driver Installation KeyStudio 49i Macintosh Driver Installation KeyStudio 49i and the M-Audio GM Module Software The M-Audio GM Module User Interface Overview MIDI 16 Channels General MIDI... - Page 3 KeyStudio 49i Audio Setup and Controls Using the Mic and Instrument Inputs Using the Aux Inputs Using Direct Monitoring The Mono Button Sample Operating Scenarios Advanced MIDI Features in Edit Mode Advanced Functions in Edit Mode Octave Buttons Options Additional Edit mode black key functions include MIDI Messages In-Depth Program &...
-
Page 4: Introduction
Information on driver installation can be found in the “Connecting KeyStudio 49i to a Computer” chapter of this User Guide This User Guide covers setup and operation of the KeyStudio 49i USB keyboard, use of the M-Audio GM Module software, and basic MIDI software setup KeyStudio comes bundled with recording software, but it can also be used with many third-party music programs See your software’s documentation for more information on this... -
Page 5: Keystudio 49I Features
• Software drivers and documentation • M-Audio GM Module standalone and plug-in application < Ableton Live Lite CD-ROM and registration card < USB cable If any of the above listed items are missing, please contact the retailer where you purchased the product. -
Page 6: Minimum System Requirements
Windows Media Center Edition is not currently supported. M-Audio suggests you also check the minimum system requirements for any software applications you plan on using with your new M-Audio hardware, as they may be greater than the above. Important: Connect your Headphones or powered speakers to KeyStudio 49i. Sounds created by KeyStudio and from software used with it will be available at the audio outputs on KeyStudio 49i (and not on the outputs of your computer’s built-in soundcard). -
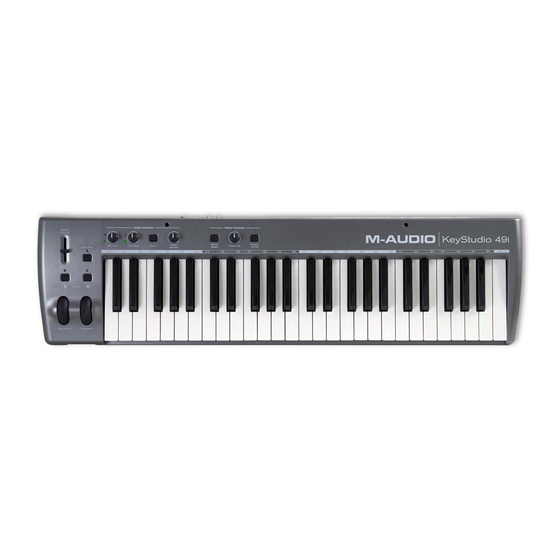
Page 7: Controls And Connectors
Top Panel Diagram Top Panel Descriptions Modulation Wheel (Modulation): This is an assignable controller with a default of controlling vibrato or tremolo effects assigned to the instrument you are currently playing This type of real-time controller was originally introduced on electronic keyboards to give the performer options such as adding vibrato, just like players of acoustic instruments do If you are using your keyboard as a MIDI controller, the Modulation wheel transmits MIDI modulation (MIDI CC 01) messages as it is moved Some external MIDI devices may not respond to modulation messages, and not all instruments respond to modulation data sent from the Modulation wheel Check the MIDI implementation charts provided with your... - Page 8 Edit Mode Button (Edit Mode): When this button is pressed, the keyboard will enter “Edit Mode ” While in Edit Mode, the keys on the keyboard no longer send MIDI notes, and instead are used to select advanced functions and enter data See the “Advanced Features in Edit Mode”...
-
Page 9: Rear Panel Descriptions
Rear Panel Descriptions 14 1/4” Audio Outputs (Output R—L (Mono)): These are unbalanced tip-sleeve (TS) audio outputs for the piano sound, signal from all inputs, and audio signal coming from your computer If you are connecting to a mono (1 channel) device or amplifier, use the left 1/4”... -
Page 10: Hardware Connections
MIDI input (when using software synthesizers) or audio input signal to appear as audio at your computer’s outputs On a Macintosh computer, installing the M-Audio drivers enables you to use your KeyStudio 49i with Pro Tools M-Powered recording... -
Page 11: Keystudio 49I Windows Driver Installation
The computer will automatically display the interactive install screen If your computer fails to launch the installer, manually start it by clicking on Start > My Computer > M-Audio KeyStudio 49i Choose the KeyStudio 49i keyboard from the pull down menu and click “Install ”... -
Page 12: Keystudio 49I Macintosh Driver Installation
KeyStudio 49i Macintosh Driver Installation M-Audio driver installation is not required in order to use KeyStudio 49i with the GM Module software on your Macintosh OS X computer These drivers are however, required for Pro Tools M-Powered use NOTE: Disconnect your KeyStudio 49i keyboard from your computer until the appropriate driver files have been copied to your hard drive. -
Page 13: Keystudio 49I And The M-Audio Gm Module Software
MIDI is an abbreviation for Musical Instrument Digital Interface MIDI in itself is a means of digital communication– no sound is transmitted over a MIDI connection, but only a series of digital messages that tell a connected sound generator (like the M-Audio GM Module) what to do For example, if you hit the middle C on the KeyStudio keyboard, the keyboard will send a “Note On”... -
Page 14: 16 Channels
4 notes at a time As a result, one of the notes played with your left hand will stop playing in favor of the new note triggered with your right hand M-Audio GM Module has no such limitation and allows you to play as many notes at the same time as... -
Page 15: Gm Module Standalone Operation With Keystudio 49I
When the M-Audio GM Module software is launched in standalone mode, it sends a MIDI message to the KeyStudio keyboard This message programs the Octave buttons on KeyStudio 49i to send program change messages The GM Module software always opens with program zero selected on GM Module channel 1 This mutes GM Module, allowing only the KeyStudio 49i built-in piano sound to be heard Pushing the Octave “>”... -
Page 16: Using The M-Audio Gm Module As A Plug-In
Fine Tune Click and hold the Fine Tune control, and drag up or down to fine-tune the pitch of all voices produced by M-Audio GM Module Transpose... -
Page 17: Channel Specific Settings
S (Solo) This is the GM channel solo for a selected channel Soloing a channel will mute all other 15 channels of the M-Audio GM Module software Accordingly, all channels with exception of the Soloed channel will be displayed in a lighter shade of gray and will not show any meter activity –... - Page 18 Category The M-Audio GM Module arranges its sounds into the General MIDI standard categories Clicking this field produces a drop- down menu of all categories Appendix A shows a list of all available categories and the contained instruments Note: Although selecting a new Category changes the display of the Instrument control, it is necessary to select a sound from the Instrument control to load it.
-
Page 19: Getting Started With Midi Music Creation Software
In Windows XP and Windows Vista, the audio outputs of KeyStudio 49i will appear as “USB Audio Device” if the optional drivers are not installed, and as “M-Audio KeyStudio IO Out 1/2” if theses drivers are installed As mentioned earlier in this section, the actual... -
Page 20: The Keystudio 49I Software Audio Control Panel (Windows Only)
Control Panel gives you access to certain audio hardware parameters and status readouts The M-Audio KeyStudio 49i Control Panel icon appears on the task bar (located close to the “clock”), and is also accessible from the Windows Control Panel Double click the M-Audio Control Panel icon to open it... -
Page 21: Keystudio 49I Audio Setup And Controls
Using the Aux Inputs M-Audio KeyStudio 49i has a pair of line inputs labeled “Aux Input ” They are designed to interface with both the left and right input from a stereo source, such as a synthesizer, drum machine, or CD player... -
Page 22: Using Direct Monitoring
Using Direct Monitoring When a microphone or instrument is plugged into the inputs of M-Audio KeyStudio 49i, its signal needs to be converted to a digital signal, which then gets sent to the computer via the USB cable From there, it gets sent to your music software and gets processed,... -
Page 23: Sample Operating Scenarios
Typical Setup #1 Typical Setup #1 shows the M-Audio KeyStudio 49i with a microphone plugged into the Microphone input on Channel 1, and an electric guitar plugged into the Instrument input on Channel 2. A CD player is plugged into the auxiliary inputs (the volume of the CD player may need to be adjusted so the signal coming from the CD player does not distort). -
Page 24: Advanced Midi Features In Edit Mode
The button to the left of the keys labeled “Edit Mode” is used to access additional advanced functions of the keyboard When this button is pressed, the keyboard will enter Edit mode and the keys on the keyboard can be used to select functions and enter data The light above the Edit Mode button indicates whether or not the keyboard is in Edit mode When in Edit mode, the black keys on the keyboard are used for selecting functions, while the white keys are used for data entry and channel selection Your keyboard will exit Edit mode as soon as either a function is selected or the CANCEL or ENTER key is pressed The light above... - Page 25 To select an alternate function: Press the Edit Mode button Press the black key that represents the function you want to assign to the Octave buttons KeyStudio will exit Edit mode as soon as you push one of these keys NOTE: Some of the functions the Octave buttons can be used for cannot send out a value less than zero.
- Page 26 Program change messages can be beneficial when using the KeyStudio keyboard to control MIDI sound modules or synthesizers like M-Audio GM Module For an example, let’s change the instrument on M-Audio GM Module to a cello sound To do this we need to send a program change of 42 to the GM Module software, which will select a cello sound from the...
- Page 27 B) Quick Select Program Change 1 Press the Edit Mode button 2 Press the black key above F4 (F#4), representing “Program ” 3 Press keys D4, then B3, then C5 This enters the combination: “4,” “2,” “ENTER ” Now the keyboard is set to play the GM Module cello sound 42 (from the General MIDI Instruments standard list) The full list of General MIDI program numbers is given in Appendix A at the end of this manual Method A is useful if you want to cycle through different instruments for the purpose of comparing and choosing which sound works best in your song Method B is more useful if you want to select a specific sound patch, as is the case here...
-
Page 28: Additional Edit Mode Black Key Functions Include
Additional Edit mode black key functions include: MIDI Out Mode Key The MIDI Out Mode key (G#2) determines what data is sent to the external MIDI Out port Pressing this key in Edit mode will toggle between two options: 1) MIDI coming from the computer via USB is sent to the external MIDI Out port 2) MIDI from the Keyboard is sent to the USB and external MIDI Out ports When the keyboard is played with Local mode on (see the following Local Mode Key section) and MIDI Out set to send data from the keyboard to the MIDI Out port, MIDI data will be transmitted from the keyboard to the external MIDI port and also via... - Page 29 There are 128 MIDI continuous controllers (0-127, counting from and including zero) plus an additional 4 proprietary M-Audio controller numbers for a total of 132 assignable controls and features KeyStudio accepts controller numbers 0-131 Numbers beyond 127 are a proprietary method M-Audio uses to simplify the transmission of certain, otherwise more complicated multi-part MIDI messages A full list of controller values is given at the back of this manual in Appendix C There are 132 (counting from and including zero to 131) MIDI continuous controllers (MIDI CC’s) For these...
- Page 30 Knob Assign Key As with the Modulation wheel, the Piano Volume knob can also be assigned to any of 132 controllers (0-131) shown at the back of this manual in Appendix C To assign the Piano Volume knob to a certain MIDI parameter: 1 Press the Edit Mode button 2 Press the black key above A3 (A#3), representing “Knob Assign ”...
-
Page 31: Midi Messages In-Depth
KeyStudio 49i User Guide MIDI Messages In-Depth Program & Bank Changes When the MIDI standard was first established, it enabled the user to access only 128 different sounds using program change messages (0-127) As MIDI devices grew to be more sophisticated and contain more sounds, bank change messages were included in an updated MIDI specification to allow for more than 128 sounds to be accessed The language MIDI uses to communicate between musical instruments only allows for program change commands 0-127, for a total of 128 possible programs (127 programs + program “0”... -
Page 32: Nrpn/Rpns
KeyStudio 49i User Guide You will find many MIDI devices respond to program change commands and many are organized according to the GM listing In General MIDI devices, different sounds are organized in the same way from device to device Piano sounds are in their particular place, string sounds are in their place, drum sounds are in their place, and so on All GM devices (both hardware and software sound modules) are clearly labeled as such, so you know that their sounds are organized in the General MIDI structure When a GM device receives a MIDI program change, it calls up a type of sound that you expect from the GM sound set All non-GM MIDI sound... -
Page 33: Troubleshooting
I hear any sound. Solution 3: This delay is known as latency, and latency can be adjusted by changing the buffer size setting in your M-Audio Control Panel The goal is to set the buffer size as low as possible without experiencing artifacts in the audio Faster computers generally allow for smaller buffer size settings, and thus less latency You can also avoid this problem by using the Direct Monitor knob See the “Using Direct Monitoring”... - Page 34 Problem 6: My synthesizer always recalls the sound next to the program number that I have sent to it from KeyStudio. For example, if I send a program change with the number 40 (Violin), my software loads sound number 41 (Viola). Solution 6: Some General MIDI modules count their sound patches from 1 –...
-
Page 35: Technical Info
Note: Your M-Audio product has been tested to comply with FCC Standards FOR HOME OR OFFICE USE. Modifications not authorized by the manufacturer may void user’s authority to operate this device. -
Page 36: Appendices - Useful Midi Data
Appendix A - General MIDI Instruments Piano Bass 0 Acoustic Grand Piano 32 Acoustic Bass 1 Bright Acoustic Piano 33 Electric Fingered Bass 2 Electric Grand Piano 34 Electric Picked Bass 3 Honky Tonk Piano 35 Fretless Bass 4 Electric Piano 1 36 Slap Bass 1 5 Electric Piano 2 37 Slap Bass 2... -
Page 37: Appendix B - Channel 10 Drum Map
Appendix B - Channel 10 Drum Map Key# Drum Sound Acoustic Bass Drum Bass Drum 1 Side Stick Acoustic Snare Hand Clap Electric Snare Low Floor Tom Closed Hi-Hat High Floor Tom Pedal Hi-Hat Low Tom Open Hi-Hat Low-Mid Tom Hi-Mid Tom Crash Cymbal 1 High Tom... -
Page 38: Appendix C - Standard Midi Controller Numbers (Midi Cc's)
Appendix C - Standard MIDI Controller Numbers (MIDI CC’s) 00 Bank Select 40 Balance LSB 01 Modulation 41 Controller 41 02 Breath Control 42 Pan LSB 03 Controller 3 43 Expression LSB 04 Foot Control 44 Controller 44 05 Portamento Time 45 Controller 45 06 Data Entry 46 Controller 46... -
Page 39: Appendix D - Additional Rpn Messages
This is because messages 128 – 131 are a different type of MIDI message, defined in the MIDI Specification as RPN messages M-Audio has created four messages that are sent like MIDI CC’s, but actually transmit a series of... -
Page 40: Technical Specifications
44.1 kHz sampling rate unless otherwise stated Mic Inputs Input Impedance Maximum Input Level at minimum gain Dynamic Range THD+N Frequency Response Available Pre-amp Gain Instrument Input Input Impedance Maximum Input Level at minimum gain Dynamic Range THD+N Frequency Response Available Pre-amp Gain Aux Inputs Input Impedance... - Page 41 ......052-218-0875 Web ......www.m-audio.jp 071220_KeyStu49i_UG_EN01 愛知県名古屋市...
Need help?
Do you have a question about the KEYSTUDIO KeyStudio 49i and is the answer not in the manual?
Questions and answers