Table of Contents
Advertisement
Advertisement
Table of Contents

Related Manuals for Janome MB-4S


Summary of Contents for Janome MB-4S
- Page 1 Instruction Book MB-4S...
-
Page 2: Important Safety Instructions
IMPORTANT SAFETY INSTRUCTIONS When using an electrical appliance, basic safety precautions should always be followed, including the following: This sewing machine is designed and manufactured for household use only. Read all instructions before using this sewing machine. DANGER — To reduce the risk of electric shock: 1. -
Page 3: Table Of Contents
TABLE OF CONTENTS SECTION 1. SETTING UP THE MACHINE Editing ...............46 Installing the Machine ..........2 Editing Functions ............47 Adjusting the feet ...........3 Selecting the hoop ..........47 Names of Parts ............5 Moving the pattern ..........48 Sub control panel ..........6 Resizing the pattern ..........48 RCS unit (optional item) ........6 Rotating the pattern ..........48 Standard accessories ..........7... -
Page 4: Section 1. Setting Up The Machine Installing The Machine
SECTION 1. SETTING UP THE MACHINE Installing the Machine Place the machine on a flat and stable surface such as a sturdy table that could withstand the machine’s weight and vibration. Place the machine on the flat and level surface. Make sure that all the feet firmly contact the surface. -
Page 5: Adjusting The Feet
Adjusting the feet Turn the adjusting screw counterclockwise (in the direction of A) as much as possible, before placing the machine on a surface. q Adjusting screw Place the machine on a flat and level surface. Turn the adjustable foot so the four feet firmly contact the surface. - Page 6 Do not use the machine near appliances that radiate electromagnetic noise such as a microwave oven, or do not plug in the machine to the same branch circuit where such appliances are connected. Do not use or store the machine near a heat radiator or in a place with dust or high humidity.
-
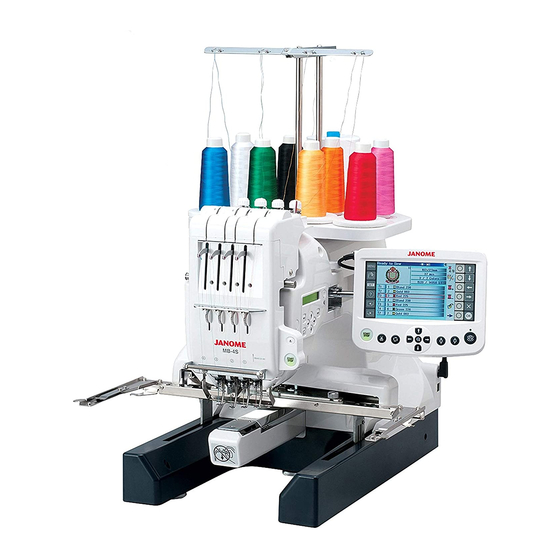
Page 7: Names Of Parts
Names of Parts q Thread guide bar w Pre-tension control e Tension control r Check spring t Hoop supporter y Needle plate u Hook cover i Start/Stop button o Auto thread cutter button !0 Sub control panel !1 Spool pins !2 Spool stand !3 Machine socket !4 Power switch... -
Page 8: Sub Control Panel
Sub control panel q Mode button w Trace button e Arrow buttons r Enter button t LCD brightness adjusting dial y LCD display RCS unit (optional item) q RCS unit w Start/Stop button e Auto thread cutter button r Trace button t Jog buttons y Carriage return button u Stitch back button... -
Page 9: Standard Accessories
Standard Accessories q Needle (DB x K5Q1-NY) w Scissors e Bobbins r Lint brush t Seam ripper y Handy needle threader u Spool caps i Spool net o Screwdriver !0 Screwdriver (small) !1 Oiler !2 Offset screwdriver !3 Tweezers !4 Screwdriver (large) !5 Accessory box... - Page 10 Standard Accessories q Instruction book w Instructional movie CD-ROM e Power supply cable r USB cable t Hoop M1 (MB Hoop 240 X 200) y Hoop M2 (MB Hoop 126 X 110) u Hoop M3 (MB Hoop 50 X 50) i Hoop supporter o Felt ring (large) !0 Felt ring (small)
-
Page 11: Assembling The Spool Stand
Assembling the Spool Stand z Insert the thread guide poles into the sleeve of the spool stand. Secure the poles with setscrews (A) from the bottom. Insert the spool pins into the spool stand. q Thread guide poles w Setscrews (A) e Spool stand r Spool pin x Attach the thread guide bar to the thread guide poles with the setscrews (B). -
Page 12: Setting The Thread Cones Or Spools Of Thread
Setting the Thread Cones or Spools of Thread Use the 4 spool pins in the front row for sewing, and second row spool pins are for the standby spools. Use the rear most spool pin for bobbin winding. Felt rings of two sizes are provided to accommodate various types of spools of thread and thread cones. -
Page 13: Installing The Hoop Supporter
Installing the Hoop Supporter z Loosen the two thumbscrews on the hoop supporter. q Hoop supporter w Thumbscrew x Turn the power switch on and select an embroidery pattern (see pages 26, 38) to move the carriage to the center. Hold the hoop supporter with both hands and place it under the carriage plate by inserting the necks of both thumbscrews into the slots in the carriage plate. -
Page 14: Installing The Rcs Unit (Optional Item)
Installing the RCS Unit (optional item) z Loosen the thumbscrew and open the mounting arm. q Thumbscrew w Mounting arm x Loosen the screw knob A and set the RCS unit on the mounting arm by hooking the RCS unit on the pins. Tighten the screw knob A to secure the RCS unit. Adjust the angle of the mounting arm as desired and tighten the thumbscrew. -
Page 15: Connecting The Power Supply
Connecting the Power Supply CAUTION: Turn the power switch off before connecting the machine to the power supply. z Turn the power switch off. q Power switch x Insert the machine plug into the machine socket. w Machine plug e Machine socket c Insert the power supply plug into the properly grounded outlet. -
Page 16: Direct Pc-Link
(optional item) to operate the machine via direct PC-link. Connecting the Machine and PC Start up the MB-4S and PC, and insert the type A USB connector in to the PC. Insert the type B USB connector into the USB port on the machine. -
Page 17: Threads
Cotton or spun polyester threads sizes 80 to 120 (74 to 100 dtex/2) are recommended for bobbin thread. Do not use poor quality prewound bobbins. Needles Use the DB x K5Q1-NY, size 11 needles (Janome part number 770811000). Stabilizers To obtain the best quality embroidery, it is important to use stabilizers. -
Page 18: Winding The Bobbin
Winding the Bobbin z Place the thread cone (spool of thread) on the rear most spool pin. Pass the thread through the thread guide A. q Thread guide A x Pass the thread through the upper hole and lower hole in the thread guide B. w Thread guide B c Draw the thread to the front. -
Page 19: Removing The Bobbin Case
Removing the bobbin case CAUTION: Turn the power switch off before removing the bobbin case. z Open the hook cover toward you. q Hook cover x Hold and open the latch of the bobbin case. Take the bobbin case out from the machine. w Latch NOTE: Do not force to pull the thread keeper when you... -
Page 20: Inserting The Bobbin Case
Inserting the bobbin case Hold the bobbin case with the latch and insert the bobbin case into the hook, aligning the bulge with the concave. Push the bobbin case as far as it will go and release the latch. q Latch w Bulge e Concave Close the hook cover. -
Page 21: Threading The Needle
Threading the Needle The threading path of all needles is similar. Review the threading procedure of the first needle when threading other needles. NOTE: Rayon threads are recommended for needles to achieve a better result. Threading needle No.1 z Place a thread cone on the front right spool pin. Draw the thread up and pass it through the right hole in the thread guide bar from behind. - Page 22 b Draw the thread down and pass it through the right hole in the guide plate. q Right hole in the guide plate n Pass the thread through the eye of the right check spring. w Eye of the check spring m Pull the thread up and pass it through the second hole from the right.
-
Page 23: Threading The Needle With The Needle Threader
Threading the needle with the needle threader z Hold the needle threader with a triangle mark facing up. Insert the thread into the Y-notch of the threader from the right. q Triangle mark w Y-notch x Slide the threader down along the needle while pushing it gently until the threader pin goes into the needle eye. -
Page 24: Setting The Fabric In The Embroidery Hoop
Setting the Fabric in the Embroidery Hoop z Attach stabilizer to the wrong side of the fabric. Mark the centerlines for pattern placement on the right side of the fabric. q Fabric w Centerlines e Stabilizer CAUTION: Thick and hard materials such as multi-layer canvas may cause needle to warp or break. -
Page 25: Setting The Embroidery Hoop
Setting the Embroidery Hoop Hold the setting plate with both hands and insert them under the holder clips. Slide the hoop on the hoop supporter until the holes catch the positioning pins on the hoop supporter. q Setting plate w Holder clip e Hole in the setting plate r Positioning pin NOTES:... -
Page 26: Section 2. Basic Operation
SECTION 2. BASIC OPERATION Basic Operation with the Sub Control Panel Machine operating buttons q Start/Stop button Press this button to start or stop the machine. The button glows red when the machine is stitching, and green, when the machine has stopped. w Auto thread cutter button Press this button to trim the threads. -
Page 27: Lcd Screen
LCD screen z When turning the power on, the LCD screen will show [W:00]. W: 00 Press the ENTER button and the hoop will move to the home position. q LCD screen w ENTER button NOTE: If the LCD screen shows [E:03], press the ENTER button to initialize the needle bar position. -
Page 28: Machine Settings
Machine Settings Press the MODE button to select the item you wish to change the setting. M1 00001 01/13 1 The selected item will blink. Press the MODE button to select the next item or press the ENTER button to change the setting of the selected item. -
Page 29: Starting To Embroider
Starting to Embroider M1 00001 01/13 1 z Select the pattern you wish to sew. The LCD screen shows the Ready to sew mode display. NOTE: The embroidery result may vary depending on the fabric and threads used. Make a test embroidery using the same fabric and threads before sewing on the actual garment. - Page 30 b Press the START/STOP button, the LCD screen will show the reminder asking you to confirm the hoop type to be used. y START/STOP button u Reminder display NOTE: If you press the START/STOP button when the tension release lever is in the open position, a warning sign [W:03] will appear.
-
Page 31: Removing The Hoop
Removing the Hoop z Hold the setting plates with both hands and lift the front side of the setting plates to release them from the positioning pins. Slide the hoop toward you and remove it from the machine. q Setting plate w Positioning pin x Loosen the hoop tightening screw. -
Page 32: Adjusting The Thread Tension
Adjusting the Thread Tension Adjusting the needle thread tension Adjust the needle thread tension by turning the tension dial so that a small amount of the needle thread shows on the wrong side of the fabric. q Tension dial NOTE: If the thread kinks while stitching, turn the pre-tension dial clockwise slightly to eliminate kinks. -
Page 33: Replacing The Needle
Push the needle up as far as it will go and tighten the needle clamp screw securely with the screwdriver. r Long groove NOTE: Use the DB x K5Q1-NY, size 11 needles (Janome part number 770811000). -
Page 34: Basic Operation Of The Optional Rcs Unit
Basic Operation of the Optional RCS Unit Machine operating buttons q Start/Stop button Press this button to start or stop the machine. The button glows red when the machine is stitching, and green, that the machine has stopped. w Auto thread cutter button Press this button to trim the threads. -
Page 35: Function Keys
Function keys CAUTION: Do not press the LCD touch panel with hard or sharp pointed objects like pencils, screwdrivers or the like. Press the LCD touch panel and buttons gently. Rough or forceful pressing may damage the unit. q MENU key Press this key to assign mode selection to the circle keys. -
Page 36: On-Screen Help Movie
On-screen Help Movie Press the help (?) key to open the help movie menu. You can view 6 help topics of essential operations. q Help key ? Winding the bobbin Select the help topic you wish to view by pressing the arrow keys and press the OK key. w Arrow keys e OK key Press the circle key next to the playback icon to... -
Page 37: Disconnecting The Rcs Unit
Disconnecting the RCS Unit You can use the RCS unit to control two or more machines. 88x90mm 88x90mm After setting up the first machine, press the MENU key 21 min 21 min 1 / 5 Color 1 / 5 Color and press the circle key next to the RCS icon. -
Page 38: Section 3. Advanced Operation With The Optional Rcs Unit
SECTION 3. ADVANCED OPERATION WITH THE OPTIONAL RCS UNIT Selecting the Embroidery Patterns When turning the power on, the LCD touch panel will show the opening window, then a warning message will appear after a few seconds. Keep hand clear. Carriage will now move to set position. -
Page 39: Selecting The Built-In Designs
Selecting the built-in designs There are 50 ready to sew embroidery designs categorized by hoop size. To view the designs on the next page, press the next page key. q Next page key Press the previous page key to go back to the previous page. - Page 40 Press the pattern selection key and the Ready to sew window will open. q Pattern selection key The stitch image of the selected pattern and a list of the thread color assignment to each needle bar 88x90mm along with the sewing information are displayed on the 21 min screen.
-
Page 41: Manual Color Assignment
Manual color assignment Thread colors are automatically assigned to the needle bar in the optimum order. However, you can change the color assignment manually. 88x90mm If a new pattern has a thread color that is same as one 21 min 1 / 5 Colors of the colors previously sewn, you may change the 1 / 8565 ST... -
Page 42: Monogramming
Monogramming There are 3 pages of the monogramming window. Press the page key to show the next or previous page. q Page keys Page 1: Roman alphabets and spaces Page 2: Numerals, punctuation marks and symbols Page 3: Dieresis and European accented letters (3/3) -
Page 43: Function Keys
Function keys Font selection Press the circle key next to font icon to open the font selection window. q Circle key (font selection) Press the arrow keys to select the desired font or Script Cheltenham Gothic border patterns. The selected font will be indicated with a red Hollowblock Bauhaus Galant... -
Page 44: Entering The Characters
Entering the characters Example: “Jump” in Gothic font Select Gothic font. Press the desired alphabet key to enter characters. Enter upper case “J”. Press the circle key next to the letter case icon to switch to the lower case. q Circle key (letter case) Enter lower case “u”, “m”... -
Page 45: Correcting The Text
Correcting the text To delete a character: Press the arrow key to move the cursor under the character to delete. Press the circle key next to the delete icon. q Arrow keys w Cursor e Circle key (delete) To insert a character: Press the arrow key to move the cursor under the character next to the place to where you wish to insert a character. -
Page 46: Placement Of Monogramming
Placement of monogramming You can select from one of the 3 placements for monogramming. 59x22mm Press the circle key next to the placement icon to 4 min select the left justify, center justify or right justify 1 / 1 Color alternately. -
Page 47: Multi-Color Monogramming
Multi-color monogramming You can sew a multi-color monogramming by assigning different thread color to each character. 59x22mm 4 min z Press the circle key next to the right arrow icon 1 / 1 Color to show the alternate function key assignment. 1 / 1012 ST q Circle key (right arrow) x Press the circle key next to the separation icon. -
Page 48: Editing
Editing In the editing mode, you can modify and combine the embroidery patterns and monograms. z Press the circle key next to the editing icon. q Circle key (editing) x The editing window will open. Edit c Press the MENU key and press the circle key next Edit to the built-in icon to import the built-in patterns. -
Page 49: Editing Functions
Editing Functions Selecting the hoop Edit Press the circle key next to the hoop icon. q Circle key (hoop) The function key assignment will change to the hoop type selection. The following hoop types are available: : MB hoops : Tajima hoops (optional item) : Socks and Hat hoops (optional item) : Monogram hoops (optional item) Edit... -
Page 50: Moving The Pattern
Moving the pattern Edit To move the pattern on the editing screen, press and drag the pattern to the desired location with your fingertip. You can move the selected pattern also by pressing the arrow keys. q Arrow keys Resizing the pattern Edit Press the circle key next to resize icon and the function key assignment will change to resizing. -
Page 51: Deleting The Pattern
Deleting the pattern Edit Select the pattern to delete by pressing the pattern image in the editing screen. The selected pattern is indicated with a green frame. Press the circle key next to the delete icon to delete the selected pattern. q Circle key (delete) Saving the file Edit... -
Page 52: Duplicating The Pattern
Duplicating the pattern Press the circle key next to the copy icon to duplicate the pattern. q Circle key (duplicate) NOTE: The original pattern will be superimposed with a copy. Move the copy to show the original pattern. Flipping the pattern To flip the pattern horizontally, press the circle key next to the flip horizontal icon. -
Page 53: Monogramming In An Arc
Monogramming in an arc You can make a monogramming in an upper or lower arc. z Enter the characters in the editing mode. Press the circle key next to the arc icon. q Circle key (arc) x The alternate function key assignment will appear. Press the circle key next to the lower arc icon to make a lower arc. -
Page 54: Customizing The Color Setting
Customizing the color setting The background color of the editing screen and section color of the pattern image can be changed to simulate the actual colors of the fabric and threads. z Press the circle key next to the color icon and the color palette window will open. -
Page 55: Combining The Patterns And Lettering
Combining the Patterns and Lettering z Press the MENU key. Edit q MENU key Edit x Press the circle key next to the built-in pattern icon. w Circle key (built-in) e OK key Press Corresponding Function Button. c The pattern selection window will open. Select pattern #6. v The editing window will open and the stitch image Edit of the selected pattern will appear. - Page 56 m Move the flipped pattern to the left bottom corner of the editing screen by using the arrow keys or by dragging it with your fingertip. Edit i Arrow keys Edit , Make a duplicate of the pattern and flip it vertically. Move the flipped pattern to the top left corner of the editing screen.
- Page 57 ⁄2 Press the circle key next to the arc icon. !1 Circle key (arc) ⁄2 Edit ⁄3 Press the circle key next to the lower arc icon to ⁄3 Edit make a lower arc. Press the circle key next to the outward arrow to make the arc larger.
-
Page 58: Grouping The Patterns
Grouping the patterns Edit You can move more than one pattern at one time by grouping the patterns. Press the circle key next to the grouping icon. q Circle key (grouping) The patterns in the editing window will be combined as a single group. -
Page 59: Starting To Embroider
Starting to Embroider z Select the pattern you wish to sew. The LCD touch panel shows the Ready to sew window. NOTE: The embroidery result may vary depending on the 88x90mm 21 min fabric and threads used. Make a test embroidery using 1 / 5 Colors 1 / 8565 ST the same fabric and threads before sewing on the... - Page 60 v Press the START/STOP button, the LCD screen will show the reminder asking you to confirm the hoop type to be used. e START/STOP button 88x90mm r Reminder message 21 min 1 / 5 Colors 1 / 8565 ST 1071 1127 NOTE: 1372 1278 If you press the START/STOP button when the 1158...
-
Page 61: Customizing The Settings With The Sub Control Panel
[03] Machine ID number When connecting two or three units of the MB-4S to the PC at the same time, you need to assign the identification number to each machine. Press the right or left arrow button to select the ID number. -
Page 62: Formatting The Memory
The color code of the selected brand will be shown in the Ready to sew mode display. The brand numbers are as follows: 1 Janome 2 Gütermann Sulky (rayon 40) 3 Madeira (polyester 40) 4 Madeira (rayon 40) -
Page 63: Reminder Message On/Off
[08] Reminder message ON/OFF When you press the START/STOP button, a reminder message will appear on the LCD screen. However, you can turn off the reminder. Press the right arrow button to indicate [OFF] to turn off the reminder. Press the ENTER button to register the new setting or press the upward arrow button to go to the next setting. -
Page 64: Jump Thread Trimming On/Off
[12] Jump thread trimming ON/OFF If you wish to trim jump threads automatically, press to indicate [ON]. the right arrow button Press the left arrow button to disable the jump thread trimming. Press the ENTER button to register the new setting or press the upward arrow button to go to the next setting. -
Page 65: Resume Mode On/Off
[15] Resume mode ON/OFF When resume mode is enabled, the last stitch of the pattern sewn before turning the power off will be resumed when the power is turned on again. Press the right or left arrow button to turn [ON] or [OFF] the resume mode. -
Page 66: Mm/Inch Option
[18] mm/inch option You can select “millimeter” or “inch” for measuring unit displayed on the screen. Press the right or left arrow button select [mm] or [inch]. Press the ENTER button to register the new setting or press the upward arrow button to go to the next setting. -
Page 67: Customizing The Settings With The Optional Rcs Unit
Customizing the Settings with the Optional RCS Unit The machine settings and LCD screen display can be customized with the RCS unit. Press the SET key and the setting mode window will open. q SET key There are 8 pages of display including the language selection in the setting mode. - Page 68 v Resume mode ON/OFF When resume mode is enabled, the last stitch of the pattern sewn before turning the power off will be resumed when the power is turned on again. Press the circle key next to “ON” or “OFF” to turn on or off the resume mode.
- Page 69 , Machine ID and name When connecting two or three units of the MB-4S to the PC at the same time, you need to assign the Rename identification number and name to each machine. Eco Mode Press the circle key next to Rename and the keyboard window will open.
- Page 70 . Formatting the memory If the internal memory or media does not function due to damage to the memory bank, you need to re-enable it by formatting the memory. Format Press the arrow key (up or down) to select the desired memory location.
- Page 71 ⁄1 Grid size The grid size of the editing screen can be changed by ⁄1 pressing the circle key next to “+” or “–“. You can select one of 3 sizes, 10 mm, 20 mm and 30 mm. Grid size To hide the grid, select “OFF”.
- Page 72 There are 8 kinds of embroidery threads to choose ⁄5 from. Press the circle key next to the upward or downward arrow to move the cursor (red arrow) to select the Thread selection desired brand. Janome Rayon 40 Gutermann SULKY q Circle keys (arrow) Madeira Polyester 40 Rayon 40...
- Page 73 ⁄7 Reminder message ON/OFF ⁄7 When you press the START/STOP button, a reminder message will appear on the LCD touch panel. However, you can turn off the reminder. Color Control Press the circle key next to OFF to turn off the Reminder to Start reminder.
- Page 74 ¤0 Setting the trim tail length ¤0 Some times you need to adjust the tail length of the thread being trimmed depending on the thickness and type of the thread. Trim Tail Length Press the circle key next to “+” or “–“ to adjust the trim length.
- Page 75 ¤4 Jump thread trimming ON/OFF ¤4 If you wish to trim jump threads automatically, press the circle key next to “ON”. SET8 A check mark will appear in the box. Jump Thread Trimming Number of Jumps Press the circle key next to “OFF” to disable the jump thread trimming.
-
Page 76: Language Selection
¤7 Hoop position adjustment ON/OFF (after starting embroidery) ¤7 The hoop position can be adjusted before sewing each layer (section) or even in the middle of SET8 embroidering. Jump Thread Trimming Number of Jumps NOTES: The adjusted hoop position will apply to the Minimum jump thread length to cut subsequent layers (sections). -
Page 77: File Management
File Management Saving the Pattern as a File z Press the circle key next to the save file icon in 240x200mm the Ready to Sew mode. 59 min 1 / 13 Colors q Circle key (save file) 1 / 22479 ST 1028 1117 1031 1028... -
Page 78: Creating A New Folder
Creating a new folder z If you wish to create a new folder, press the circle Save File key next to the New. Location : 0.1/3MB q Circle key (new) Rename Embf NOTE: If you wish to change the name of the existing folder or file, press the circle key next to Rename. -
Page 79: Opening A File
Opening a file You can open embroidery data files from the internal memory of the MB-4S, RCS unit and memory devices such as USB memory and CD-ROM drive. The RCS unit is able to open embroidery data files in Janome *.jef and Tajima *.dst format. -
Page 80: Deleting The Folder
Deleting the folder Delete z To delete the unnecessary folders, press the circle Open File Location : 0.1/3MB key next to the delete icon in the folder list window Rename and press the folder icon you wish to delete. ABC_1 q Circle key (delete) Embf x A confirmation dialog box will open. - Page 81 This page is intentionally left blank.
-
Page 82: Section 4. Optional Items Usb Memory
SECTION 4. OPTIONAL ITEMS USB Memory The RCS unit is compatible with the USB memory, which can be used to save and transfer the files between the machine and your PC. The USB memory is available at camera shops, PC supplies stores etc. -
Page 83: Cd-Rom Drive
CD-ROM Drive NOTE: Do not use any other CD-ROM drive than the exclusive CD-ROM drive, which is available from authorized dealers. Insert the mini USB connector into the USB port on the back of the CD-ROM drive. q Mini USB port on the CD-ROM drive Insert the USB connector into the USB port on the RCS unit. -
Page 84: Section 5. Care And Maintenance Cleaning The Hook
SECTION 5. CARE AND MAINTENANCE Cleaning the Hook CAUTION: Turn the power switch off before cleaning the hook area. Open the hook cover and remove the bobbin case. Clean the inside of the hook with the lint brush. q Hook cover w Lint brush Cleaning the Bobbin Case Remove the bobbin from the bobbin case. -
Page 85: Cleaning The Auto Thread Cutter Mechanism
Cleaning the Auto Thread Cutter Mechanism CAUTION: Turn the power switch off before cleaning the auto thread cutter mechanism. z Loosen the 2 setscrews on the needle plate with the offset screwdriver. Unscrew and remove the 2 setscrews with the screwdriver q Setscrews w Needle plate e Offset screwdriver... -
Page 86: Oiling
Oiling CAUTION: Turn the power switch off before oiling. If you use the machine frequently, oil the needle bars every two weeks and oil the hook race every day. Clip the tip of the oiler with scissors. Apply a few drops of oil to the needle bar through the holes in the front cover. - Page 87 If you use the machine frequently, oil the following points every four months. z Turn the machine on and select pattern #1. Move the head to the right most position by selecting needle bar #4. The oiling points will be exposed. Turn the machine off.
-
Page 88: Error Messages
Error Messages Error Message Error Description Remedy Communication error with the Turn the power switch off and turn it on again. E : 00 RCS unit. Initializing error. Turn the power switch off and turn it on again. Needle bar switching error. Turn the power switch off and turn it on again. -
Page 89: Troubleshooting
Troubleshooting Reference Problem Cause See page 13. 1. The machine is not plugged in correctly. The machine does not run. 2. The threads are jammed in the hook or Remove jamming threads. around the take-up lever. Follow the message to turn 3. - Page 90 Troubleshooting Reference Problem Cause See pages 30. 1. The needle thread tension is too tight. The fabric puckers. 2. The fabric is not stretched tight enough in the See page 22. hoop. See page 15. 3. A stabilizer is not used. The LCD screen is not clear.
- Page 92 770-865-009 ① (EN)
Need help?
Do you have a question about the MB-4S and is the answer not in the manual?
Questions and answers