Table of Contents
Advertisement
WARNING: If the information in this manual is not followed exactly, a fire or explosion may result causing
property damage, personal injury or loss of life.
– Do not store or use gasoline or other flammable vapors and liquids in the vicinity of this or any other appliance.
– WHAT TO DO IF YOU SMELL GAS
• Do not try to light any appliance.
• Do not touch any electrical switch.
• Immediately call your gas supplier. Follow the supplier's instructions.
• If you cannot reach your gas supplier, call the fire department.
– Installation and service must be performed by a qualified installer, service agency or the gas supplier.
Tested &
Portland
Listed By
Oregon USA
US
OMNI-Test Laboratories, Inc.
0177WB036S (12/2014)
OUTDOOR WOOD FURNACE
OWNER'S MANUAL
CLASSIC EDGE 350
CLASSIC EDGE 550
CLASSIC EDGE 750
INSTRUCTIONS
(p/n 9000295 - REV. A) - 10-JUN-2015
SAVE THESE
Advertisement
Table of Contents
Troubleshooting

Related Manuals for Central Boiler CLASSIC EDGE 350


Summary of Contents for Central Boiler CLASSIC EDGE 350
- Page 1 OUTDOOR WOOD FURNACE OWNER’S MANUAL CLASSIC EDGE 350 CLASSIC EDGE 550 CLASSIC EDGE 750 WARNING: If the information in this manual is not followed exactly, a fire or explosion may result causing property damage, personal injury or loss of life.
- Page 2 The Classic Edge includes two 4-foot stainless steel insulated chimney sections (6" in diameter, p/n 6500004 - Edge 350 and 550, 8" in diameter, p/n 10508 - Edge 750). Use only stainless steel solid fuel chimneys specified by Central Boiler. Maximum draft is marked on nameplate.
-
Page 3: Table Of Contents
Central Boiler Furnace Installation - Connecting to Your Existing System . . . . . . . . . . . . . . . . . . . . . . . . . . . . . . . . 4 dealer. -
Page 4: Central Boiler Online Resources
Enter CentralBoiler.com in your browser or scan the code using any QR code reader app on your smartphone to access Central Boiler's library of information to help with installation, operation and maintenance of your Central Boiler outdoor furnace. Detailed Furnace Installation Variations - http://www.CentralBoiler.com - go to Explore > Furnace Installation View and/or download PDFs to assist in installation of your outdoor furnace. -
Page 5: Labeling And Terminology
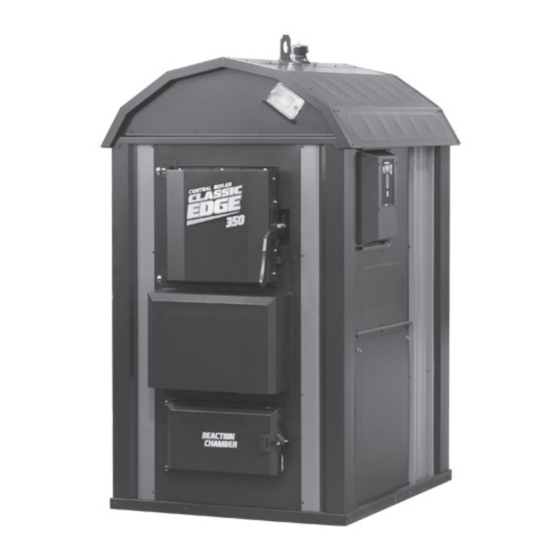
Be sure to follow all instructions and related precautions as they are meant for your safety and protection. Store this manual in a readily accessible location for future reference. Classic Edge 350 Measurements 40.5 72 50.75 43 51.5 129 109 131 Classic Edge 550 Measurements 42.5... -
Page 6: Foundation
Foundations may consist of concrete, crushed rock or patio blocks. Classic Edge 350 Classic Edge 550 Classic Edge 750... -
Page 7: Access To Ports On Outdoor Furnace
NOTE: The Installation Guide provides more information on pump selection. For even more detailed information, see the Hydronic Component Selection Guide (p/n 2482), available from your Central Boiler dealer. Classic Edge 350 / 550 Models – 1-Pump Configuration Classic Edge 350 / 550 Models – 2-Pump Configuration* 3/4" Return Side View 3/4"... -
Page 8: Ground Rod Kit
CLASSIC EDGE OUTDOOR FURNACE • OWNER'S MANUAL Ground Rod Kit The outdoor furnace must be electrically bonded to ground in accordance with the requirements of the authority having jurisdiction or, in absence of such requirements, with the National Electrical Code, ANSI/NFPA 70 and/or the Canadian Electrical Code Part 1, CSA C22.1 Electrical Code. -
Page 9: Typical Installation
Any electrical installation should be done by a qualified installer NOTE: A certified electrician must in accordance with applicable do the electrical installation. © 2014 Central Boiler codes. Remote Thermal Storage Installation Connecting to Remote Thermal Storage Tank To Thermal... - Page 10 CLASSIC EDGE OUTDOOR FURNACE • OWNER'S MANUAL...
-
Page 11: Chimney Recommendations
NOTE: For chimney extensions or chimney replacement, use only In higher populated areas, extend the chimney to a height genuine Central Boiler chimney components. Parts are available above the roofs of surrounding buildings. Use Central from an authorized Central Boiler dealer. -
Page 12: Important Precautionary Information
CLASSIC EDGE OUTDOOR FURNACE • OWNER'S MANUAL Important Precautionary Information Be sure to read carefully and understand these precautions before, during and after the installation, operation and maintenance of the furnace. NOTE: All operations must be in accordance with local and state codes which may differ from the information in this manual. - Page 13 CLASSIC EDGE OUTDOOR FURNACE • OWNER'S MANUAL The firebox door must be closed and latched at all times except This heater is designed to burn natural wood only. Higher when filling the firebox with wood. Leaving the firebox door efficiencies and lower emissions generally result when burning open may lead to a runaway fire.
-
Page 14: Wood Selection And Preparation
CLASSIC EDGE OUTDOOR FURNACE • OWNER'S MANUAL Wood Selection and Preparation Before You Start Operating Your For the best results, it is best to burn seasoned split wood. However, it may be Classic Edge Outdoor Wood Furnace possible to burn some unsplit wood with the split wood depending on quality, size, moisture content and wood type. -
Page 15: Importance Of Properly Seasoned Wood
CLASSIC EDGE OUTDOOR FURNACE • OWNER'S MANUAL Following are some reasons that green, unseasoned wood should not be used: • Green wood contains about 50% moisture by weight. Energy is required to heat the wood and evaporate the moisture - energy which could have been used to provide heat for the home. -
Page 16: Operating Instructions
• Extends life of furnace • Increases maintenance requirements • Reduces bridging • Increases bridging NOTE: The larger the volume where the wood is burning and not drying, the more efficiently the outdoor furnace will be operating. © 2015 Central Boiler... - Page 17 Primary Combustion Air Outlets Secondary Coals Mixing Channel Reaction Chamber 3" (8 cm) Max. Front View © 2015 Central Boiler NOTE: The illustration shows the Classic Edge operating correctly with proper combustion air flow and with the wood properly loaded.
-
Page 18: Air Flow And Maintaining The Coal Bed
CLASSIC EDGE OUTDOOR FURNACE • OWNER'S MANUAL NOTE: A key point to remember about the operation of the Classic Edge is that as wood burns, the combustion gases flow down through the bottom of the firebox so the proper flow must be maintained as shown. NOTE: Refer to the General Troubleshooting Information for more information on outdoor furnace operation and for conditions to avoid. - Page 19 CLASSIC EDGE OUTDOOR FURNACE • OWNER'S MANUAL CAUTION Do not burn plastic, garbage, treated wood or fuels not listed for this outdoor furnace. CAUTION If the water in the outdoor furnace boils, be sure to check the water level and restore to full.
-
Page 20: Adding Heat Load
Paper Kindling Approximately 15" (38 cm) © 2015 Central Boiler Allow the wood load to burn until the kindling turns to coals (for Classic Edge 750 models, leave the bypass door open); then add enough kindling again to fill the firebox about 1/4 full. On top of the kindling, add 8-10 inches (20-25 cm) of dry, seasoned split wood. -
Page 21: Adding Wood - Best Practices For Frequency And Amount
CLASSIC EDGE OUTDOOR FURNACE • OWNER'S MANUAL Adding Wood - Best Practices for Frequency and Amount For the best results, it is best to burn seasoned split wood less than 25% moisture by weight. Burning wood with a high moisture content increases maintenance requirements and can lower the service life of the outdoor furnace. - Page 22 CLASSIC EDGE OUTDOOR FURNACE • OWNER'S MANUAL Top View of Firebox Push cleaning rod Cleaning back and forth through ash in these locations. Push cleaning rod back and forth through ash in these locations. Unlatch the firebox door; then slightly open the firebox door and wait 10 seconds.
- Page 23 CLASSIC EDGE OUTDOOR FURNACE • OWNER'S MANUAL When adding wood to the firebox, be careful not to get pinched between the wood and the door frame or any part of the outdoor furnace. Use extreme care with large pieces of wood that may be difficult to handle. Each time wood is loaded, visually check the condition of the coal bed and ash content and, if needed, use the cleaning rod to make sure the system is not plugged.
-
Page 24: Why A 12-Hour Burn Time
Over time, you will become familiar with your particular conditions, and you will learn how best to load the wood so it burns down to a glowing coal bed as often as possible before reloading. ©2015 Central Boiler • 1-MAY-2015... -
Page 25: Maintenance
CLASSIC EDGE OUTDOOR FURNACE • OWNER'S MANUAL Maintenance PREVENTIVE MAINTENANCE SCHEDULE Regular maintenance and inspections can SERVICE INTERVAL help extend the life of your outdoor furnace and prevent high-cost repairs. This table is meant to serve as a general guideline until you become acquainted with how the outdoor furnace operates with your specific application. -
Page 26: Control Locations
Light Switch ROUTINE MAINTENANCE CAUTION Use only genuine Central Boiler Parts and Accessories if it ever becomes necessary to replace any component of the outdoor furnace. Routine inspections and maintenance are essential to the proper operation and longevity of the outdoor furnace. The items indicated in the preventive maintenance schedule are intended to serve as a guideline. -
Page 27: Maintenance Sections
CLASSIC EDGE OUTDOOR FURNACE • OWNER'S MANUAL Creosote - Formation and Need for Removal. When wood is burned slowly, it produces tar and other organic vapors, which combine with expelled moisture to form creosote. The creosote vapors condense in the relatively cool chimney flue of a slow-burning fire. - Page 28 CLASSIC EDGE OUTDOOR FURNACE • OWNER'S MANUAL 3-4. Ash Some ash, but not more than three inches, on the sides and bottom of the firebox is necessary for the proper operation of the outdoor furnace (as shown). No ash should cover the mixing channel (the area alongside the secondary air charge tube).
- Page 29 CLASSIC EDGE OUTDOOR FURNACE • OWNER'S MANUAL When removing ash, be careful not to spill any coals or ash outside of the noncombustible container. Each time ash is cleaned out, inspect the firebox door seal and/or covers to make sure they are sealing properly. Every other day (or as needed), use the Wonder Bar to completely scrape the face of the firebox door frame where the door seal contacts.
-
Page 30: Chimney Inspection
Inspection Cover 3-7. Heat Exchangers © 2015 Central Boiler NOTE: Clean the heat exchangers weekly until the interval for your application can be determined. Frequency will vary depending on a number of factors including heat load requirements, type of wood used and the moisture content of the wood. - Page 31 CLASSIC EDGE OUTDOOR FURNACE • OWNER'S MANUAL Remove the wing nut and open the Reaction Chamber door. Use the tapered small end of the cleaning rod to pull the ashes forward from between each fold of the heat exchanger. Cleaning Rod Use the hoe to pull the ash to the front of the furnace;...
- Page 32 CLASSIC EDGE OUTDOOR FURNACE • OWNER'S MANUAL CAUTION Be sure to turn off the FireStar controller before doing this procedure. Remove the wing nut and open the Reaction Chamber door. Use the tapered small end of the cleaning rod to scrape between each fold of the heat exchanger and to pull the ashes forward.
- Page 33 CLASSIC EDGE OUTDOOR FURNACE • OWNER'S MANUAL Furnace shown for illustration purpose only; actual furnace will vary. ©2015 Central Boiler Close the Reaction Chamber door and install the wing nut. Press the Power button on the FireStar controller to turn it on.
- Page 34 CLASSIC EDGE OUTDOOR FURNACE • OWNER'S MANUAL 3-10. Combustion Air Outlets Primary combustion air enters the firebox through the combustion air outlets located on the sides and front of the firebox. It is essential to the operation of the outdoor furnace that these outlets remain unobstructed. Clean the combustion air outlets before they become plugged.
- Page 35 CLASSIC EDGE OUTDOOR FURNACE • OWNER'S MANUAL Remove the bolts securing the combustion fan and remove the combustion fan. Hold fan so the oil locations are upright; then apply 10 drops of SAE 20 ® non-detergent oil (e.g., 3-IN-ONE Oil) in each location, as shown. NOTE: Hold fan so the oil locations are upright to ensure the oil will drain down into the...
- Page 36 Inspect each refractory module for damage. Small cracks and chips in the refractory are normal. If large pieces of the refractory modules are missing, contact your Central Boiler dealer. Install the secondary air charge tube making sure the alignment pin is seated in the alignment hole in the refractory modules.
- Page 37 CLASSIC EDGE OUTDOOR FURNACE • OWNER'S MANUAL Close and secure the airbox cover. Install the outer airbox cover and secure with screws. Do not connect power or operate the outdoor furnace with the outer airbox cover removed. The outer airbox cover must be installed and secured with screws. 10.
- Page 38 Heat Exchangers Reaction Chamber Combustion Air Outlets/Air Channel Plates © 2015 Central Boiler NOTE: Refer to the illustration and clean the areas identified in the order shown. For each area in the illustration, refer to the following corresponding section. Press the Power button to turn the FireStar controller off.
- Page 39 Take care not to damage the temperature sensor when removing ash. Furnace shown for illustration purpose only; actual furnace will vary. ©2015 Central Boiler 3. Firebox Using a shovel, remove as much ash as possible. Turn the shovel around and push ash from the front of the furnace below the door frame to the back of the furnace.
- Page 40 CLASSIC EDGE OUTDOOR FURNACE • OWNER'S MANUAL NOTE: It can take many days before ash is completely cooled. Other waste should not be placed in the same container. When removing ash, be careful not to spill any coals or ash outside of the noncombustible container.
- Page 41 CLASSIC EDGE OUTDOOR FURNACE • OWNER'S MANUAL Use the tapered small end of the cleaning rod to scrape between each fold of the heat exchanger and to pull the ashes forward. Cleaning Rod If needed, the plate at the back of the firebox can be removed for inspection and cleaning of the heat exchangers.
- Page 42 Furnace shown for illustration purpose only; actual furnace will vary. ©2015 Central Boiler Close the Reaction Chamber door and install the wing nut. 7. Combustion Air Outlets/Air Channel Plates Mark the location of each air channel plate; then remove the acorn nuts securing the side and front air channel plates and remove the plates.
-
Page 43: Water Quality And Maintenance
CLASSIC EDGE OUTDOOR FURNACE • OWNER'S MANUAL WATER QUALITY AND MAINTENANCE An important part of outdoor furnace maintenance is controlling the quality of the water in the outdoor furnace. Water Test Kits and Test Results DATE pH LEVEL NITRITE LEVEL Record the results of pH and nitrite level tests in the table above. -
Page 44: Testing Supply Water
Corrosion Inhibitor Plus™ and Initial Treatment Central Boiler Corrosion Inhibitor Plus™ (p/n 1650) gives optimum protection when it is used to initially treat the water and is then maintained at proper levels. -
Page 45: Testing Treated Water In The Outdoor Furnace
CLASSIC EDGE OUTDOOR FURNACE • OWNER'S MANUAL NOTE: If the system has a larger than normal water capacity, more Corrosion Inhibitor Plus™ should be added at a recommended rate of one unit per 180 gallons (681 liters) of water. Add the recommended amount of Corrosion Inhibitor Plus™ through the vent pipe at the top of the outdoor furnace. -
Page 46: System Maintenance
CLASSIC EDGE OUTDOOR FURNACE • OWNER'S MANUAL NOTE: Always hold the dropper in a vertical position to ensure proper droplet size. If the nitrite level is not at least 20 drops by nitrite test, add 1/4 unit of Corrosion Inhibitor Plus™ (p/n 1650); then circulate water for 24 hours and repeat procedure, as needed, to achieve a nitrite level of at least 20 drops by nitrite test. -
Page 47: Post Heating Season Maintenance
Rotate the wand in a circle to flush thoroughly. Flush top of firebox and bottom of water jacket beneath firebox using wand placed in vent. Drain location NOTE: Pump configuration may vary from illustration. © 2014 Central Boiler... -
Page 48: Firebox Door Hinge / Latch Bearing Adjustment
NOTE: If any of these items are under warranty, remember that the warranty covers only the cost of the replacement part. Labor is not covered. NOTE: Use only genuine Central Boiler parts and accessories if it ever becomes necessary to replace any component on the outdoor furnace. -
Page 49: Firebox Door Seal
CLASSIC EDGE OUTDOOR FURNACE • OWNER'S MANUAL To tighten the latch bearing, loosen the latch adjustment nut; then tap the latch bearing assembly in toward the firebox. Tighten the latch adjustment nut securely. Latch Adjustment Hinge Adjustment Nuts FIREBOX DOOR SEAL The firebox door seal must be in good condition to ensure an airtight seal. -
Page 50: Reaction Chamber Door Seal
CLASSIC EDGE OUTDOOR FURNACE • OWNER'S MANUAL Scrape the face and surface area of the door frame to remove any deposits. ©2015 Central Boiler Close the firebox door. Make sure that pressure is felt as the latch is closed to ensure the seal is tight with the door frame. -
Page 51: Circuit Breaker
CLASSIC EDGE OUTDOOR FURNACE • OWNER'S MANUAL Using a scraper, remove the Reaction Chamber door seal rope and clean any remaining silicone adhesive from the groove. Any residue left in the groove will interfere with the new seal. Apply a liberal amount of silicone sealant into the entire Reaction Chamber door seal groove. -
Page 52: Solenoid
CLASSIC EDGE OUTDOOR FURNACE • OWNER'S MANUAL To test for a faulty component, connect one component at a time (e.g., start with one of the solenoids); then connect power to the outdoor furnace. If the circuit breaker trips, the component is likely faulty. If not, disconnect power to the outdoor furnace and repeat the procedure until all components have been tested. -
Page 53: Secondary Air Charge Tube And Refractory Modules
CLASSIC EDGE OUTDOOR FURNACE • OWNER'S MANUAL 10. Install the disc onto the air tube making sure the disc fits evenly. Install the cotter pin through the solenoid and disc; then bend the ends of the pin to prevent it from falling out. 11. -
Page 54: Thermocouple
CLASSIC EDGE OUTDOOR FURNACE • OWNER'S MANUAL Remove the secondary air charge tube by lifting it up and sliding it toward the back of the outdoor furnace. Remove the rope gasket; then remove the existing refractory modules. Install the new refractory modules; then install a new rope gasket on top of the refractory modules. -
Page 55: Troubleshooting
CLASSIC EDGE OUTDOOR FURNACE • OWNER'S MANUAL TROUBLESHOOTING GENERAL TROUBLESHOOTING INFORMATION The Classic Edge operates differently than other types of wood-burning appliances. Understanding how the Classic Edge operates will help you to quickly identify and solve many commonly asked questions. Be sure to read thoroughly and understand Section 2 –... - Page 56 Restricted Inadequate Flow Is the Reaction Chamber full of ash? © 2015 Central Boiler The Reaction Chamber is where final combustion occurs. It is important that the Reaction Chamber remain unobstructed to allow final combustion to occur. It is not designed to be an ash collection area, although over time ash will gradually accumulate in the Reaction Chamber.
- Page 57 INCORRECT (Blocked Flow) Flow Blocked © 2015 Central Boiler Are the air outlets plugged? Primary combustion air is provided through the combustion air outlets in the firebox. The air outlets must not be plugged or obstructed for the outdoor furnace to operate correctly. If it appears the combustion air outlets are plugged or restricted, refer to the Complete Firebox Cleaning Procedures section.
-
Page 58: Troubleshooting Other Situations
Check the water level at the sight gauge and, if necessary, add water according to the Water Quality and Maintenance section. If adding water does not correct the problem, contact your Central Boiler dealer. 10. Low water temperature for too long a period of time - The display on the... - Page 59 If no exhaust comes out, chimney might still be drafting poorly at times. © 2015 Central Boiler • If a spark arrestor is being used, make sure it is clean and unobstructed. • Objects like buildings and trees in close proximity or nearby terrain (e.g., hills, valleys, etc.) can adversely affect air flow in the chimney.
- Page 60 3" (8 cm) Max. Front View © 2015 Central Boiler Load of wood too large in relation to coal bed - Adequate coals are needed to restart the fire after adding wood. If adding too much wood causes the fire to go out, either add drier, smaller pieces of wood first or partially fill with wood to allow time for the coals to restart the fire.
- Page 61 12. Poor water quality - Water with high amounts of solids, sand or dirt can create deposits inside the wall of heat exchanger components, reducing the amount of heat output. If this condition is suspected, contact your Central Boiler dealer. 13. New construction with radiant in-floor heat - Bringing a cold concrete slab up to temperature the first time will take a considerable amount of time and wood;...
- Page 62 (see Owner Serviceable Items). ©2014 Central Boiler NOTE: If the outdoor furnace is operated with the door open, the firebox door seal may be damaged. Solenoid and/or air regulating disc stuck open or obstructed - Remove any obstructions.
- Page 63 © 2014 Central Boiler Make sure the pump motor is installed in a horizontal position. The junction box must not be located below the pump motor. If necessary, remove the four screws and rotate the pump body.
- Page 64 CLASSIC EDGE OUTDOOR FURNACE • OWNER'S MANUAL Excessive heat loss - See items 6-10 of Building is Losing Temperature. Supply and return line heat loss - If not using ThermoPEX, supply and return lines buried in a wet, low-lying area may cause a large heat loss that will greatly increase wood consumption.
- Page 65 Some, but not all, causes of corrosion are listed below with possible solutions. If you are unsure how to proceed, contact your Central Boiler dealer. Water temperature is too low - If the heat load in the system is too large, the water in the system will not reach high enough temperatures to dry the firebox and corrosion can occur.
-
Page 66: General Information
CLASSIC EDGE OUTDOOR FURNACE • OWNER'S MANUAL GENERAL INFORMATION Make note of these precautionary statements, also found on the outdoor furnace. CAUTION • DO NOT start fire until water level is full. • Keep face away from door area. • Hot surfaces. -
Page 67: Wiring Diagram
CLASSIC EDGE OUTDOOR FURNACE • OWNER'S MANUAL WIRING DIAGRAM PRIMARY SOLENOID SECONDARY SOLENOID... - Page 68 If a defect in workmanship exists, at its option Central Boiler will (1) repair the defective part at no charge, using new or refurbished replacement parts, (2) exchange the furnace with a comparable model furnace that is new or which has been manufactured from new or serviceable used parts and is at least functionally equivalent to the original furnace, or (3) refund the purchase price based on the pro-rated scale.
Need help?
Do you have a question about the CLASSIC EDGE 350 and is the answer not in the manual?
Questions and answers