
Related Manuals for Central Boiler CLASSIC


Summary of Contents for Central Boiler CLASSIC
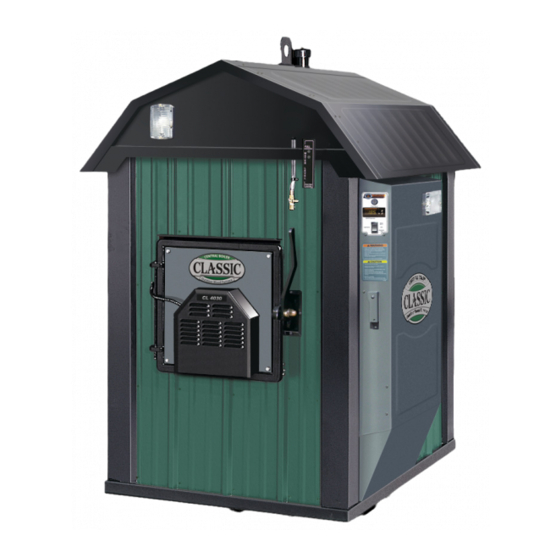
- Page 1 Save This Manual For Future Reference Tested & Beaverton Listed By Oregon USA OMNI-Test Laboratories, Inc.
-
Page 2: Introduction
The Central Boiler Classic Models CL 4436, SCL 5636, CAUTION: Indicates presence of a hazard which will CL 5648, and SCL 5648 are either UL or OMNI tested and or can cause minor personal injury or property damage if listed. -
Page 3: Table Of Contents
Table of Contents INTRODUCTION ................................ 2 Labeling and Terminology ..................... 2 Foreword ..........................2 SECTION 1 - OPERATING INSTRUCTIONS ......................4 OPERATING CLEARANCES AND PRECAUTIONS ................4 FIRING THE FURNACE ........................4 Filling the Firebox ........................4 Adjusting Water Temperature ....................5 CONTROL LOCATIONS ........................ -
Page 4: Section 1 - Operating Instructions
FULL mark. CHECK WATER LEVEL! Be sure water is at the FULL mark before firing. 1. The Classic is to be fueled with untreated wood only. Do not burn garbage, gasoline, rubber, engine oil, CAUTION naphtha, plastics, treated wood, or combustibles other If the furnace boils hard, be sure to check the water than wood. -
Page 5: Adjusting Water Temperature
Adjusting Water Temperature CAUTION The furnace high water temperature setting can be Stay as far away as possible from the door area adjusted anywhere within a temperature range from 150 - when opening the door. º º F. At 10 F less than the temperature setting (10º... -
Page 6: Section 2 - Maintenance Instructions
A hoe, ash rake, and shovel to be used for this Inspect the firebox for signs of corrosion every 3 months procedure may be purchased from your Central Boiler the first year and every 6 months thereafter. Clean firebox dealer. -
Page 7: Maintenance Schedule
An important part of furnace maintenance is controlling recommended rate of one unit per 180 gallons of the quality of the water in the furnace. Central Boiler water. supplies a pH tape and a nitrite test kit with each new outdoor Before collecting the sample, drain about a quart of water wood furnace. -
Page 8: Post Heating Season Maintenance
Fig. 5 POST HEATING SEASON MAINTENANCE The water should be left in the furnace during the non-heating season. Check pH and nitrite as described in the Water Quality and Maintenance section; add Corrosion Inhibitor (p/n 165) as needed. If Corrosion Inhibitor is added, run the circulation pump for two days to thoroughly mix in the new corrosion inhibitor. -
Page 9: Section 3 - Furnace Installation
INSTALLATION CLEARANCES AND PRECAUTIONS • The Classic is not intended or certified to be installed inside a building. • 3. A nontoxic boiler-type antifreeze may be added to If this outdoor wood furnace is used to heat potable... -
Page 10: General Installation Information
PLANNING THE INSTALLATION Several items must be taken into consideration when selecting a suitable location for the Classic outdoor wood furnace. Highlighted below are many of the key items that must be considered when choosing a location for the furnace. -
Page 11: Water Supply Lines And Insulation
(4-6 months) will reduce the effects of ultraviolet rays on the water lines and insulation. Fig. 10 Central Boiler now offers a convenient alternative to ordering and assembling Central PEX tubing, Central Therm insulation, and Central Therm Sleeve. CentralFlex™ is a preassembled set of two 1 in. - Page 12 Fig. 11 Do not use a drain tile pipe, bubble wrap, or PVC pipe for water lines unless these pipes can be installed in a manner that allows the drainage of any water that could possibly enter. If the water supply and return lines are not insulated properly, there can be excessive heat loss.
- Page 13 Fig. 15 If not mounted on the furnace, the circulation pump(s) need to be mounted 4 to 5 feet lower than the top water level in the furnace (see Fig. 13 & 14). It is recommended to mount the pump(s) at the furnace especially if the building being heated is higher than the furnace or if there is a large rise in the water lines between the furnace and the building (see Fig.
-
Page 14: Installing
Installing NOTE: The rods should be long enough to be inserted into the insulation section and grabbed NOTE: If installing CentralFlex™, the tubing, from the other end. insulation, and sleeve assembly instructions in this C. For each insulation section, slide the rods into the section may be ignored. -
Page 15: Wiring The Circulation Pumps
Wiring The Circulation Pumps WATER HEATER INSTALLATION Upon completion of the water lines and circulation Installing a domestic hot water heat exchanger in the pump(s) installation, the circulation pump(s) must be building that is being heated is an inexpensive way to capture properly wired using the following procedure. -
Page 16: Existing Forced Air Installation
Fig. 21 being drawn from the Classic furnace and should be set to the desired room temperature. The existing heating system thermostat should be set to a temperature 4-5° lower than... - Page 17 NOTE: If a low water temperature switch is not An alternative method is to install a line voltage installed, the fan will run continuously even when thermostat to control the blower on the existing furnace. In this installation, a 120-volt line is run from the thermostat the outdoor wood furnace is out of wood.
- Page 18 Fig. 24 Section 3 - Furnace Installation...
-
Page 19: Heating Multiple Zones Or Buildings
Side panel models offer three sets of outlets (for up to three zones or buildings without the need for manifolds) for the mounting of up to three pumps on the furnace. Fig. 25 Section Central Boiler 2004 Section 3 - Furnace Installation... -
Page 20: Hydronic Installations
165° F, there are alternative installation procedures that will make the system work very well with CAUTION the Classic outdoor wood furnace. These include: The outdoor wood furnace must NEVER be 1. More fin tube water baseboard heaters can be added. -
Page 21: Pressurized Water System Installations
Pressurized Water System Installations It is very important to purge all air and eliminate all air and water leaks (valve packings, bleeders, etc.) from the WATER TO WATER HEAT TRANSFER SYSTEM existing system. After filling the outdoor furnace (as If it is preferred to keep the existing system pressurized, a described in the Initial Start-Up Procedures section) and water-to-water heat exchanger may be used (see Fig. - Page 22 WATER TO WATER HEAT TRANSFER SYSTEM With this type of installation, the exchange temperature may be more than 165° F and may eliminate the need for USING A WRAPAROUND HEAT EXCHANGER additional baseboard heaters or other added heat exchanger Another option for installing the water-to-water heat as illustrated.
-
Page 23: Direct Circulation Baseboard Installation
Direct Circulation Baseboard Installation Baseboard heaters, as either the main source of heat or as supplements to forced air or boiler applications are easily plumbed into the water lines from the outdoor wood furnace. The following illustrations detail the proper plumbing methods. Fig. -
Page 24: Radiant Floor System Installations
Radiant Floor System Installations Proper insulation is key to effective radiant heating and controlling large heat demands. Heat from this type of Installing radiant floor (ceiling) heating is a very viable system radiates nearly equally in all directions; therefore as heating option when either remodeling or building new. - Page 25 Fig. 32 Section Fig. 33 Section 3 - Furnace Installation...
-
Page 26: High Volume Water Heating
Fig. 34 High Volume Water Heating Fig. 35 Section 3 - Furnace Installation... -
Page 27: Pool And/Or Hot Tub Heating
Pool And/Or Hot Tub Heating Fig. 36 Section Valves should be installed so the heat exchanger can be WARNING isolated when shock treating or adding chemicals. High Do not use automotive or ethylene glycol antifreeze chemical concentrations from improper feeding of chemicals in the outdoor wood furnace connected to a can cause rapid corrosion to the heat exchanger. -
Page 28: Finalizing The Installation
E. Add Corrosion Inhibitor. Add Corrosion Inhibitor FINALIZING THE INSTALLATION immediately after filling with water. Be sure to add Before firing the furnace for the first time, Corrosion Inhibitor as soon as possible so it will perform the following important items: immediately begin to protect the steel. - Page 29 7. Fill for 5 minutes; then if more than one pump circuit All valves in the outdoor wood furnace system should is present, close the valves and repeat the process for be opened before starting this procedure. each pump circuit. Once all pump circuits have been 1.
-
Page 30: Section 4 - Troubleshooting
SECTION 4 - TROUBLESHOOTING 10. Water lines uninsulated - Losing heat from A. FURNACE DOES NOT HEAT (BUILDING IS LOSING uninsulated water lines in areas that are not intended TEMPERATURE) to be heated (unheated crawl spaces, under mobile 1. Circulation valve(s) closed - Be sure all valves in the homes, etc.). - Page 31 3. Temperature controller set incorrectly - The 4. Water line heat loss - If water lines are buried in wet, temperature controller should not be set above 195°F. low-lying areas, there may be a large heat loss which would greatly increase the wood consumption. 4.
-
Page 32: Section 5 - Owner Serviceable Items
SECTION 5 - OWNER SERVICEABLE ITEMS 9. Place the new solenoid into position and lightly secure NOTE: If any of these items are under warranty, with the screws. Adjust the solenoid up or down until remember that the warranty covers only the cost the solenoid plunger free length is between 15/16 and of the replacement part. -
Page 33: Water Temperature Sensor
Fig. 41 Fig. 42 Water Temperature Well Sensor Wire Temperature Controller 3. Remove (by pulling) the sensor wire from the well. 4. Firmly press the sensor wire into the well. 5. Depress the tabs on the side of the controller mounting 5. -
Page 34: Section 6 - General Information
SECTION 6 - GENERAL INFORMATION Fig. 43 WIRING DIAGRAMS Fig. 44 Section 6 - General Information... -
Page 35: Parts Listing, Cl 4436
PARTS LISTING, CL 4436 Fig. 45 Section Section 6 - General Information... -
Page 36: Parts Listing, Cl 5636
PARTS LISTING, CL 5636 Fig. 46 Section 6 - General Information... -
Page 37: Parts Listing, Cl 5648 & Scl 5648
PARTS LISTING, CL 5648 & SCL 5648 Fig. 47 Section Section 6 - General Information... -
Page 38: Furnace Measurements
FURNACE MEASUREMENTS Fig. 48 Section 6 - General Information... -
Page 39: Inspection Record
INSPECTION RECORD Date Inspection Performed Date Inspection Performed Section Section 6 - General Information... -
Page 40: Year Limited Warranty
CL 4436, CL 5648, SCL 5636, or SCL 5648 outdoor wood furnace to be free from defects in the workmanship of all parts of the outdoor wood furnace manufactured by Central Boiler for a period of 1 year from date of manufacture.
Need help?
Do you have a question about the CLASSIC and is the answer not in the manual?
Questions and answers