Table of Contents
Advertisement
Advertisement
Table of Contents

Related Manuals for Shark UV440


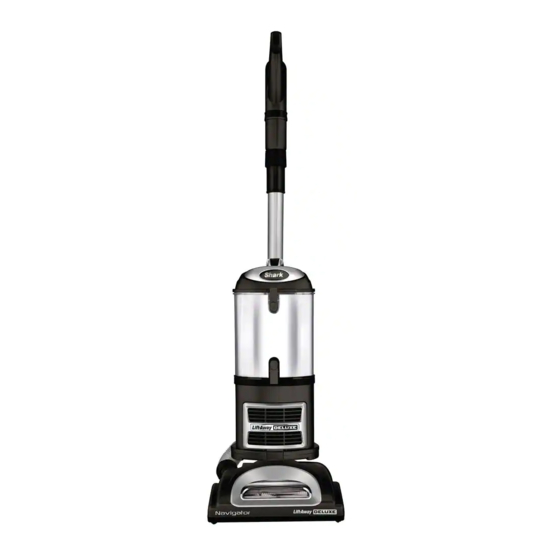
Summary of Contents for Shark UV440
- Page 1 WWW.SHARKCLEAN.COM UV440 Owner’s Guide...
-
Page 2: Important Safety Instructions
SHOULD ALWAYS BE OBSERVED, SHOCK OR INJURY: INCLUDING THE FOLLOWING: GENERAL ELECTRICAL SAFETY: READ ALL INSTRUCTIONS BEFORE USING 1. Unplug from electrical outlet when not in use YOUR SHARK NAVIGATOR LIFT-AWAY ® ® and before servicing. DELUXE. 2. DO NOT use vacuum with a damaged cord POLARIZED PLUG: or plug. - Page 3 HOSE ATTACHMENTS: DUST CUP/FILTERS/ACCESSORIES: 1. DO NOT use if air flow is restricted; if the air Before turning on the vacuum: paths, the hose, or the accessories become 1. Make sure that all filters are thoroughly dry blocked, turn the vacuum cleaner off. Remove after routine cleaning.
-
Page 4: Technical Specifications
This manual covers model numbers: UV440 26 TECHNICAL SPECIFICATIONS Voltage: 120V., 60Hz Watts: 1200W Amps: Euro-Pro, Shark, and Navigator are trademarks of Euro-Pro Operating LLC. All other brand names may be trademarks of their respective owners. TOLL FREE: 1-800-798-7398... -
Page 5: Table Of Contents
Contents Thank you for Getting Started purchasing Mode 1: Upright Vac the Shark Mode 2: Portable Lift-Away ® Navigator ® Above-Floor Cleaning Lift-Away ® Deluxe Storage Maintenance Emptying the Dust Cup Cleaning the Pre-Motor Filters Cleaning the Post-Motor HEPA Filter... -
Page 6: Getting Started
Getting Started Fig. 1 Fig. 2 Fig. 4 Fig. 3 Fig. 5 ACCESSORIES: CREVICE TOOL Reach deep into narrow spaces and clean between cushions, under radiators and baseboards and in hard to reach crevices and corners. (Fig. 1) DUSTING BRUSH Dust shelves, lamp shades, window blinds, books, furniture and other upholstered household items. - Page 7 Your new Shark Navigator Lift-Away Deluxe vacuum cleaner can easily be configured into ® ® different cleaning modes to meet all your cleaning needs: upright vacuum and portable Lift- Away - both with constant suction power. ® Fig. 6 Fig. 7...
-
Page 8: Mode 1: Upright Vac
Mode 1: Upright Vac To reduce the risk of electric shock, unplug the unit before assembling, adding or removing attachments or converting modes. WARNING: The On/Off switch is on the top of the Lift-Away canister. Always ensure the power is OFF ®... - Page 9 Suction Release Collar Release suction for easier push & pull on high pile carpets and area rugs. Fig. 11 Fig. 12 TO USE: ently press the floor nozzle down with your foot while you grasp the handle and tilt it back towards Rotate the cord release to quickly release the you.
-
Page 10: Mode 2: Portable Lift-Away
Mode 2: Portable Lift-Away ® You can carry your vacuum cleaner in both modes by the carry handle located on top of the dust cup. Fig. 13 Fig. 14 Fig. 15 Attach desired accessory onto the end of either PORTABLE LIFT-AWAY ®... -
Page 11: Above-Floor Cleaning
Above-Floor Cleaning Release suction when dusting delicate objects, furniture or draperies. Fig. 16 Suction Release Collar CLEAN ABOVE THE FLOOR IN UPRIGHT VAC OR Press the On/Off switch to the “I” position to turn the vacuum on for above-floor cleaning. PORTABLE LIFT-AWAY MODE ®... -
Page 12: Storage
Storage and Maintenance Quick Cord Release Lower Cord Storage Clip Fig. 17 STORE YOUR VACUUM SAFELY To reduce the risk of electric shock, unplug the unit Convert your vacuum back to upright vac mode. before performing any cleaning, maintenance, or troubleshooting checks. -
Page 13: Maintenance
Maintenance COMPONENT MAINTENANCE SCHEDULE Dust Cup Empty each time you vacuum. Pre-Motor Foam Filter Rinse and air dry every 3 months under normal use. Pre-Motor Felt Filter Rinse and air dry every 3 months under normal use. Post-Motor HEPA Filter Clean once every 2 years or as needed. -
Page 14: Cleaning The Post-Motor Hepa Filter
Maintenance - cont’d CLEANING THE POWER BRUSH Slide the locking latch (a) forward and gently tilt brush housing upward to remove. (Fig. 25) Carefully remove any blockage or debris and cut away any build-up of hair or string wrapped around the rotating bristle brush with scissor. To reassemble, insert the tabs on the front edge of the bottom cover into the matching holes in the top half and tilt it back down until it clicks into... -
Page 15: Checking For Blockages
Make sure you are working in a well lit area and use a flashlight to help search for blockages. Fig. 29 Fig. 30 Fig. 28 CHECKING FOR BLOCKAGES Hose and Connections to Vacuum Blockages may cause your vacuum to overheat and • D etach the stretch hose from the back of the shut down. -
Page 16: Troubleshooting Guide
Troubleshooting Guide PROBLEM POSSIBLE REASONS & SOLUTIONS Check filters to see if they need cleaning. Follow instructions for rinsing and drying the filters before re-inserting back into the vacuum. (See “Maintenance” sections for instructions.) Vacuum is not Dust cup may be full; empty dust cup. picking up dirt. -
Page 17: Ordering Parts
Ordering Parts To purchase replacement parts, please visit our website: www.sharkclean.com or contact customer service: 1-800-798-7398. PART PART NO. Pre-Motor Filter Set XFF350 HEPA Filter XHF350 Dusting Brush & Crevice Tool 112FFJ Power Brush 119FFJ Extension Wand 1116FC www.sharkclean.com... - Page 18 Notes TOLL FREE: 1-800-798-7398...
-
Page 19: Warranty & Product Registration
Product Registration Please visit www.sharkclean.com or call 1-800-798-7398 to register your new Shark product within ten (10) ® days of purchase. You will be asked to provide the store name, date of purchase and model number along with your name and address. - Page 20 Ville St. Laurent, Québec H4S 1A7 1-800-798-7398 www.sharkclean.com Copyright © Euro-Pro Operating LLC 2013 Printed in China Illustrations may differ from actual product. Euro-Pro, Shark, and Navigator are trademarks of Euro-Pro Operating LLC. All other brand names may be trademarks of their respective owners. UV440.26.E.130419.1...
Need help?
Do you have a question about the UV440 and is the answer not in the manual?
Questions and answers