
Related Manuals for Andrew James 5.2 L Food Mixer


Summary of Contents for Andrew James 5.2 L Food Mixer
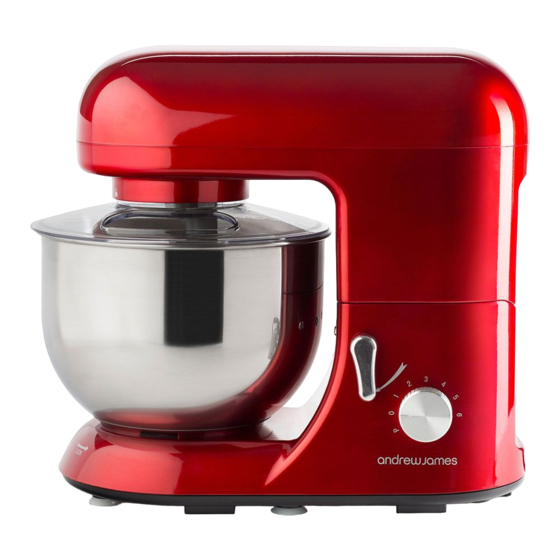
- Page 1 5.2 L Food Mixer Please read the manual fully before using the appliance and keep the manual safe for future reference.
-
Page 2: Table Of Contents
Contents page Safety guide Page 3 Appliance components parts Page 6 Standard accessories Page 7 Before first time use Page 8 Removing the splash guard Page 8 Using the appliance Page 8 Application Page 10 Ice cream maker attachment Page 14 Tips for baking Page 19 Cleaning... -
Page 3: Safety Guide
General safety instructions When using any electrical appliance, basic safety precautions should always be followed including: This appliance can be used by children aged from 8 years and above and persons with reduced physical, sensory or mental capabilities or lack of experience and knowledge if they have been given supervision or instruction concerning use of the appliance in a safe way and understand the hazards involved. - Page 4 extension cord is equal to or greater than the power consumption of the appliance to avoid overheating of the appliance and extension cord. Do not use any other appliance on the extension cord. Do not place the extension cord in a position where it can be pulled on by children or animals or be tripped over.
- Page 5 can disconnect the plug quickly and easily. The device must be operated with the type of power specified on the rating label. If you are unsure about the details of the available power supply, ask your dealer or the local power supply company. ...
-
Page 6: Appliance Components Parts
Appliance components parts 1. Metal beater blade 2. Large cover 3. Upper housing cover 4. Small knob 5. Switch 6. Lower housing cover 7. Foot 8. Mixing bowl 9. Balloon whisk 10. Dough blade 11. Flexible beater blade... -
Page 7: Standard Accessories
Standard accessories Main device (1 pc) Mixing bowl (1pc) Dough blade (1pc) Metal beater blade (1pc) Balloon whisk (1pc) Bowl cover (1pc) Manual (1pc) Flexible beater blade (1pc) Ice cream maker attachment (1 pc sold separately) -
Page 8: Before First Time Use
Before first time use All parts of the stand mixer are to be thoroughly cleaned before being used for the first time (see section “Cleaning”). Take out the required length of cable from the cable tidy on the base of the device and connect the device to the mains supply. - Page 9 Turn the small knob (4) in the direction of the arrow (on the machine) and press the housing cover (3) downwards with one hand, Fig.6 and 7. Insert the power plug into the power socket and turn the switch (5) to the “P”...
-
Page 10: Application
Using the Andrew James spatula, place the mixture into the baking tray either all the mixture in one big round portion or into small individual meringues. - Page 11 Select setting 6 for 10 seconds to make the mixture airy and smooth. Place the cake mix using the Andrew James spatula into a cake tin and place it into the oven for 25 minutes on 180˚c. Once baked, take the cake out of the oven and place it on a cooling rack, allowing it time to cool.
- Page 12 Use the Dough Blade Whisk Dough blade attachment 500g strong white bread flour 1 teaspoon of salt 1 teaspoon of sugar Sachet of yeast 225ml of tepid water 1 teaspoon of olive oil For the best results use the dough blade for making bread and any type of mixture that requires kneading.
- Page 13 Dough blade attachment To mix or knead dough Use the Dough Blade Whisk Use a flour to water ratio of 5: 3 Mix on speed 1 for 20 seconds and speed 2 for 20 seconds before continuing on speed 3 for 3 minutes.
-
Page 14: Ice Cream Maker Attachment
Ice cream maker attachment Accessories: 1. Cover & chute 2. Paddle 3. Freezing bowl Mixing bowl Before first time use Read these instructions carefully and retain them for future reference. Remove all packaging. Wash all parts before using the ice cream maker attachment. ... - Page 15 Any ice cream or sorbet containing raw ingredients should be consumed within one week. Ice cream tastes best when fresh, so do not make the ice cream too far in advance. Ice cream or sorbet that contains raw eggs should not be given to young children, pregnant women or the elderly.
- Page 16 After approximately 30 minutes, the ice cream should be ready to serve. Turn off the mixer. If the ice cream or sorbet is not to be used immediately, spoon the mix into a suitable container and store it in a freezer until it is required. Notes In order for the Ice Cream Maker to be operated safely and successfully, the following guidelines should be followed:...
- Page 17 It is recommended to store the freezing bowl in a plastic bag in your freezer so that it is always ready for use. Recipe suggestions Vanilla Ice cream Ingredients: 500ml/1 pt full fat milk 125ml/1/4 pt single cream 5ml/1 tsp vanilla essence 150g/6 oz caster sugar Instructions Combine the cream, milk and vanilla essence in a pan and bring it...
- Page 18 Strawberry Ice cream Ingredients 400g/1 lb. ripe strawberries 200ml/ 8fl oz double cream 75g/3 oz caster sugar Juice of ½ lemon Instructions: Puree the strawberries. Mix the sugar, cream and lemon juice into the puree. Place the mix in a refrigerator to cool. When the mix is cool, pour it into the Ice cream maker and mix until it is firm.
-
Page 19: Tips For Baking
Tips for baking To reduce the risk of curdling when baking sponges ensure that the eggs are at room temperature so it will not harden the butter. Dried fruit often soaks up the moisture of the dough or cakes, to ensure a better texture with your bake soak the dried fruit first. -
Page 20: Cleaning
Cleaning Before cleaning, please ensure that the switch knob (5) is at the “0” position and that the plug has been disconnected from the socket. After use, allow the device to cool down, this also applies before cleaning the appliance. ... -
Page 21: Disposal Of The Appliance
UK and EU Guarantee Your new Andrew James product comes with a 24 month guarantee and a 2 year fixed warranty, effective from receipt confirmation. Your receipt or order number is required as proof of purchase date so it is imperative that you keep it safe. - Page 22 warranty, we will pay all shipping costs to have it returned to us. After 12 months the customer will be liable for the cost of returning the product to us. We will then pay to have the repaired/replaced item shipped back to the customer.
-
Page 23: Electrical Information
Electrical information Please note: It is extremely important that the wires or cores in the flex are connected to the correct terminals in the plug. If the colour of the mains lead of the appliance does not correspond with the coloured markings identifying the terminals in your plug proceed as follows: ... - Page 24 When changing the fuse always replace it with a fuse that is of the same identical rating as the original. If you are unsure about which plug or fuse to use, always refer to a qualified electrician. Please note after replacing the fuse, ensure that the cover is correctly fitted back onto the plug.
-
Page 25: Contact Details
Contact Details Andrew James UK LTD Unit 1 P C Henderson Premises Bowburn North Industrial Estate Bowburn Co Durham DH6 5NG Customer Service / Technical Support- Telephone 0844 335 8464 (Monday – Friday 9am -9pm) (Saturday – 9am -5pm) (Sunday – 10am -4pm) Customer Service/ Technical Support Email: customerservices@andrewjamesworldwide.com...
Need help?
Do you have a question about the 5.2 L Food Mixer and is the answer not in the manual?
Questions and answers
Hi would like to know the cost of a new balloon whisk and spiral beater as mine have broken. Also need an address where to purchase the items.Thank you