Table of Contents
Advertisement
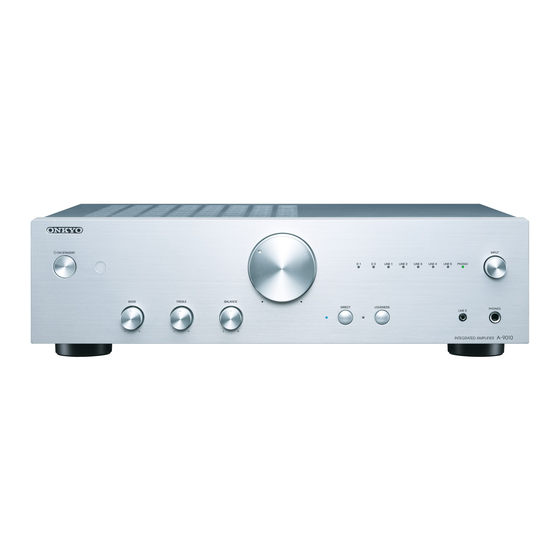
A-9010
Integrated Amplifier
Instruction Manual
Thank you for purchasing an Onkyo product.
Please read this manual thoroughly before making any
connections and plugging in your new Onkyo product.
Following the instructions in this manual will enable you to
obtain optimum performance and listening enjoyment from
your new product.
Please retain this manual for future reference.
Connections ................................ 6
Operations................................. 11
Troubleshooting ........................ 14
To return to the default setting ............14
Advertisement
Chapters
Table of Contents

Related Manuals for Onkyo A-9010


Summary of Contents for Onkyo A-9010
-
Page 1: Integrated Amplifier
Thank you for purchasing an Onkyo product. Please read this manual thoroughly before making any connections and plugging in your new Onkyo product. Following the instructions in this manual will enable you to obtain optimum performance and listening enjoyment from your new product. -
Page 2: Important Safety Instructions
WARNING: WARNING ATTENTION TO REDUCE THE RISK OF FIRE OR ELECTRIC RISK OF ELECTRIC SHOCK RISQUE DE CHOC ELECTRIQUE SHOCK, DO NOT EXPOSE THIS APPARATUS TO DO NOT OPEN NE PAS OUVRIR RAIN OR MOISTURE. The lightning flash with arrowhead symbol, within an equilateral triangle, is intended to alert the user to the CAUTION: presence of uninsulated “dangerous voltage”... - Page 3 7. Never Touch this Unit with Wet Hands—Never handle this unit or its power cord while your hands are wet or damp. If water or any other liquid gets inside this unit, have it checked by your Onkyo dealer. En-3...
- Page 4 – Safety – Limits and methods of measurement of radio disturbance characteristics – Limits for harmonic current emissions – Limitation of voltage changes, voltage fluctuations and flicker – RoHS Directive, 2011/65/EU WEEE http://www.onkyo.com/manual/weee/weee.pdf En-4...
-
Page 5: Supplied Accessories
Remote control sensor Simple circuitry that delivers powerful and faithful sound quality The A-9010 is a model designed to deliver the best performance in sound quality, the most basic element required for a pre-main amplifier. Using our reliable discrete amplifier as a core component, the A-9010 incorporates compact circuitry thanks to its simplified 5 m (approx. -
Page 6: Connections
Cables used to connect (sold separately) Audio pin cable European models): Used to set the link function with the Onkyo equipment with RI terminal. DIGITAL IN COAXIAL (D1)/OPTICAL (D2) jacks (North American and Continental European (North American and Continental European models) - Page 7 OPTICAL (D2) terminal) The operation such as power can be linked when connecting to an Onkyo equipment with RI terminal. For the connecting and setting methods, refer to Connecting to an Onkyo equipment with RI “Connecting Onkyo equipment with RI terminal” (...
- Page 8 Following link functions can be operated by connecting terminal. Also, if there is a GND terminal on the turntable, an Onkyo CD player, an RI dock, or a tuner (*) with RI connect with the GND terminal of this unit using a ground terminal via an RI cable.
- Page 9 Connections ∫ Other connection method ∫ When connecting two or more RI equipment When there are two RI terminals on the equipment, one can be connected to this unit and the other can be connected to other equipment, allowing to link both equipment to this unit.
-
Page 10: Connecting Speakers
Connections Connecting speakers 0 (North American models) When using commercially available banana plugs, tighten the speaker terminals to the end and then insert the banana plugs. It is not Refer to the illustration below to connect the unit and the possible to connect by inserting the core of the right and left speakers with the speaker cables. -
Page 11: Operations
LED will go off. (UK models) 0 The power of Onkyo equipment connected via RI will LINE 1, LINE 2, LINE 3, LINE 4, LINE 5, PHONO be automatically turned off when the power is turned to input source LED corresponding to the standby. -
Page 12: Adjusting Sound Quality
Operations Adjusting sound quality, etc. Using headphones ∫ DIRECT Turn down the volume, then connect your stereo headphones with a standard plug (ø 6.3 mm, 1/4q) to the Audio is output through shortest path which is PHONES jack. The speakers output no sound while advantageous to sound quality without passing the sound the headphones are connected. - Page 13 Operations Operating with the remote control Í button: Turn the unit on or put it in standby mode. 0 The power of Onkyo equipment connected via RI will be automatically turned off when the power is turned to standby. INPUT SELECTOR 2/1 buttons: Select an input source of the unit.
-
Page 14: Troubleshooting
0 The connecting method may vary depending on the device that will be connected. See the instruction manual for the connected device. Onkyo is not responsible for damages (such as CD rental The unit does not turn on. fees) due to unsuccessful recordings caused by the unit’s 0 Confirm that the power plug is securely plugged in to malfunction. - Page 15 Specifications Rated output power: 44 watts minimum continuous power per channel, 8 ohm loads, 2 channels driven at 1 kHz, with a maximum total harmonic distortion of 0.08 % (FTC) 70 watts minimum continuous power per channel, 4 ohm loads, 2 channels driven at 1 kHz, with a maximum total harmonic distortion of 0.7 % (FTC) (North American)
- Page 16 Tel: 86-21-52131366 Fax: 86-21-52130396 http://www.cn.onkyo.com/ Asia, Oceania, Middle East, Africa Please contact an Onkyo distributor referring to Onkyo SUPPORT site. http://www.intl.onkyo.com/support/ The above-mentioned information is subject to change without prior notice. Visit the Onkyo web site for the latest update.
Need help?
Do you have a question about the A-9010 and is the answer not in the manual?
Questions and answers